25 DIY Picture Frame Ideas That Look Stylish and Unique
Introduction
Store bought frames do their job quietly, but diy picture frame ideas do something better: they make the frame part of the memory. A twig border for a cabin photo, a gold touched thrift frame for a wedding print, a clipboard wall you can refresh in minutes, each one tells a little more of the story.
Most of these ideas start with what you already have: a tired frame, leftover paint, fabric scraps, or a thrift store find. The techniques are simple, and the safety habits are simple too.
One habit matters throughout. Handle frame glass slowly over a protected surface, keep it flat and supported, and consider acrylic glazing instead for kids rooms, nurseries, and busy hallways where a knocked frame is a matter of when, not if.
1. Build a Rustic Pallet Wood Frame
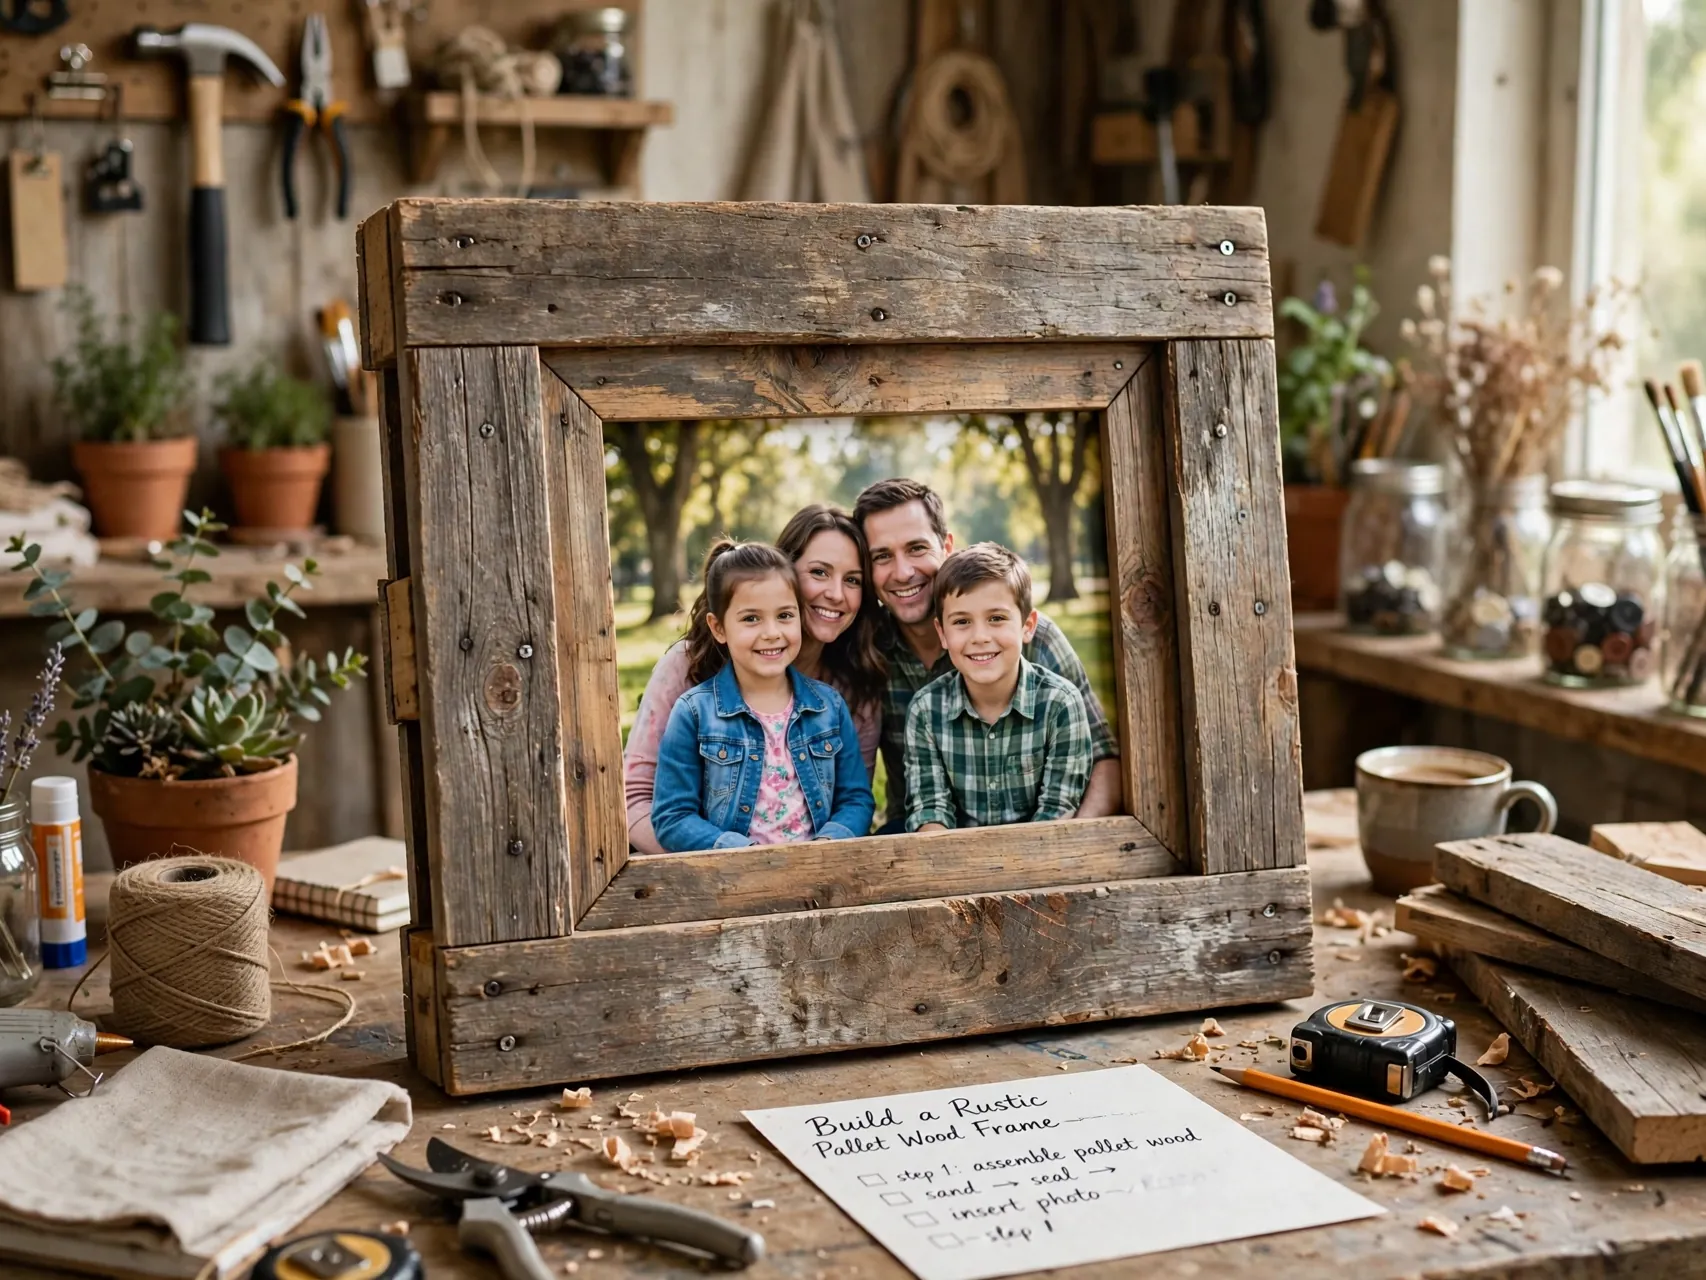
Weathered pallet or reclaimed wood, cut and joined into a simple rectangle, gives photos instant farmhouse character. Sand splinters smooth, keep the saw marks and knots visible, and finish with a clear coat or a light stain so the grain stays the star.
Check reclaimed wood for nails and staples before you cut, and wear eye protection while sanding. Mount the photo on a firm backing board inside the frame so prints stay flat against the rough wood instead of curling at the edges.
2. Tie Together a Twig and Branch Frame
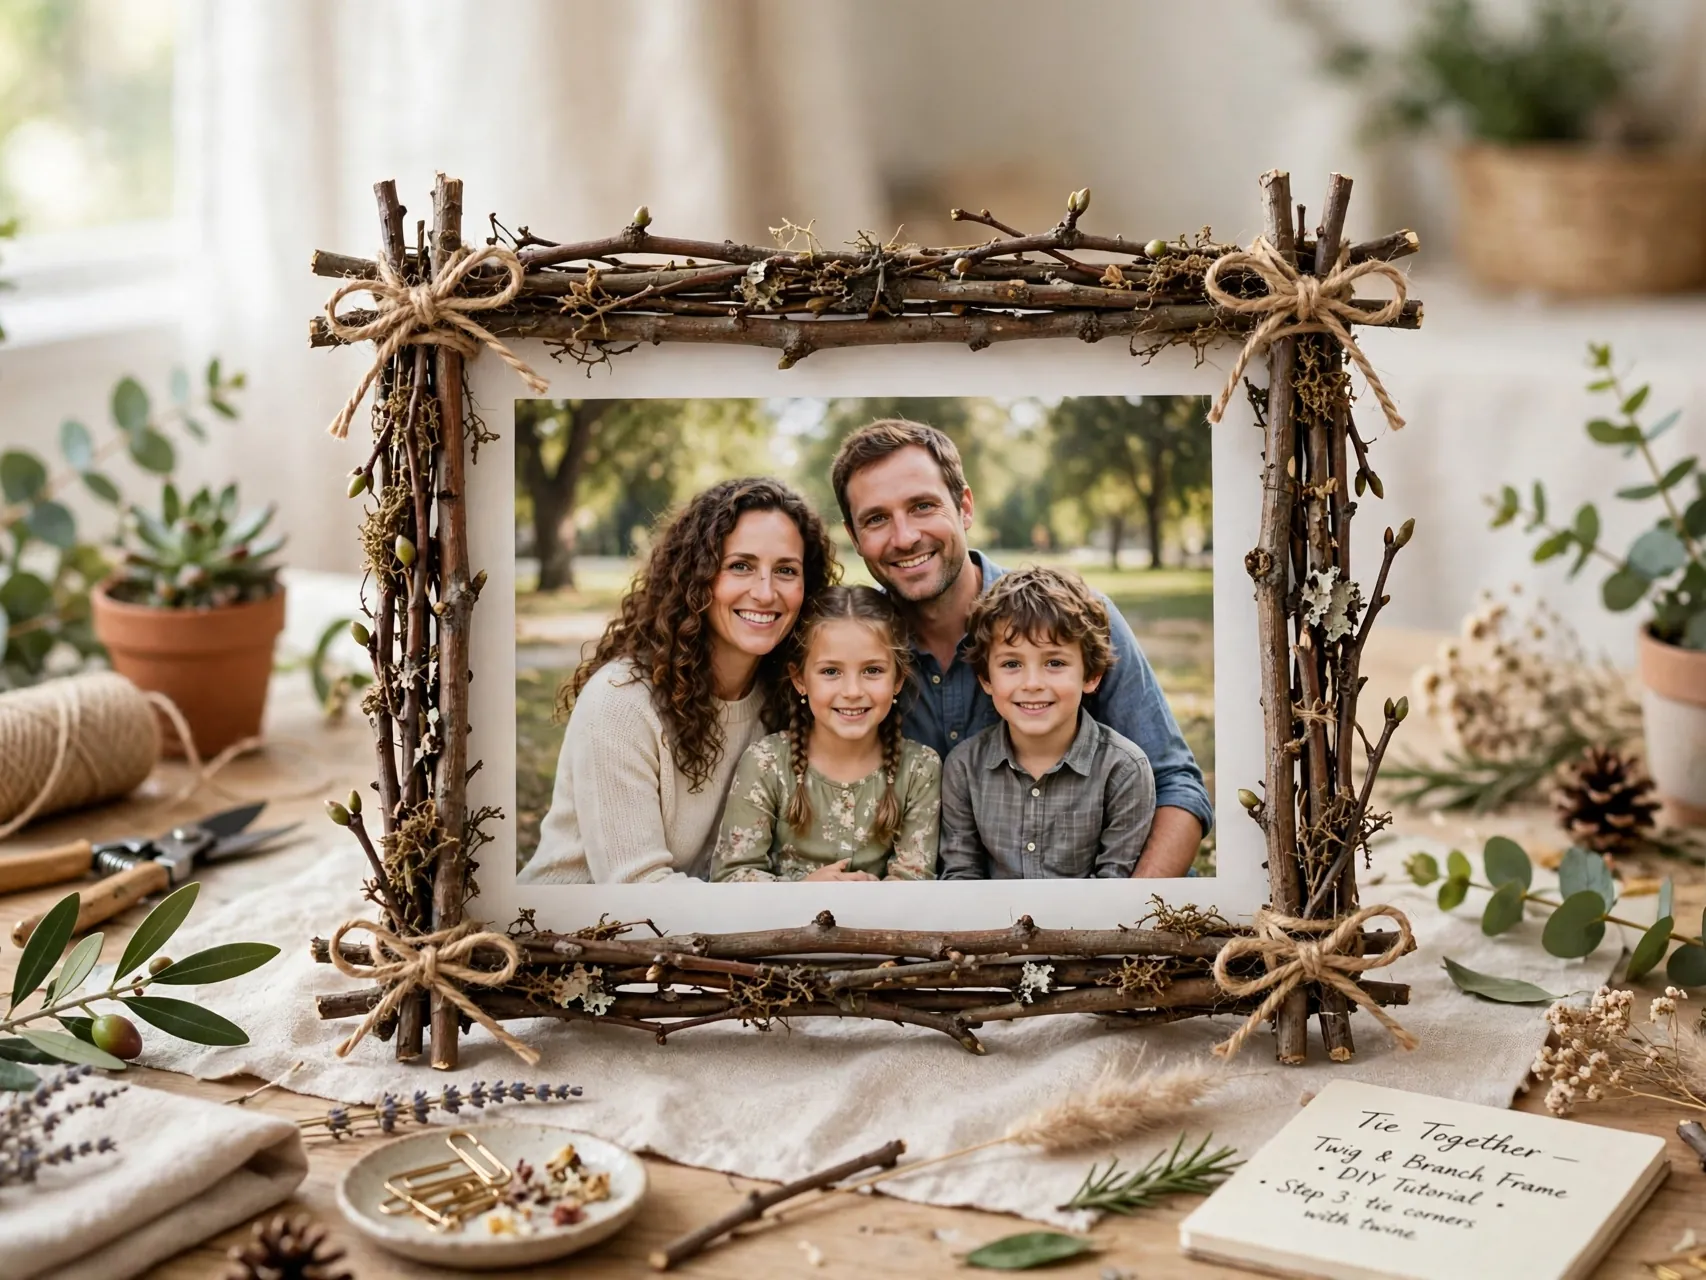
Four straight branches of similar thickness, laid into a square with overlapping corners and lashed with twine, make the sweetest frame for nature and cabin photos. Choose dry, sturdy twigs and trim them with pruners on a stable surface.
Glue the photo to a backing board first, then attach the board behind the twig square. The result hangs light, so a small nail or hook holds it easily, and the frame costs nothing but a walk and ten minutes.
3. Create a Clipboard Gallery Wall
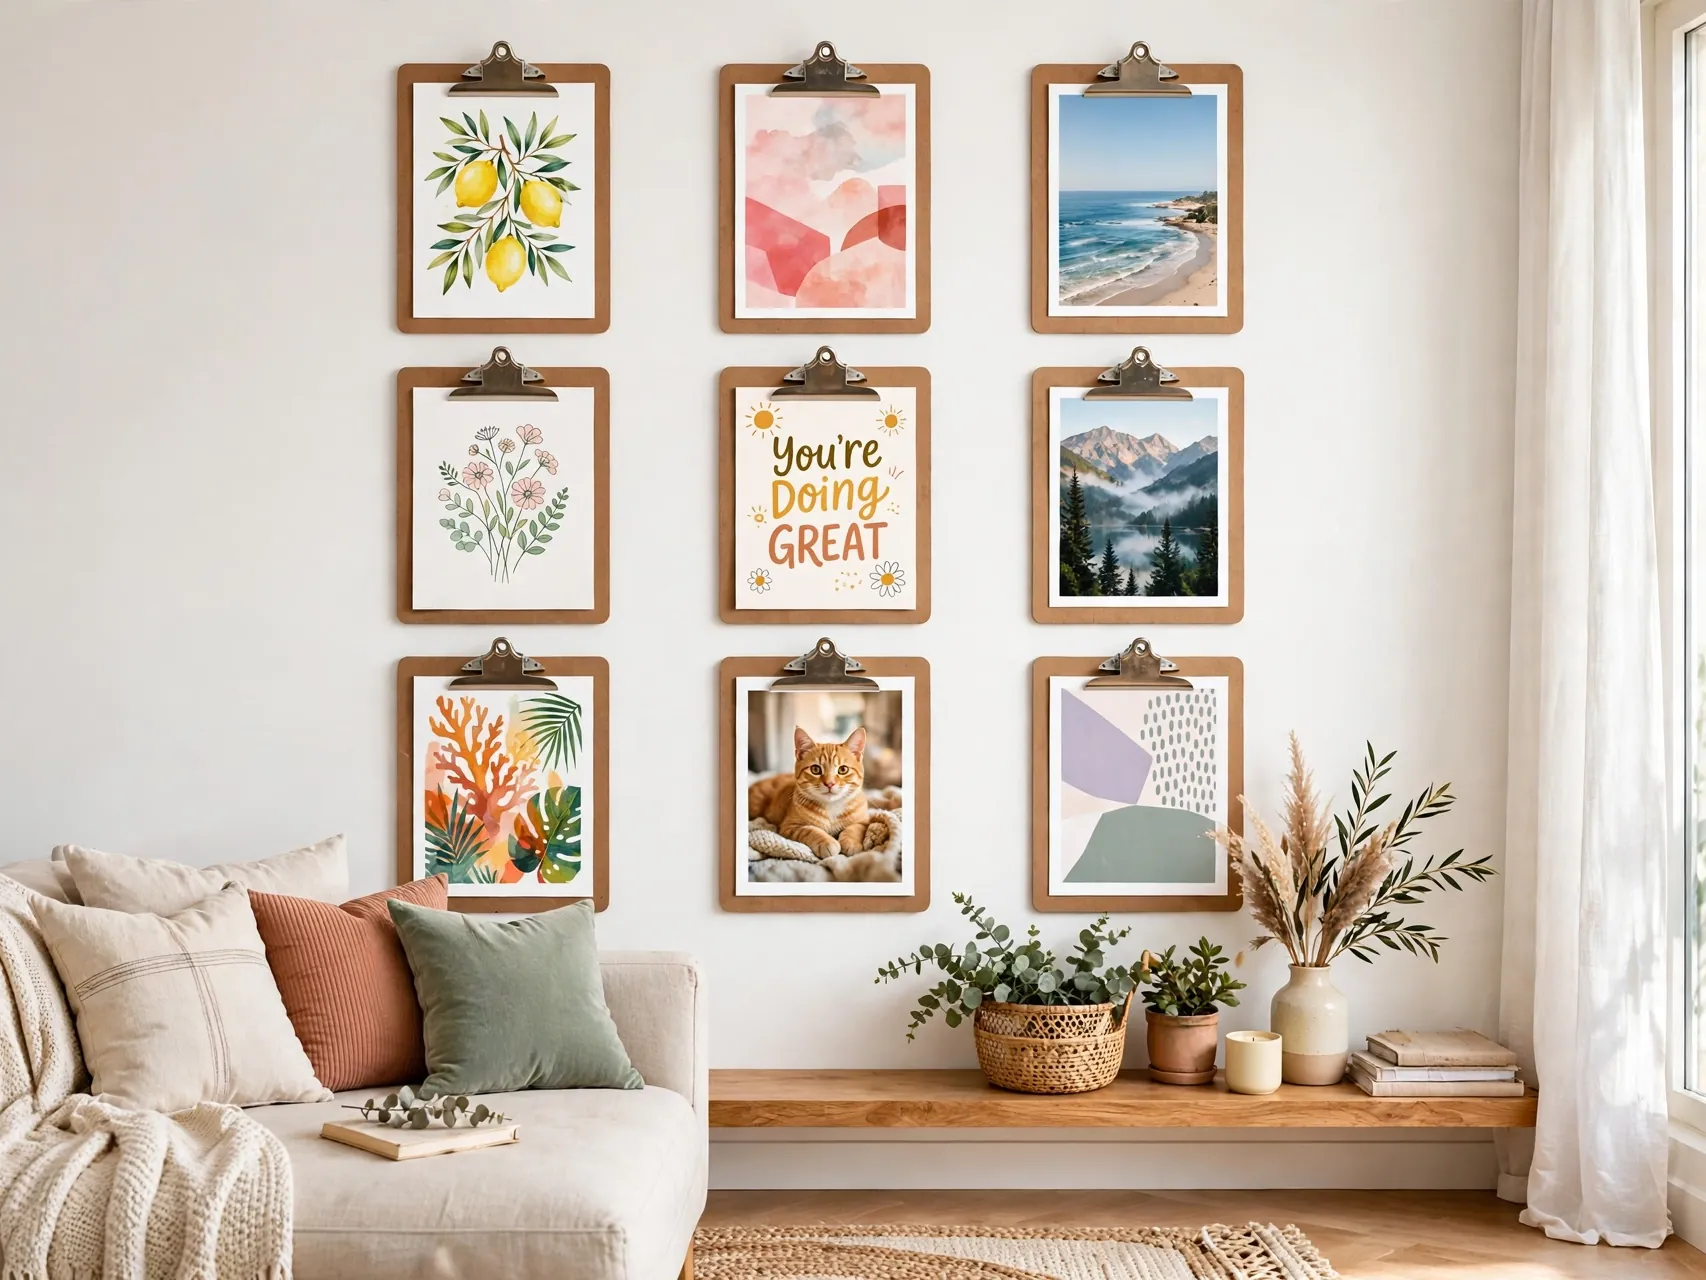
A row of simple clipboards is a gallery you can change in minutes. Clip in photos, kids art, postcards, or seasonal prints, and swap them whenever the mood changes, with no glass, no backing boards, and no commitment to one arrangement.
Use matching clipboards for a tidy look or mixed sizes for a relaxed one. This is one of the best renter friendly gallery wall frame ideas, because the whole display can hang from a few small hooks and leaves walls almost untouched.
4. Make a Paint Stick Poster Hanger
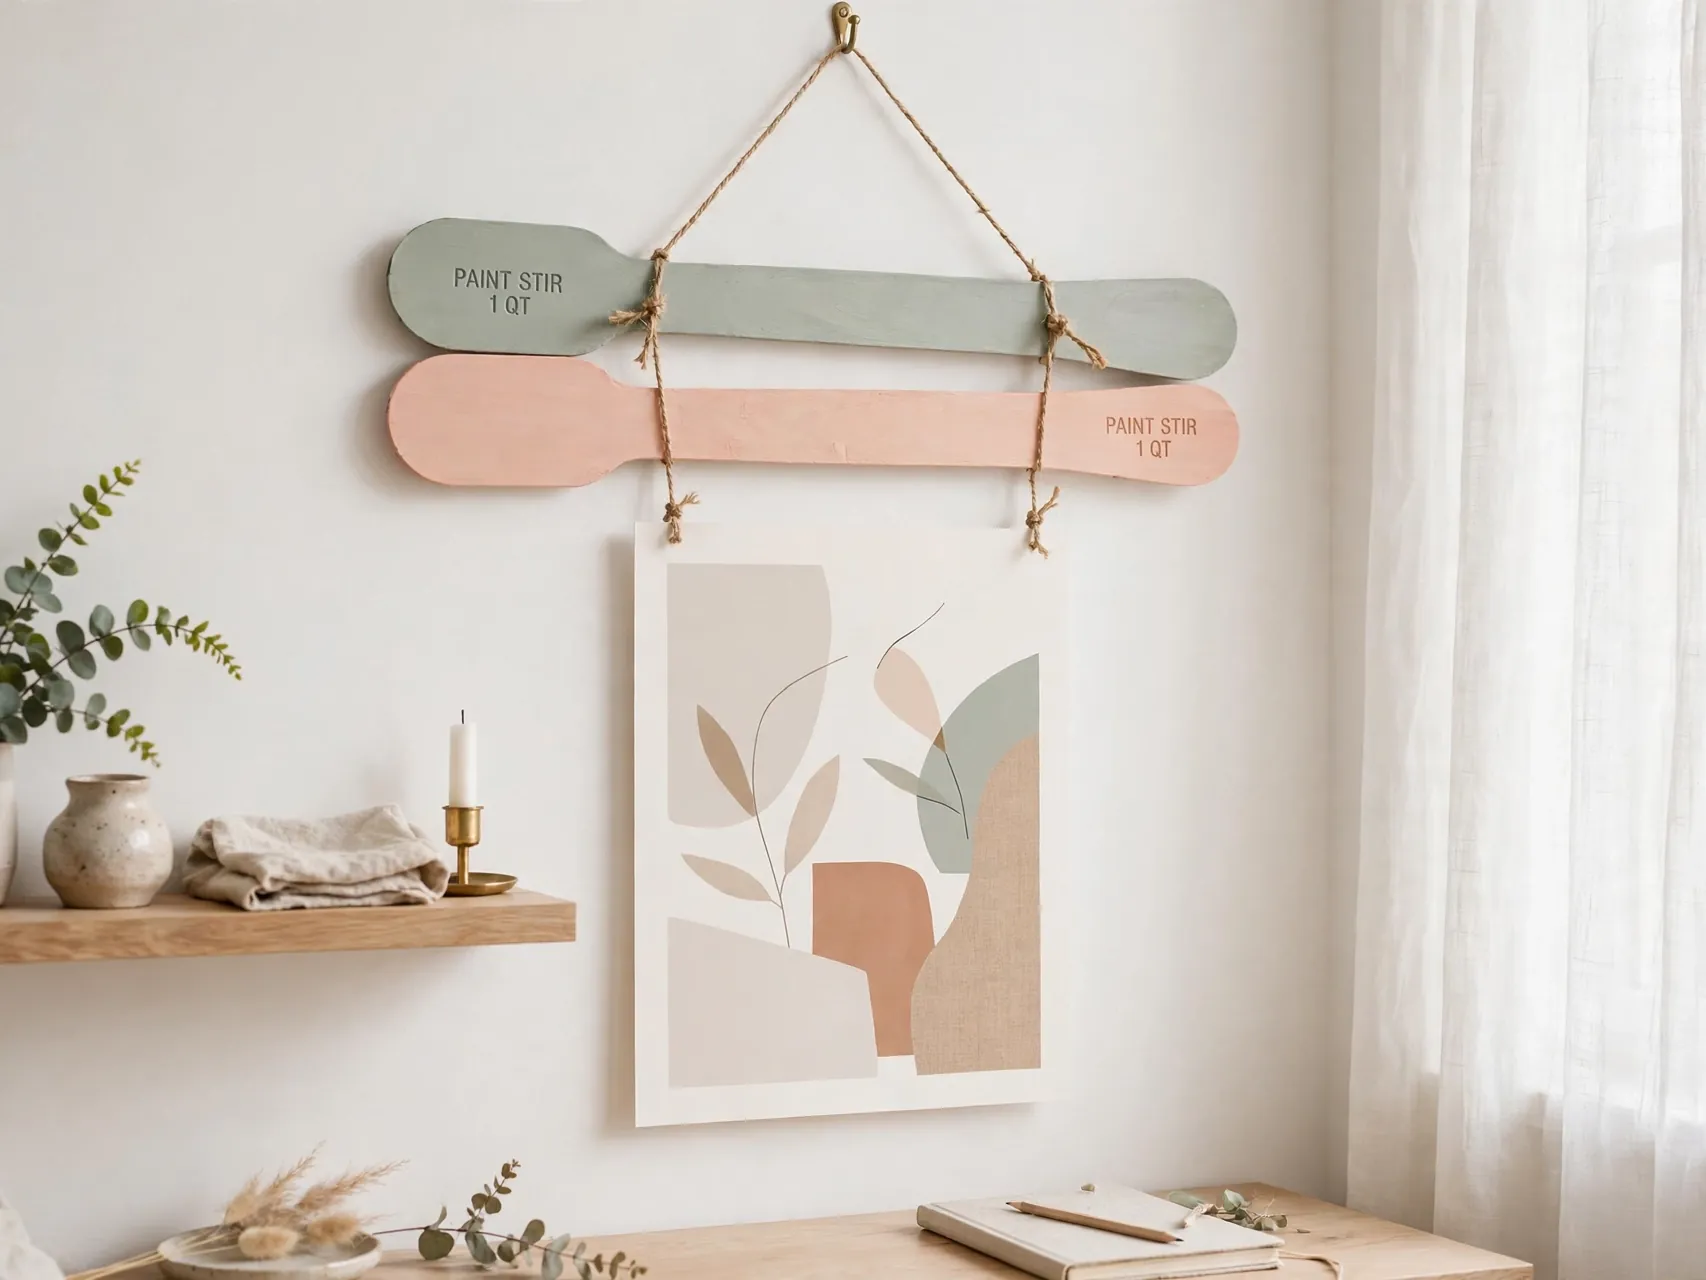
Two pairs of wooden paint stir sticks, small magnets or a thin line of glue, and a length of twine create the modern scroll style hanger seen in design shops. One pair grips the top of the print, the other weights the bottom so it hangs flat.
This style suits large prints and posters that would cost a fortune to frame traditionally. Keep prints unglazed and lightweight, hang them away from steamy rooms, and enjoy a frame you can resize simply by cutting longer sticks.
5. Wrap a Frame in Washi Tape

Washi tape turns a plain or scuffed frame into a patterned one in minutes, with no paint and no mess. Wrap stripes around the frame edges, cover the whole face in a bold print, or tape only the mat for a border of color.
The best part is commitment free design. Peel the tape off and the frame resets for a new season, a new room, or a kids rotating art display. Smooth each strip down firmly so edges do not lift in warm rooms.
6. Decoupage a Frame With Pretty Paper

Scrapbook paper, wrapping paper, or old book pages glued smoothly onto a flat wood frame give you any pattern imaginable. Cut the paper slightly larger than the frame face, glue it down, smooth out bubbles with a soft cloth or roller, then trim the excess and the center opening once dry.
Sand the edges lightly for a seamless finish and seal with a clear coat made for paper crafts. Work on a protected table and keep craft knives moving away from your hands when trimming the center.
7. Cover a Frame in Fabric or Linen

Fabric wrapped frames feel soft and tailored, perfect for bedrooms and nurseries. Stretch linen, cotton, or a favorite patterned fabric over a wood or sturdy cardboard frame, glue it at the back, and miter the corners neatly like wrapping a gift.
Add thin batting under the fabric for a padded, upholstered look. Choose fabrics that echo a cushion or curtain in the room and the frame stops looking homemade and starts looking designed, which is the goal of the best handmade photo frame ideas.
8. Build a Sparkling Mosaic Frame
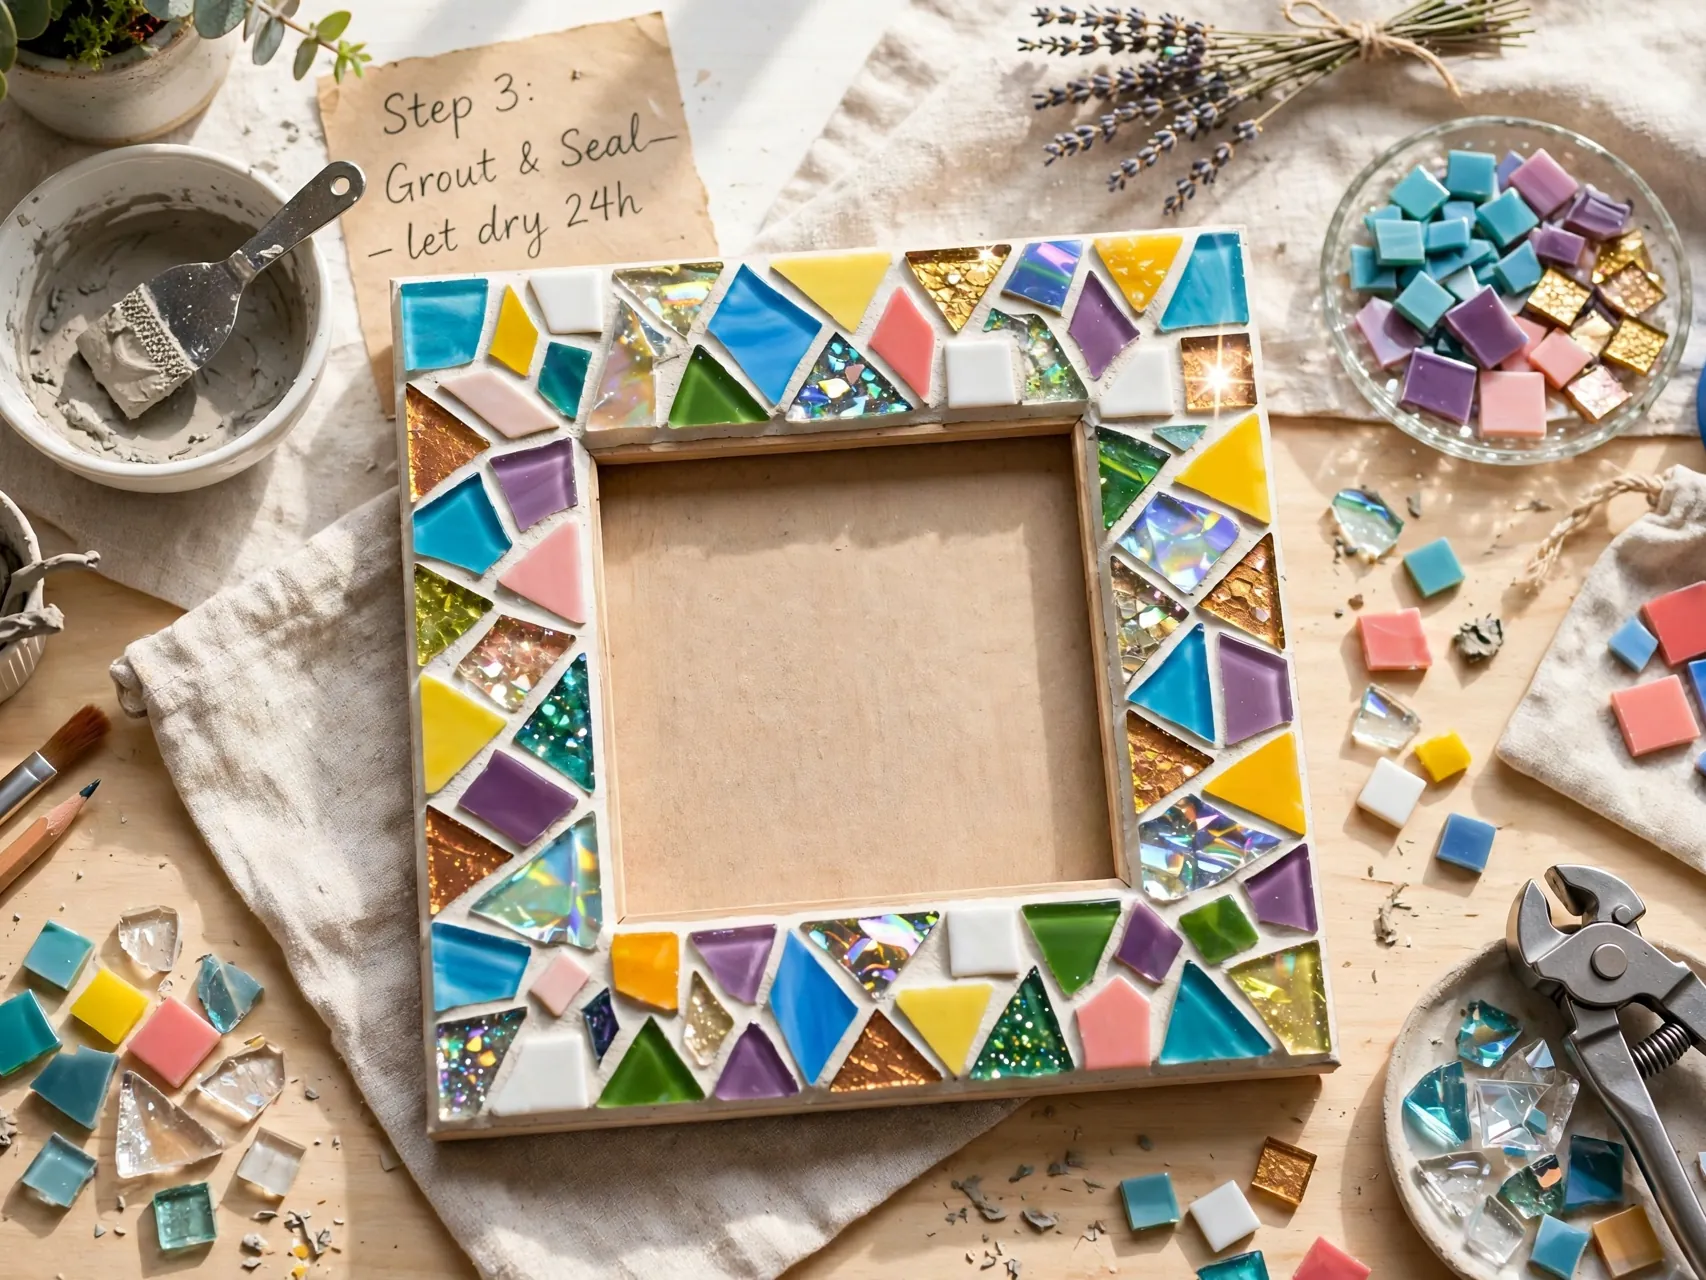
Small tiles, flat glass gems, or craft mosaic pieces glued onto a wide flat frame catch light beautifully around a simple photo. Lay your pattern out dry first, then glue piece by piece, leaving even gaps if you plan to grout.
Treat every cut tile or glass edge as sharp: handle pieces by their faces, keep loose pieces in a tray, and keep mosaic work away from small children. If you grout, wipe it before it fully hardens and let the finished frame cure before hanging.
9. Glue on a Seashell Beach Frame

Small shells, a little sand toned grit, and starfish shapes turn a plain frame into a vacation keepsake. Clean and fully dry collected shells first, arrange them dry to balance sizes, then glue the largest pieces first and fill gaps with small ones.
This frame belongs with beach and lake photos, obviously, but it also brightens a bathroom shelf. Keep shells out of the inner edge so glass or acrylic can still sit flat, and dust it with a soft brush rather than water.
10. Wrap a Frame in Twine or Jute

Twine wrapping is slow, soothing, and almost impossible to get wrong. Run a thin line of glue along one edge, then wrap twine tightly around the frame, pressing each row against the last so no gaps show, and secure the end at the back.
The texture suits farmhouse, coastal, and fall decor, and it hides chipped frames completely. Add one small accent, like a wooden button or a tiny dried flower, at a corner, and stop there so the texture stays the design.
11. Give a Thrift Frame a Chalk Paint Finish

Chalk style paint refreshes ornate thrift frames with almost no prep. Remove the art and glass first, setting glass flat on a towel, then brush on paint, let it dry, and distress the raised details lightly with fine sandpaper so the original finish peeks through.
Wax or a matte sealer protects the finish. This thrifted frame makeover turns heavy gold or dark wood frames into soft, shabby pieces that suit cottage and vintage rooms, and one small paint pot covers many frames.
12. Add Gold Leaf or Metallic Rub to Raised Details

The opposite trick also works: take a plain dark frame and wake it up with metallic wax or rub on finish worked into just the raised edges. Apply it with a fingertip or soft cloth, a tiny amount at a time, and buff once dry.
The result reads antique and expensive, especially on carved frames. Keep the metallic to edges and details rather than the whole surface, because restraint is what makes it look like real aged gilding instead of craft paint.
13. Paint a Checkered Mat for a Trendy Pop

Sometimes the frame is fine and the mat needs the makeover. A plain white mat painted with a soft checkerboard border is one of the most saved looks in decor right now, and it takes only tape, two paint colors, and patience.
Tape your grid, paint alternate squares, and peel tape while the paint is just tacky for crisp lines. Let the mat dry completely before reassembling so no paint touches the photo, and handle the glass with the usual care as it goes back in.
14. Paint or Tint the Mat a Solid Bold Color

A deep green, navy, terracotta, or blush mat transforms black and white photos and simple line art instantly. Paint the mat with a foam brush in thin coats, or cover it with colored paper cut to size for a reversible version.
Colored mats are a designer trick for making inexpensive frames look custom, because the eye reads the color block as intentional. Match the mat to one color inside the artwork and the whole piece pulls together like it was framed professionally.
15. Wrap the Mat in Leftover Wallpaper
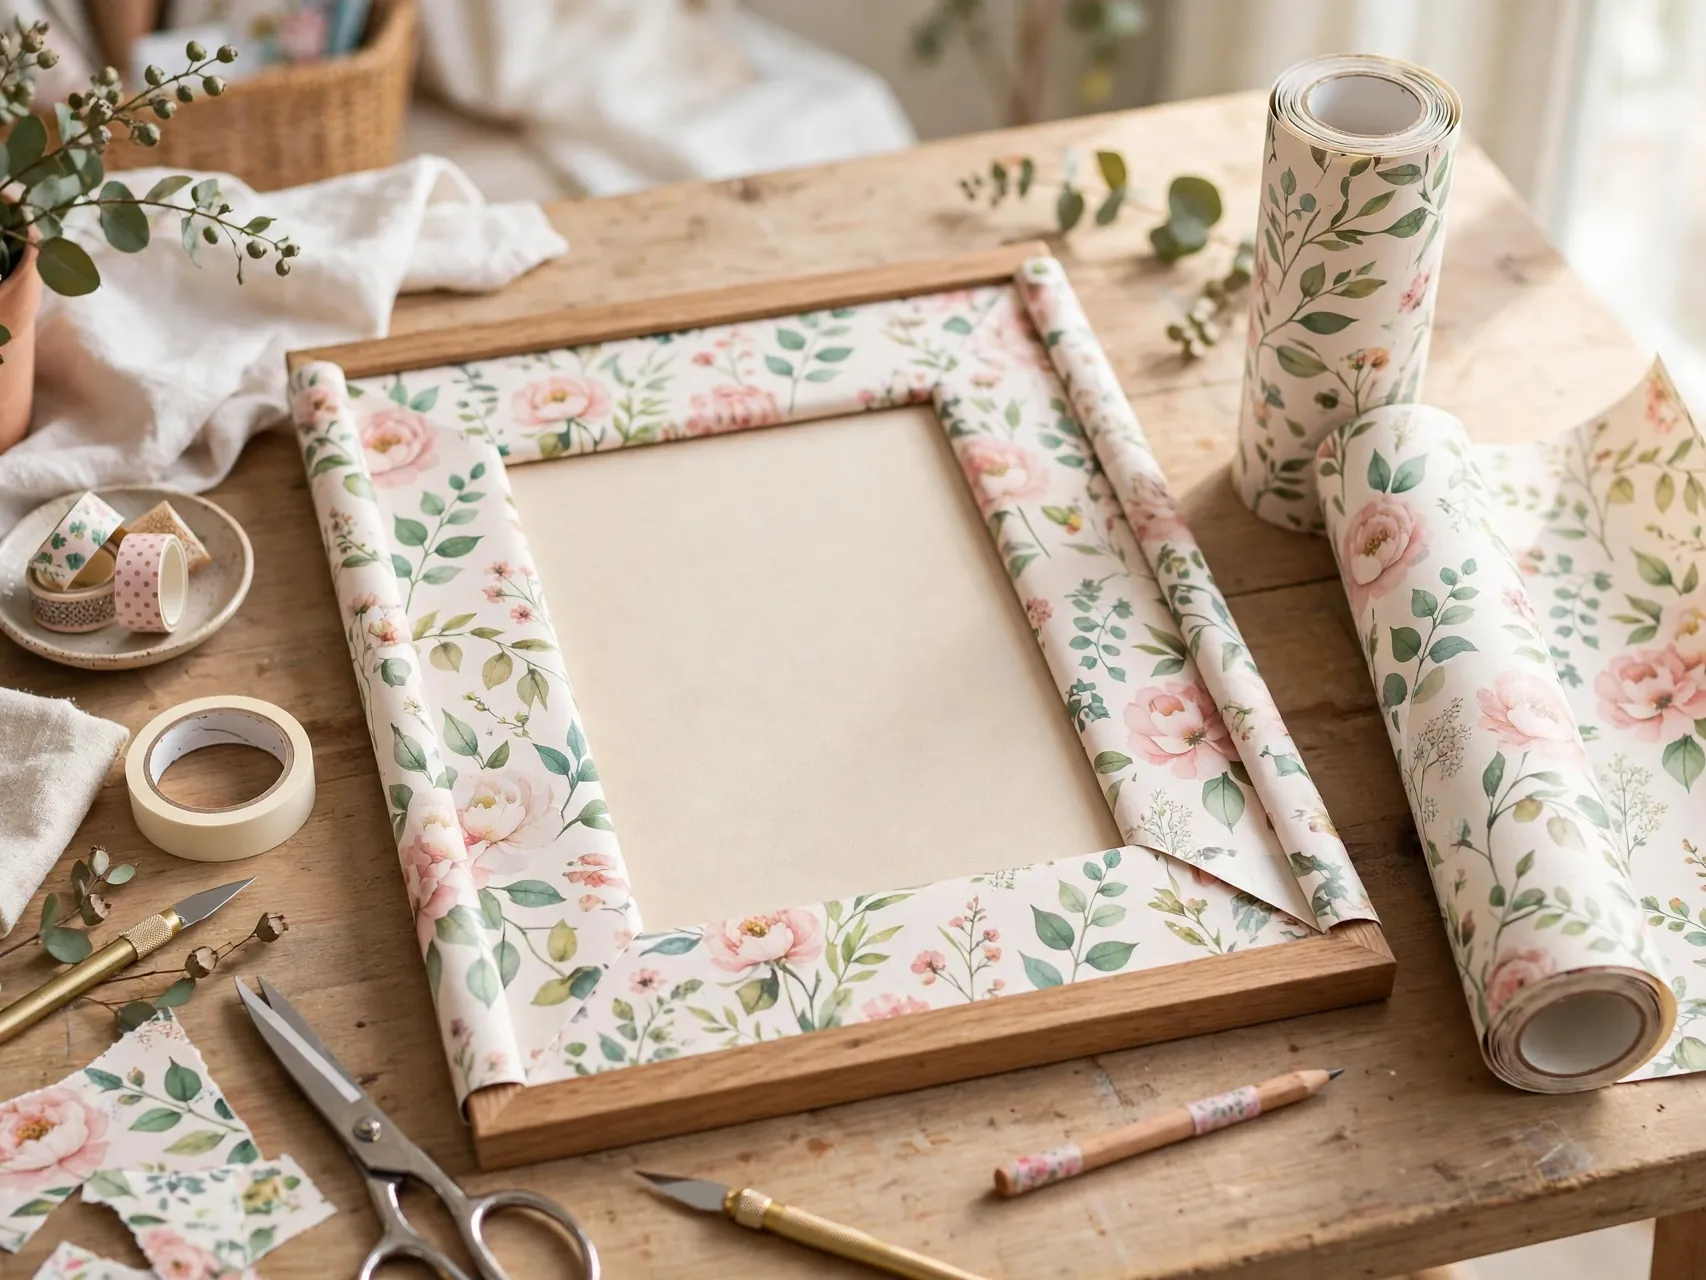
Leftover wallpaper scraps are too pretty to throw away, and a mat is exactly the right size to use them. Cut the paper to cover the mat, wrap the edges neatly, and glue it at the back so the front stays smooth.
A patterned mat frames simple art beautifully and ties a gallery wall to the room walls in a subtle way. Keep busy patterns with plain art and plain photographs, so the mat supports the picture instead of competing with it.
16. Decorate a Kids Frame With Buttons and Beads
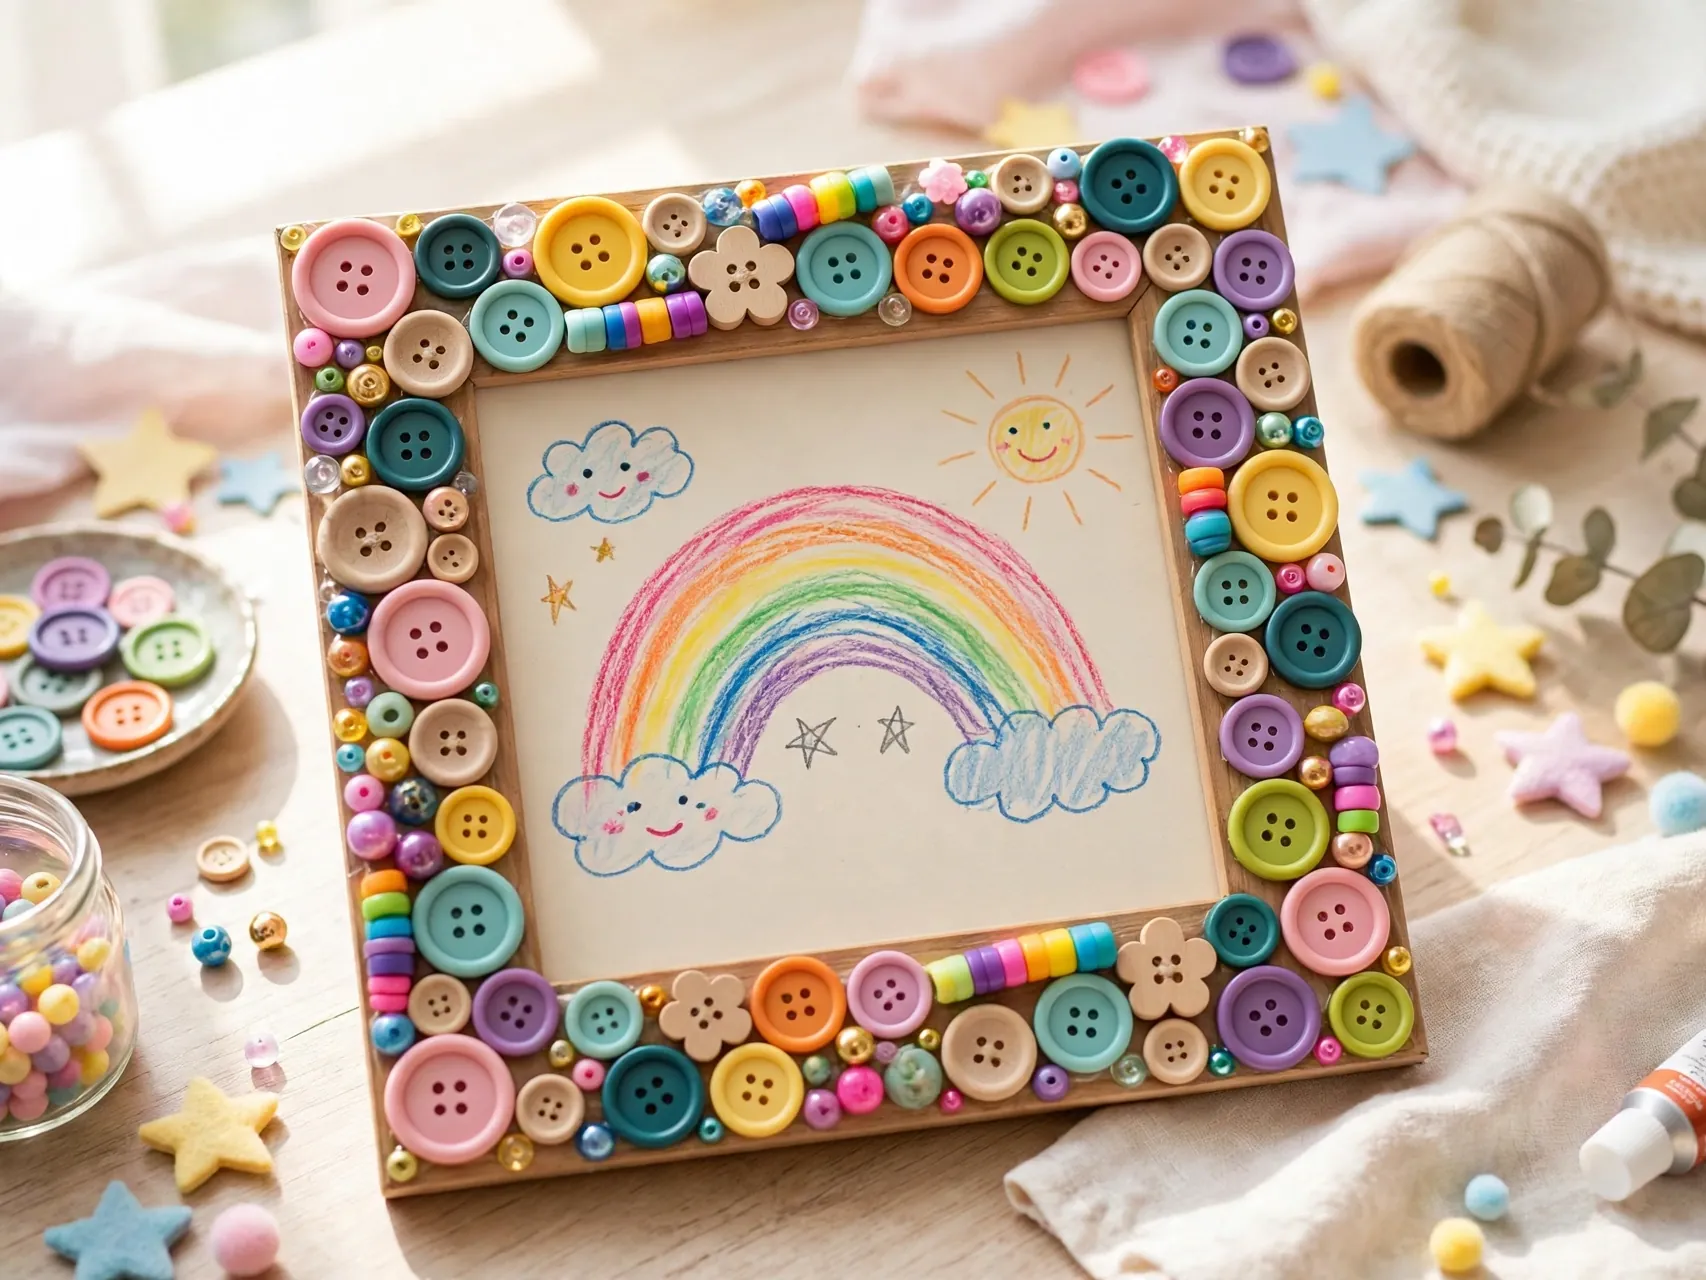
A flat frame covered in colorful buttons, large beads, or foam shapes is a joyful afternoon project and a perfect grandparent gift with a school photo inside. Lay the design out first, then glue pieces one by one with craft glue.
Keep this strictly an adult supervised craft when small pieces are involved, and keep finished button frames out of reach of toddlers who still mouth objects. For the photo inside, acrylic glazing is the safer choice in a childs room, as with several of these easy frame crafts.
17. Press Flowers Between Acrylic Sheets
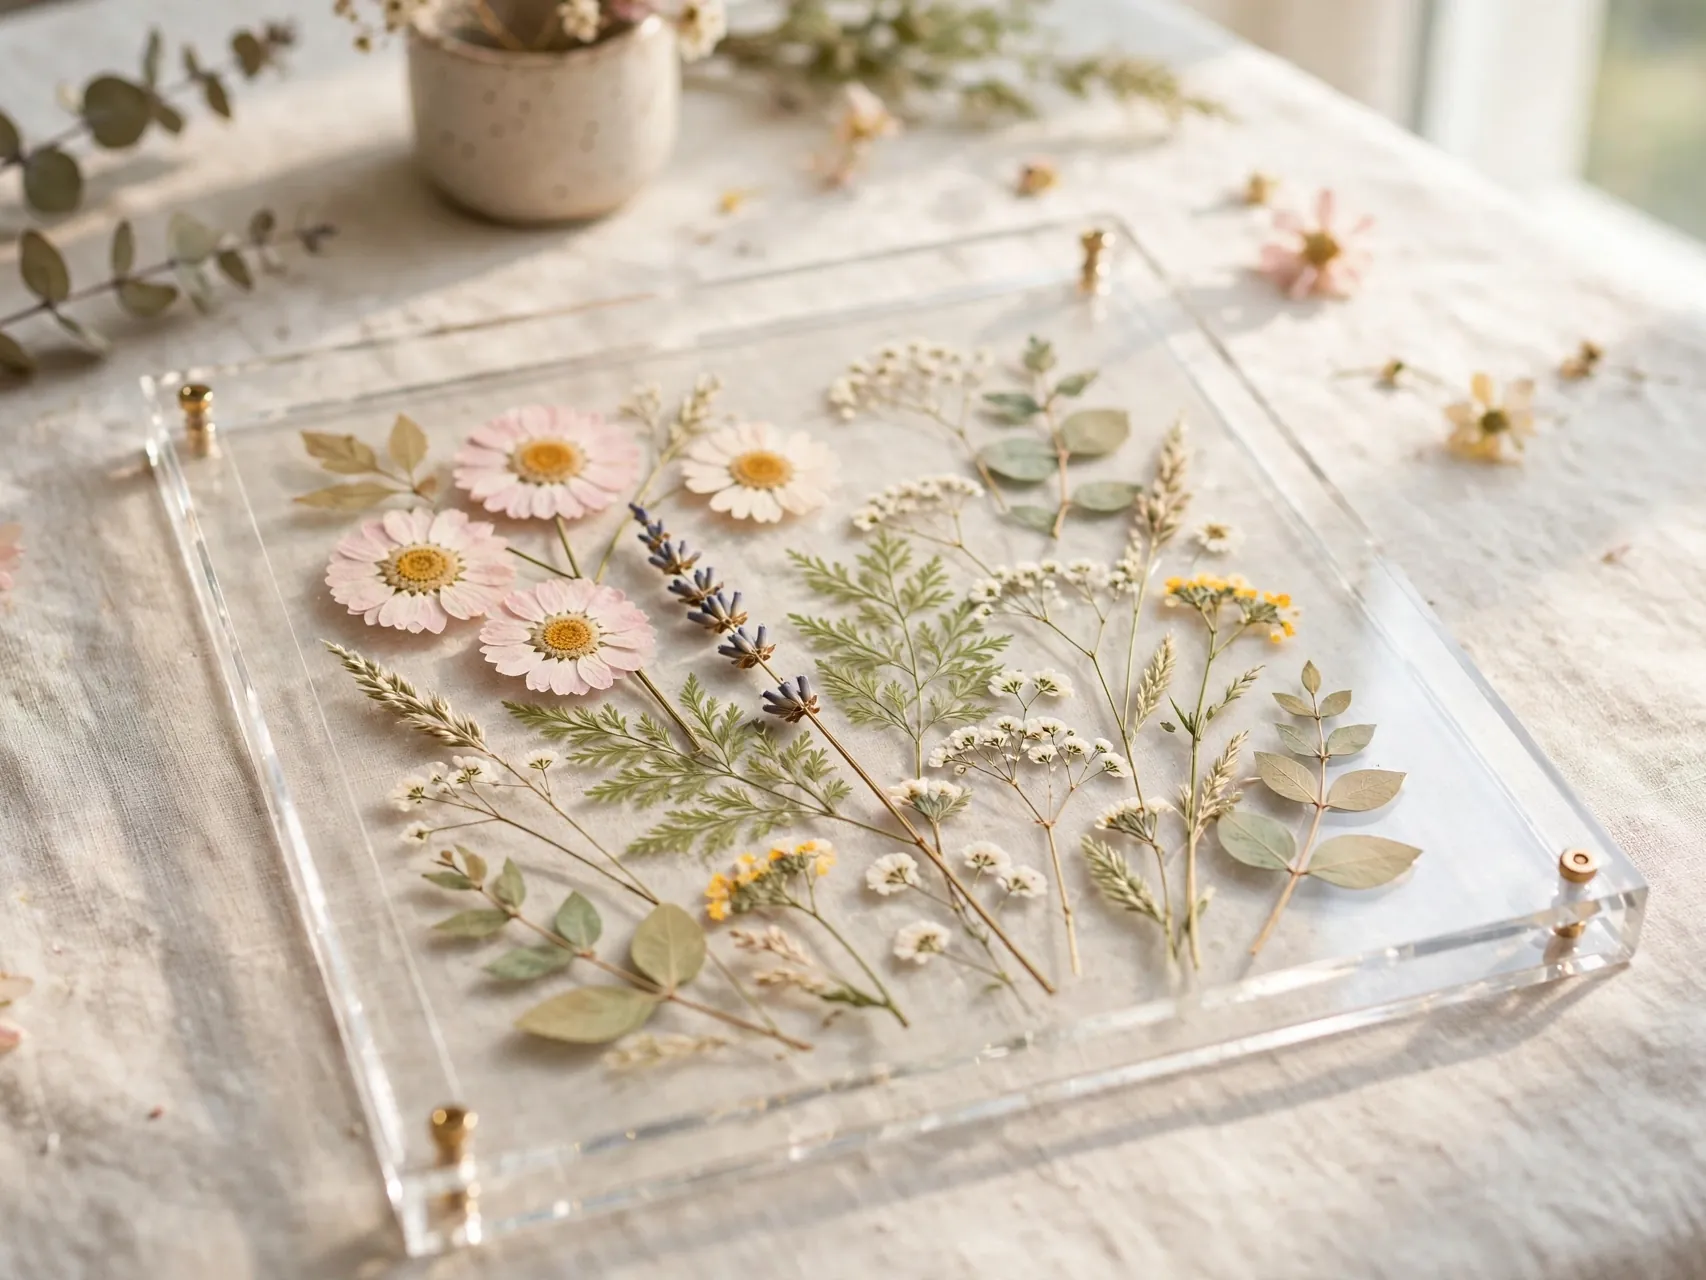
Two clear acrylic sheets, pressed flowers or leaves arranged between them, and a simple clip or wood stand create a floating botanical frame with no glass at all. Press flowers in a heavy book for a week or more until fully dry and flat.
Dry flowers are essential: any moisture left in petals fogs the sheets and can mold. This style suits pressed garden flowers, wedding bouquet keepsakes, and simple leaves, and it shows off both sides if you display it on a stand instead of a wall.
18. Make a Nautical Rope Frame

Rope coiled and glued in rows around a flat frame gives strong coastal texture. Start at the outer edge, glue a short section at a time, press the rope into place, and keep rows tight so the frame beneath never shows.
Finish the inner edge with a single neat row and trim ends at the back with sharp scissors, cutting away from your hands. Rope frames suit boat, beach, and lake house photos, and they pair beautifully with the twine and shell frames in a grouped display.
19. Hang Prints From a Leather Strap Frame

A print mounted on a backing board, hung from a leather or faux leather strap looped over a brass hook, gives that relaxed studio look. The strap does the framing work, so clean edges on the board matter more than any border.
Use a firm board so the print hangs flat, and keep the strap long enough that the art sits at eye level. This is another renter friendly option, needing one hook per piece, and it mixes well with traditional frames in an eclectic gallery.
20. Turn an Old Book Into a Standing Frame

A damaged hardcover book, opened and fitted with a photo inside a cut window or mounted on its cover, becomes a standing frame with real literary charm. Choose a book that is already falling apart, not a treasured edition, and cut pages with a craft knife over a cutting mat.
Photo corners are the gentle option because they hold the print without glue. Book frames suit reading nooks, library shelves, and gifts for book lovers, especially when the book subject quietly matches the photo inside it.
21. Repurpose a Wooden Tray as a Deep Frame
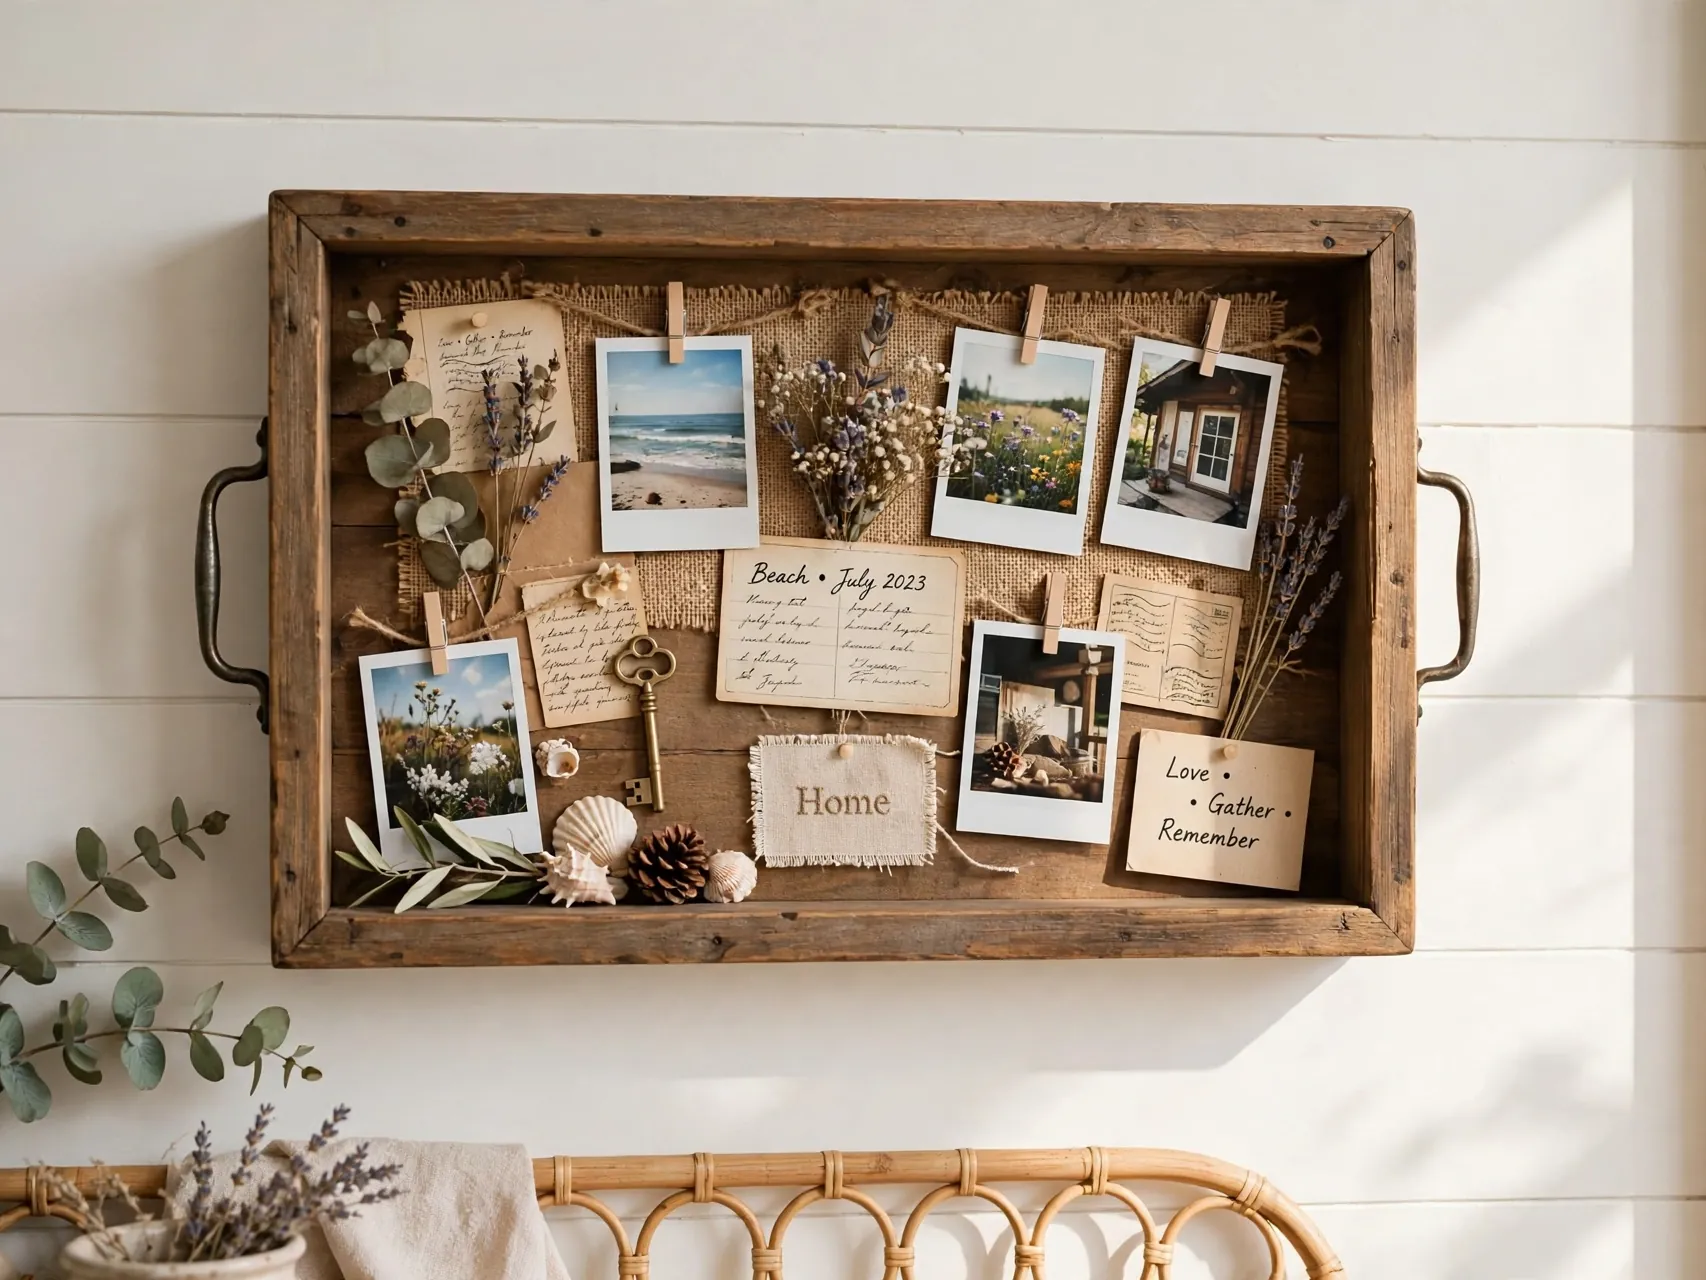
A shallow wooden tray is a ready made shadow frame. Line the base with fabric or paper, mount the photo in the center, and the tray edges frame it with real depth that shows off small objects placed alongside, like tickets or a dried flower.
Thrift stores are full of trays for almost nothing. Hang the tray by secure hardware rated for its weight, or lean it on a shelf for a casual look. Deep frames like this are a lovely bridge between flat photos and full shadow boxes.
22. Style a Chalkboard Frame With Captions

Mount a photo in the center of a small chalkboard, or fit chalkboard material into a frame, and write the caption, date, or a short quote around it in chalk or chalk marker. The handwritten note is the charm, and you can rewrite it whenever you like.
This style shines in kitchens, family command centers, and kids art displays. Use a photo print you can replace, since chalk dust and erasing happen right around it, and keep the board unglazed so writing stays easy.
23. String a Clothespin Photo Line in a Big Frame
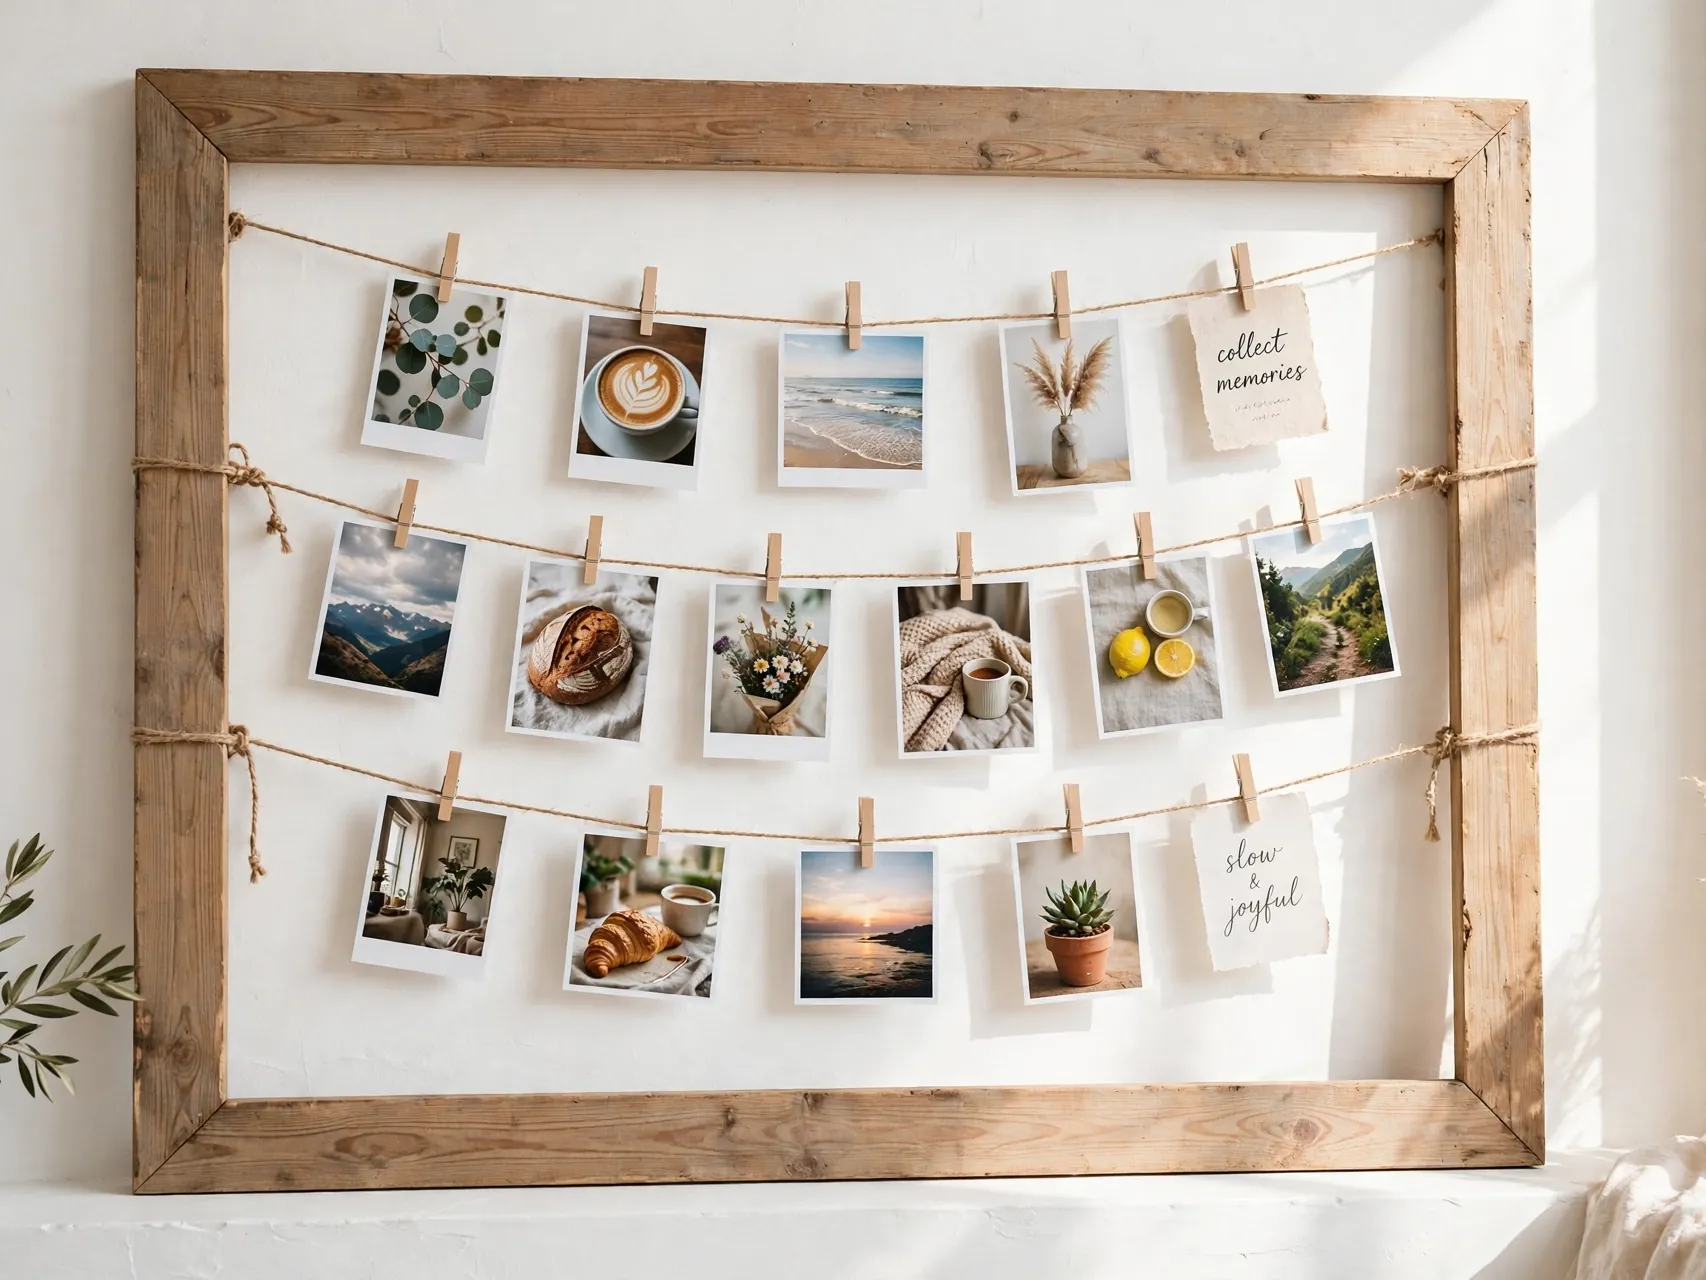
Remove the glass and backing from a large open frame, run two or three rows of twine across the inside, and clip small prints along the lines with mini clothespins. One frame suddenly holds a dozen photos, and swapping them takes seconds.
Without glass, prints are unprotected, so use copies rather than originals, and keep the display away from kitchens and bathrooms where steam and splashes shorten print life. This is a favorite for dorms, family photo walls, and holiday card season displays.
24. Choose Acrylic Frames for Kids Rooms and Hallways

For rooms where frames get bumped, build the whole project around acrylic instead of glass from the start. Acrylic panels, standoff clips, or simple acrylic box frames are light, clear, and far safer if a frame falls or gets knocked during play.
Clean acrylic with a soft microfiber cloth and mild soap only, because rough sponges and strong cleaners scratch and cloud it. Teaching this one swap is the most practical safety upgrade in this whole collection of diy picture frame ideas, and the clear modern look suits almost any decor.
25. Mix Everything Into One Layered Gallery Set

The final idea is to combine the others. A gallery wall mixing a chalk painted thrift frame, a twine wrap, a clipboard, photos with painted mats, and one rope frame looks collected and personal in a way matching sets never do.
Unify the mix with one thread: similar photo tones, one repeated color, or consistent spacing. Lay the arrangement on the floor first, photograph it, and hang from the center outward. If any frame in the set still holds glass, hang it higher and check its hardware twice.
FAQ
How do I handle frame glass safely when making over a frame?
Work over a towel or protected table, lift glass out slowly with both hands supporting it flat, and set it down flat, never leaning it where it can slide or tip. Keep it away from table edges, handle edges as if they are sharp, and wrap broken glass thickly before disposing of it safely. For kids rooms and low hallway spots, replace glass with acrylic glazing instead.
What is the easiest DIY frame for a complete beginner?
Clipboards, washi tape wraps, and clothespin string frames need no cutting, no glass handling, and almost no tools, and all three look genuinely stylish. Painted mats are another easy win: one foam brush and a thrift frame with an existing mat, painted a bold color or checkered, looks custom within an hour of drying time.
How can I make cheap frames look expensive?
Upgrade the mat first with paint, paper, or wallpaper, keep the frame color restrained, and add a small touch of metallic wax to raised details. Larger mats with smaller photos also read as high end, because galleries use generous white space. Finally, hang pieces with consistent spacing and level lines, since careful hanging makes even dollar frames look intentional.
Can I make frames without any glass at all?
Yes, and many styles here do exactly that: clipboards, paint stick hangers, chalkboard frames, clothespin lines, and pressed flowers between acrylic sheets. Unglazed prints are less protected from dust, light, and moisture, so display copies rather than irreplaceable originals, and keep unglazed pieces out of steamy or splash prone rooms for the longest life.
What glue works best for decorating frames?
It depends on the material. Wood glue and craft glue suit paper, fabric, and light wood pieces, while hot glue is fast for shells, rope, twine, and buttons, used carefully because the glue is hot. Strong craft adhesives handle heavier items like tile. Always check the glue label for the surfaces you are joining, work in a ventilated spot, and let the frame cure fully before hanging.
Key Takeaways
- Start with what you have: Thrift frames, leftover paint, paper, fabric, and twigs cover most of these diy picture frame ideas with almost no shopping.
- The mat is the makeover: Painted, checkered, or wallpaper wrapped mats make plain frames look custom faster than any other change.
- Glass safety, every time: Handle glass flat and slowly, and choose acrylic for kids rooms, nurseries, and busy hallways.
- Mix for a collected look: Combining two or three frame styles in one gallery, tied by color or spacing, beats a matching set.
- Protect the photo: Use copies for unglazed displays, keep steam and sun away, and let glues and paints cure fully before closing a frame.
- Got a wall that needs warming up? Save this list to Pinterest and pin the first frame you want to make this weekend.