24 Raised Garden Bed Cover Ideas to Protect Your Plants
Introduction
A raised bed concentrates your best soil and your hardest work in one place, which is exactly why losing seedlings to one frosty night or one hungry rabbit feels so frustrating. The right raised garden bed cover solves a specific job at a time: keeping insects off, holding in a few degrees of warmth, shading tender leaves, or stopping birds and pets.
Think in jobs, not products. Light fabric keeps pests off and gives light frost help. Heavier fabric gives more frost protection but less light. Mesh stops birds and larger insects while letting pollinators and rain through. Plastic traps the most heat but needs venting on sunny days.
Every cover in this list follows the same basics: support it so wet fabric does not sit on leaves where it can, secure every edge so wind and pests cannot get under it, and lift or vent it when heat builds up. Match one of these 24 ideas to the problem in front of you and your bed will reward you for it.
1. Drape Floating Row Cover Right Over Seedlings

The simplest cover is no frame at all. Lightweight floating row cover draped loosely over small plants, with slack for growth and edges held down with stones, bricks, or soil, blocks insects while light, air, and rain pass through.
Extension guidance notes lightweight cover gives only a couple of degrees of frost help, so treat this as a pest cover first. Leave extra fabric in the middle as plants grow, and check under it weekly so a hidden problem does not grow unseen.
2. Build PVC Hoops for a Classic Low Tunnel

Flexible pipe bent into hoops across the bed creates the low tunnel most gardeners picture. Push the ends into the soil or slip them over short stakes, space hoops evenly, then pull fabric or film over the top and secure the edges.
Hoops keep cover off the leaves, shed light rain, and are easy to lift from one side for weeding. This frame is the base for many raised bed cover ideas in this list, because the same hoops can carry insect fabric in spring, shade cloth in summer, and heavier fabric in fall.
3. Use a Heavyweight Frost Blanket for Cold Nights
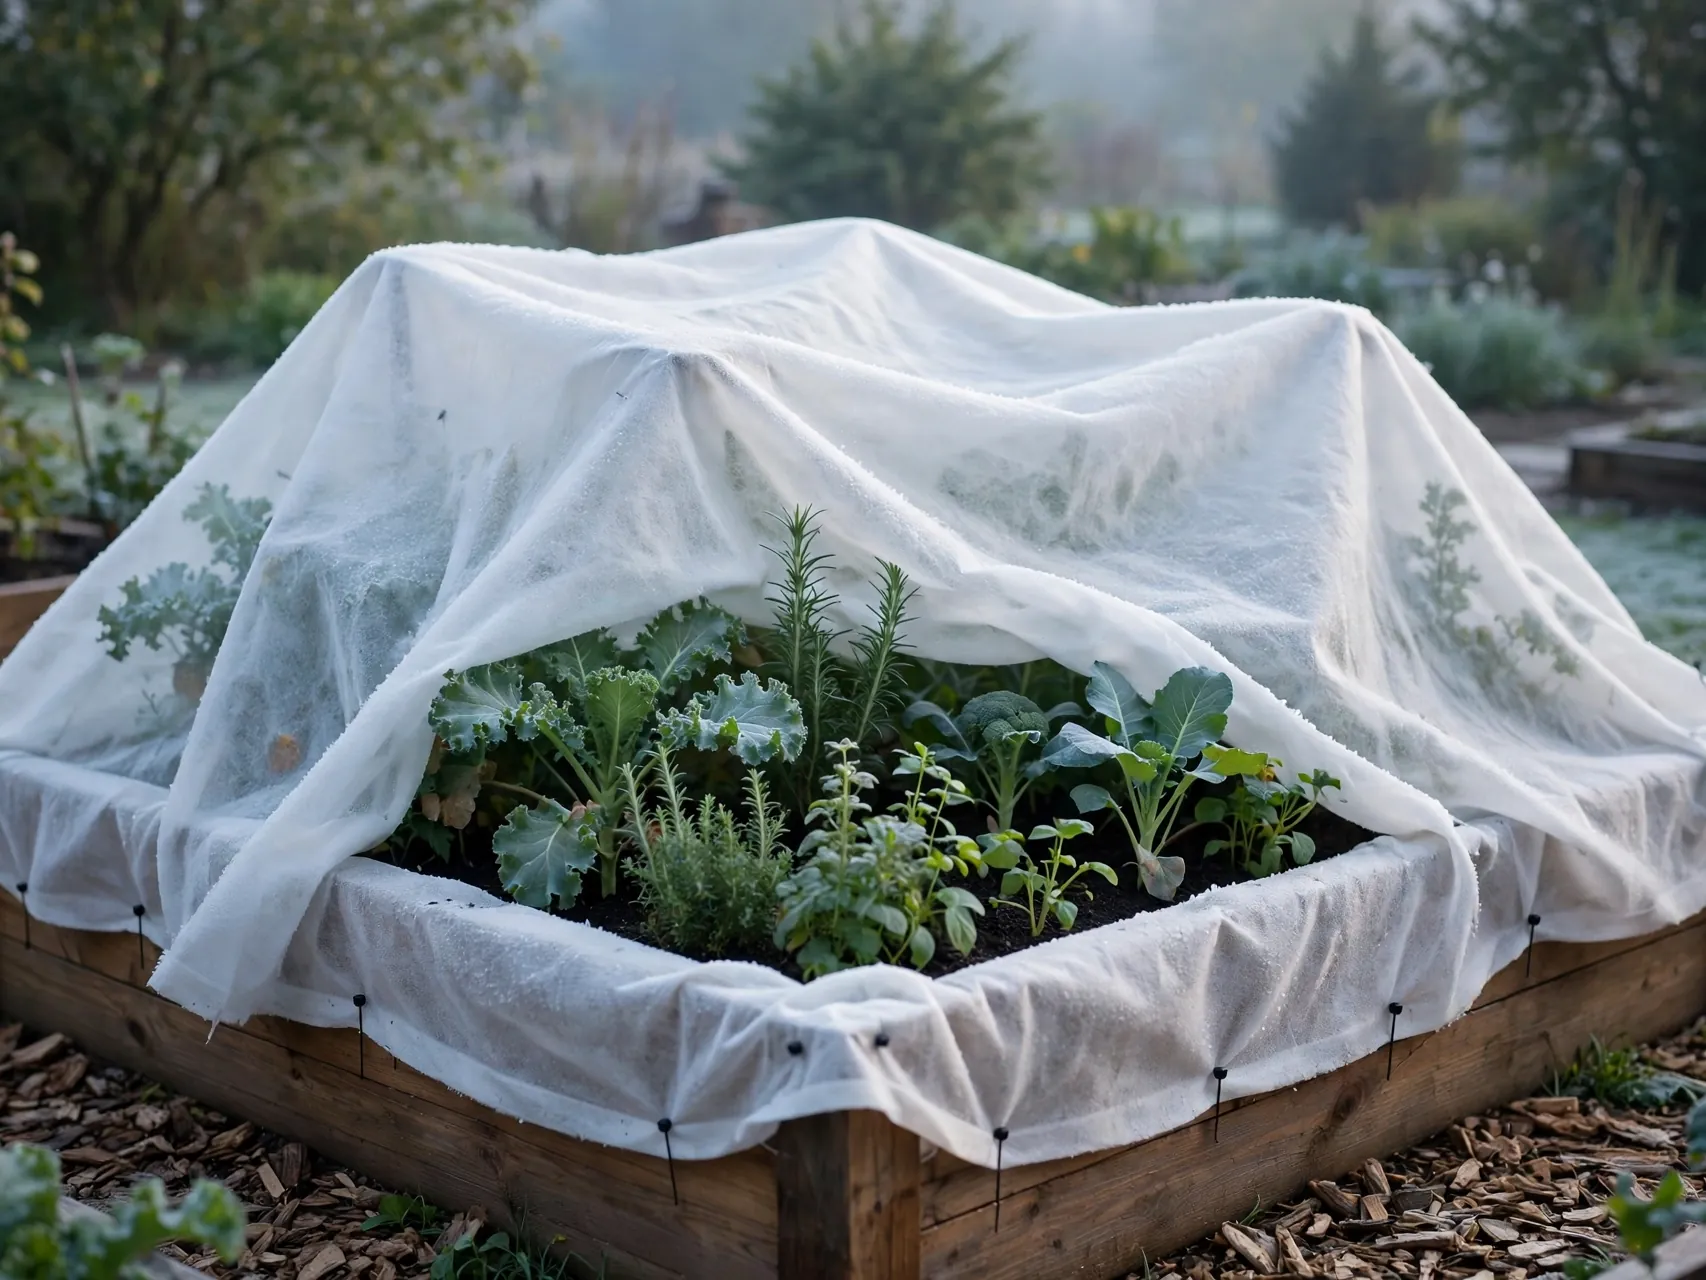
When frost is forecast, swap light fabric for a heavyweight frost blanket over hoops. Heavier row cover can give several more degrees of protection than lightweight fabric, which is often the difference between damaged and fine for hardy fall greens.
Put it on before temperatures drop in the evening so it holds some of the day heat, and secure it fully. Remove or vent it on mild, sunny days, because heat builds fast under heavy fabric. Always check the product label for its stated protection range.
4. Stretch Fine Insect Mesh Over Hoops
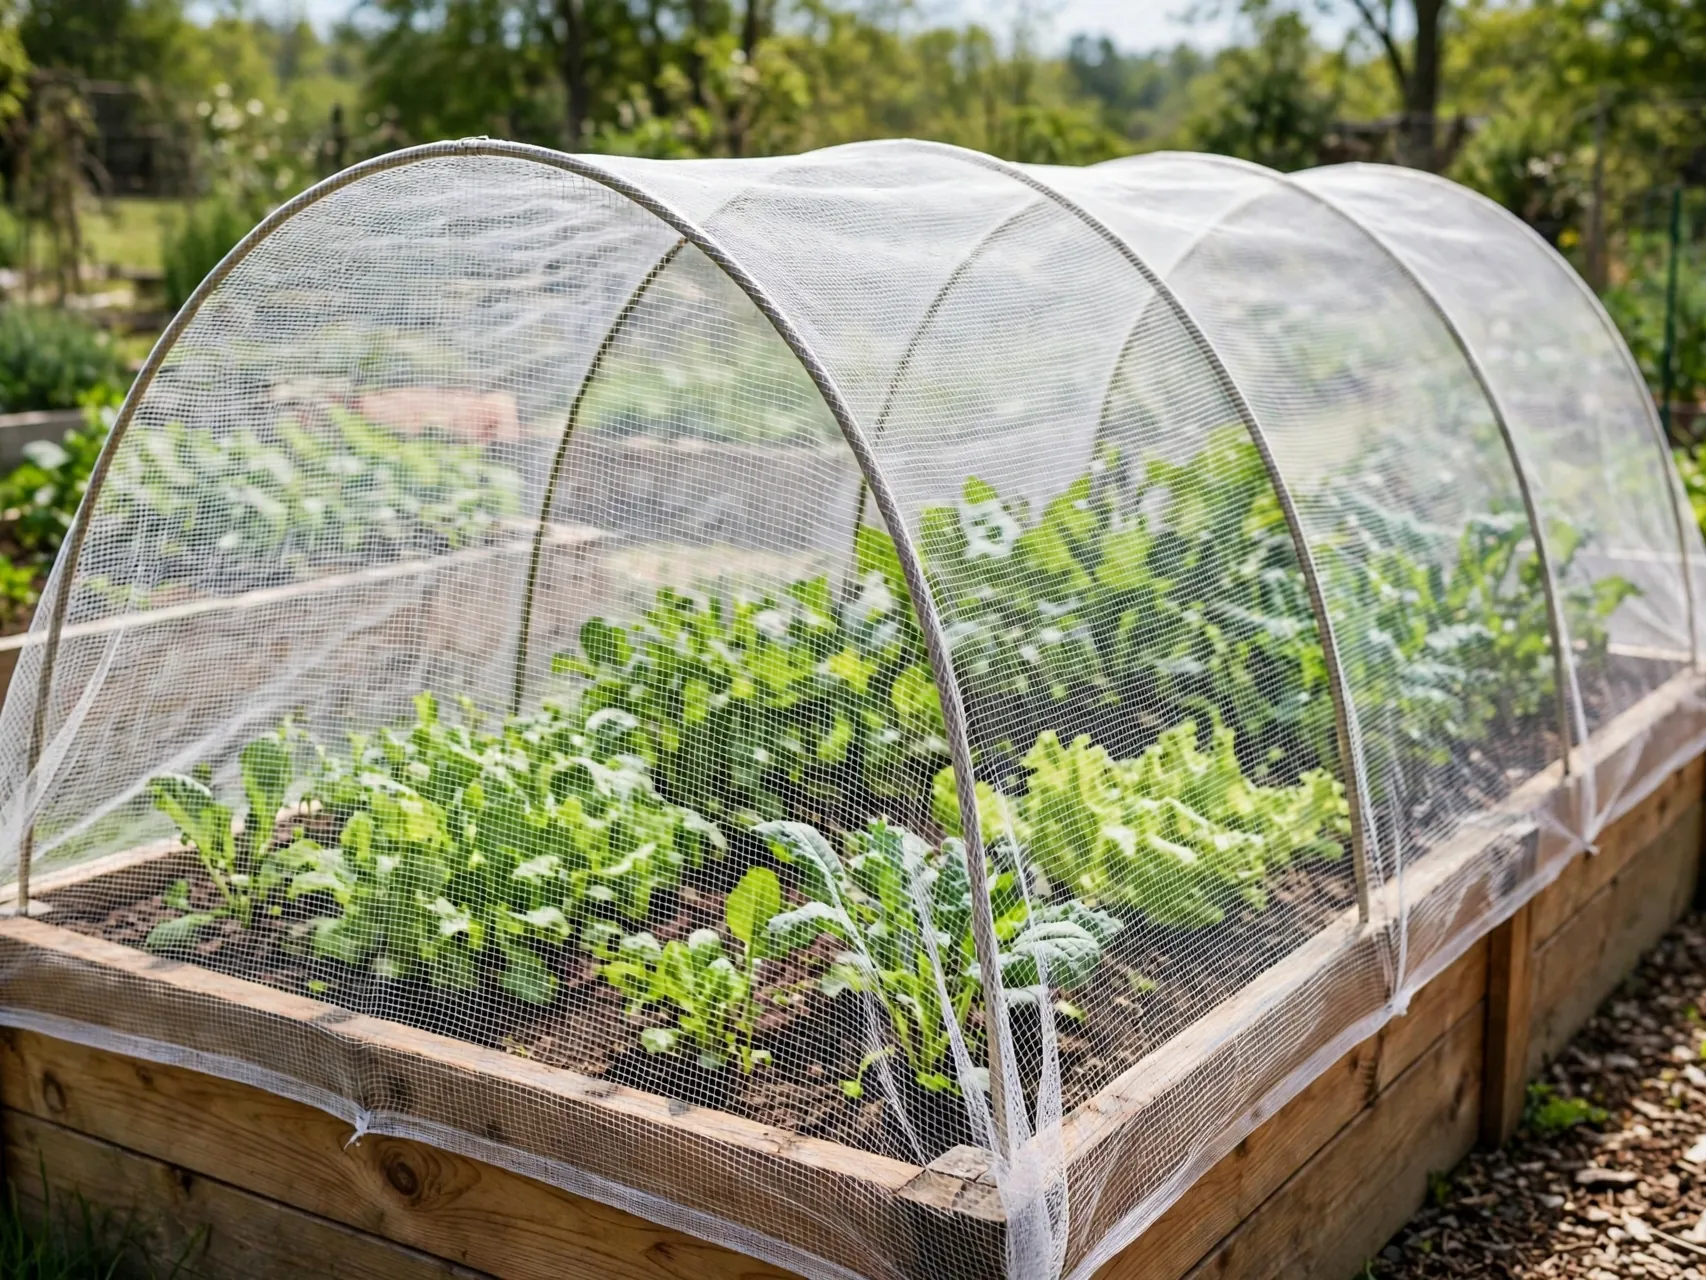
Fine insect mesh is the cover for cabbage worms, flea beetles, and other small pests that feed on leaves. Over hoops, sealed tightly at every edge, it stops adult insects from landing and laying eggs in the first place.
Mesh lets in plenty of light and water and lasts longer than light fabric. For leaf and root crops that do not need pollination, it can stay on for weeks. Brush soil off the edges each time you open it, so gaps do not invite the very pests you are excluding.
5. Fit a Hinged Frame Cover You Can Flip Open
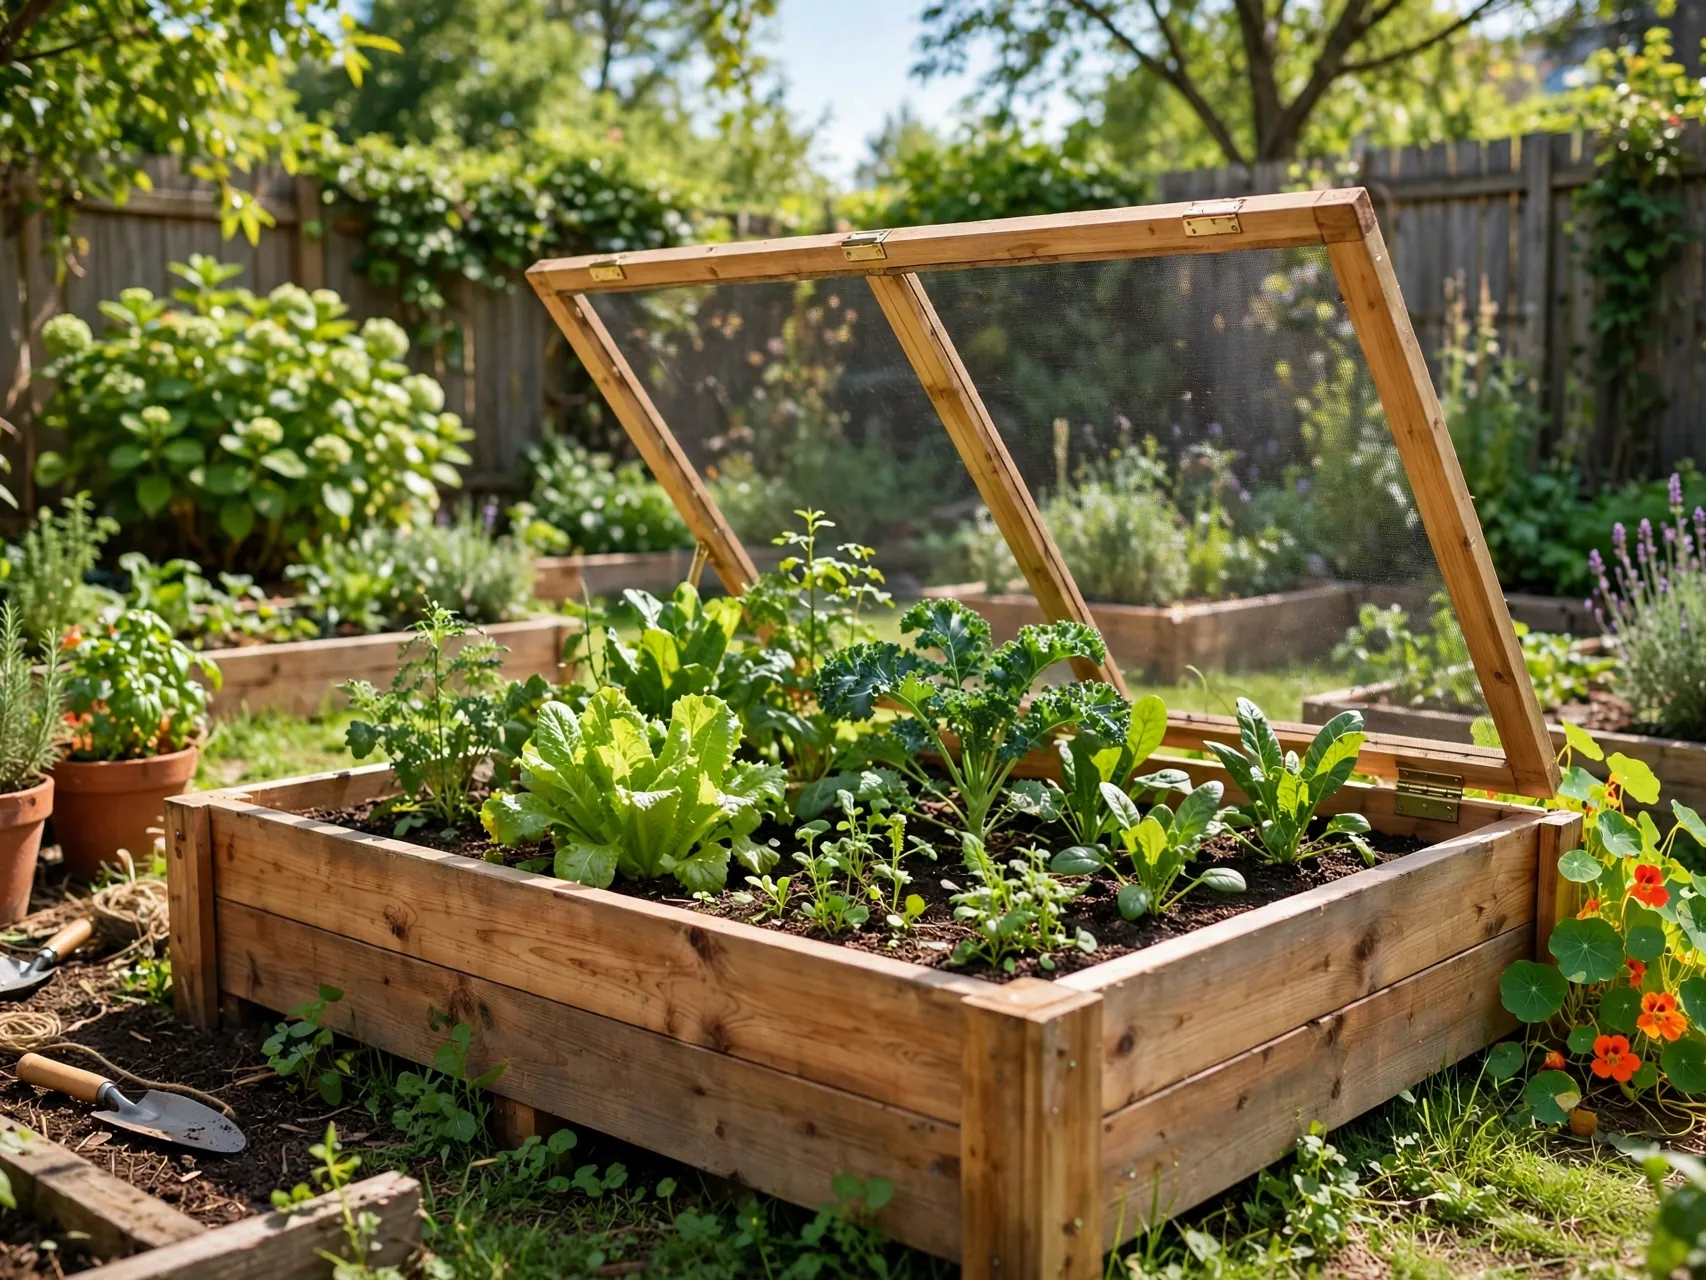
A wooden frame covered with mesh or hardware cloth, hinged along one long side of the bed, opens with one hand and closes with a satisfying click of protection. It suits beds you tend daily, because access takes seconds.
Build the frame to rest flat on the bed edges, add corner braces so it does not twist, and think about hinge placement if children will open it. Gardeners use hinged covers to protect strawberries, carrots, and greens from squirrels, rabbits, and birds all season.
6. Lay a Removable Chicken Wire Lid for Seedlings
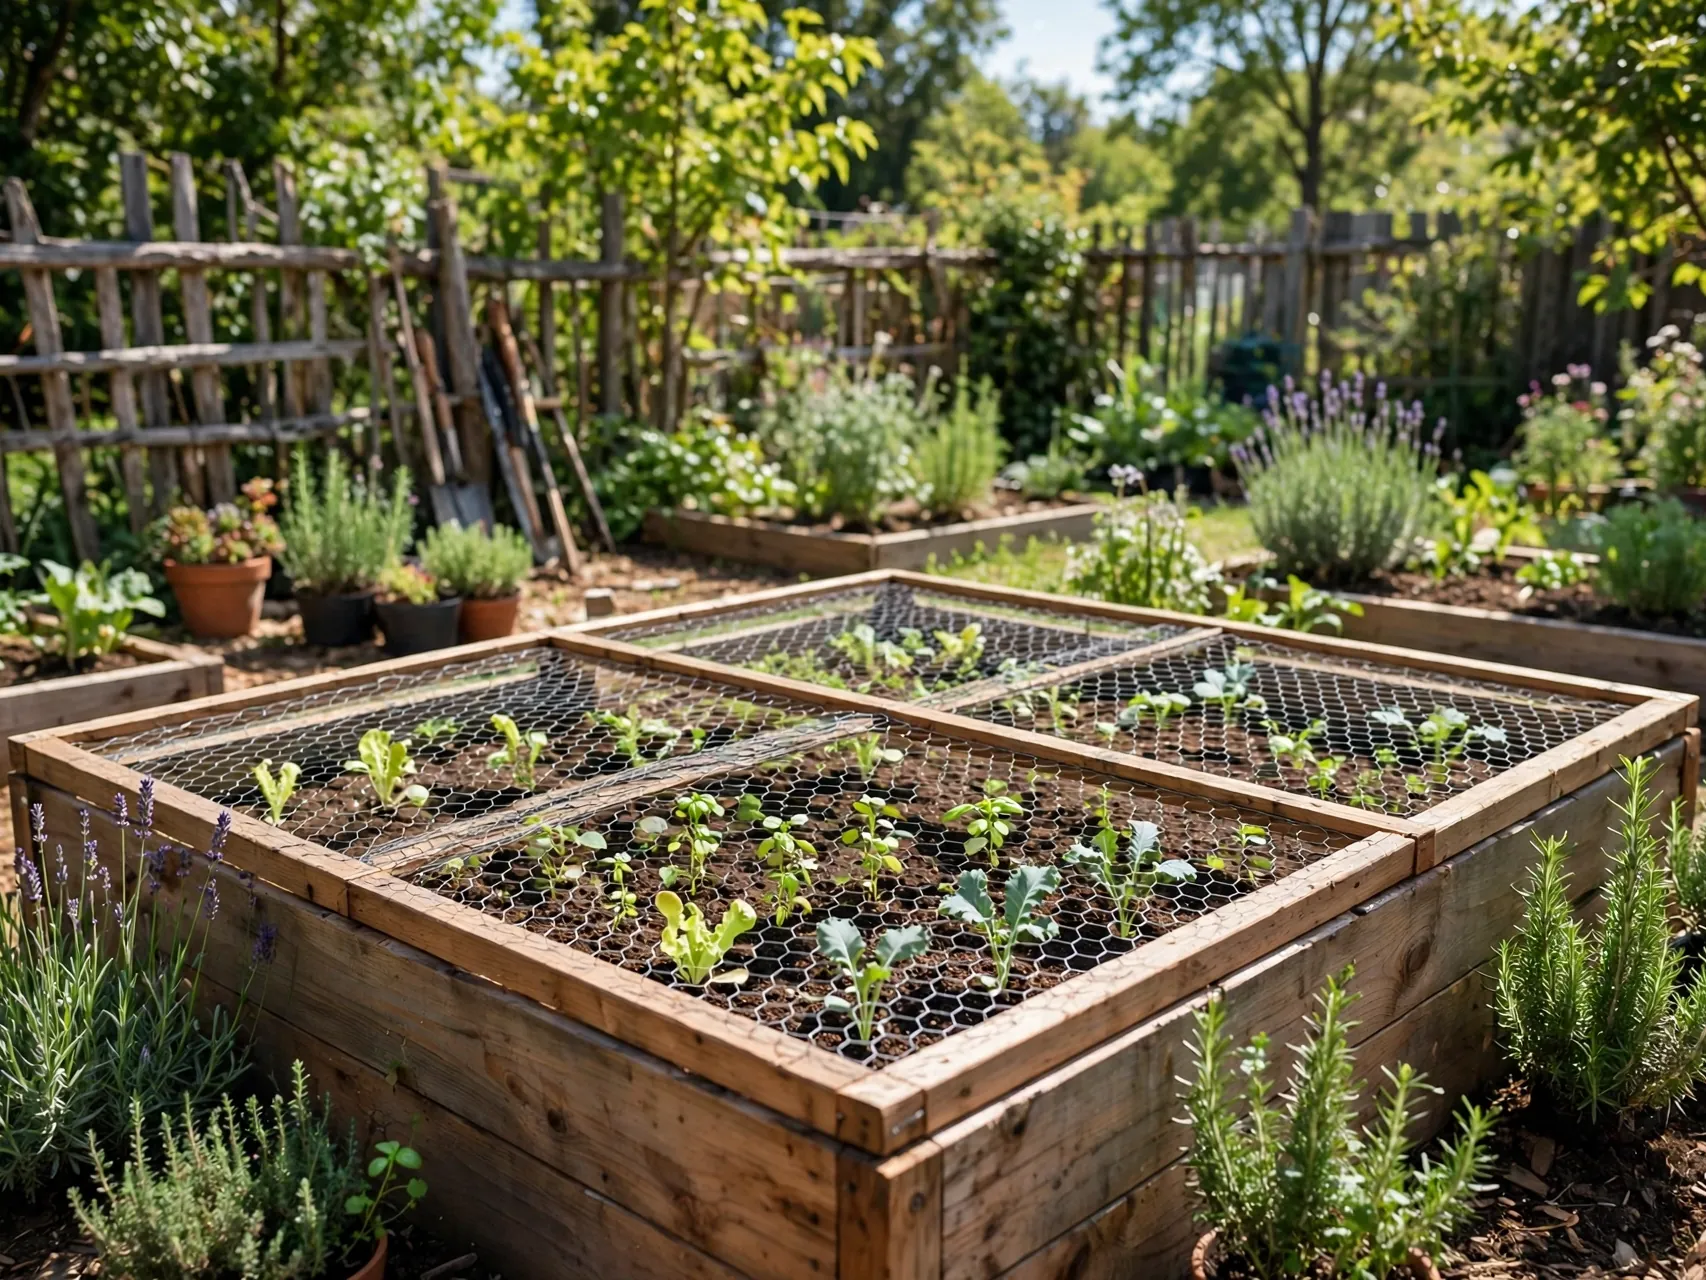
For a short window while seedlings are small and rabbits are keen, a light wooden frame with chicken wire or mesh stretched across it makes a lift-off lid. It stops digging and nibbling without changing light or airflow at all.
Store the lid once plants are large enough to cope on their own. This is a good budget DIY raised bed cover from scrap lumber. Just check wire edges for sharp ends, fold them under, and keep the frame light enough to move without straining.
7. Add a Cold Frame Top for Early and Late Crops

A cold frame top, a low box with a clear hinged lid, turns one bed or one end of a bed into a small greenhouse. It traps heat, shelters transplants as they harden off, and extends greens well past the first frosts.
Vent it on sunny days by propping the lid, because a closed frame can overheat even in cool weather. Clear lids need regular cleaning so light reaches the plants. Cold frames are the most solid option here, and with care they serve for many seasons.
8. Cover Single Plants With Cloches and Cut Bottles
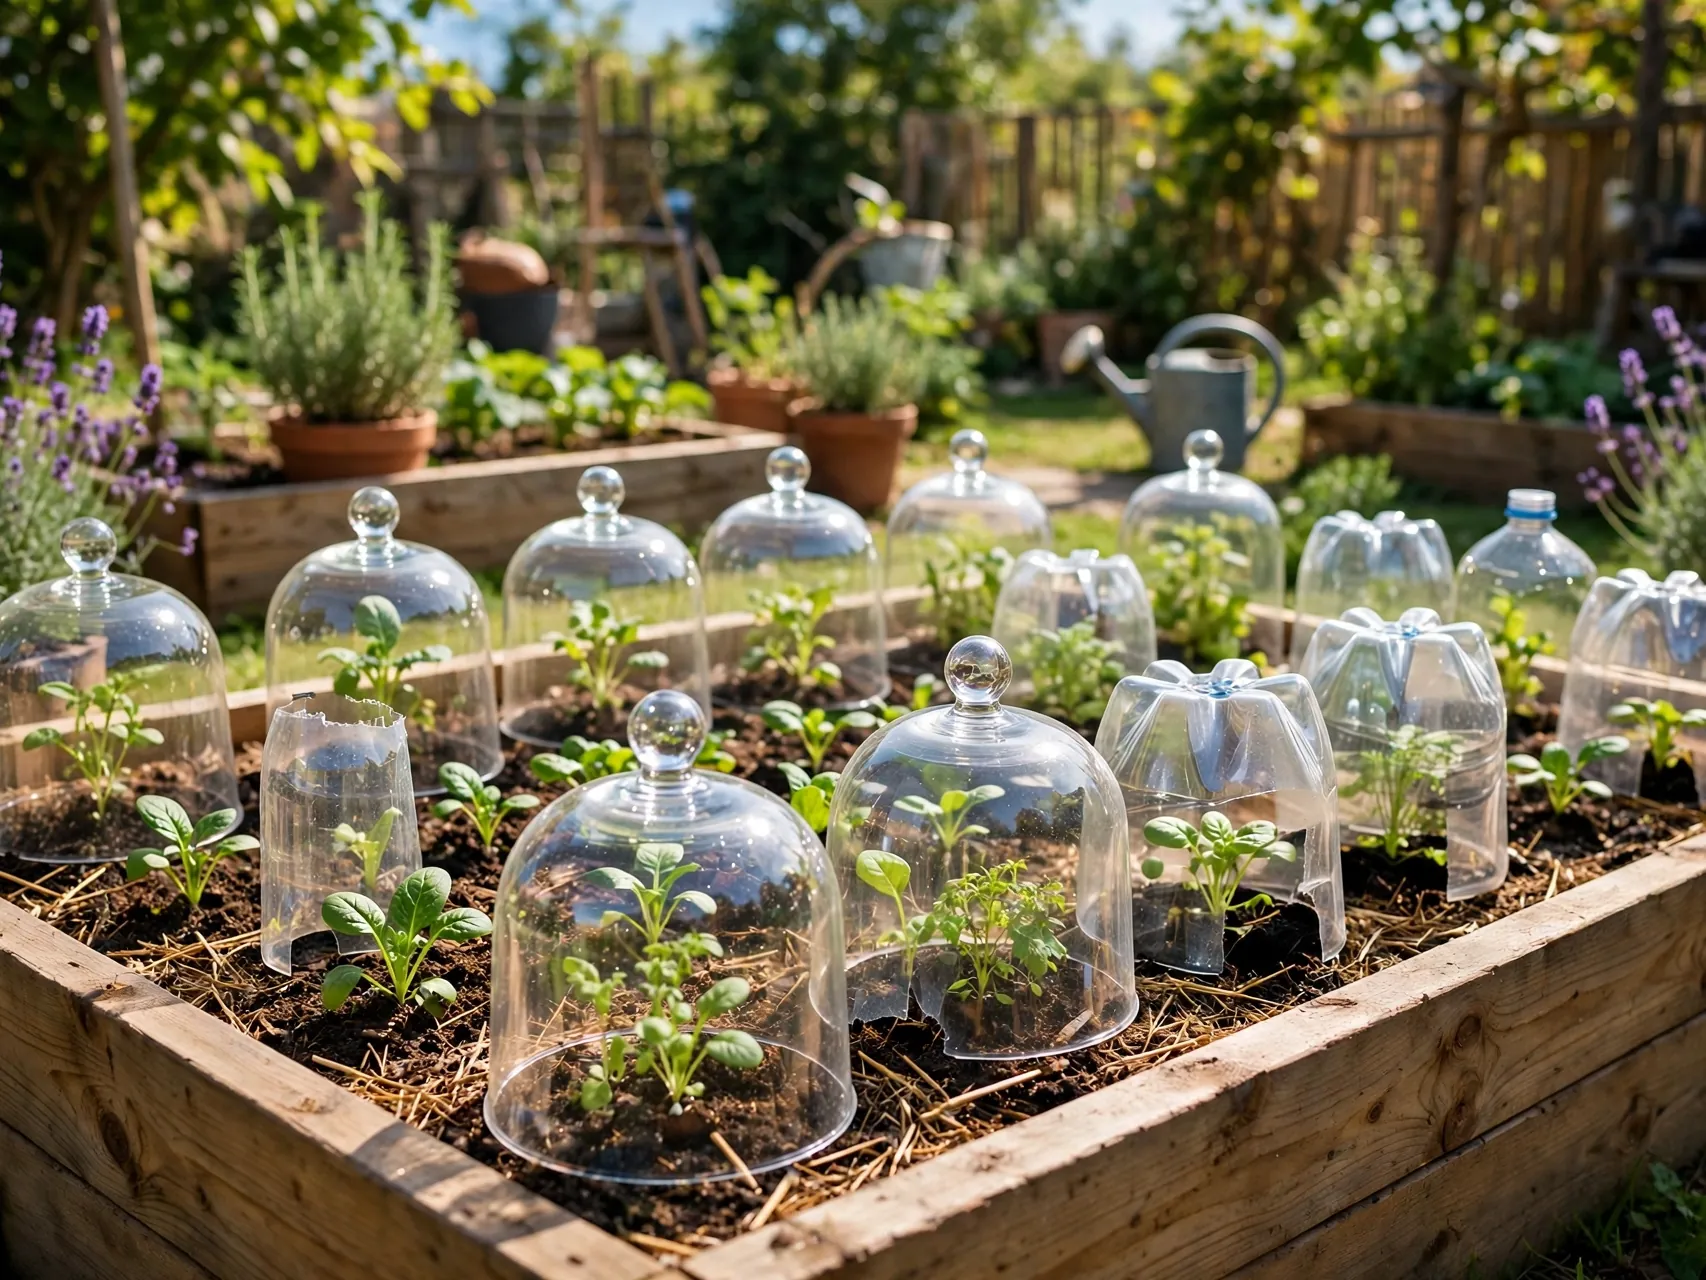
Not every plant needs the whole bed covered. A glass or plastic cloche, or a cut bottle with the cap off for air, protects one tender transplant through its first cold or windy nights.
Push the rim into the soil so wind cannot take it, and remove or vent it during the day as temperatures rise. Cloches are perfect for the few early tomatoes or peppers you could not resist planting, and they store in almost no space between uses.
9. Pull Shade Cloth Over Hoops in High Summer

Lettuce, spinach, and young transplants suffer in strong summer heat. Shade cloth over the same hoops you used in spring cuts the sun by a set percentage, cools the bed, and helps greens last longer before bolting.
Choose the shade level for your crop and climate, secure it well, and keep watering steady, since shade is not a substitute for moisture. This is the summer chapter of floating row cover for raised beds thinking: one frame, different fabrics, each matched to the season.
10. Use Clear Poly Film for a Mini Greenhouse Push
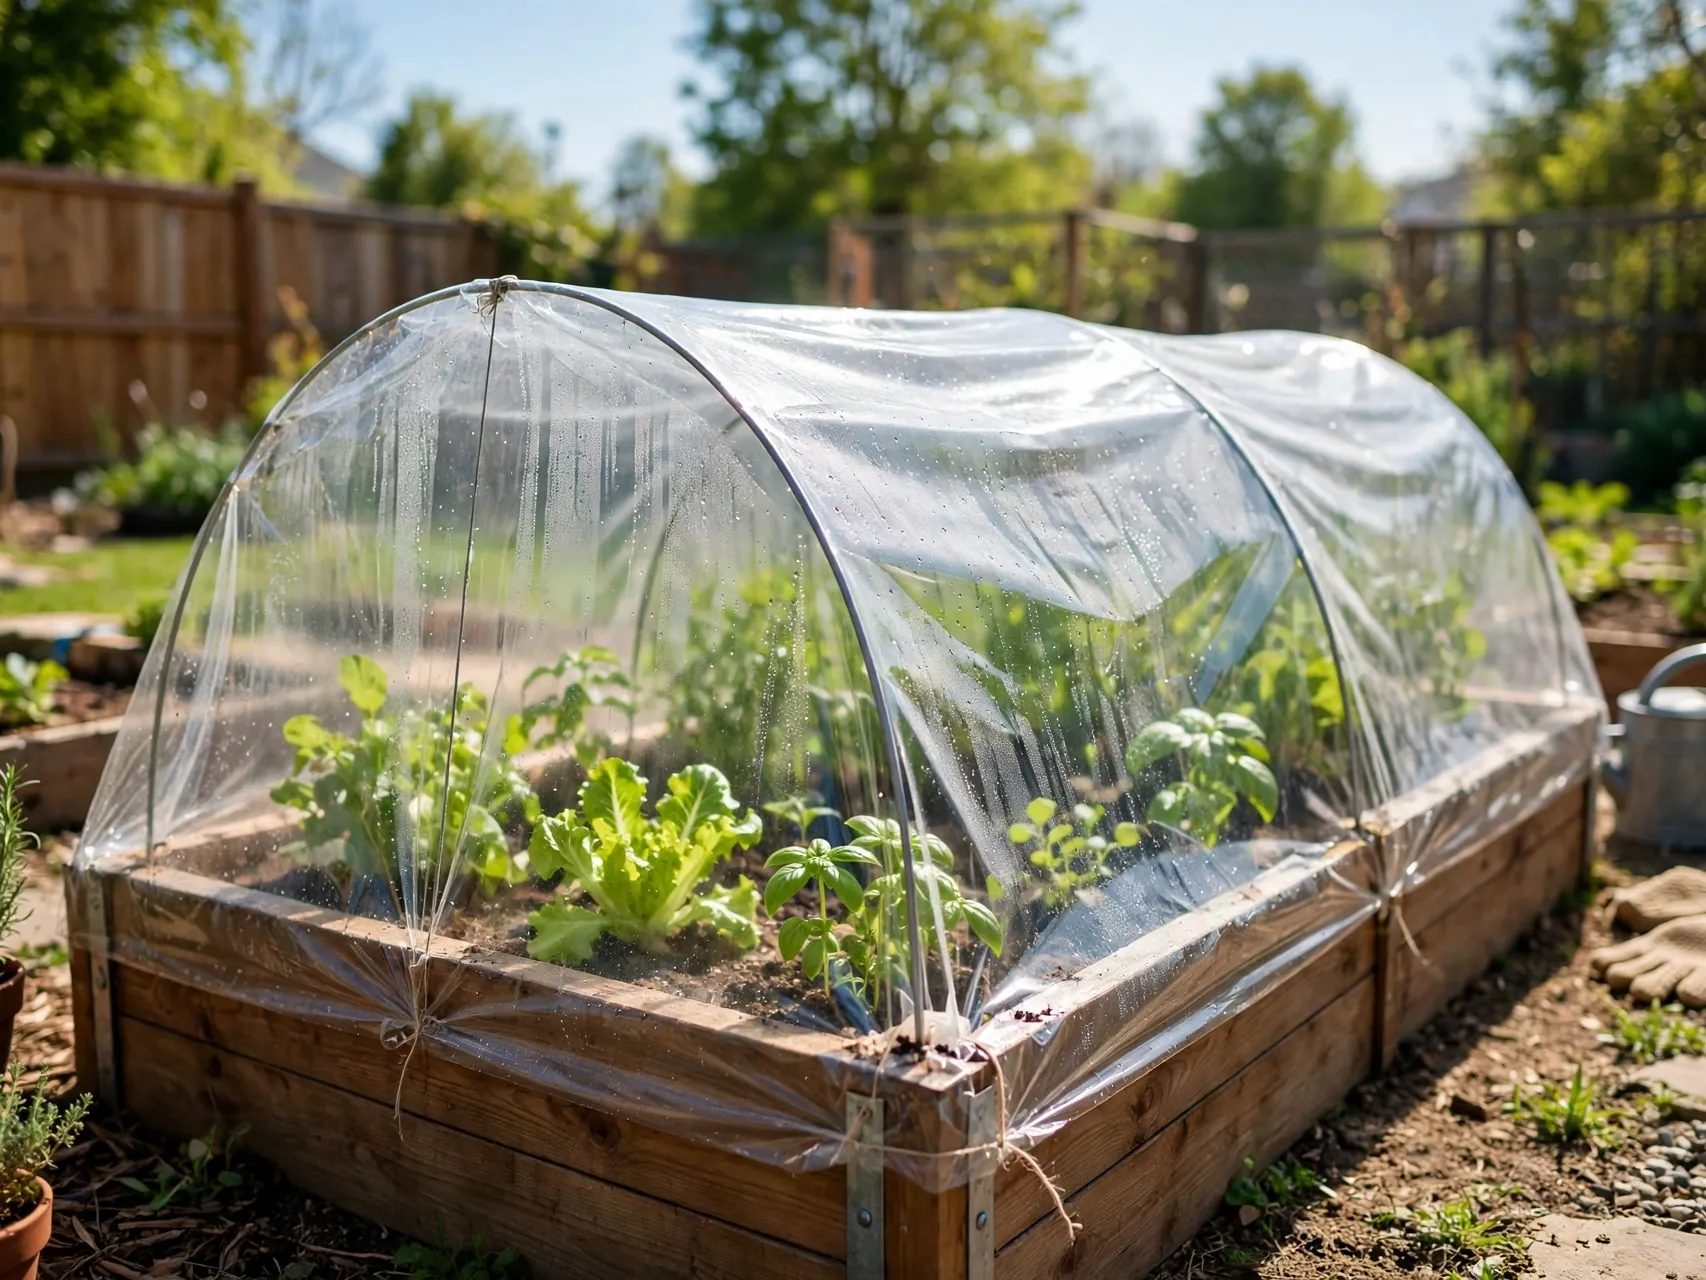
Clear plastic film over hoops traps more heat than fabric and can push warm season crops through a chilly spell. Extension guidance gives poly film stronger frost protection than row cover cloth, which is why growers use it for season extension.
The trade off is management. Film does not breathe and rain does not pass through, so vent it every sunny morning and water the bed yourself. Never leave a sealed film tunnel closed on a bright day, tender plants can cook in hours.
11. Try Bird Netting When Fruit Starts to Ripen

Birds time ripening strawberries and blueberries better than most gardeners. Loose bird netting draped over hoops or a frame, kept off the fruit and secured at the base, lets bees and light through while birds stay out.
Check netting daily and free any tangled wildlife promptly, and keep it taut so nothing gets trapped in folds. Remove and store it once picking ends. Netting is a targeted, short term cover, used only when the crop needs it.
12. Fit Hardware Cloth Panels Against Digging Pests

Where squirrels, chipmunks, or neighborhood cats treat your bed as a digging box, flat panels of hardware cloth laid over the soil or fixed to a frame give a firm answer fabric cannot. Plants grow up through or under the panels depending on spacing.
Use gloves when cutting mesh, and fold sharp edges safely. For burrowing pests, gardeners also line the bottom of a new bed with hardware cloth before filling it. This is protection as infrastructure: fit it once and it works quietly for years.
13. Build a Tall Walk-In Hoop Cover for Big Crops

Tall hoops or a simple frame let tomatoes, peppers, and climbing beans grow under cover without brushing the fabric. A taller tunnel holds more warm air, is easier to work inside, and suits beds you cover for most of the season.
Anchor a tall structure properly, because it catches more wind than a low tunnel. Add a door or a fully lifting side for harvest access. If you grow one bed intensively all year, this bigger build is often worth the extra materials.
14. Drape Old Sheets and Blankets for One Frosty Night

For a single surprise frost, a clean old sheet or light blanket over hoops or stakes is a perfectly good emergency cover. Fabric protects better than plastic laid right on leaves, and hoops keep the weight off the plants.
Put emergency covers on in the evening and take them off in the morning once temperatures rise, so plants get light and air. Keep a frost kit ready in fall: fabric, clips, and supports in one place. Improvised covers save crops when a purpose made blanket is still on a wish list.
15. Secure Every Edge With Clips, Pins, and Weights
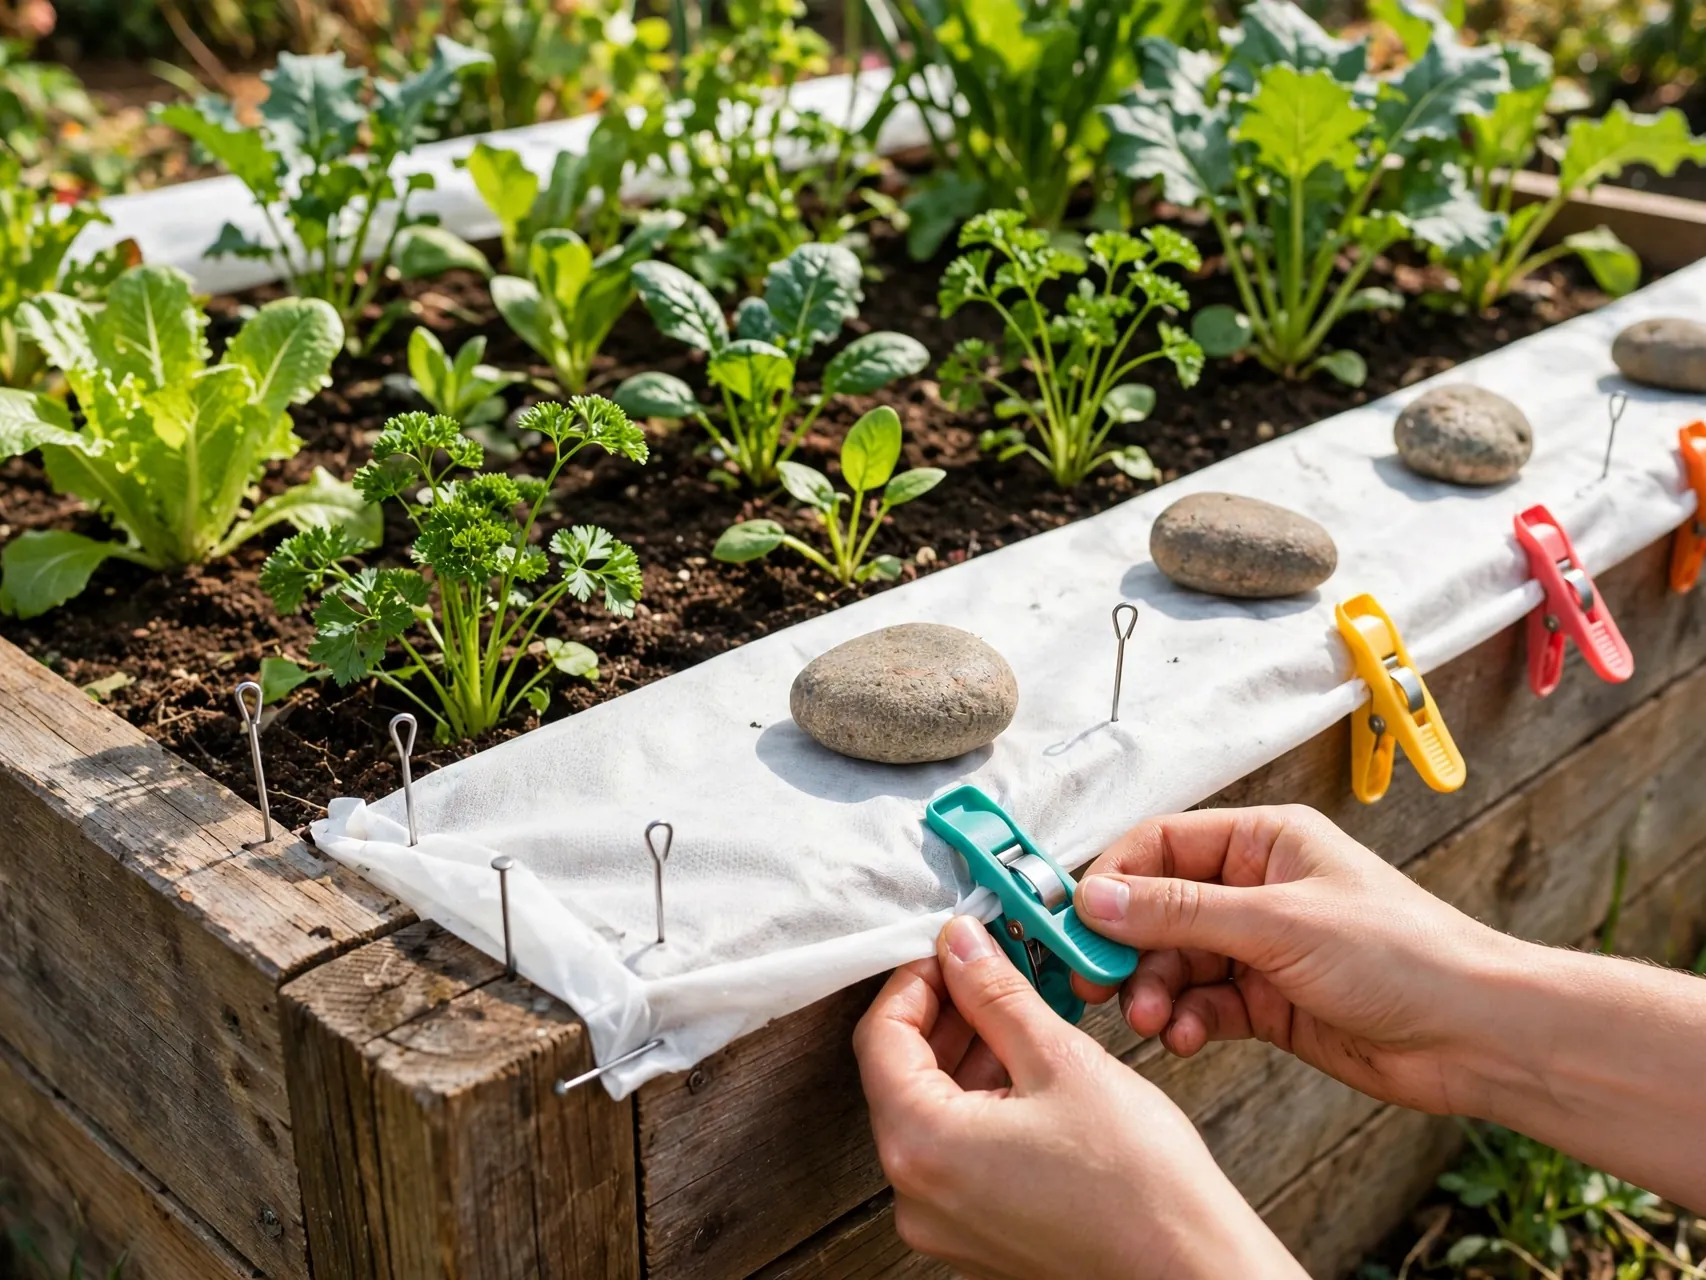
More covers fail at the edges than in the middle. Wind lifts a loose corner, insects walk in under a gap, and the whole job is undone. Fix edges with soil, bricks, stones, landscape staples, or clips on the hoop frame, and check them after windy days.
Leave one planned opening side for your own access and reseal it every time. Good edge habits are the cheapest garden bed covers for pests upgrade there is, because even the best fabric only works as a sealed barrier.
16. Layer Two Covers on the Coldest Nights
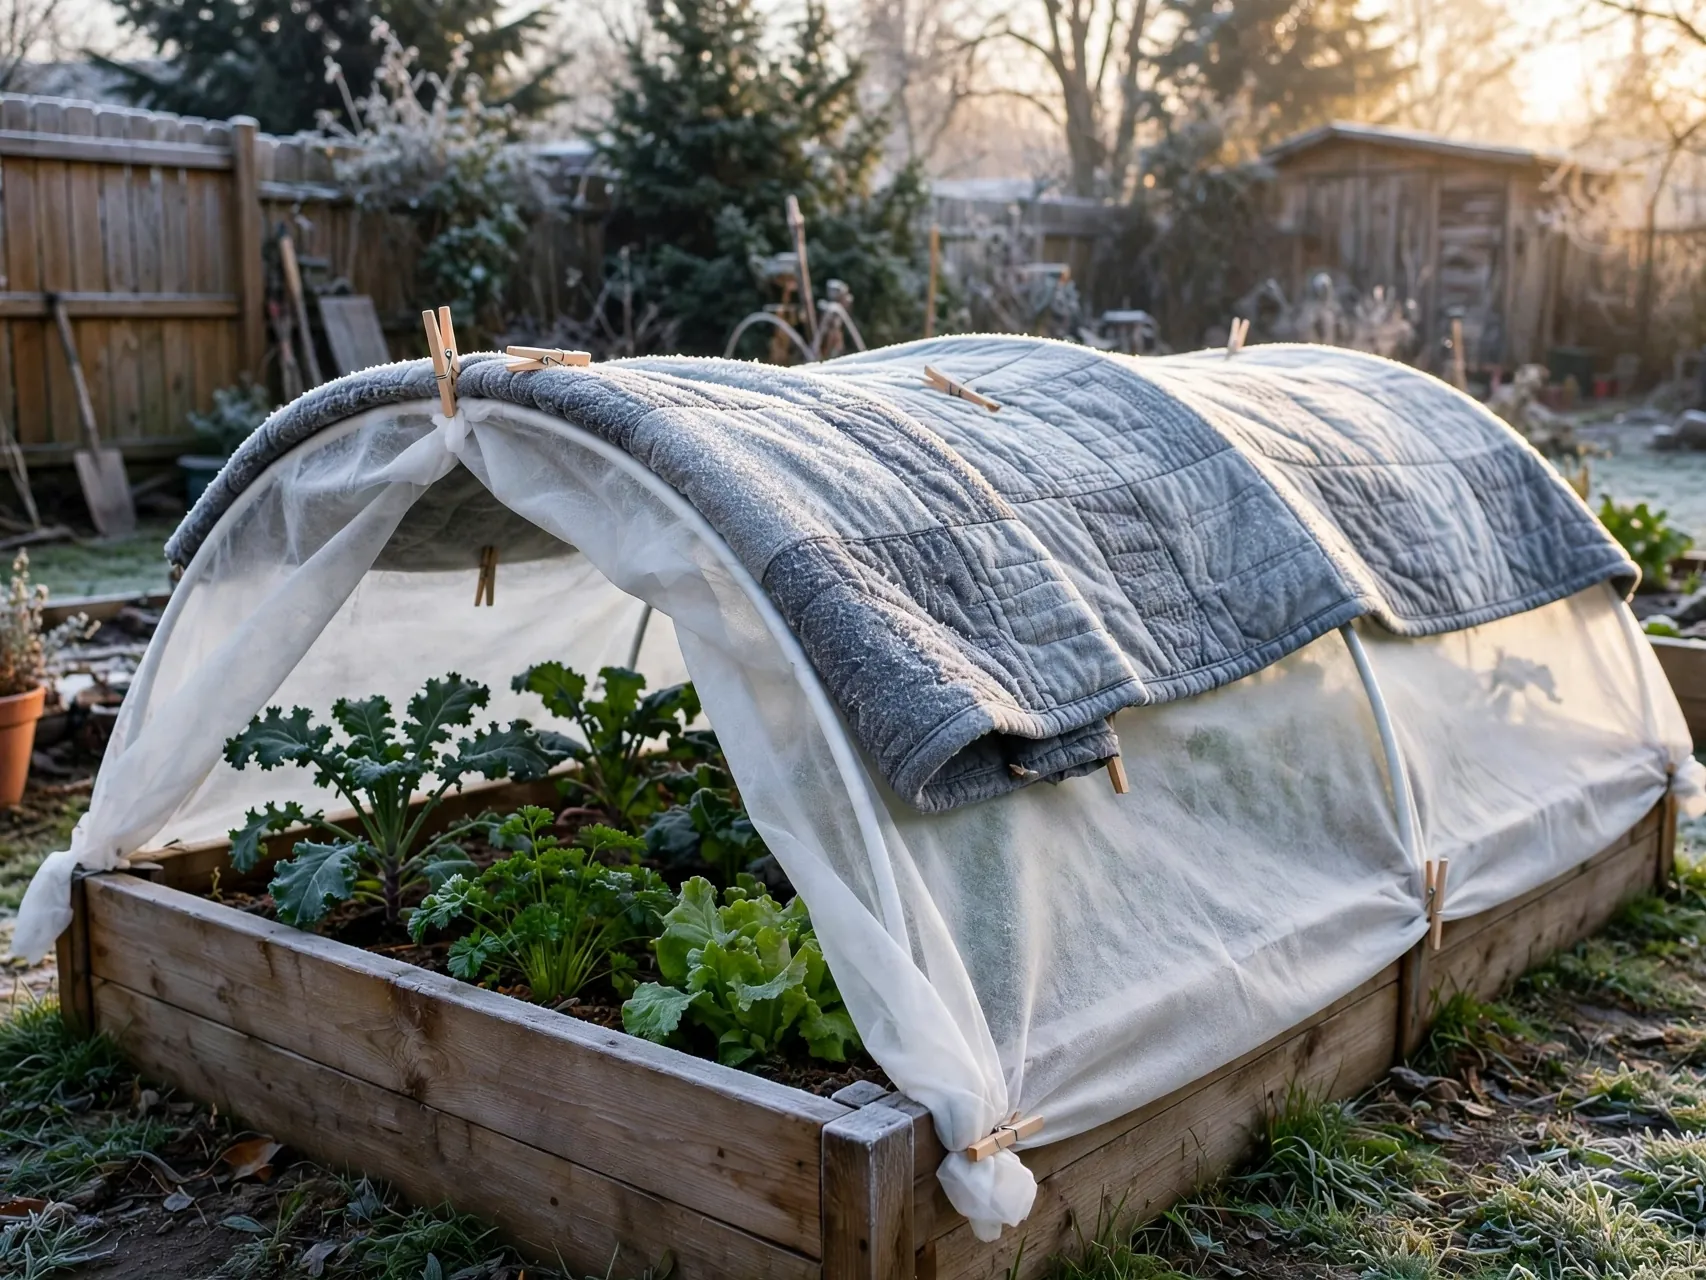
On a hard frost night, two layers beat one. A light fabric over the plants plus a heavier blanket over hoops traps an extra pocket of air and adds protection when a single layer is not enough for the forecast.
Remove the outer layer promptly the next day so light returns and moisture does not linger on leaves. Layering is a tactic for a few critical nights, not a way to leave tender summer crops out through winter. Know each crop limit and harvest what will not cope.
17. Use a Mesh Pop-Up Tent for Instant Protection

Pop-up mesh tents and ready made bed covers suit gardeners who want protection in minutes with no building. Set one over a bed or a section, peg it down, and seedlings get an instant pest barrier with good airflow.
They are handy for renters and for rotating protection to whichever bed is youngest. Check the fit against your bed size before buying, store them dry, and do not expect a light pop-up to give heavy frost protection. Convenience is its job, and it does it well.
18. Vent Covers Daily When the Sun Comes Out

A cover that saves plants at night can harm them at noon. Temperatures under fabric or film rise well above outside air on sunny days, and flowers of beans, tomatoes, and peppers can fail in excess heat, as extension guides warn.
Build a simple routine: vent or lift covers on bright mornings, close them again before evening chill. If you are away during the day, choose breathable fabric over film and leave a small vent gap. A good raised garden bed cover always has a venting plan.
19. Remove Covers at Bloom for Pollinated Crops
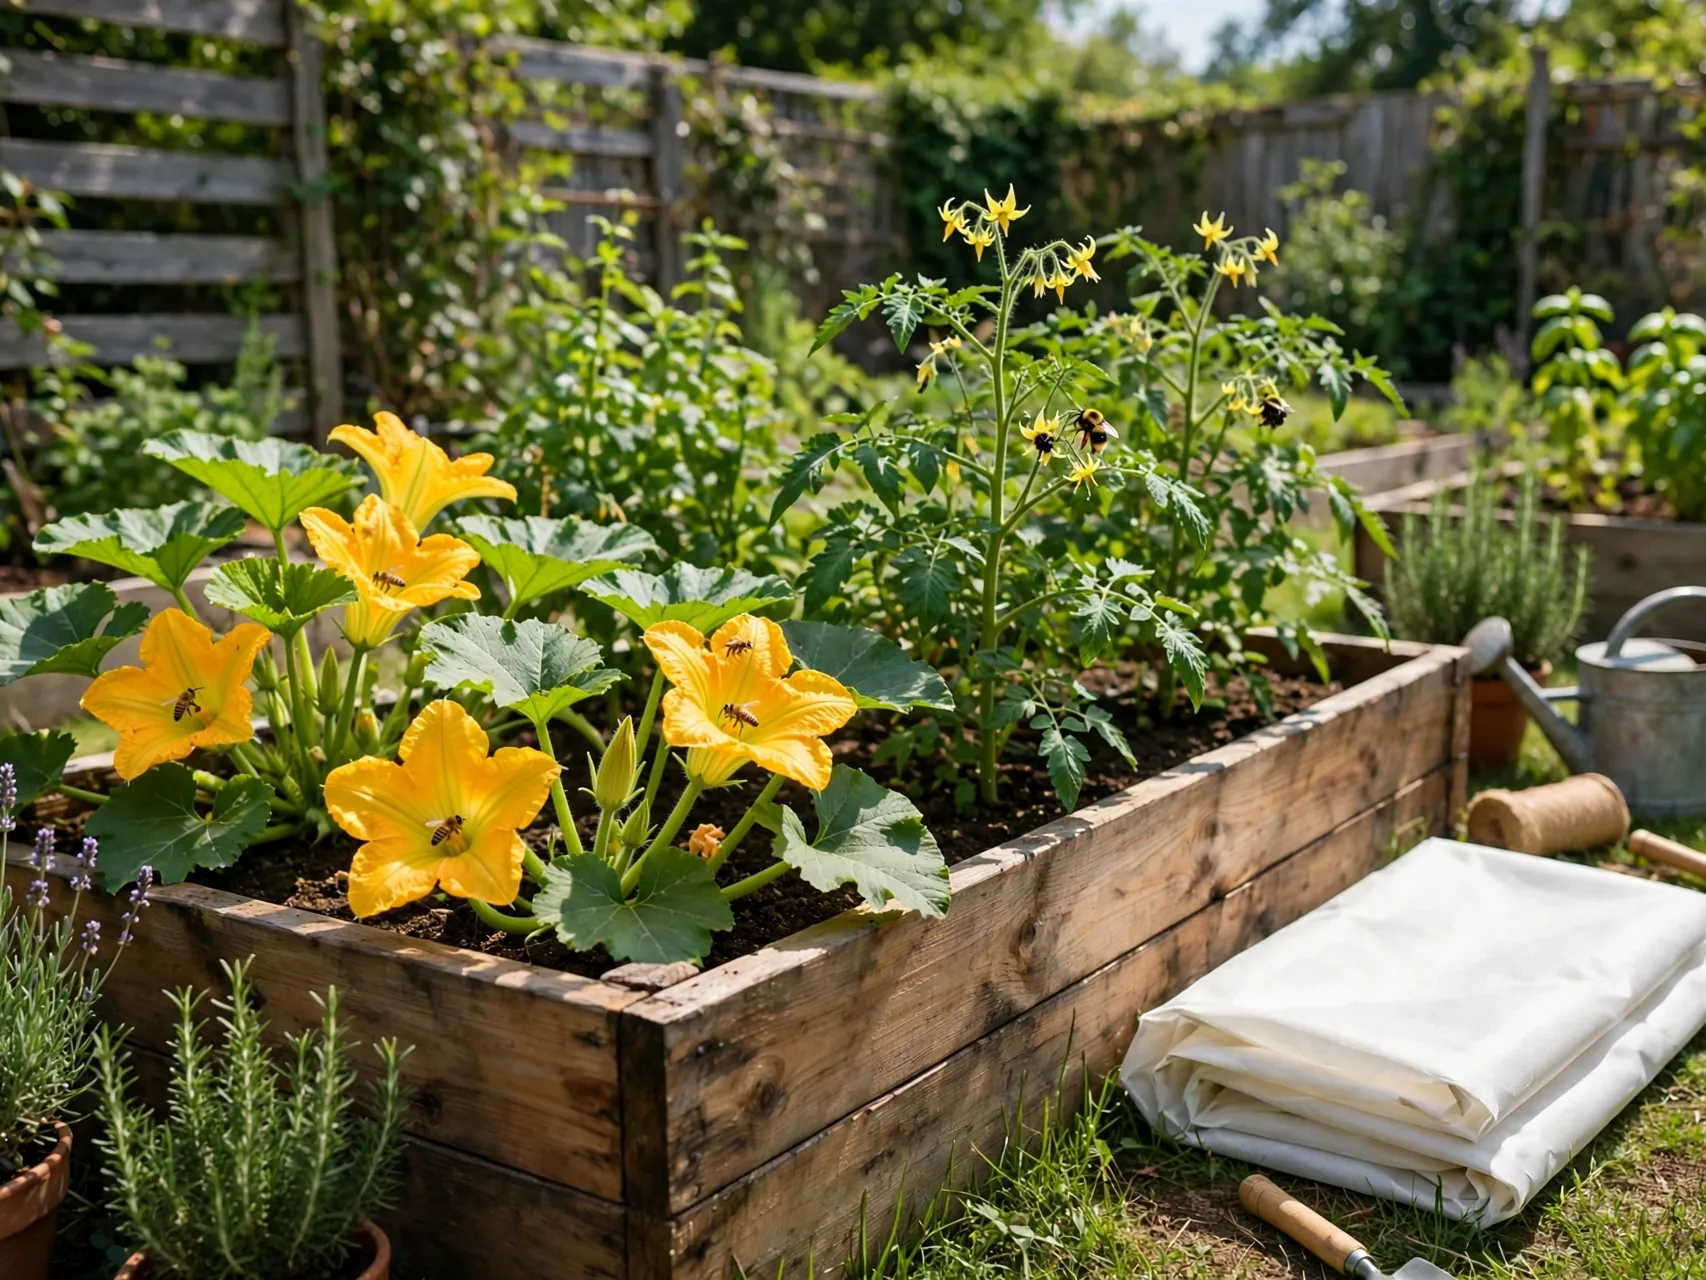
Insect mesh does its job too well once squash, cucumbers, melons, beans, tomatoes, and peppers start to flower: it keeps pollinators out along with pests. Remove covers at bloom, or open them daily, for any crop that needs bees to set fruit.
Leaf crops like cabbage, kale, and lettuce, and root crops like carrots, do not need pollination for the part you harvest, so their covers can stay on longer. This one timing rule is the difference between a protected bed and a flower bed with no harvest.
20. Cover Fresh Seed Rows From Birds and Washouts
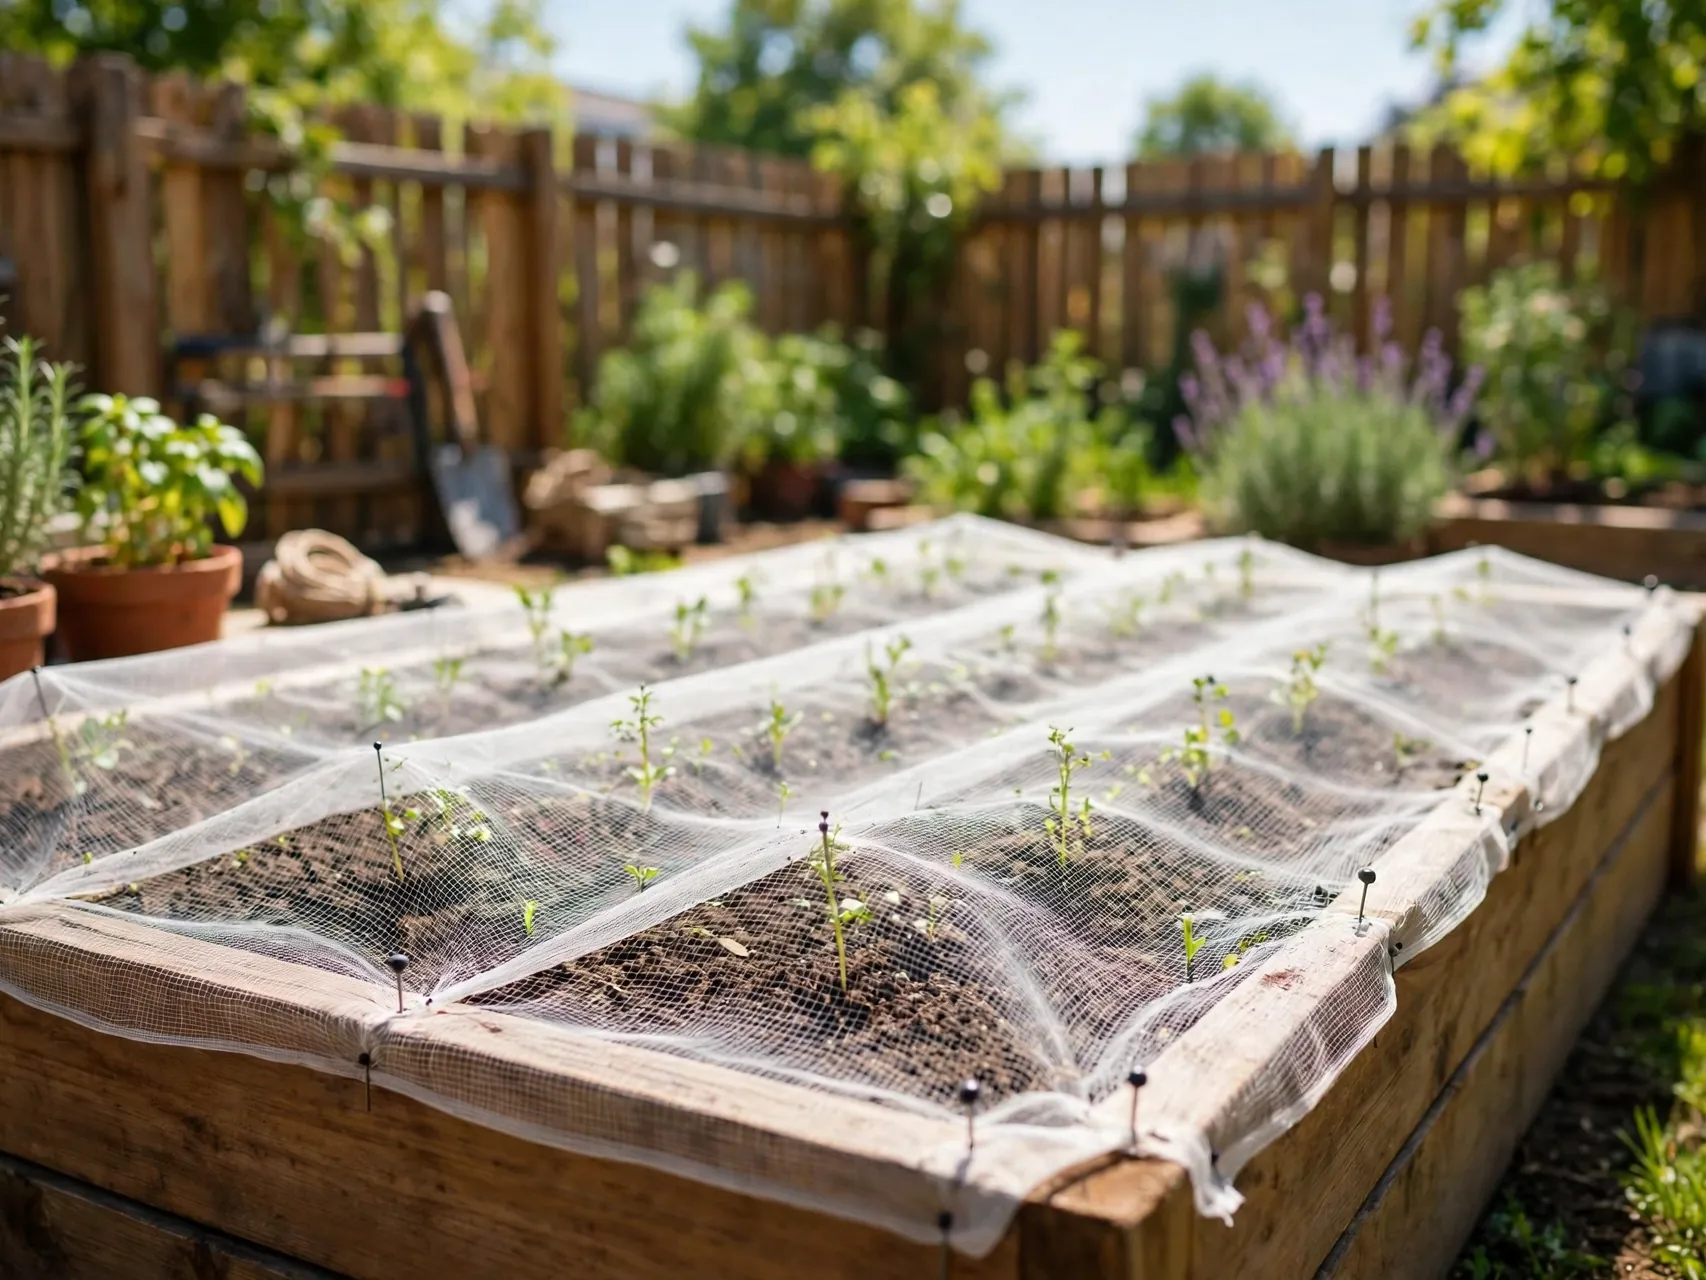
Freshly sown rows face two enemies: birds that eat seed and heavy rain that washes it out of line. A light fabric cover laid right over the row, watered through, holds moisture steady and hides seed until germination.
Lift the cover as soon as seedlings push up strongly, or transfer it onto small hoops so growth is not checked. Steady moisture from a cover often gives more even germination than open soil, which is a quiet bonus beyond pest protection.
21. Make a Slatted Wood Cover for Hail and Debris
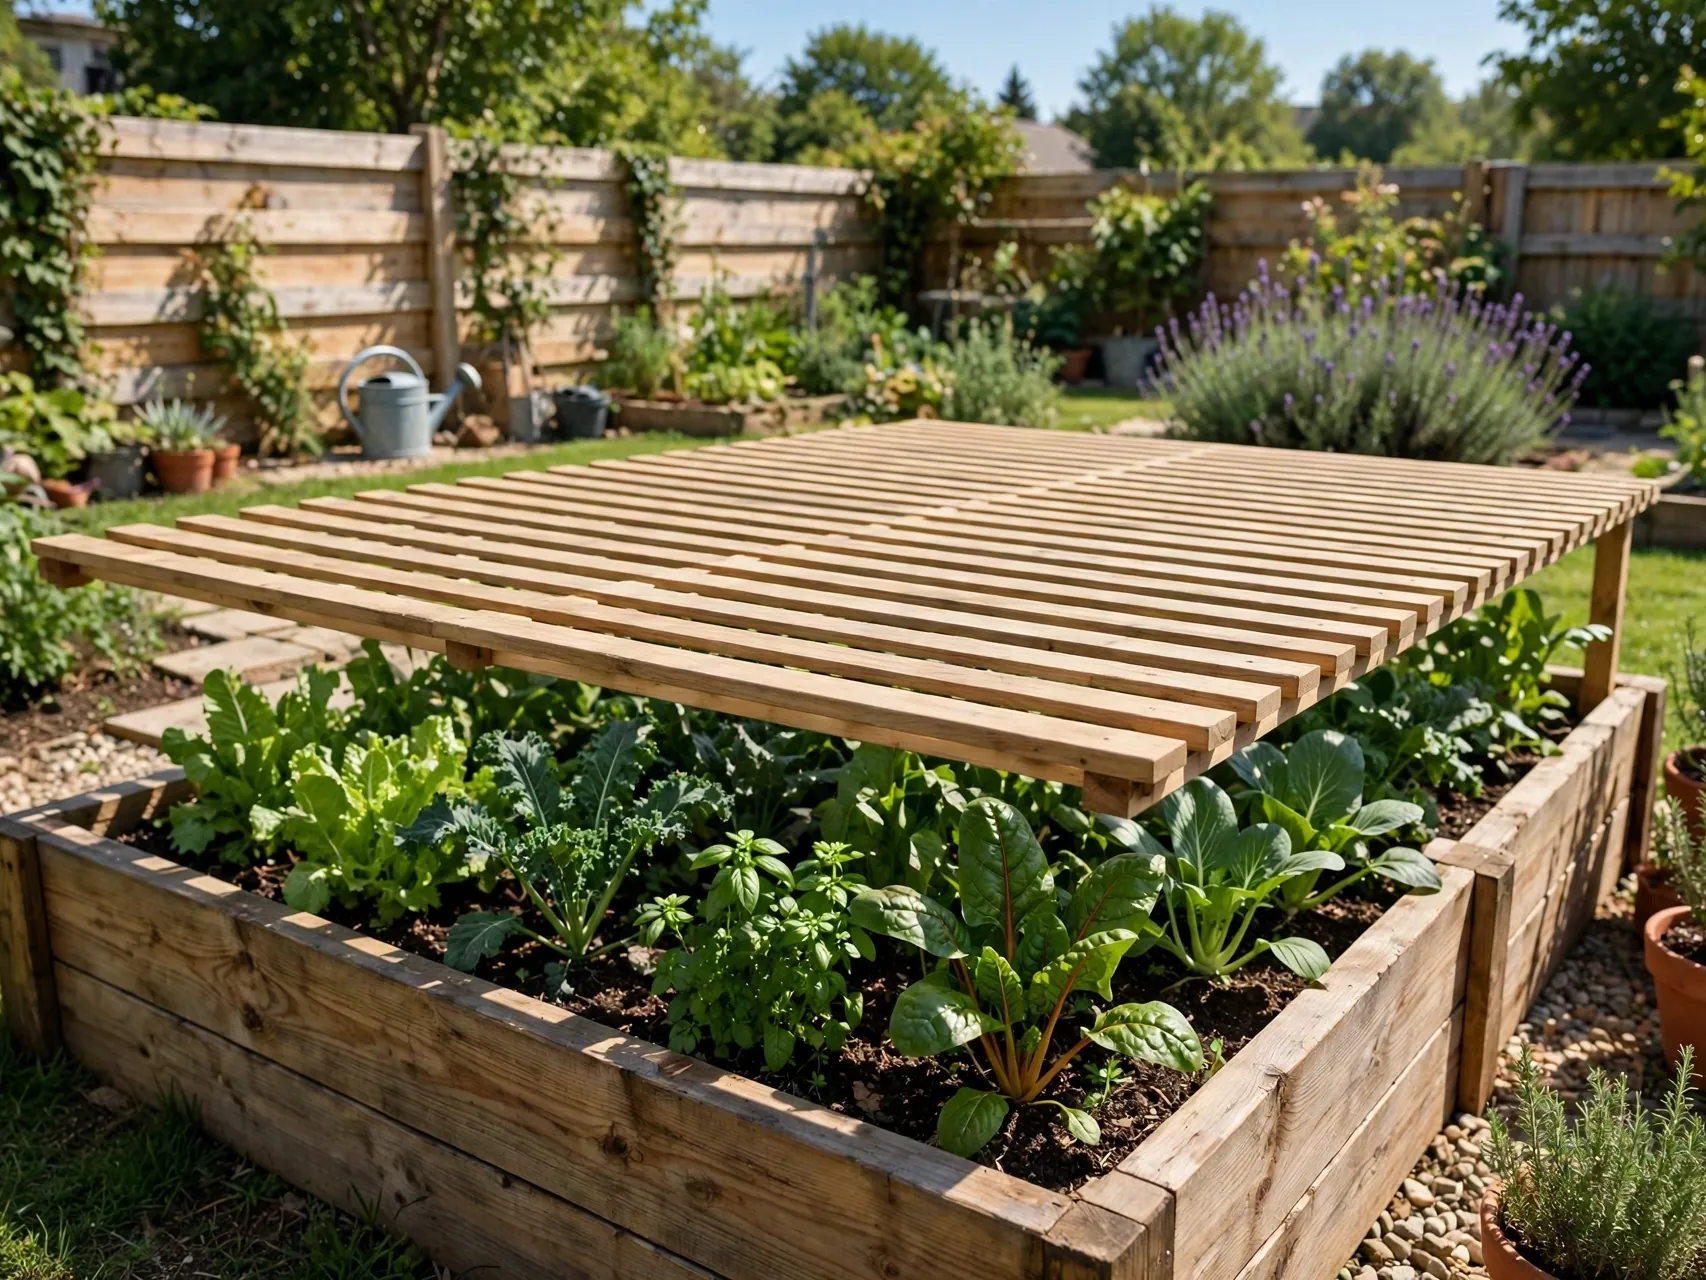
In hail prone areas, a slatted wooden frame over the bed breaks the force of hail and falling debris while still letting in light and rain at an angle. It is heavier to build, but it doubles as a support for fabric in frost season.
Keep slats spaced so plants are not in deep shade all day. Gardeners in stormy regions often leave this frame in place year round and simply add or remove fabric layers below it as the weather demands.
22. Use Burlap and Natural Fabric for Short Jobs
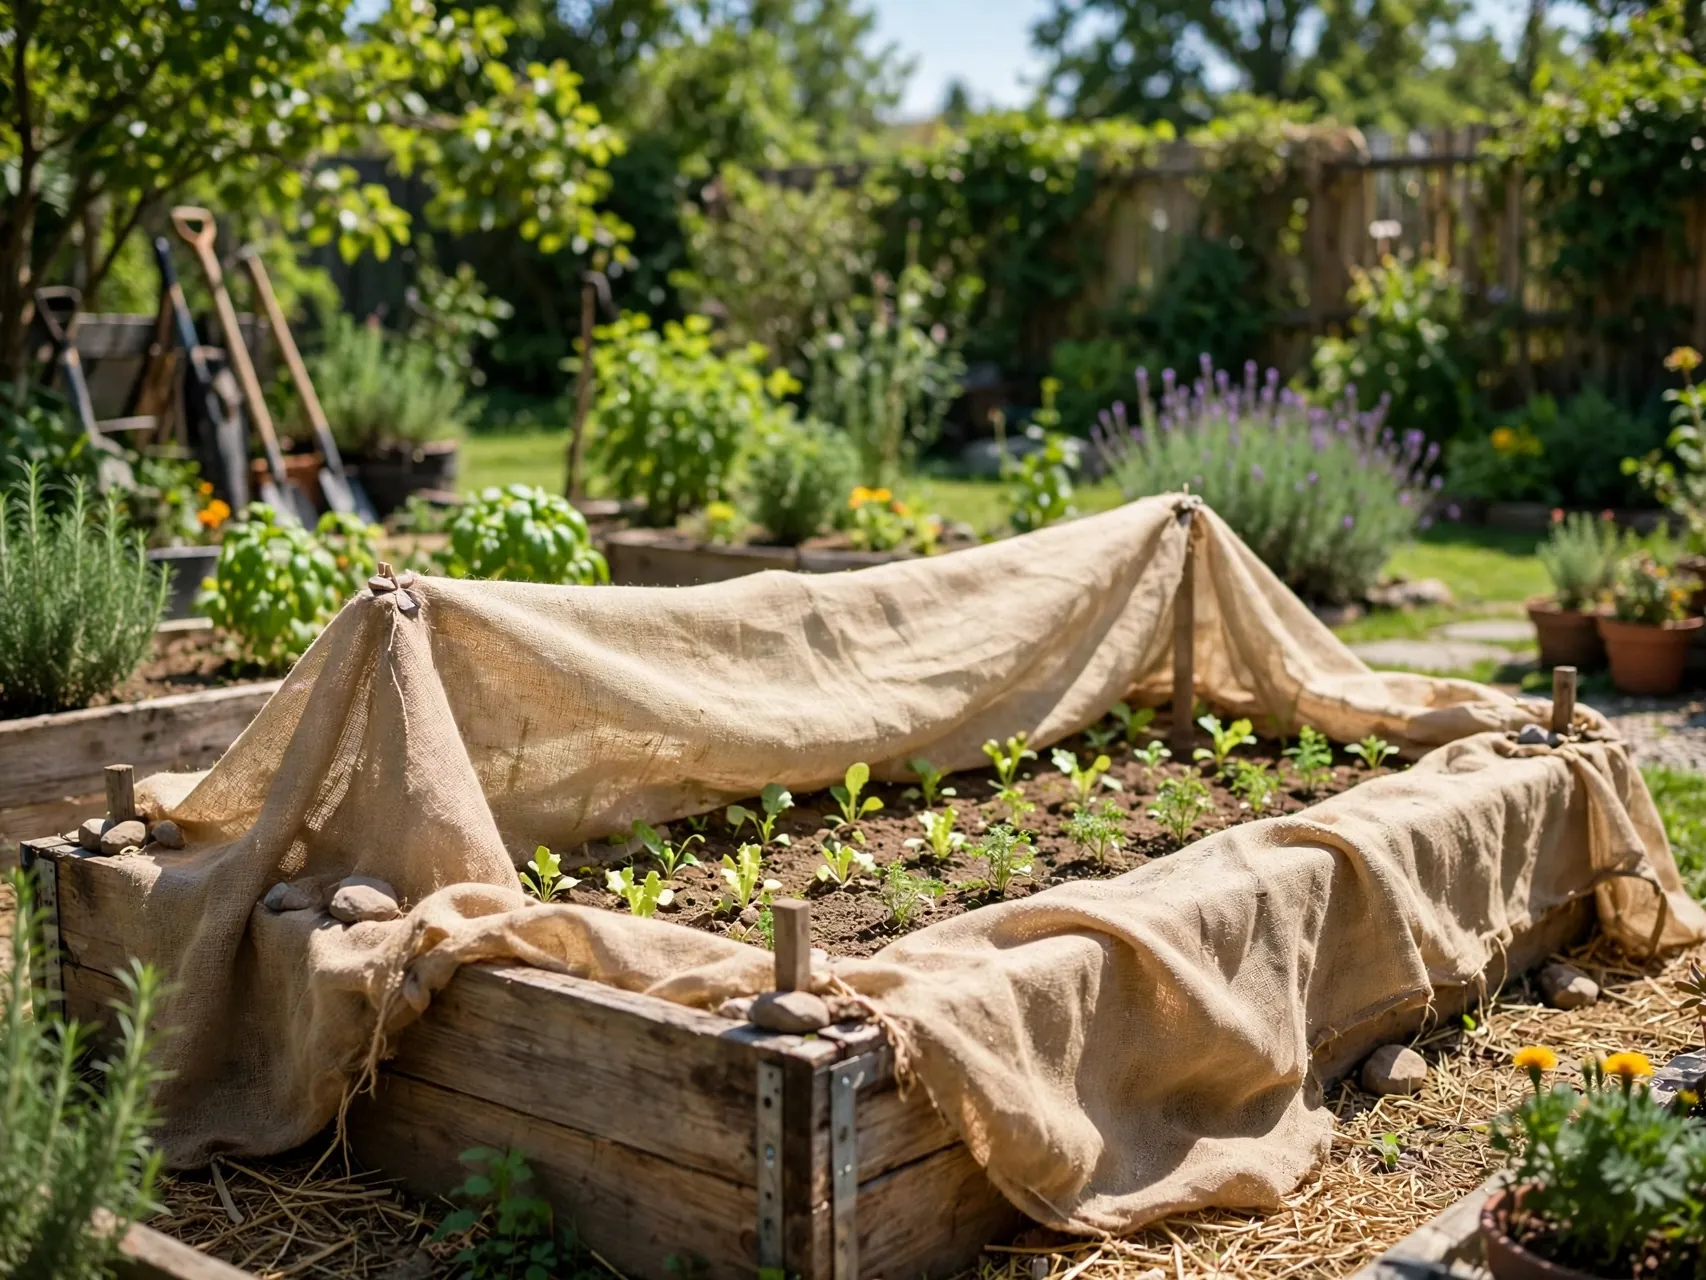
Burlap and other open weave natural fabrics handle short, specific jobs well: shading a newly seeded patch, softening wind for transplants, or giving one night of light frost help over supports. They are easy to cut, reuse, and compost at the end of their life.
Do not expect fine insect protection from an open weave, and expect natural fabric to wear faster than synthetic row cover. Matched to the right small job, though, burlap is one of the most useful offcuts in the garden shed.
23. Rotate One Cover Kit Across Every Bed

You do not need a cover for every bed at once. One kit of hoops, light fabric, insect mesh, shade cloth, and clips can follow the youngest or most valuable bed through the season, moving as crops change.
Label fabric pieces by bed size, store them dry and folded, and repair small tears early so they do not grow. A shared kit keeps costs and storage down, and it forces the good habit of asking which bed actually needs protection this week.
24. Store and Label Covers So They Last for Years

Covers fail early when they are stored wet, torn, or in sunlight. Shake soil off fabric, let it dry fully, fold it away from sun, and store hoops and frames where they will not warp or rust through winter.
Note the weight and size on a tag for each piece, because lightweight and heavyweight fabrics look alike in a shed in March. With basic care, a raised garden bed cover kit serves for many seasons, which is where its real value lies.
FAQ
What is the best all-around cover for a raised bed?
Lightweight floating row cover on hoops is the most versatile starting point. It blocks many insects, lets light, air, and rain through, and gives a small amount of frost help. Add a heavier frost blanket for cold nights and shade cloth for summer, and one hoop frame covers most jobs across the year.
How much frost protection does row cover really give?
It gives a few degrees, not a season change. University extension guidance puts lightweight cover at about 2 degrees Fahrenheit of protection and heavyweight cover at roughly 6 to 10 degrees, varying by product. Check your product label, layer covers on harder nights, and do not rely on fabric alone in a deep freeze.
Do I need hoops, or can fabric touch the plants?
Fabric can float right on sturdy plants for insect protection, which is why it is called floating row cover. Hoops help for tender plants, frost nights, and tall crops, because fabric touching leaves in a frost can transfer cold at the contact points, and wet fabric weighs on soft growth. Use supports when in doubt.
When should I take covers off for pollination?
Take insect covers off, or open them daily, once crops that need pollinators start to bloom, including squash, cucumbers, melons, and beans. Leaf crops like kale and cabbage and root crops like carrots do not need pollination for harvest, so their covers can stay on. Watch the plants, not the calendar.
How do I stop wind from wrecking my covers?
Secure every edge with soil, bricks, stones, staples, or clips, and leave no loose corners to flap. Flapping both lifts the barrier for pests and tears fabric at fixing points. Check fixings after storms, keep one access side that you reseal carefully, and store spare clips with the cover kit so repairs take minutes.
Key Takeaways
- Match the cover to the job: Light fabric for pests, heavy fabric for frost, mesh for birds and insects, shade cloth for heat.
- Edges decide success: A sealed edge keeps pests out and wind off, a loose edge undoes even the best raised bed cover ideas.
- Vent and time it right: Lift covers in strong sun and remove them at bloom for crops that need pollinators.
- One frame, many fabrics: A simple hoop set carries different covers across spring, summer, and fall.
- Store dry and labeled: Clean, dry, tagged covers last for years and are ready the night frost is forecast.
- Found a cover that fits your bed? Save this guide to Pinterest and pin it before your next planting weekend.