20 Cardboard Gingerbread House Ideas Kids Will Love Making
Introduction
A cardboard gingerbread house gives kids everything they love about the real thing, with none of the crumbling walls, sticky royal icing, or houses eaten before they are admired. Brown cardboard is already the perfect gingerbread color, white paint becomes the icing, and paper candies never go stale or attract a single ant.
Most of these houses start with boxes you already have: milk cartons, cereal boxes, shoeboxes, and delivery boxes saved through the year. That makes this an almost free December craft, and a kind one for the recycling bin too.
Set up safely before the fun starts. Adults should do all cutting with scissors or a craft knife and handle any hot glue, while children use school glue, washable paint, and crayons or markers. Keep small embellishments like beads and tiny pom poms away from toddlers who still mouth objects, and choose big, soft decorations for the youngest makers instead.
These houses are decor and play crafts, decorated with paper candies by default rather than real sweets, so they can stay on display all season and be stored for next year. Pick a size below, from a tiny milk carton cottage to a life size playhouse, and let each child build their own address.
1. Start With a Classic Milk Carton Cottage

A clean, dry milk or cream carton is a ready made house with a peaked roof built in. Cover it with brown paper or paint it, glue it to a cardboard base, then let kids add white paint icing, paper candies, and a tiny door.
This milk carton gingerbread house is the right first project for young children, because the structure is done before decorating starts. Rinse cartons well and dry them fully before craft day. Line finished cottages along a windowsill and you have a village by the end of one afternoon.
2. Turn Cereal Boxes Inside Out for a Village
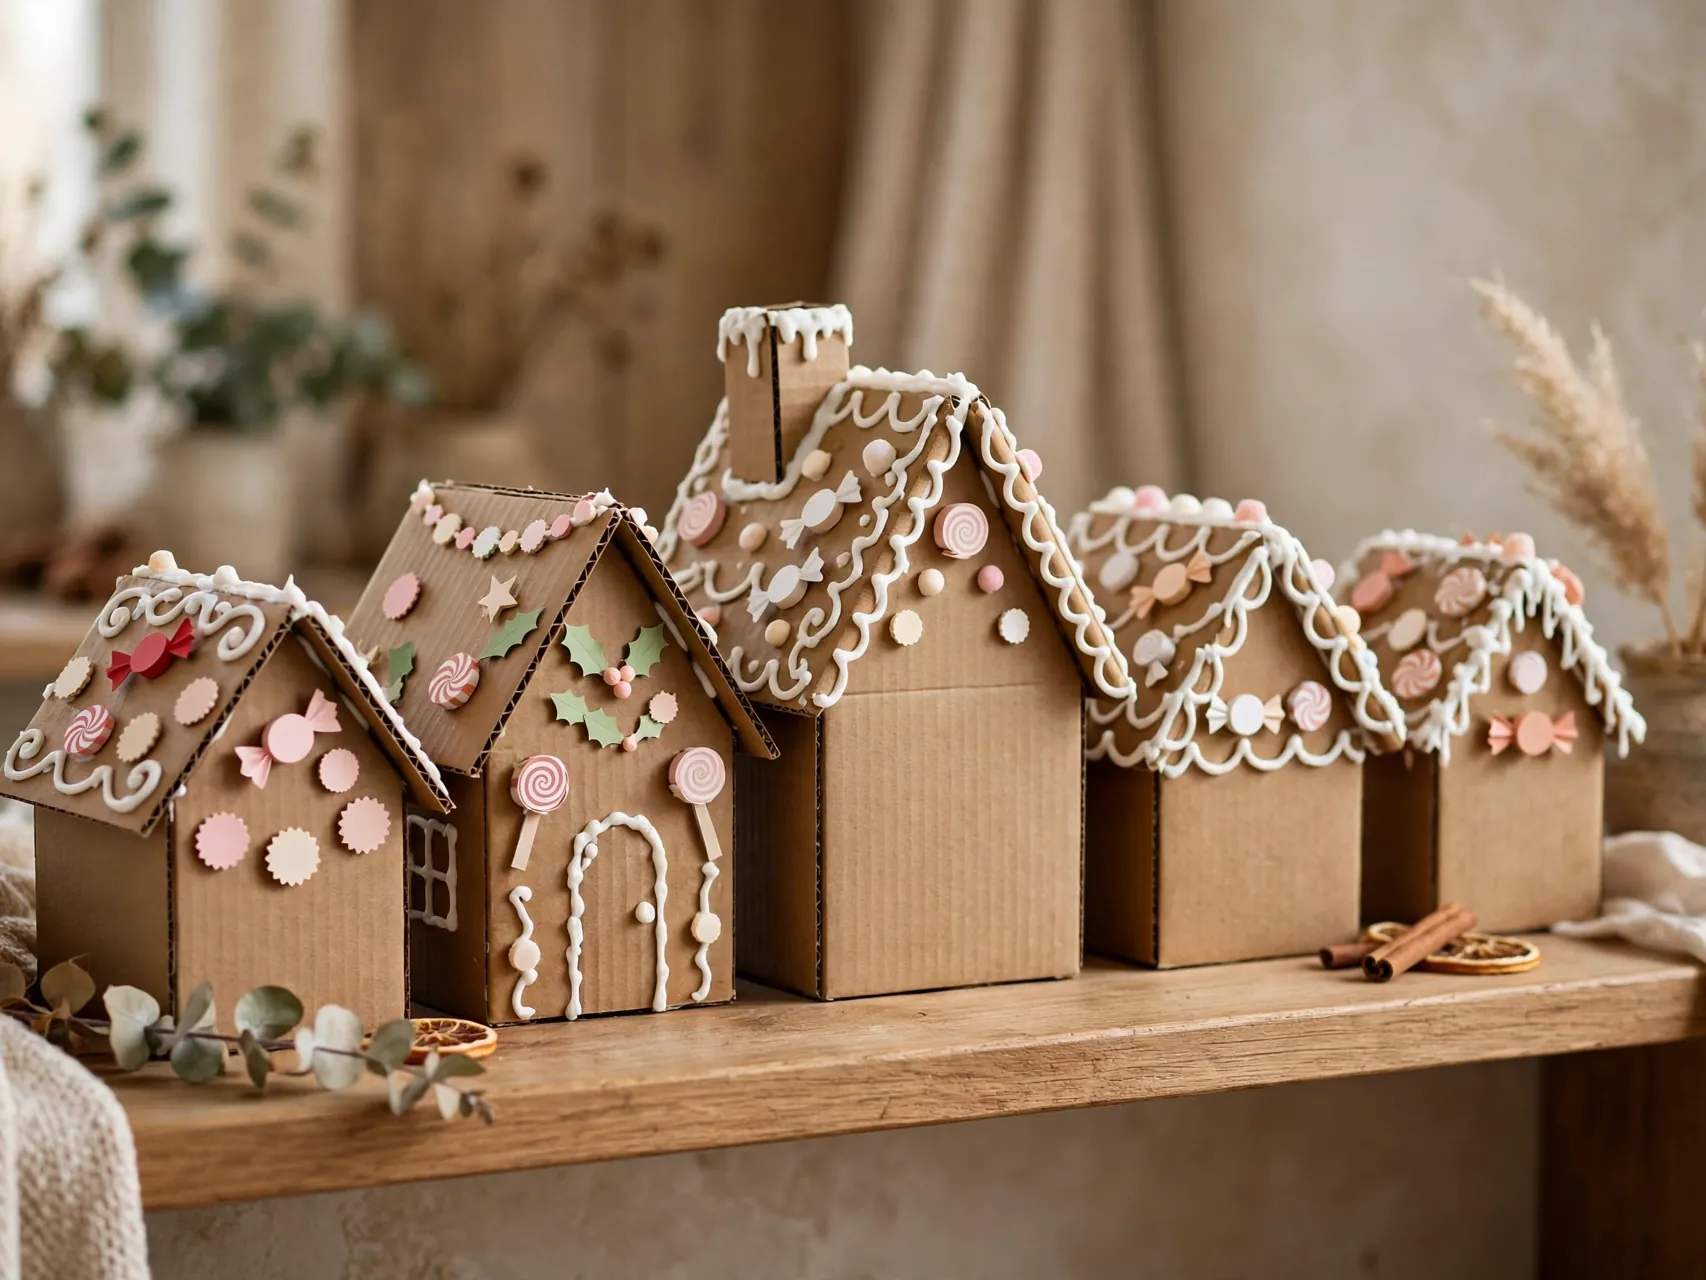
Open small food boxes like tea, cocoa, and cereal boxes, turn them inside out so the plain brown side faces out, and glue them back together. Draw or paint houses on every side, then group the boxes into a street.
This recycled cardboard christmas village costs nothing and suits classrooms perfectly, because every child can bring their own box. Stack two boxes for a taller building, add cotton snow between houses, and finish with a drawn road. Chalk markers show up beautifully on the plain cardboard and wipe off little hands easily.
3. Build a Life Size Playhouse From Appliance Boxes
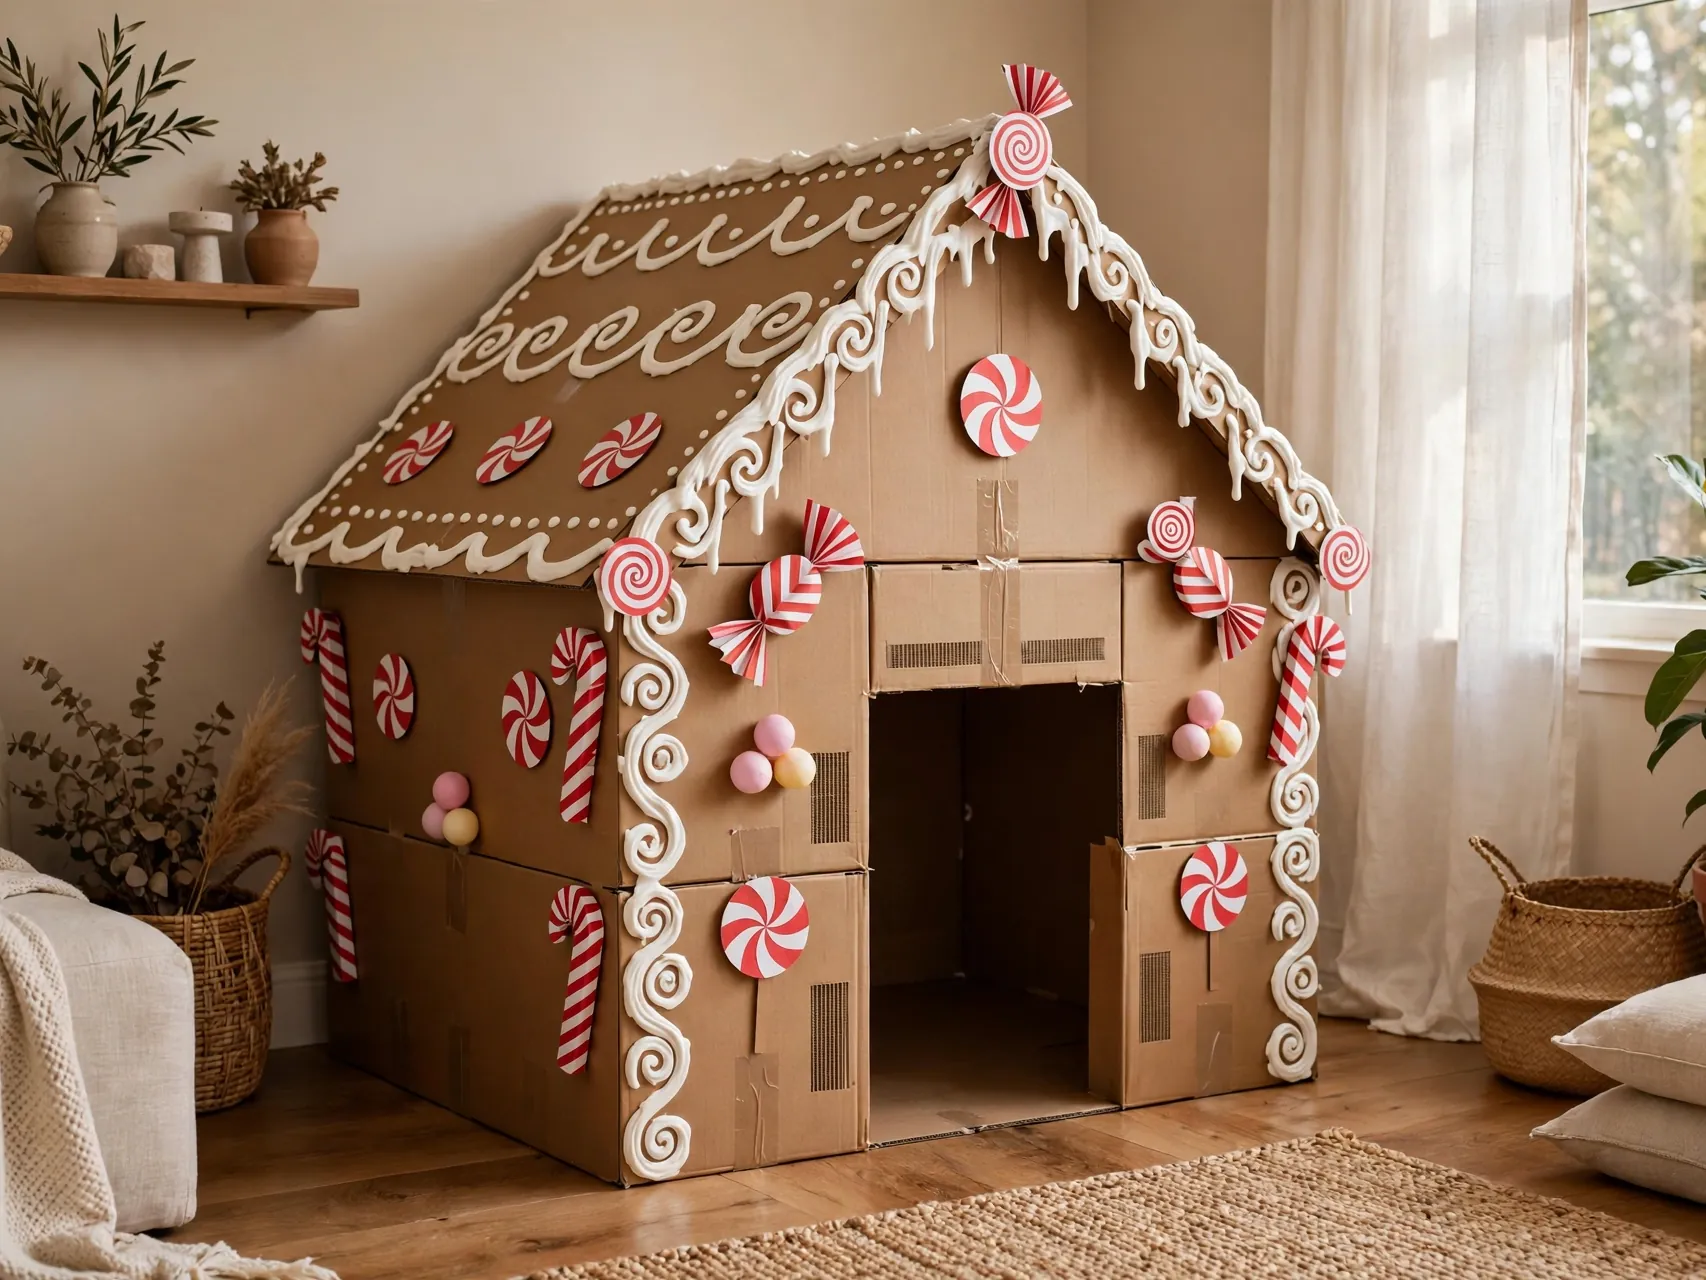
Two large appliance boxes can become a playhouse a child can sit inside. An adult cuts a rounded door and windows, reinforces the edges with white tape that doubles as icing trim, joins a second box as the roof, and then the decorating belongs to the kids.
Paper gumdrops, cardboard gingerbread figures, and drawn candy canes dress the outside without any food at all. Keep the structure stable, tape inside and out, and place it away from heaters and lamps. A life size house will be played in daily until January, so build the door hinges from tape generously.
4. Make Flat Felt Houses for Toddlers

Draw a house shape on thin cardboard, cut it out, and glue a matching brown felt house on top. Once dry, toddlers decorate with big buttons, felt shapes, yarn, and sequins pressed into tacky glue, with an adult placing glue where little hands point.
Flat houses are safe, quiet, and fridge door ready, and they suit children who are not ready for a 3D build. Press the felt house under a heavy book while it dries so it stays flat. Make one per child plus one for the adult, because crafting alongside them keeps little hands happily on their own work.
5. Fold a Brown Paper Bag House
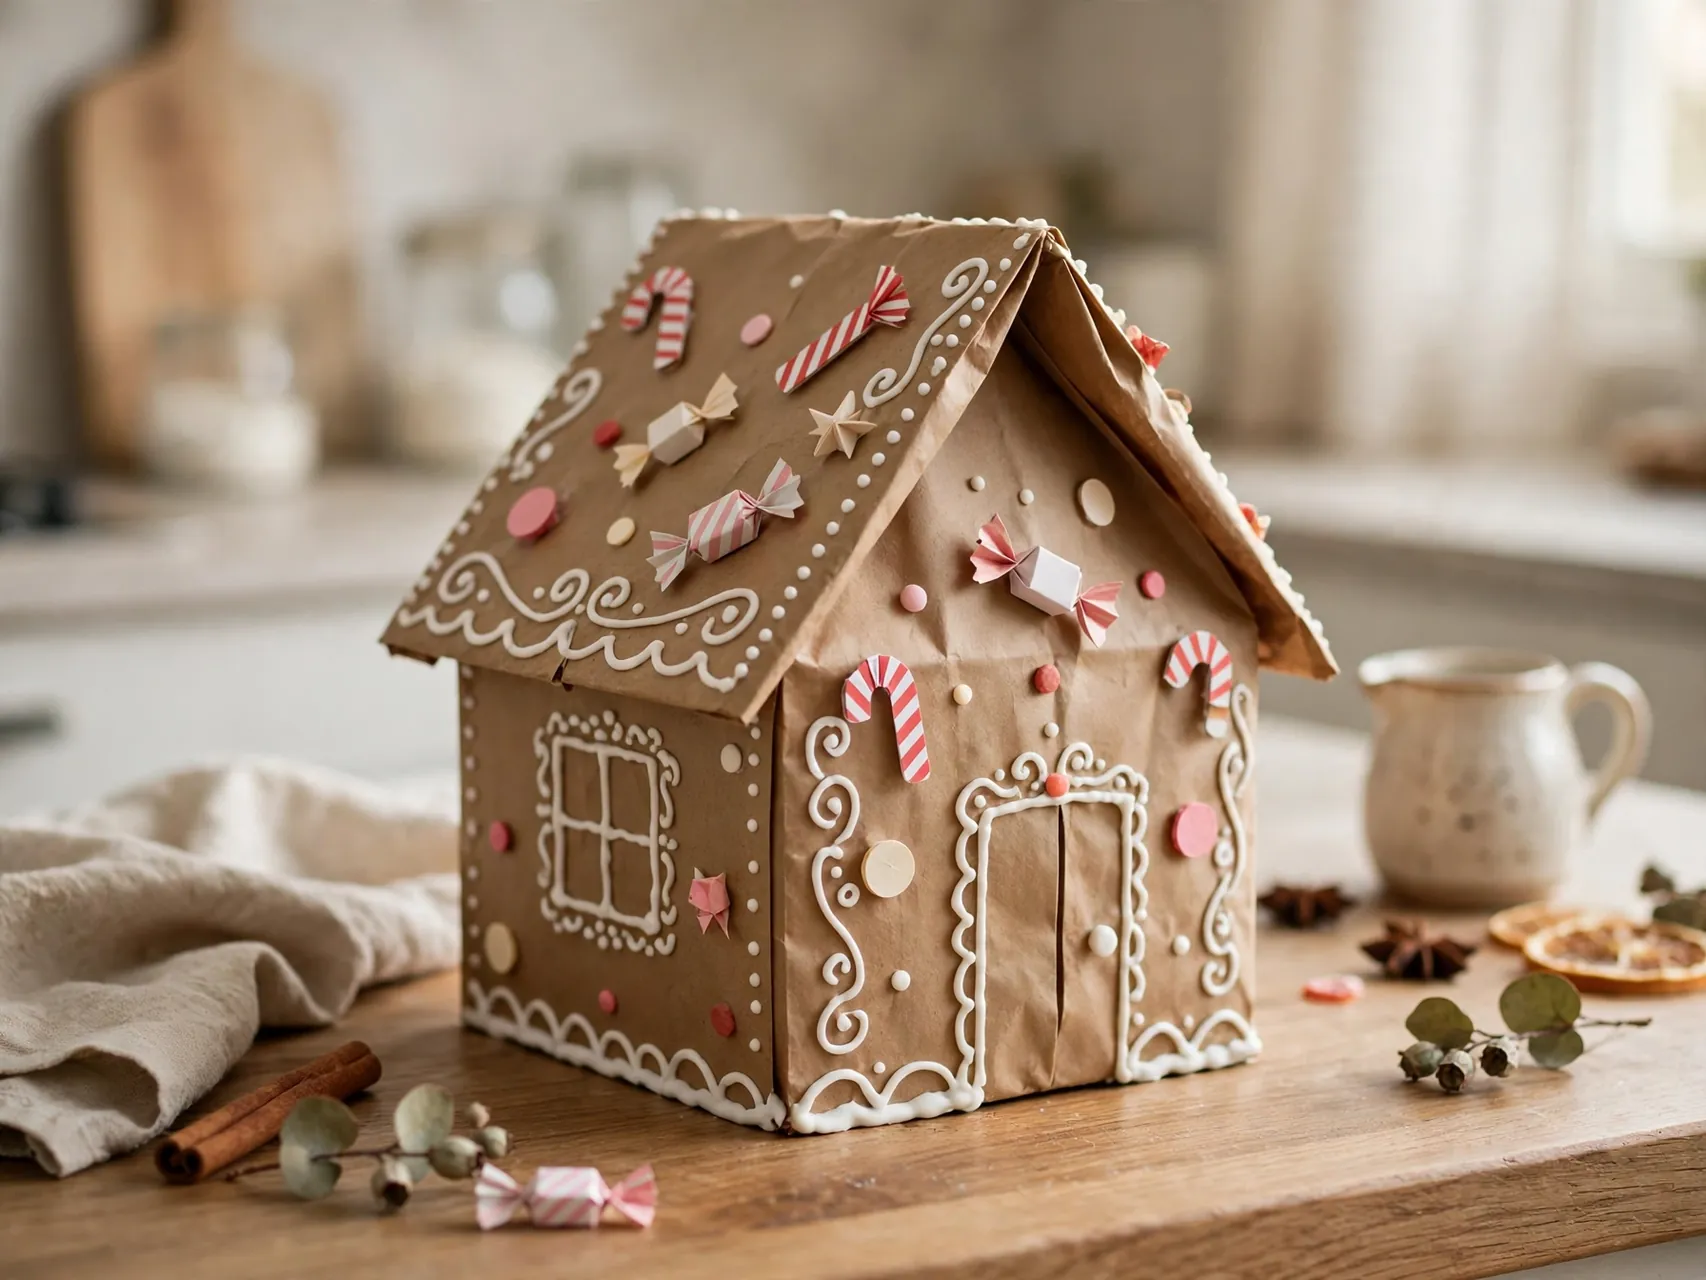
A brown paper lunch bag, stuffed lightly with crumpled paper and folded closed at the top, becomes a plump little house. Draw the roof line with white paint pen, add a paper door and windows, and glue on paper candy dots.
Bag houses are the fastest idea in this gingerbread house craft for kids list, so they work for parties and classrooms with tight time. They are not sturdy heirlooms, and that is fine: the joy is in a whole street of them made in twenty minutes. Write each maker name on the back like a house deed.
6. Create a Shoebox Diorama House With Rooms

Turn a shoebox on its side, add a cardboard floor across the middle, and you have a two story house interior to decorate. Paper furniture, a tiny drawn fireplace, mini paper gingerbread figures, and a cotton snow roof turn it into a scene children narrate for days.
A diorama rewards older children who love detail and storytelling. Cut any openings with adult help before decorating begins. Stand dioramas on a shelf where the inside stays visible, and add a battery LED tealight in the evening for a cozy window glow, never a real candle.
7. Pipe Puffy Paint Icing for a Realistic Finish

White puffy paint or white glue mixed with a little shaving foam in a squeeze bottle lets kids pipe icing lines along roofs, windows, and doors, just like a real gingerbread house. The lines dry raised and soft, and the effect is surprisingly convincing.
Practice piping on scrap cardboard first, because pressure control takes a minute to learn. Work on one side at a time and let it dry flat so the icing does not slide. Puffy paint icing is the single trick that makes every diy cardboard gingerbread house in this list look bakery made.
8. Decorate With Paper Candies Instead of Real Sweets

Cut gumdrops, candy canes, lollipops, and peppermints from colored construction paper, or draw them with bright markers and white highlights. Paper candies keep the house displayable for weeks, avoid food waste and pests, and let children with food allergies join in fully.
Older kids can trace cookie cutters for perfect candy shapes. Add a dab of glitter glue for sugar sparkle if you like, with the usual warning that glitter travels. A house covered in paper candy photographs just as sweetly as the edible kind, and it can be stored and admired again next December.
9. Make a Gingerbread House Gift Card Holder
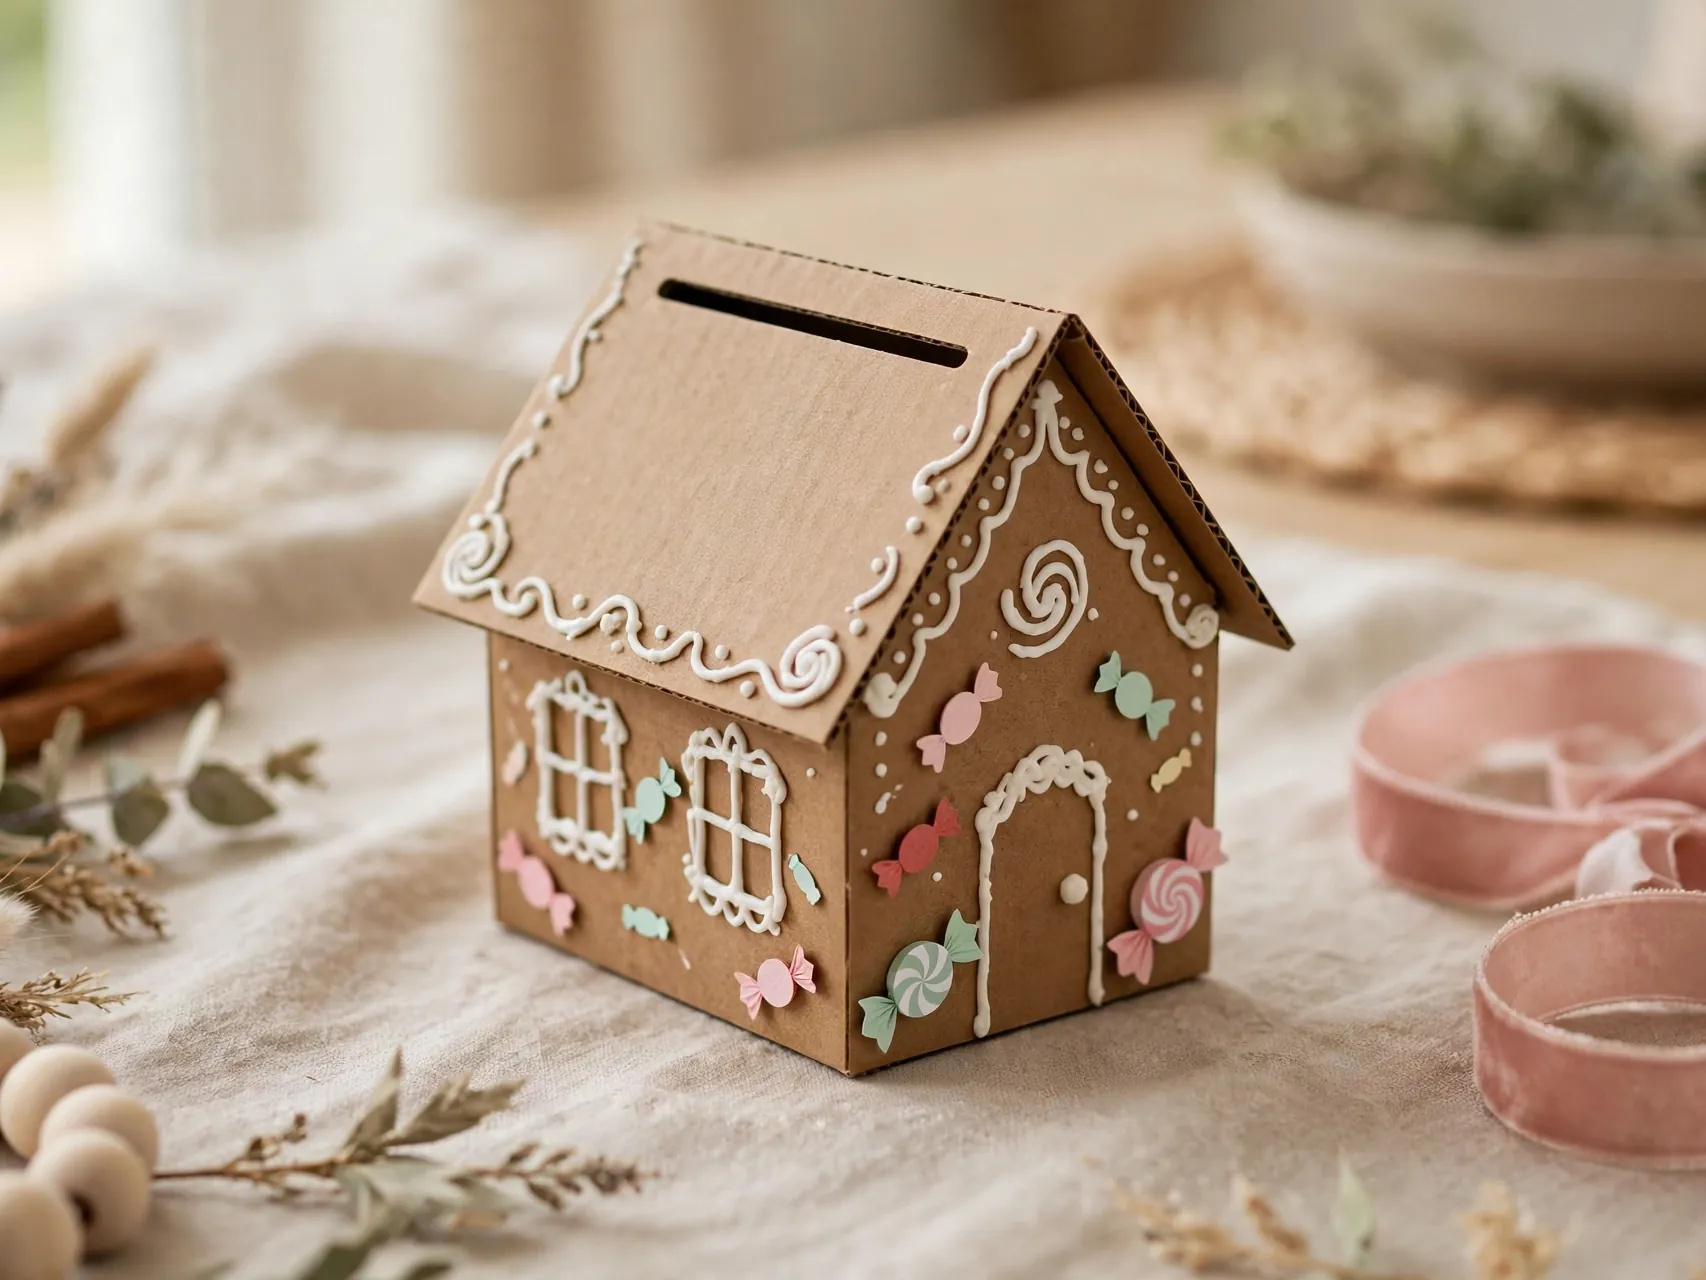
Fold card stock or thin cardboard into a small house with a slot in the roof, decorate it like a gingerbread cottage, and slip a gift card or folded money inside. It turns the least personal present into a handmade one in ten minutes.
This is a good project for older children and teens gifting friends and teachers. Reinforce the slot edges with tape on the inside so it survives being opened with enthusiasm. A house holder can stand on a desk long after the card is spent, which makes the gift last twice.
10. Turn a House Into an LED Luminary

Cut window shapes from a cardboard house with adult help, line the inside with a small piece of tissue or vellum paper, and place a battery LED tealight inside. The windows glow warm gold, and the house becomes evening decor for a mantel or hallway.
Only ever use battery LED lights inside cardboard, never real candles or tea lights, because cardboard and open flame must never meet. Choose an LED with a timer and the house can greet the family every evening without anyone remembering to switch it on. Group three luminaries for a glowing village street.
11. String a Mini House Garland for a Mantel
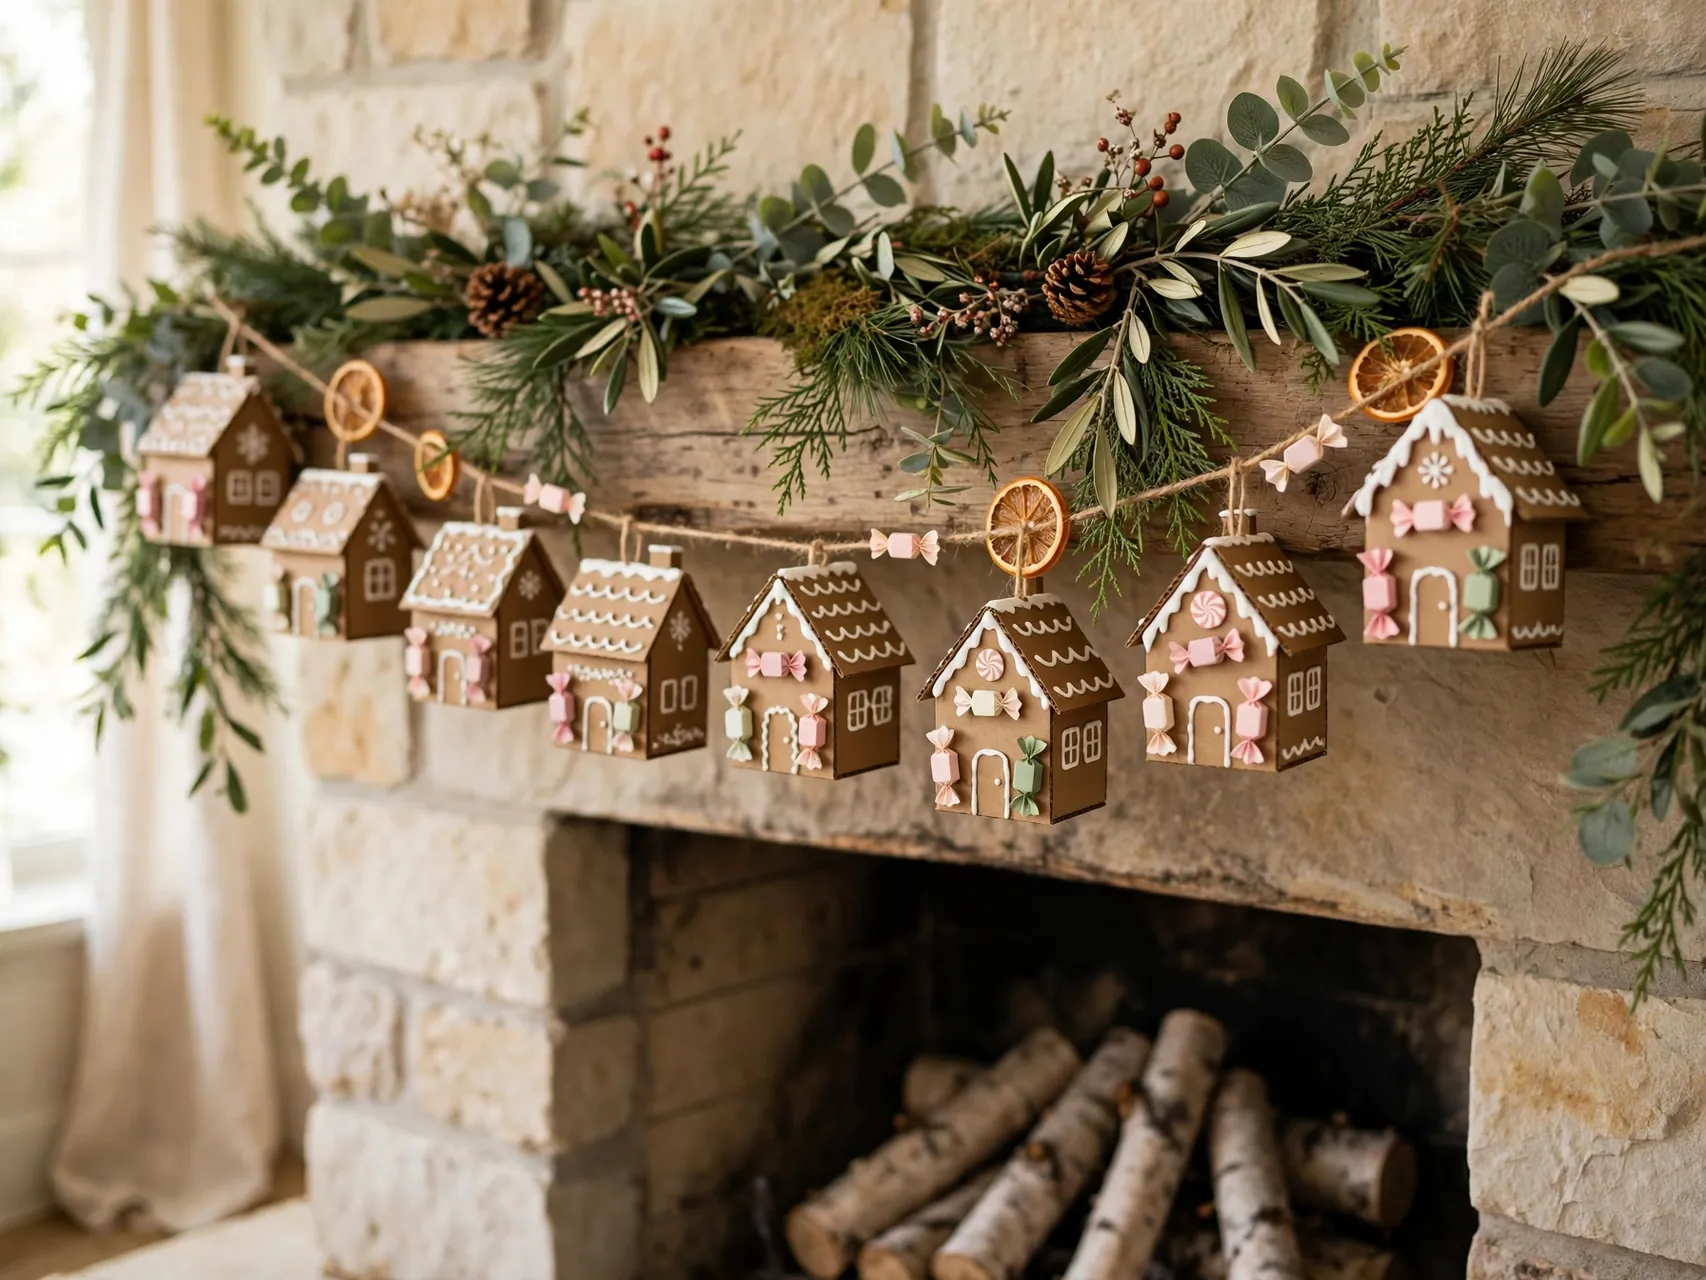
Cut a row of small flat house shapes from cardboard, decorate each one a little differently, punch two holes at the top of each, and thread them onto twine. A mini house garland dresses a mantel, a window, or the front of a classroom desk.
Keep houses light and evenly spaced so the garland hangs straight. Children can each decorate one house and the garland becomes a group artwork. Add small paper trees and stars between houses if the string looks sparse, and store it flat in an envelope for next year.
12. Build a Classroom Village Display Together
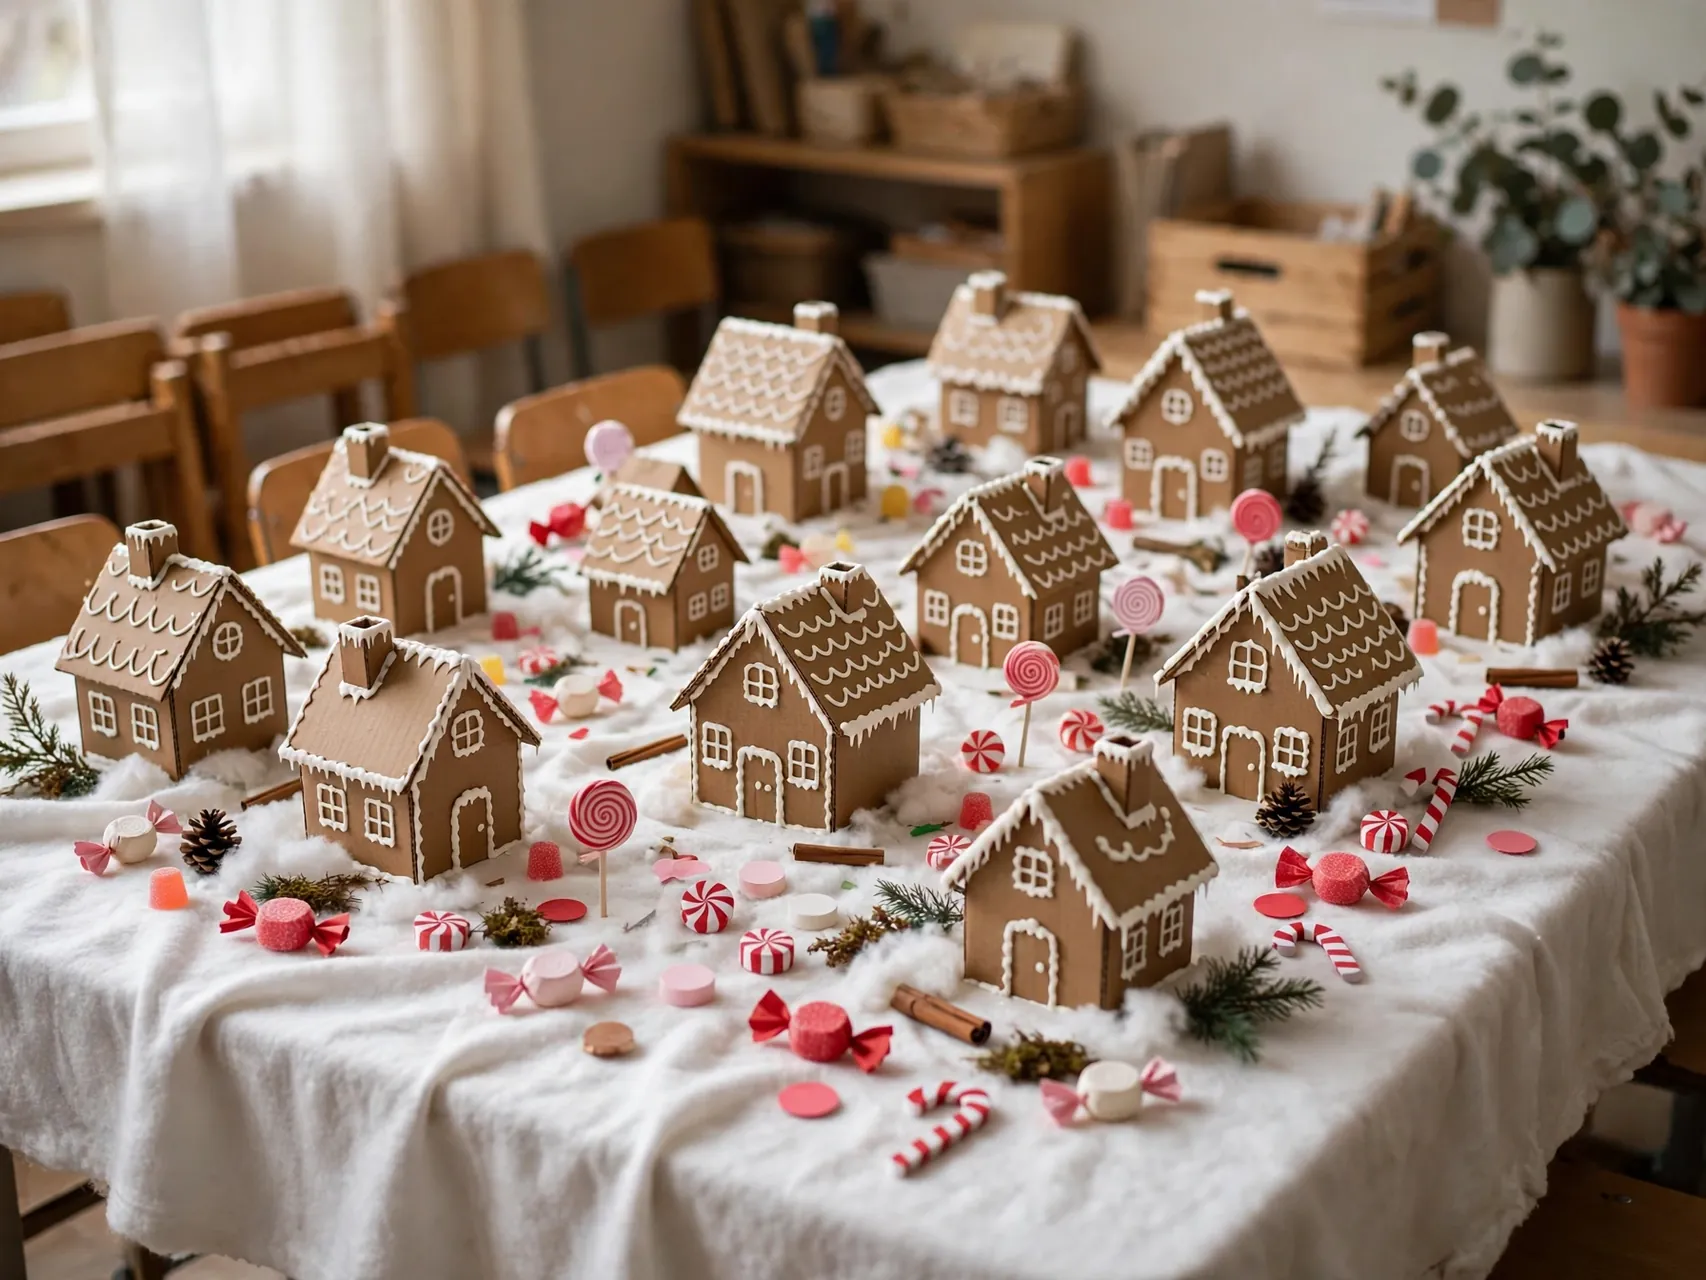
Give every child the same simple house base, then let each decorate their own home in their own style. Line the finished houses on a green felt or paper street with a drawn road, cotton snow, and a class sign, and the display teaches cooperation as much as craft.
Agree on a shared color of white icing paint so the village matches, while candies and doors stay personal. Teachers love that the materials are free and the cleanup is one box. Photograph the village for families, because not every house will survive the trip home in a backpack.
13. Roof a House With Cotton Ball Snow

Stretch cotton balls gently and glue them along the roof edges and chimney top for soft snow that looks deep and fresh. Cotton snow hides uneven roof joins, which makes it a kind friend to first time builders.
Add a pinch of fine glitter on the wet glue if your family tolerates glitter, or leave the snow matte and natural. Cotton works best indoors, away from damp porches where it will mat. A snow roofed house with painted icing windows is the picture most people imagine when they picture this craft.
14. Go Bigger With a Two Story Cardboard House
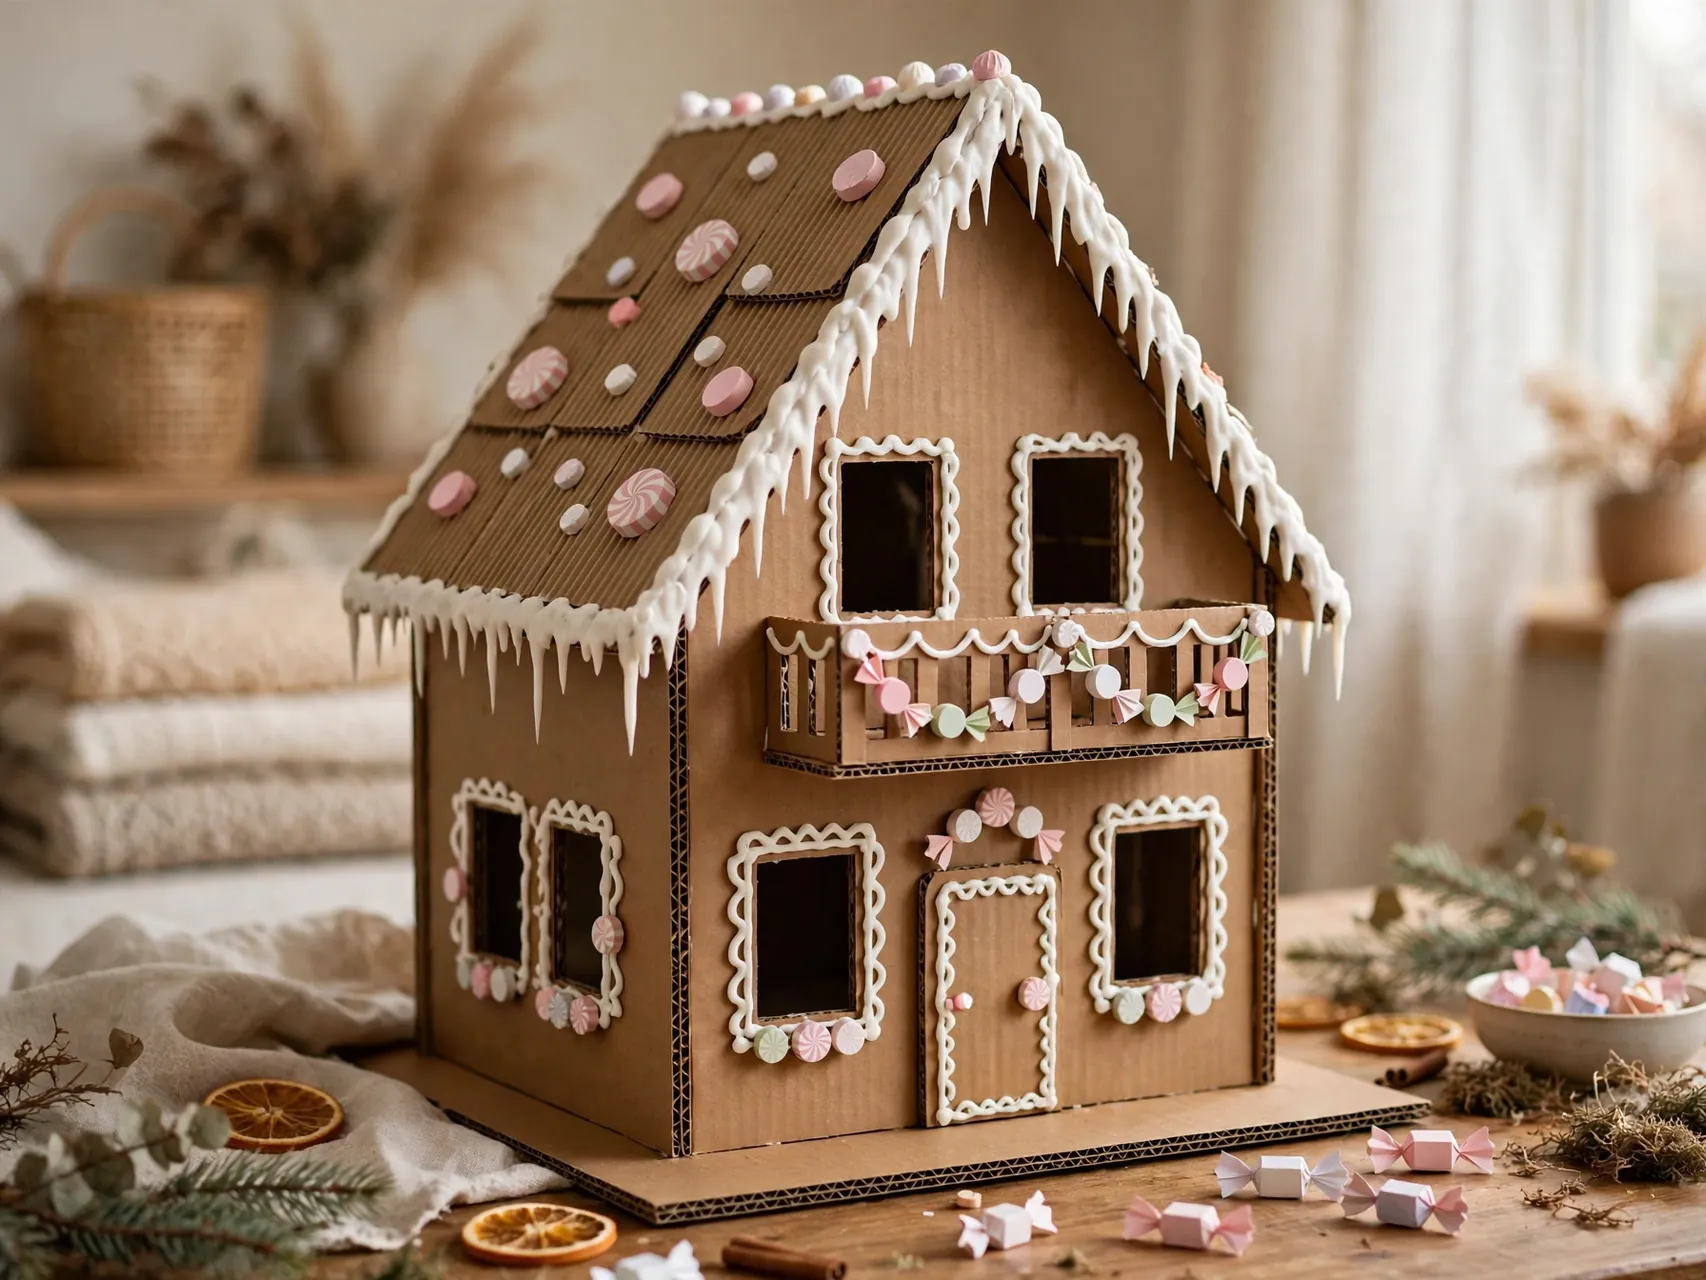
Stack and join two boxes, or build walls from flat corrugated cardboard with tape and glue, to make a two story house with a balcony of candy sticks drawn or glued on. Older children enjoy the planning: doors below, windows above, and a chimney with cotton smoke.
Reinforce the middle join with an inside strip of cardboard so the house stands straight. Two story houses suit a centerpiece spot on a sideboard, where both floors show. This is the project to choose when one child wants a whole Saturday with a single, satisfying build.
15. Add a Cardboard Gingerbread Train
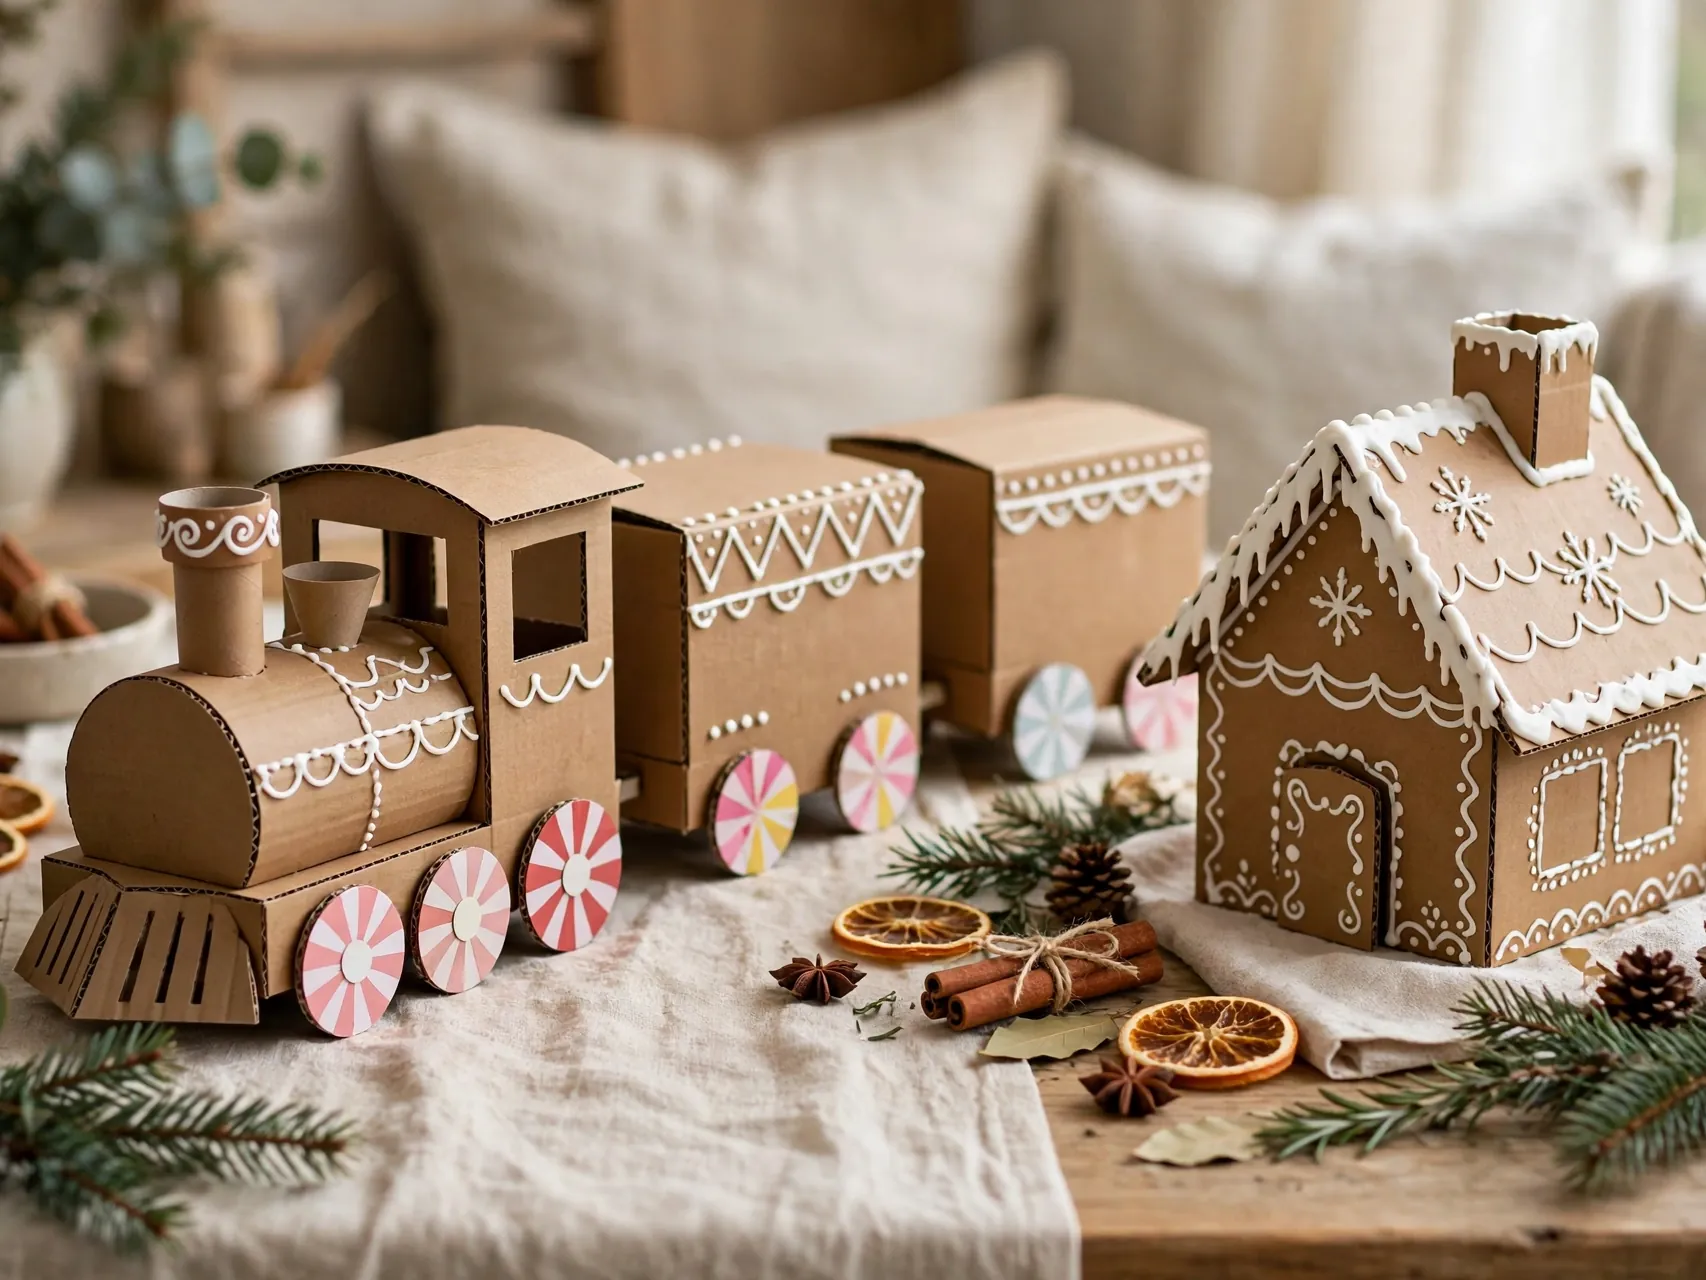
Small boxes become a train engine and cars when you add cardboard wheels, a rolled paper chimney, and paper candy cargo. Set the train in front of the village houses, loaded with paper gumdrops and tiny cardboard presents, for a display with a story.
Connect the cars loosely with ribbon so the train can curve around the village street. Children who finish their house early can build the train as a second project. Paint the engine the brightest, because the eye goes to it first in every photo.
16. Hide Treats in an Advent House With Opening Doors

Draw or cut, with adult help, 24 small numbered doors and windows on a large flat cardboard house, and tape a small wrapped sweet, note, or activity slip behind each one. Children open one door a day through December, and the house becomes the family calendar.
Cut doors on three sides only so they hinge open, and number them in a random order for the daily hunt. If you do not want sweets daily, use jokes, kind tasks, and tiny drawings instead. Keep the house where it will be seen at breakfast, and it will be remembered all year.
17. Frame a Favorite Photo in a House Frame
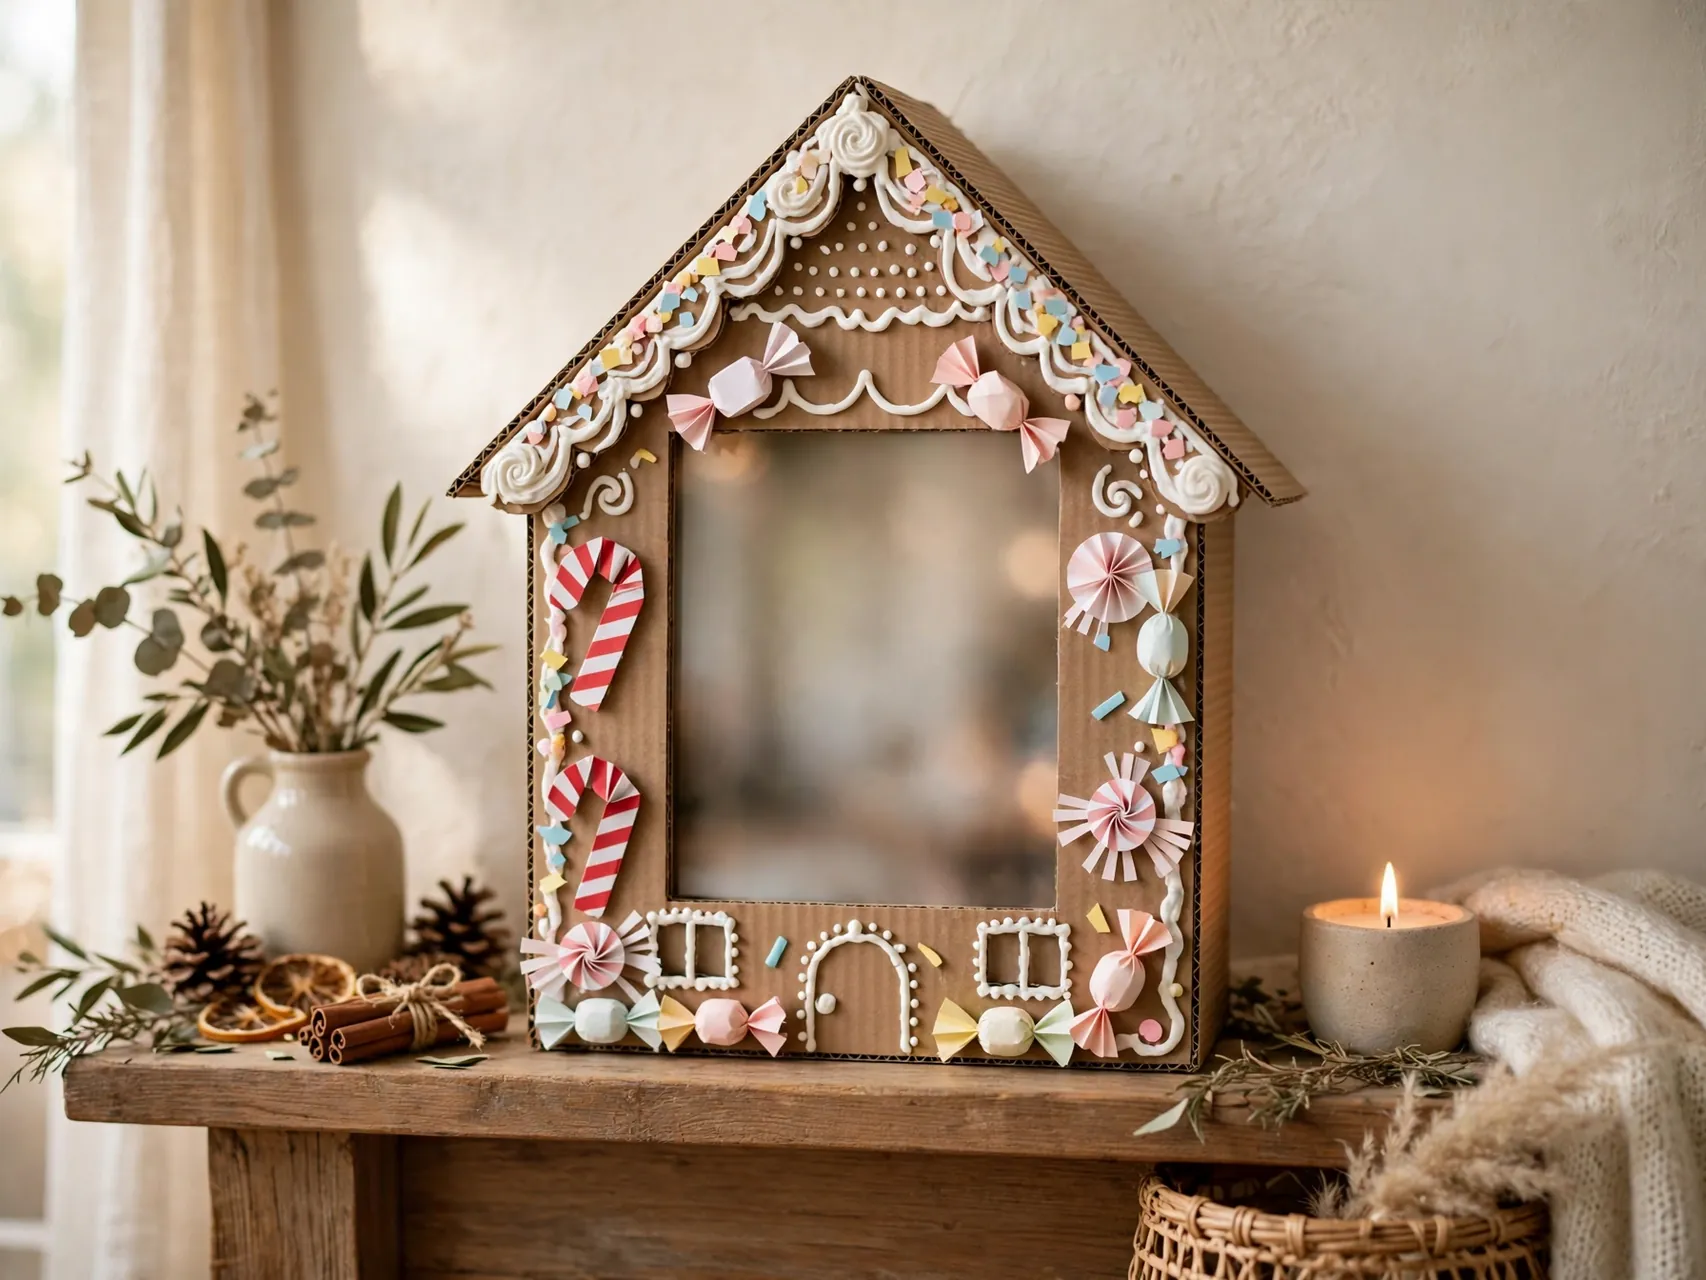
Cut a house shape from thick cardboard, cut a window opening in the middle for a photo, and decorate the frame as a gingerbread house with paint icing and paper candies. A family photo from last Christmas makes it an instant keepsake and a sweet grandparent gift.
Measure the photo before cutting, and back the frame with a second layer of cardboard for strength. Add a folded cardboard stand or a ribbon hanger. Photo houses are the version of this craft most likely to be kept for a decade, so use your best, flattest cardboard.
18. Fold a House Shaped Treat Box for Gifts

Score and fold a house shaped box from card stock, decorate it, and fill it with wrapped treats or a small gift. The box is the wrapping and the card in one, and it can be kept and refilled.
Because cardboard that is not food grade should not touch unwrapped food, keep treats in their wrappers or in a small food safe bag inside the box. Practice the fold on scrap card first. A row of little house boxes along a party table makes place settings children will talk about all meal.
19. Turn the Craft Into a Gingerbread House Puzzle

Decorate one large flat cardboard house in full detail, let it dry completely, then have an adult cut it into large jigsaw style pieces. Store the pieces in a decorated envelope, and the craft becomes a puzzle to rebuild all season.
Big pieces suit younger children, while more, smaller pieces challenge older ones. Number the backs lightly if a puzzle is proving too hard for its maker. A puzzle house is a clever quiet time activity for the busy days before Christmas, and it packs flat for travel to grandparents.
20. Press a Handprint Chimney Keepsake House
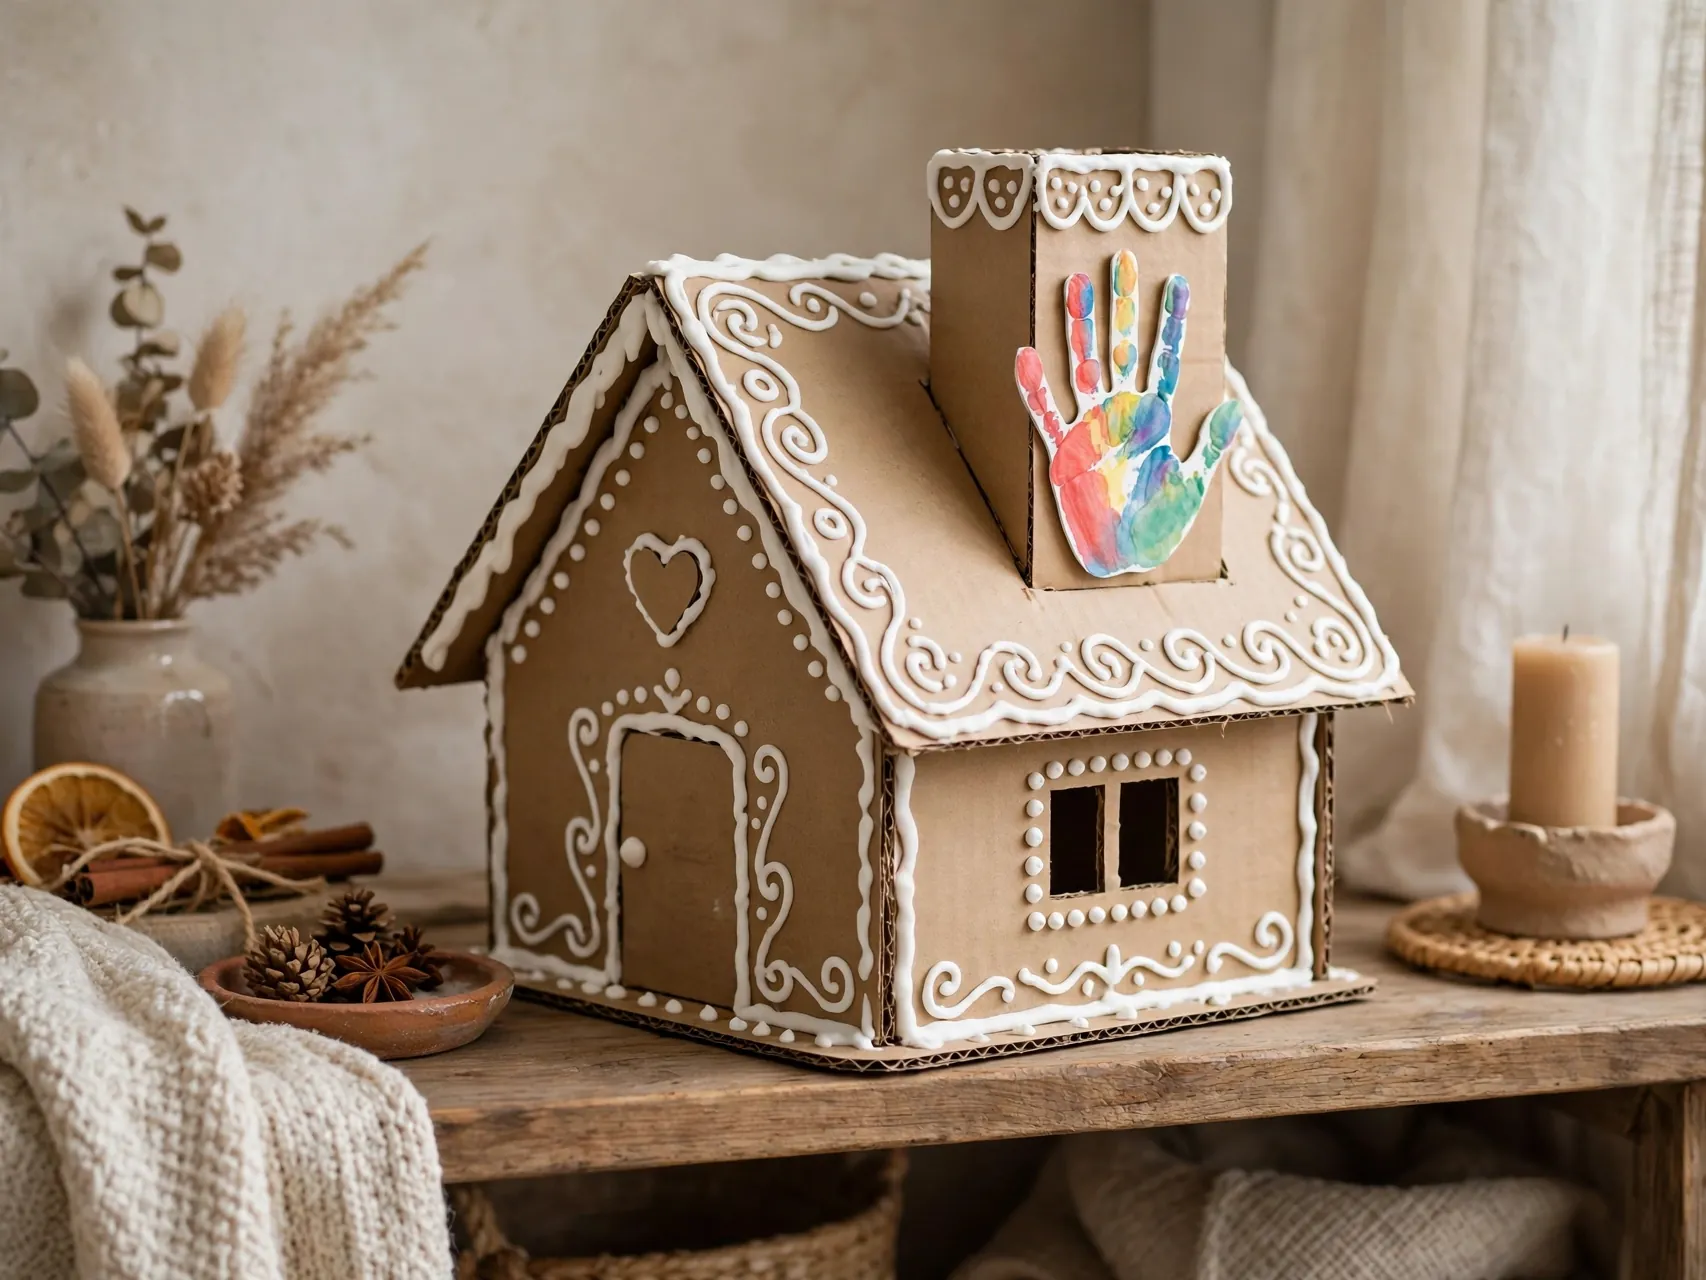
Decorate a flat or small 3D house, then add a child handprint in white paint rising from the chimney as the smoke, with the child name and year written underneath. Grandparents melt for this one, and it marks exactly how small those hands were that December.
Use washable paint, one hand at a time, and wash hands straight after printing. Press the hand gently rather than stamping hard, so fingers stay clear. Of all the cardboard gingerbread house ideas here, this is the one to make every year and line up in order, growing hands and all.
FAQ
What kind of cardboard works best?
Clean, dry corrugated cardboard from delivery boxes is strong for built houses, while cereal and food boxes are perfect for flat houses and villages. Milk cartons give a ready made peaked roof. Avoid any cardboard that is damp, greasy, or smells of cleaning products, and save good boxes through the year once you know December is coming.
How do I make cardboard houses sturdy enough to keep?
Glue houses to a firm cardboard base, reinforce inside corners and joins with tape or extra cardboard strips, and let glue dry fully before decorating. A coat of clear sealer or even plain paint helps surfaces last. Store finished houses upright in a dry box with tissue between them, away from damp and heat.
What can young toddlers safely do on this craft?
Toddlers can paint with washable paint, stick large felt shapes and cotton balls with glue an adult applies, and place big paper candies. Adults should do all cutting and any hot gluing. Avoid small parts like beads, sequins, and tiny pom poms for children who still put objects in their mouths, and supervise craft time throughout.
Can we use real candy on a cardboard house?
You can glue wrapped candy on for looks, but paper candies are the better default: they last all season, avoid pests and melting, and include children with food allergies. Cardboard is not a food contact surface, so do not plan to eat decorations off a cardboard house. If children want an edible build, make a small real gingerbread or graham cracker house as a separate project.
How do I light up a cardboard house safely?
Use battery LED tealights or small LED string lights only. Never place a real candle, tea light, or any open flame inside or near a cardboard house. Tissue or vellum behind cut out windows softens the LED glow nicely, and a timer light means the house can glow each evening without handling.
Key Takeaways
- Cardboard is the gingerbread: Brown boxes, white paint icing, and paper candies give the full look of a cardboard gingerbread house with no baking and no crumbling walls.
- Adults cut, kids decorate: Keep scissors, craft knives, and hot glue in adult hands, and give children washable, age safe supplies and big decorations.
- Paper candy wins: It lasts all season, stores for next year, avoids pests, and includes every child at the table.
- LED light only: Battery tealights make windows glow safely, and real flame never belongs near cardboard.
- Make it a keepsake: Photo frames, handprint chimneys, and dated garlands turn a free diy cardboard gingerbread house into the decor you keep.
- Building a village this December? Save this list to Pinterest and pin the house your kids want to make first.