23 DIY Christmas Gnomes So Cute You Will Not Want to Stop
Introduction
The fastest way to fill a mantel with personality is a row of handmade gnomes, each one slightly different from the last. These diy christmas gnomes start with the same simple formula, a weighted body, a long beard, a round nose, and a tall hat pulled low, and then change completely with fabric, color, and one small detail. Most versions in this list are no sew and finish in under an hour once your supplies are out. Work with a low temperature glue gun on a heat safe surface, keep hot glue away from skin, and let each joint cool before you move the gnome. Small beads and buttons are a choking risk, so keep finished gnomes with tiny parts away from young children. Make one gnome first to learn the shape, then set up a small production line. Bodies first, beards second, hats third, noses last. That rhythm is how a single cute gnome becomes a whole family for the mantel, the tree, and every gift bag on your list.
1. Start With the Classic No Sew Sock Gnome

Fill a clean crew sock with uncooked rice or dried beans until it feels firm and stands on its own, then tie it closed with an elastic or twine. The weight in the base is what keeps a sock gnome tutorial style gnome upright on a mantel or shelf without tipping.
Cut a faux fur triangle for the beard, cutting only through the backing so the fur stays long and natural. Glue the beard to the front, add a wood bead nose just under the hat line, then pull a second sock or a felt cone hat low over the top.
2. Make a Wood Slice Gnome Ornament
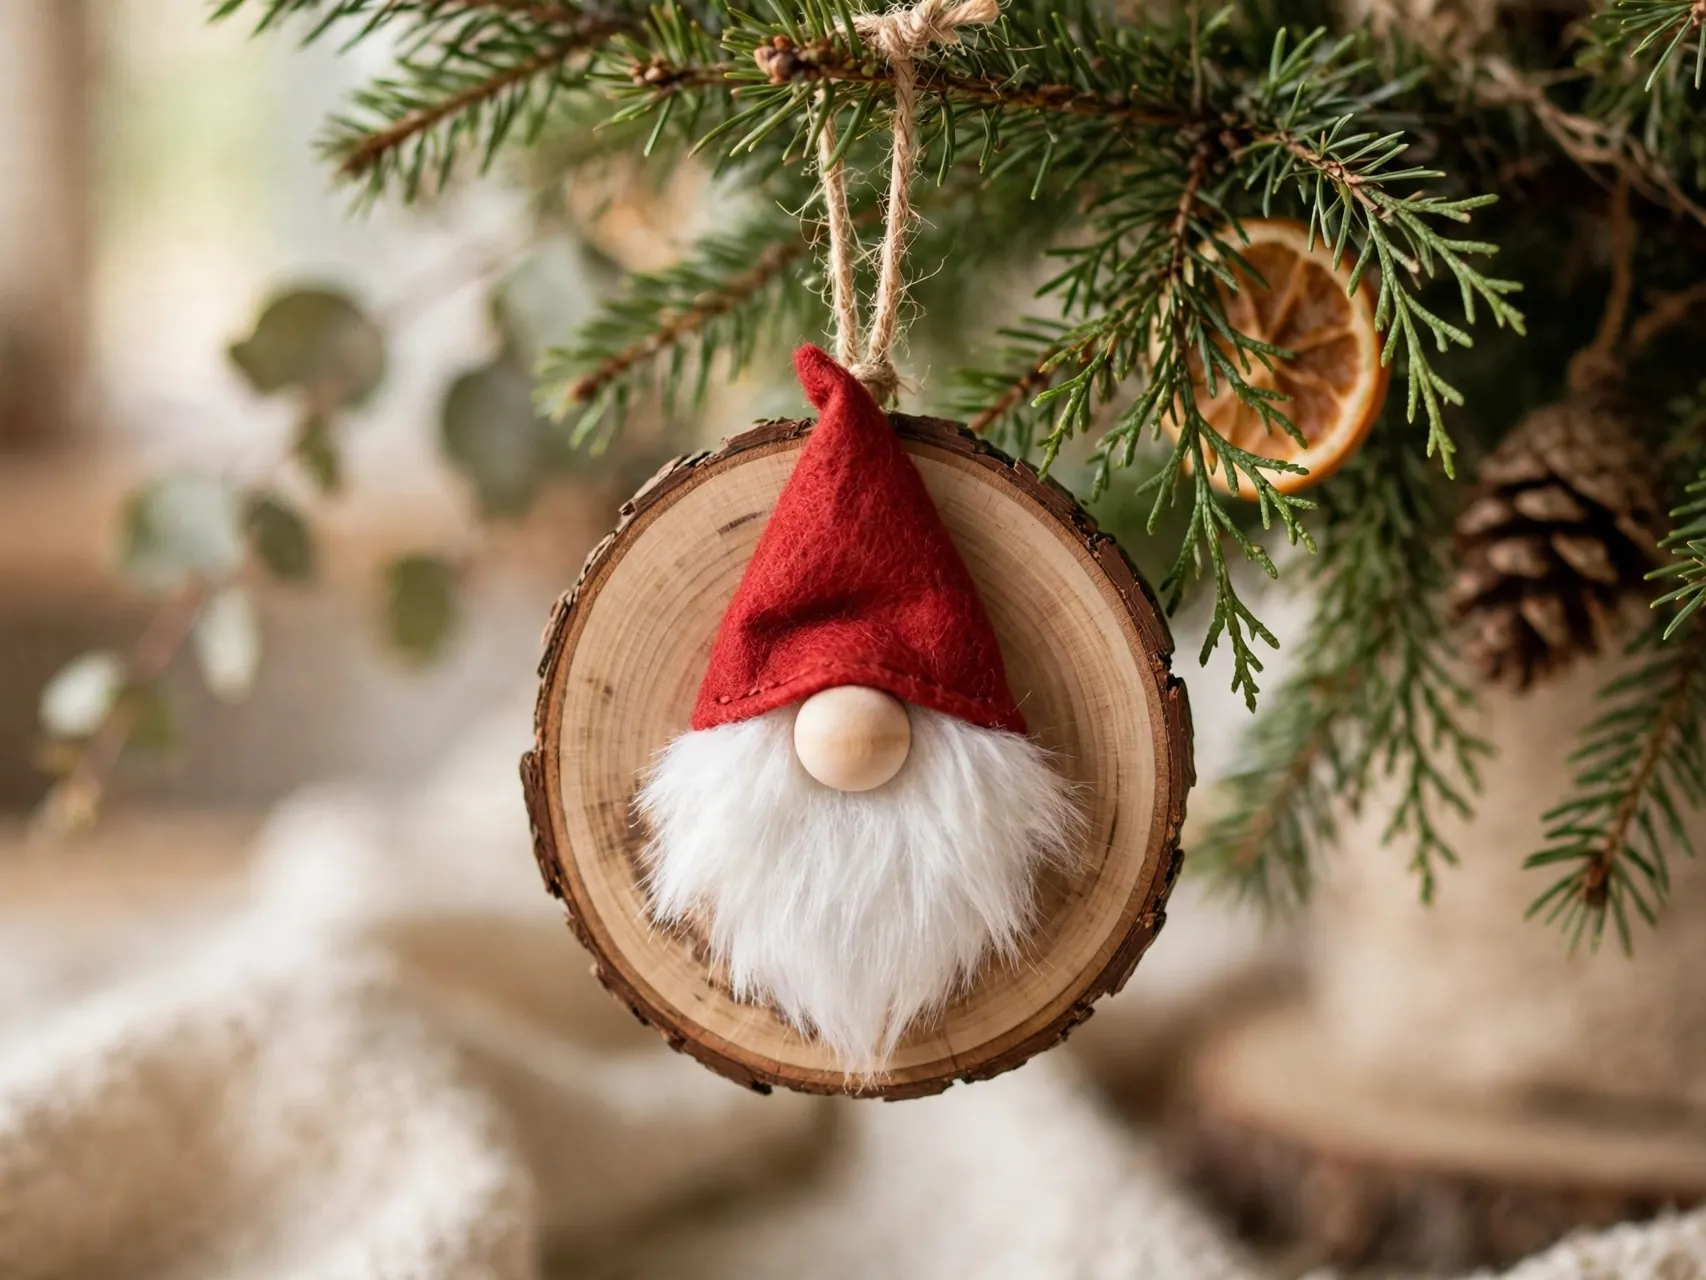
A flat wood slice makes a sturdy, giftable ornament. Glue a strip of faux fur across the lower half as the beard, add a small wood bead or button nose, then shape a felt cone for the hat and glue it down low so it scrunches over the nose.
Add a twine loop at the top of the hat before the glue sets and your ornament is ready to hang. These are some of the easiest christmas gnome ornaments diy projects to batch, because ten slices, one fur strip, and one felt sheet turn into a full set for the tree.
3. Build Pinecone Gnomes From a Nature Walk

Choose a dry, open pinecone as the body and check it is clean and fully dry before you craft. Paint a soft white V at the front for a beard, or glue on a small triangle of white felt or faux fur for a fuller look.
Top it with a felt cone hat and a wood bead nose glued at the hat edge. Pinecone gnomes suit woodland and farmhouse trees, and a short length of twine turns each one into a hanging ornament. Keep natural materials clear of light bulbs once they are on the tree.
4. Try a Fluffy Yarn Gnome With a Pom Pom Hat

Wrap yarn around a small piece of cardboard many times, tie the bundle in the middle, and cut the loops to make a soft pom pom beard and body in one. A second, smaller bundle in a contrasting color becomes the hat when you push it through a short cardboard ring.
Glue a bead nose where the two bundles meet. Yarn gnomes are light, unbreakable, and safe for lower tree branches, and they use up the leftover yarn every crafter already owns. Mix cream, gray, and red for a set that matches almost any tree.
5. Sew a Simple Fabric Gnome Family in Three Sizes

Cut a fabric circle, run a gathering stitch around the edge, fill with rice at the base and soft stuffing above, then pull the thread tight and knot it. The circle size sets the gnome size, so a dinner plate, a side plate, and a saucer give you a ready made family of three.
Add a faux fur beard, a felt cone hat, and a bead nose to each one. Grouping the three sizes together on a tray or step is what makes a handmade set look styled rather than scattered, and it photographs beautifully for sharing.
6. Make a Gnome Garland for the Mantel

Small paper or felt gnomes strung on twine make a garland that weighs almost nothing and stores flat. Cut simple cone bodies and hats from card or felt, add a cotton ball or yarn beard and a dot nose, then clip or glue each gnome along a length of twine.
Space them evenly and leave a little twine tail at each end for tying. A gnome garland fills the gap between stockings and a wreath, and because it is flat, it is one of the few decorations that survives January storage without getting crushed.
7. Dress a Gnome in Buffalo Plaid for Farmhouse Style

Buffalo plaid is the farmhouse shortcut. Use plaid fabric or a plaid sock for the body or hat, pair it with a cream faux fur beard, and finish with a wood bead nose and a tiny sprig of faux greenery tucked into the hat band.
Repeat the plaid in a nearby throw or pillow and the gnome stops being a lone craft and becomes part of the room. This is one of the most saved easy christmas gnome crafts looks every year because it matches the decor most farmhouse homes already have.
8. Create a Pair of Mr and Mrs Gnomes

Make two gnomes from the same body pattern and let the details tell the story. Give one a longer beard and a plain tall hat, and give the other braided yarn hair under the hat, a slightly smaller nose, and a tiny felt flower or bow at the hat band.
Set the pair together on an entry table or as a centerpiece with greenery around their bases. Paired gnomes make a sweet anniversary or hostess gift in December, especially with a handwritten note tucked under one hat.
9. Add Dangly Legs and Tiny Boots

A seated gnome with legs is instantly funnier. Roll two short tubes of fabric, stuff them lightly, and glue small felt boots or shoes to the ends. Glue the legs under the body so the gnome sits on a shelf edge, a stair, or the rim of a planter with its feet hanging down.
Keep the legs short and the boots oversized for the cute proportion everyone loves. Shelf sitters sell the joke from across the room, so place them where people walk past, like a banister end or the top of a bookcase.
10. Make Mini Gnomes for Tiered Trays

Tiered trays need small scale pieces, and mini gnomes are perfect filler. Scale the sock or fabric method down with a shorter fill, a trimmed beard, and a hat that stands straight instead of flopping. A finished height of a few inches sits happily beside mini mugs and small signs.
Make three in one color story rather than one in every color. Trays look styled when the palette repeats, and a matching trio reads as a set you bought together instead of leftovers from bigger projects.
11. Turn a Wine Bottle Into a Gnome Hostess Gift

Slip a tall felt or fabric gnome hat and beard set over the neck of a wine or sparkling juice bottle and you have a hostess gift that gets a laugh before it gets opened. The beard wraps the front of the bottle and the hat covers the top and foil.
Tie a gift tag around the bottle neck under the beard. It takes five minutes, travels well in a gift bag, and the hat and beard can be reused on a bottle at the next party, which makes it a gift that keeps circulating in the best way.
12. Craft a Gnome Wreath for the Front Door

Attach small, lightweight gnomes around a plain greenery or grapevine wreath, spacing them between clusters of berries and pinecones. Use floral wire or hot glue on the wreath frame, not on the greenery, so the pieces hold through cold and wind at the door.
One larger gnome at the bottom center makes a strong focal point, with two smaller ones higher up. Keep the wreath palette to two or three colors so the gnomes read clearly from the street, and bring the wreath inside during heavy storms to protect the fabric pieces.
13. Make a Standing Gnome From a Tomato Cage or Cone
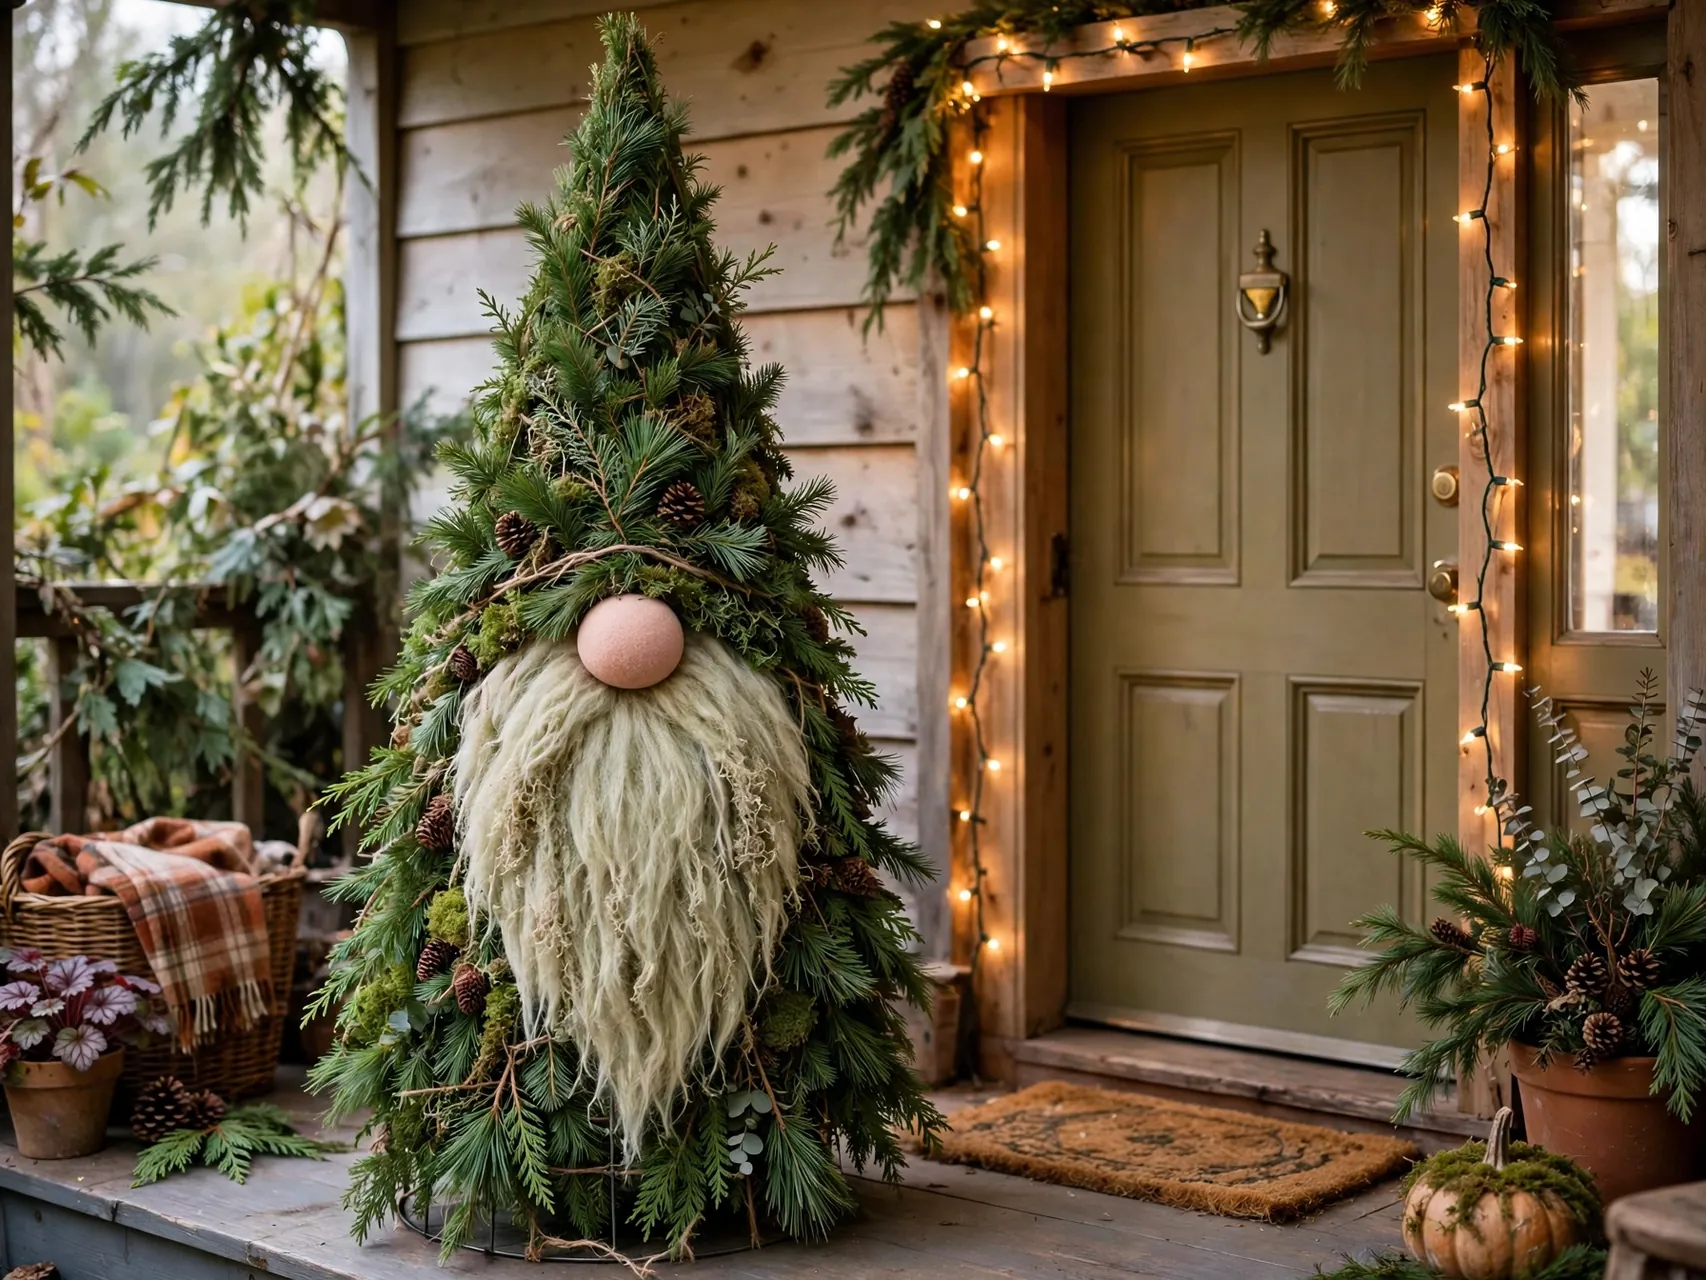
For a porch sized gnome, turn a small tomato cage or a foam cone into the body, wrap it in fabric or a thrifted sweater, and add a big faux fur beard and an oversized hat. The scale is the whole joke, so go generous with the beard and nose.
Weight the base if it will sit outside, and keep fabric porch gnomes under a covered entry so rain does not soak the filling. A pair flanking the front door is the kind of display neighbors slow down for, and it stores in a fraction of the space an inflatable takes.
14. Give a Gnome a Cozy Sweater Body

An old sweater sleeve or body panel makes the softest gnome body there is. The knit texture reads cozy before you add a single detail, and cuffs and ribbing give you a finished edge for free. Fill, tie, and add the beard, hat, and nose as usual.
Thrifted sweaters in cream, red, and fair isle patterns give you a whole set for very little. This is also the kindest use for a sweater with one worn spot, since the good panels become the visible parts of the gnome.
15. Paint Wooden Peg Gnomes With Kids

Wooden peg people, paint, and a fine brush make a calm afternoon project. Paint the body as a coat, leave a face gap, add a triangle hat, and dot on a beard with white paint or glue on a tiny tuft of cotton or yarn.
Peg gnomes are sturdy, quick to dry, and easy for small hands to hold. Seal them once dry if they will be handled a lot. Line them up as place markers at the holiday table with a name card leaning against each one, and guests get a favor to take home.
16. Make a Gnome Advent Calendar With Pockets
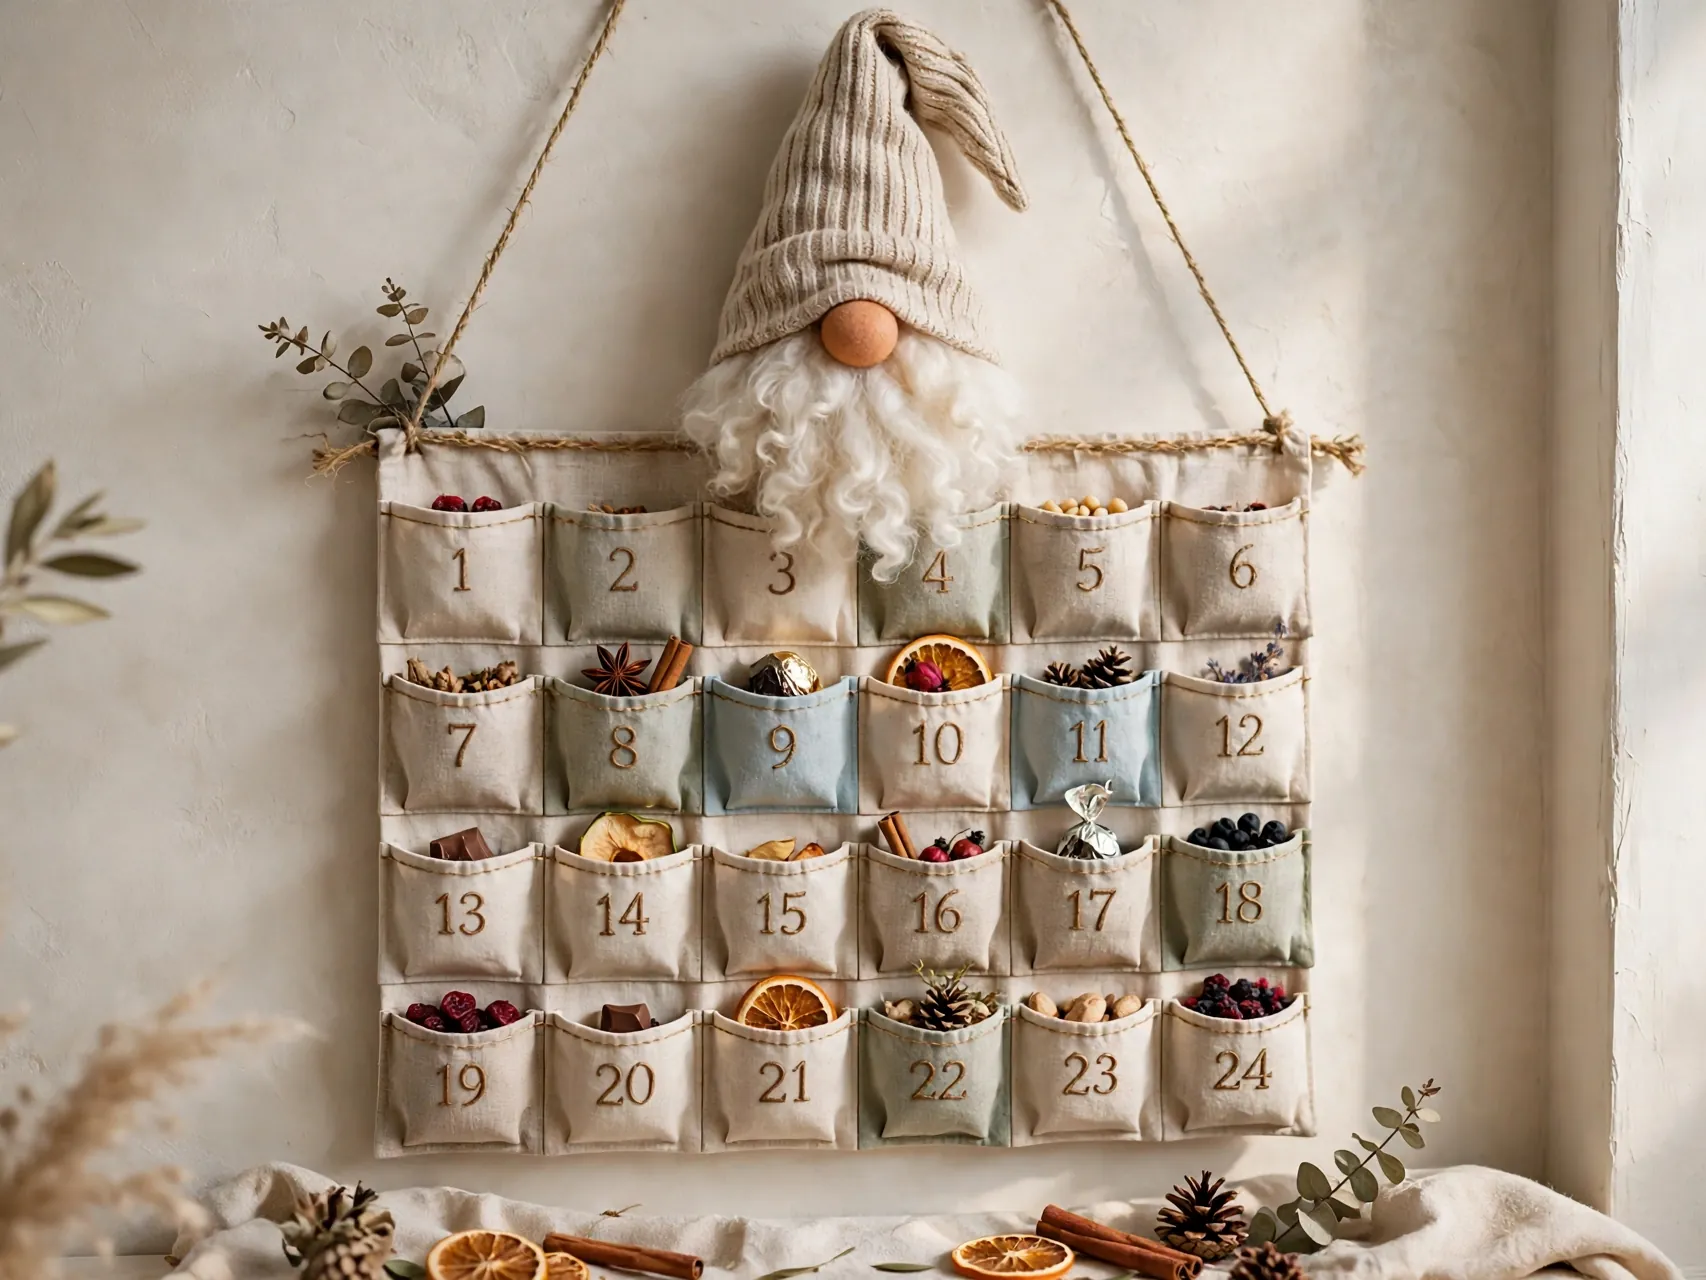
Sew or glue a row of small numbered pockets onto a fabric panel, then top the panel with one big gnome face, beard, and hat so the whole calendar reads as a single gnome holding the days. Felt pockets glued to a felt backing work fine for a no sew version.
Fill each pocket with a note, a small treat, or an activity idea. Hung at child height, the calendar becomes the morning routine all December, and the pockets are sized kindly for grandparents sending small surprises from far away.
17. Style a Woodland Gnome With a Twig Hat
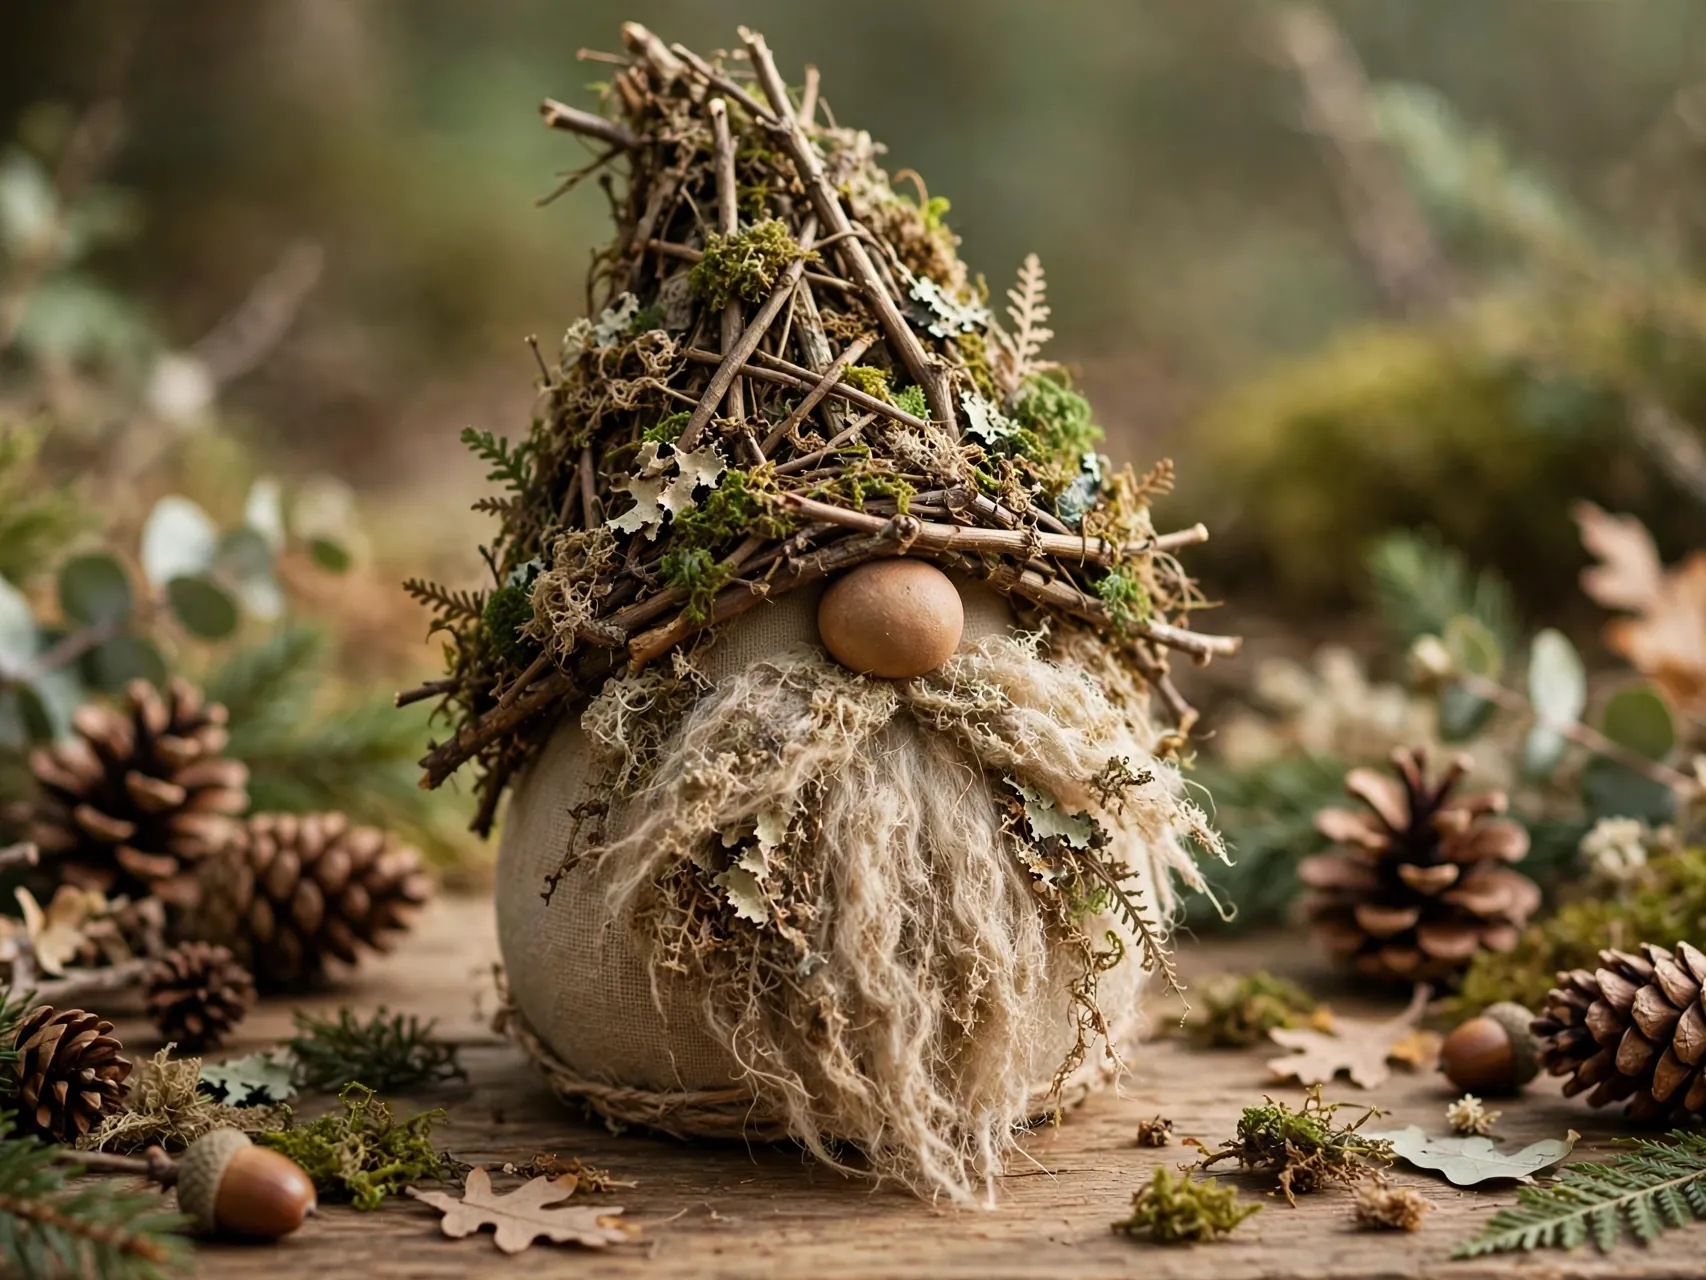
Swap the felt cone for a hat shaped from burlap or felt in a brown tone, then glue on a tiny twig, a miniature pinecone, and a speck of faux moss. Pair it with a gray or brown beard instead of white and the gnome turns woodland instead of Santa style.
Woodland gnomes belong with natural trees, pinecone garlands, and wood slice ornaments. They also bridge the season nicely, looking right at home from late November through the end of winter rather than only on Christmas week.
18. Add a Girl Gnome With Yarn Braids

Two yarn braids change everything. Part the beard idea in a new direction by gluing two braided yarn lengths under the hat on each side of the nose, then finish the braid ends with tiny bows or beads. A slightly rosy bead nose adds to the effect.
Braid gnomes pair naturally with the classic bearded style, and a mixed group looks like a village rather than a copy of one idea. Use the same hat fabric across the group so the braids, not the palette, carry the difference.
19. Make Gnomes From Dollar Store Supplies Only
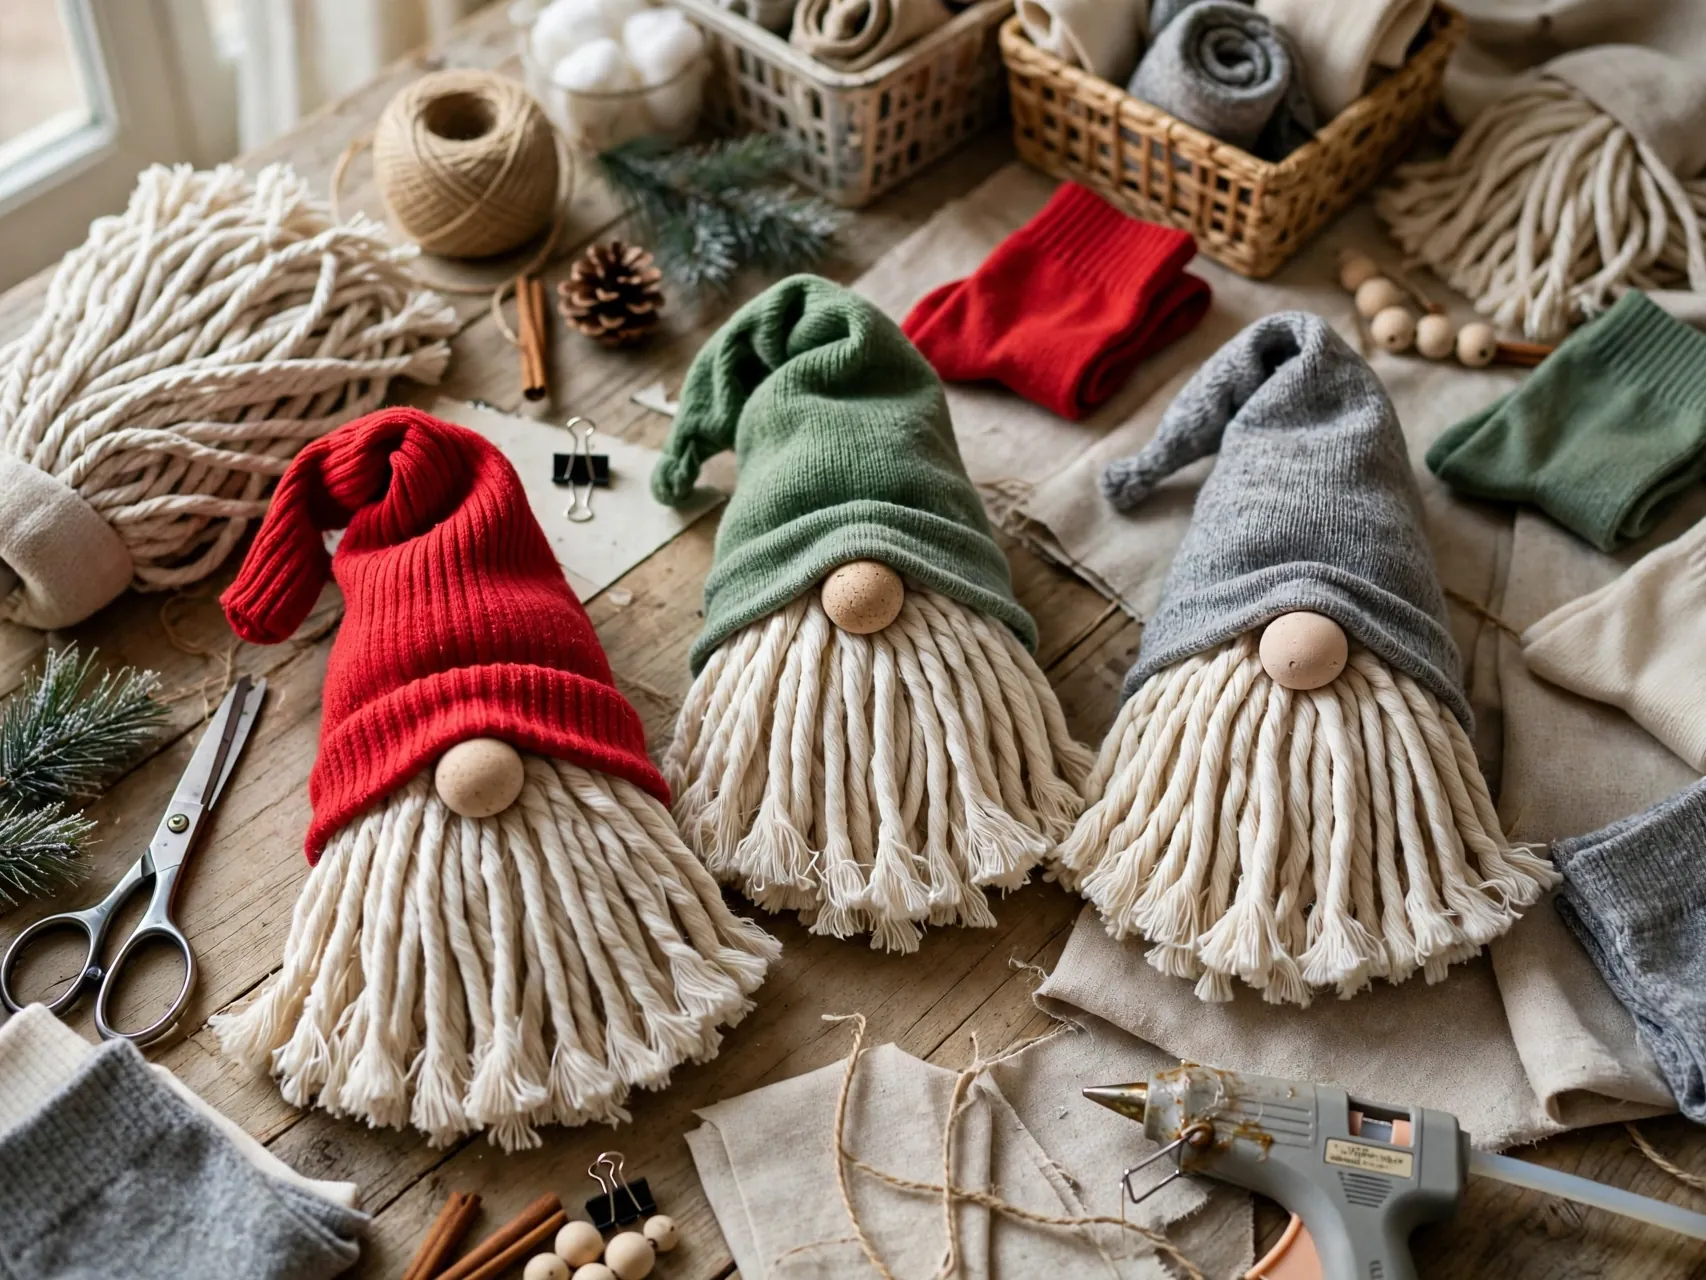
A mop head or a duster refill makes a surprisingly good beard, a foam cone or a sock makes the body, and a seasonal hat or mitten from the same store finishes the top. The whole gnome comes from one aisle run, which is the appeal for craft night groups.
Agree on one supply list and make them together, then compare how different the results look from identical parts. Dollar store gnomes are also the low risk way to test whether you enjoy the craft before buying nicer fabric and fur for a keeper set.
20. Create a Gnome Centerpiece With Greenery

Set three gnomes of different heights in the middle of a low tray, tuck faux or fresh greenery around their bases, and add battery powered fairy lights or LED candles between them. The gnomes become the characters in a small winter scene instead of a line of separate crafts.
Keep real candle flames away from fabric, fur, and greenery, and use LED versions for the same glow without the worry. A centerpiece like this carries a dining table through the whole season and takes five minutes to move when you need the space for serving dishes.
21. Hang Gnome Ornaments on Every Gift

A mini gnome on a gift is wrapping and decoration in one. Make the wood slice or felt version small, add a twine loop, and tie it to the ribbon of each present instead of a paper tag, with the name written on the back of the slice or on a tiny tag beneath it.
Recipients keep the gnome for their own tree, so your wrapping becomes next year decor. Batch these early in December before the wrapping rush, store them in a small box, and the last step of every gift is already done.
22. Make a Tall Hat Gnome With a Floppy Tip
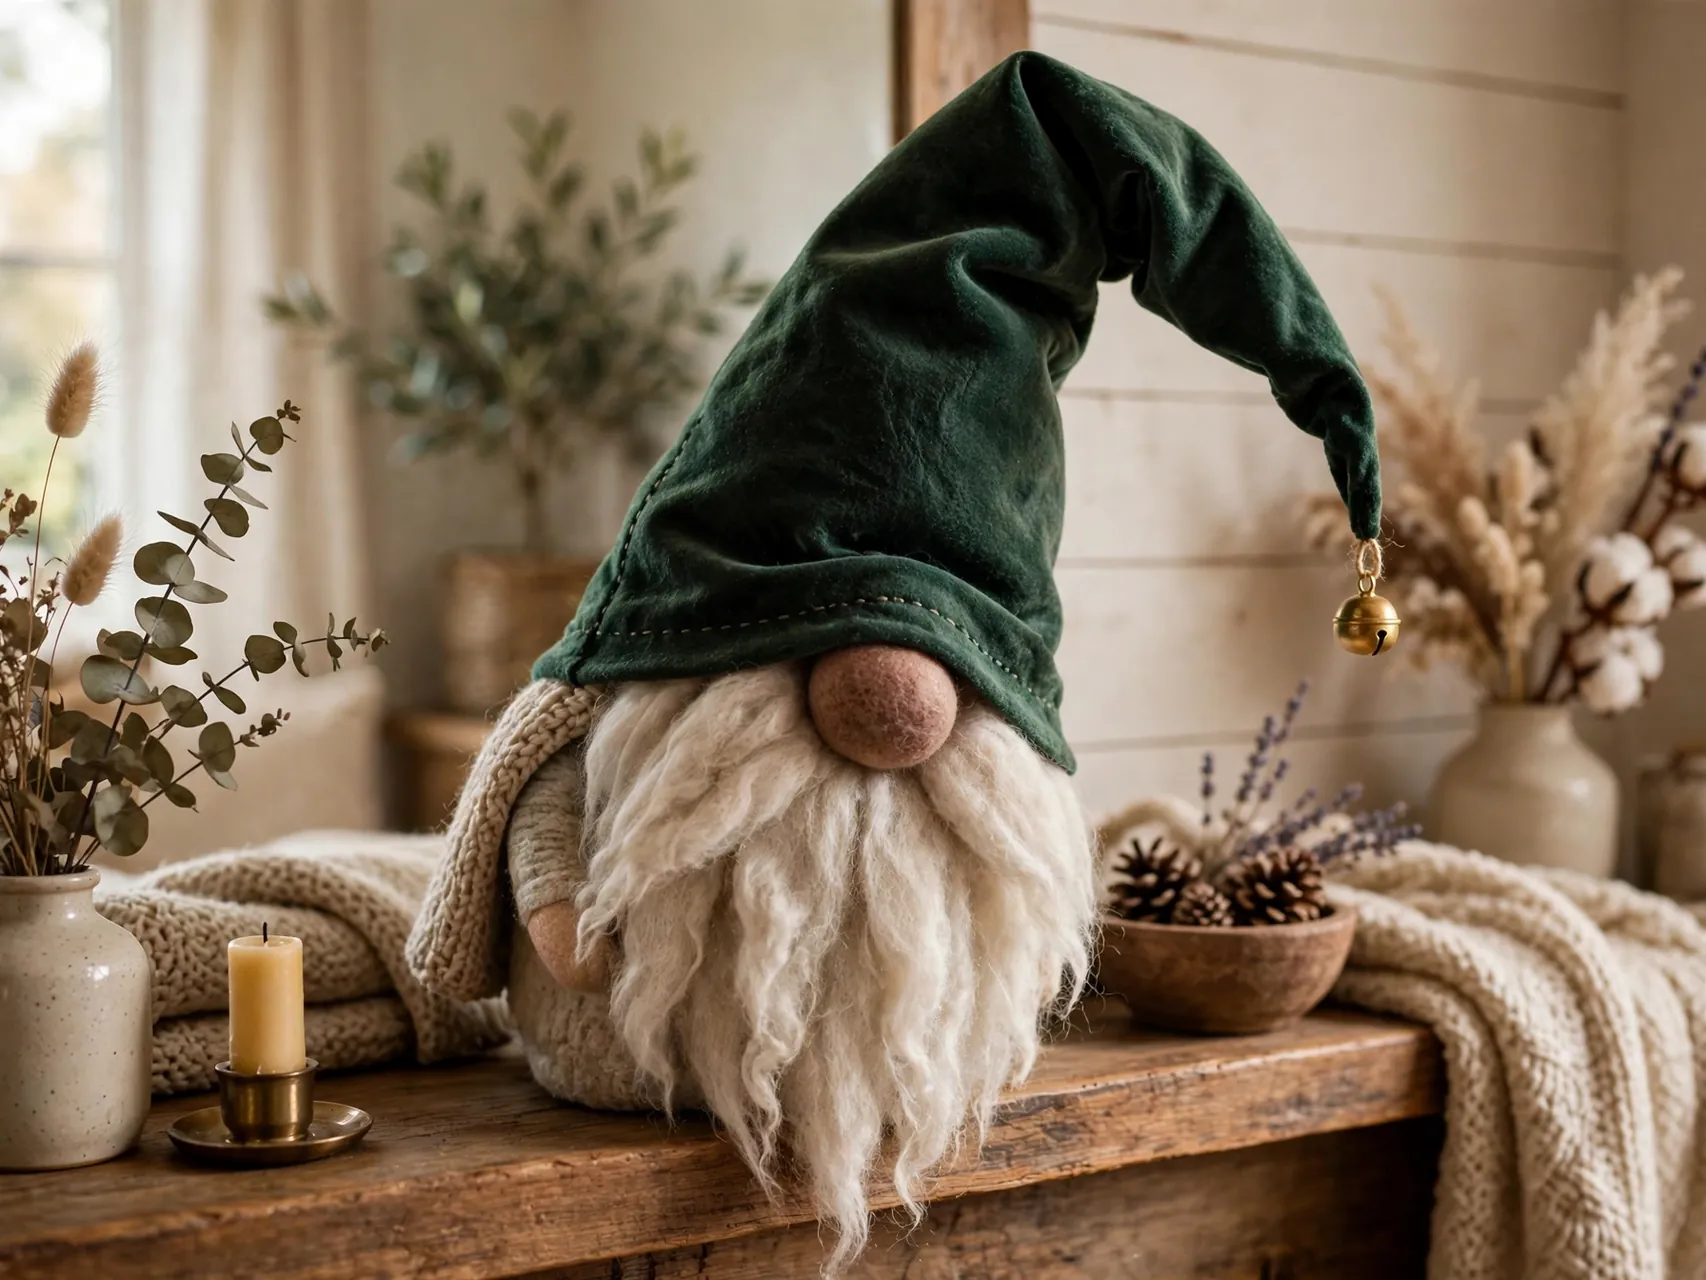
Exaggerate the hat. Cut the cone long, stuff only the base of it lightly, and let the tip flop over to one side. A small bell or pom pom at the tip finishes the bend and adds a soft sound when the gnome gets moved.
Tall hat gnomes have the most personality per inch of any style here, and the floppy tip lets you pose them differently on every shelf. Bend the tip the opposite way on the second one you make and a pair instantly looks like they are talking to each other.
23. Finish With a Matching Gnome Village Scene

The last step is grouping. Gather your finished gnomes on one surface, add a few bottle brush trees, a string of fairy lights, and a sprinkle of faux snow, and arrange them at different heights on books or small boxes under a cloth.
Villages work because the eye reads them as one scene. Photograph your grouping before you move anything for cleaning, so you can rebuild it in minutes. This is where diy christmas gnomes stop being separate crafts and become the display people remember from your home.
FAQ
What is the easiest gnome for a beginner to make?
The no sew sock gnome is the best first project. It needs a sock, rice or dried beans, faux fur, felt, a bead nose, and a glue gun, and it forgives uneven cutting because the beard and hat cover most of the body. Make one before you batch a set.
What can I use instead of rice to fill a gnome?
Dried beans, lentils, or a mix of beans at the base and soft stuffing above all work well. The goal is weight low in the body so the gnome stands firmly. Avoid anything that could attract pests in storage, and store finished gnomes in a sealed box or bin.
How do I cut faux fur without ruining the beard?
Cut from the back, through the backing only, with a craft knife or the tips of scissors, and never straight through the fur pile. Shaking the piece gently after cutting removes loose fibers. This one habit is the difference between a neat beard and a blunt, trimmed looking one.
Are homemade gnomes safe around children and pets?
Display gnomes with small glued parts, beads, and buttons out of reach of young children and pets that chew, because small pieces can come loose. Choose larger, sewn, or painted versions like peg gnomes for family spaces, and check glued joints each season before displaying them again.
How do I store Christmas gnomes so they last?
Let everything dry and cool fully, then store gnomes upright in a box with tissue between them so beards and hats are not crushed. Keep the box in a cool, dry place away from pests. A quick photograph of your display helps you rebuild the same grouping next year.
Key Takeaways
- One formula, endless gnomes: A weighted body, a long beard, a round nose, and a low hat turn into every style in this list with small changes.
- No sew first: Sock and fabric gnomes need only a glue gun, which makes them the fastest route to a full mantel.
- Cut fur from the back: Cutting only the backing keeps beards long and natural instead of blunt and trimmed.
- Safety stays simple: Use low temperature glue carefully, and keep small beads and buttons away from young children and pets.
- Group to finish: Gnomes look best in threes and in scenes, with greenery, lights, and different heights doing the styling work.
- Loved these little characters? Save this list of diy christmas gnomes to Pinterest and pin your favorite style for your next craft night.