21 Paper Pumpkin Craft Ideas for Easy Fall and Halloween
Introduction
Paper pumpkins are the rare craft that works in September, October, and right through Thanksgiving. A simple paper pumpkin craft can stay sweet and autumnal with a green stem and leaf, or turn into Halloween decor the moment you add a jack-o-lantern face in black paper or marker.
Most versions here need only orange and green paper, scissors, and glue. Adults should help with cutting, hole punching, and any paper fasteners, kids should use safety scissors for their steps, and paints and glues should be non-toxic. Keep fasteners, beads, and other small parts away from children under 3.
Vary the size as you go. One large pumpkin makes a centerpiece, a handful of medium pumpkins fill a mantel, and a row of mini pumpkins becomes a garland or a classroom pumpkin patch. That flexibility is why teachers and parents return to these projects every fall.
The ideas below start with the classic paper strip pumpkin, then move through tissue texture, accordion rosettes, stuffed bags, and simple flat pumpkins for the youngest crafters.
1. Classic Paper Strip Pumpkin With a Fastener Top

Cut eight to twelve equal orange strips, stack them, and join the ends with paper fasteners, with an adult handling the fasteners. Fan the strips out into a round pumpkin shape, add a green stem and a curled vine strip, and the pumpkin is ready.
This is the best known paper strip pumpkin craft because the shape looks impressive for very simple steps. Longer strips make bigger, looser pumpkins, while shorter strips make tight mini pumpkins that look adorable in a row.
If the pumpkin leans to one side, adjust the strips by sliding them slightly around the fasteners until the spacing looks even all the way around. A few seconds of arranging at the end makes the difference between a pumpkin that looks rushed and one that looks ready for the mantel.
2. Paper Strip Pumpkin With Glued Ends and a Tube Core
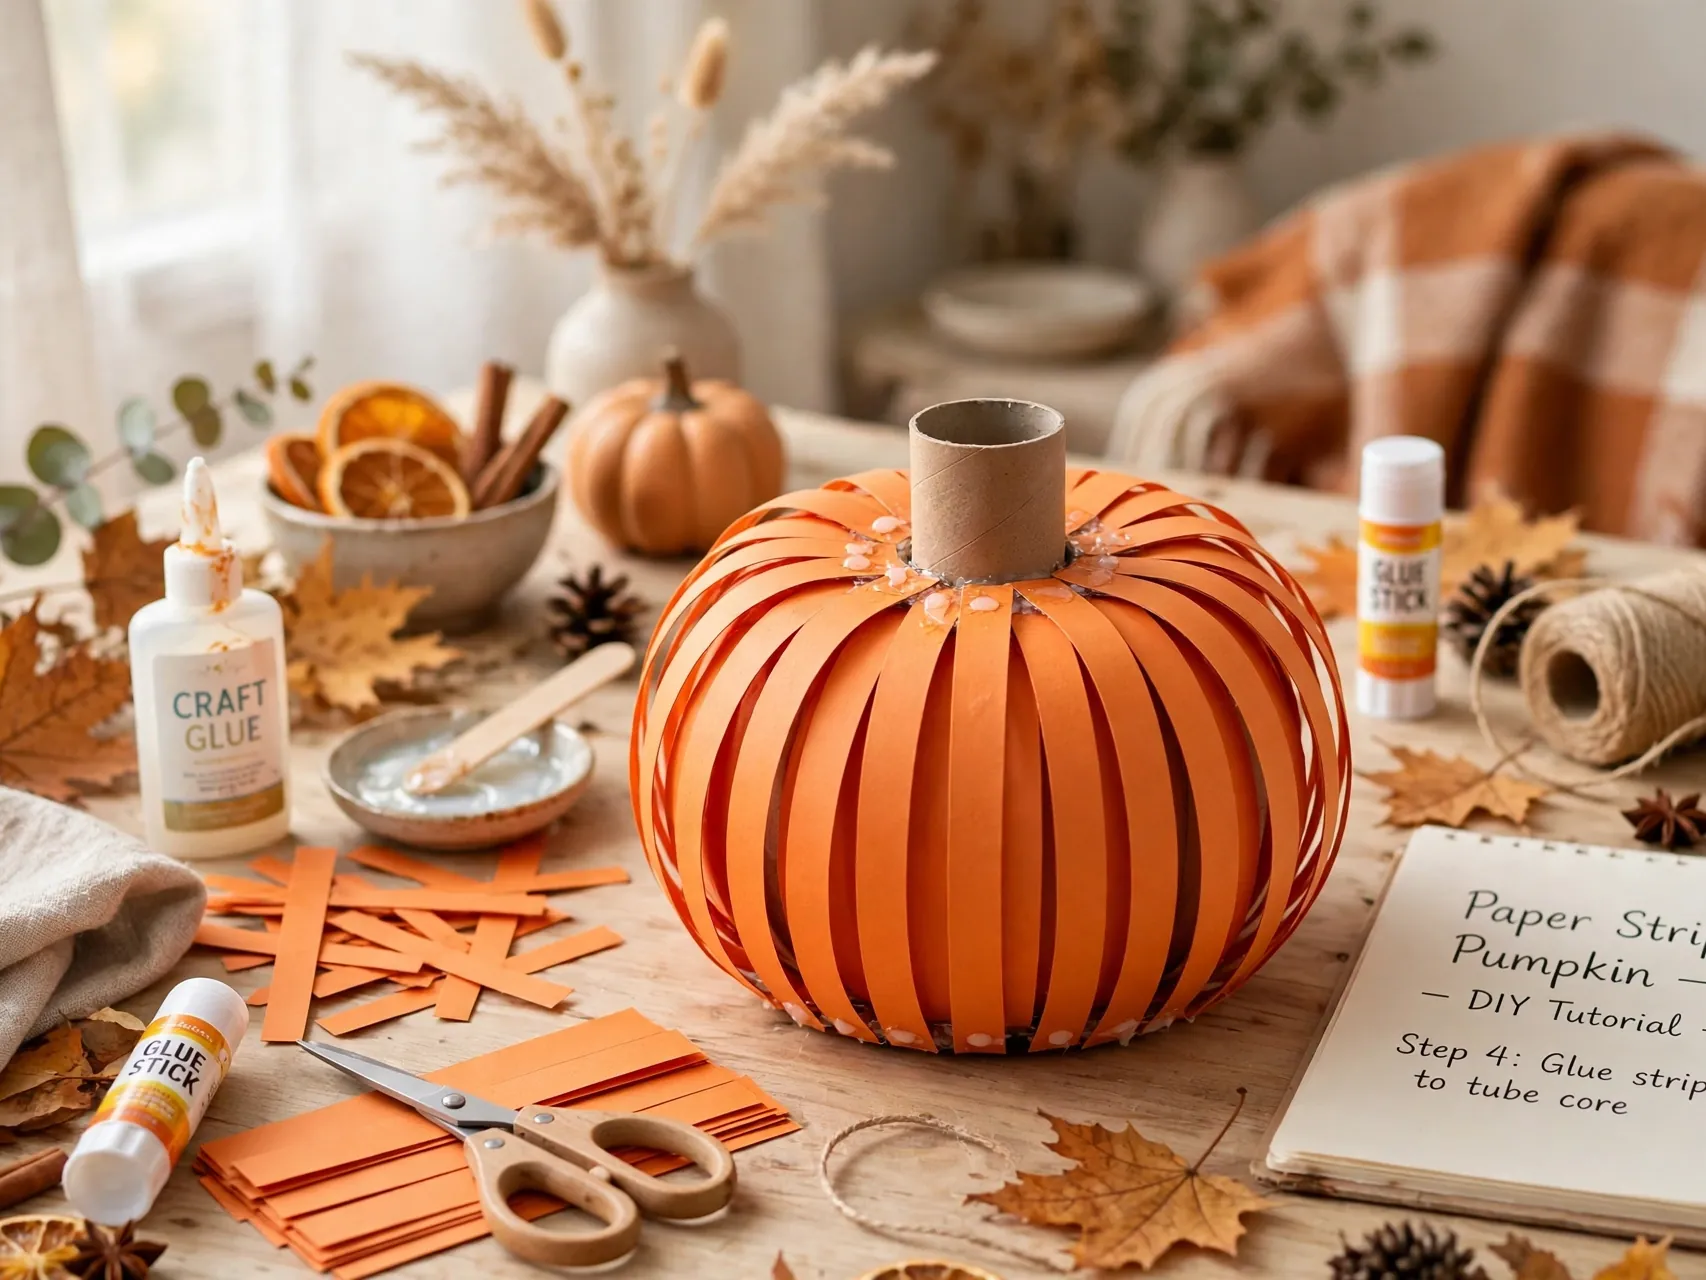
Wrap a short cardboard tube in orange paper, then glue the ends of orange strips inside the top and bottom of the tube, bowing each strip outward as you work around the core. The tube gives every strip the same anchor and curve.
This glued version suits classrooms where fasteners are not ideal, although an adult should still manage the first strips while the glue sets. Add a green stem into the top of the tube and the pumpkin holds a neat, round shape on a shelf.
3. Tissue Paper Pumpkin on a Paper Bowl

Turn a paper bowl upside down, spread glue in small sections, and press on scrunched squares of orange tissue until the bowl is covered. The scrunched tissue creates a soft, almost fabric texture that catches light beautifully.
Add a cardboard stem at the top once the glue dries. This tissue paper pumpkin craft is soothing, repetitive work that many children find calming, and it gives toddlers a way to join in without any cutting at all.
4. Tissue Paper Suncatcher Pumpkin for a Window
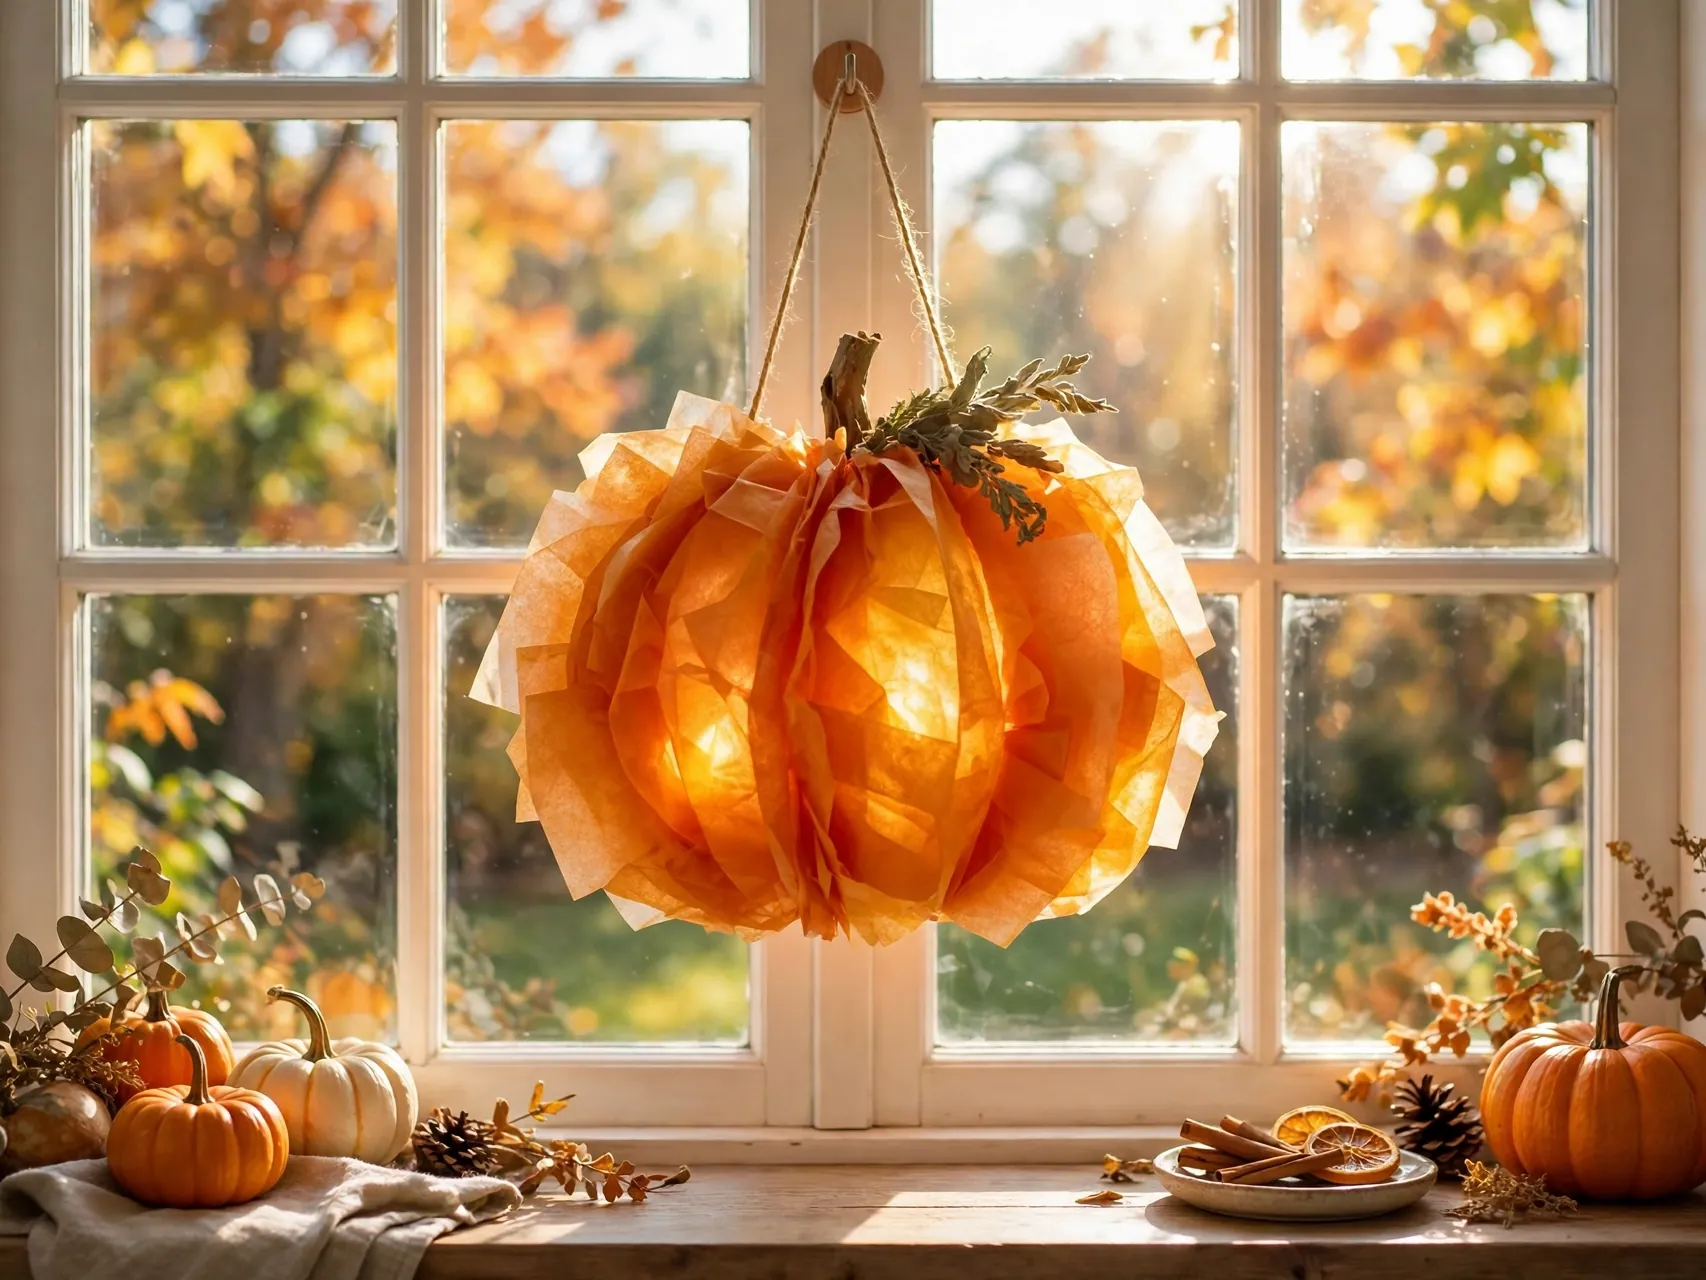
Cut a pumpkin outline frame from black or orange paper with adult help, place it on clear contact paper, and fill the inside with small orange tissue pieces. Seal, trim, and tape the finished pumpkin in a sunny window.
Add black tissue or paper eyes and a smile before sealing if you want a jack-o-lantern suncatcher for Halloween. During the day the tissue glows, and in the evening the dark frame keeps the pumpkin shape clear from outside.
5. Accordion Rosette Pumpkin With a Paper Center
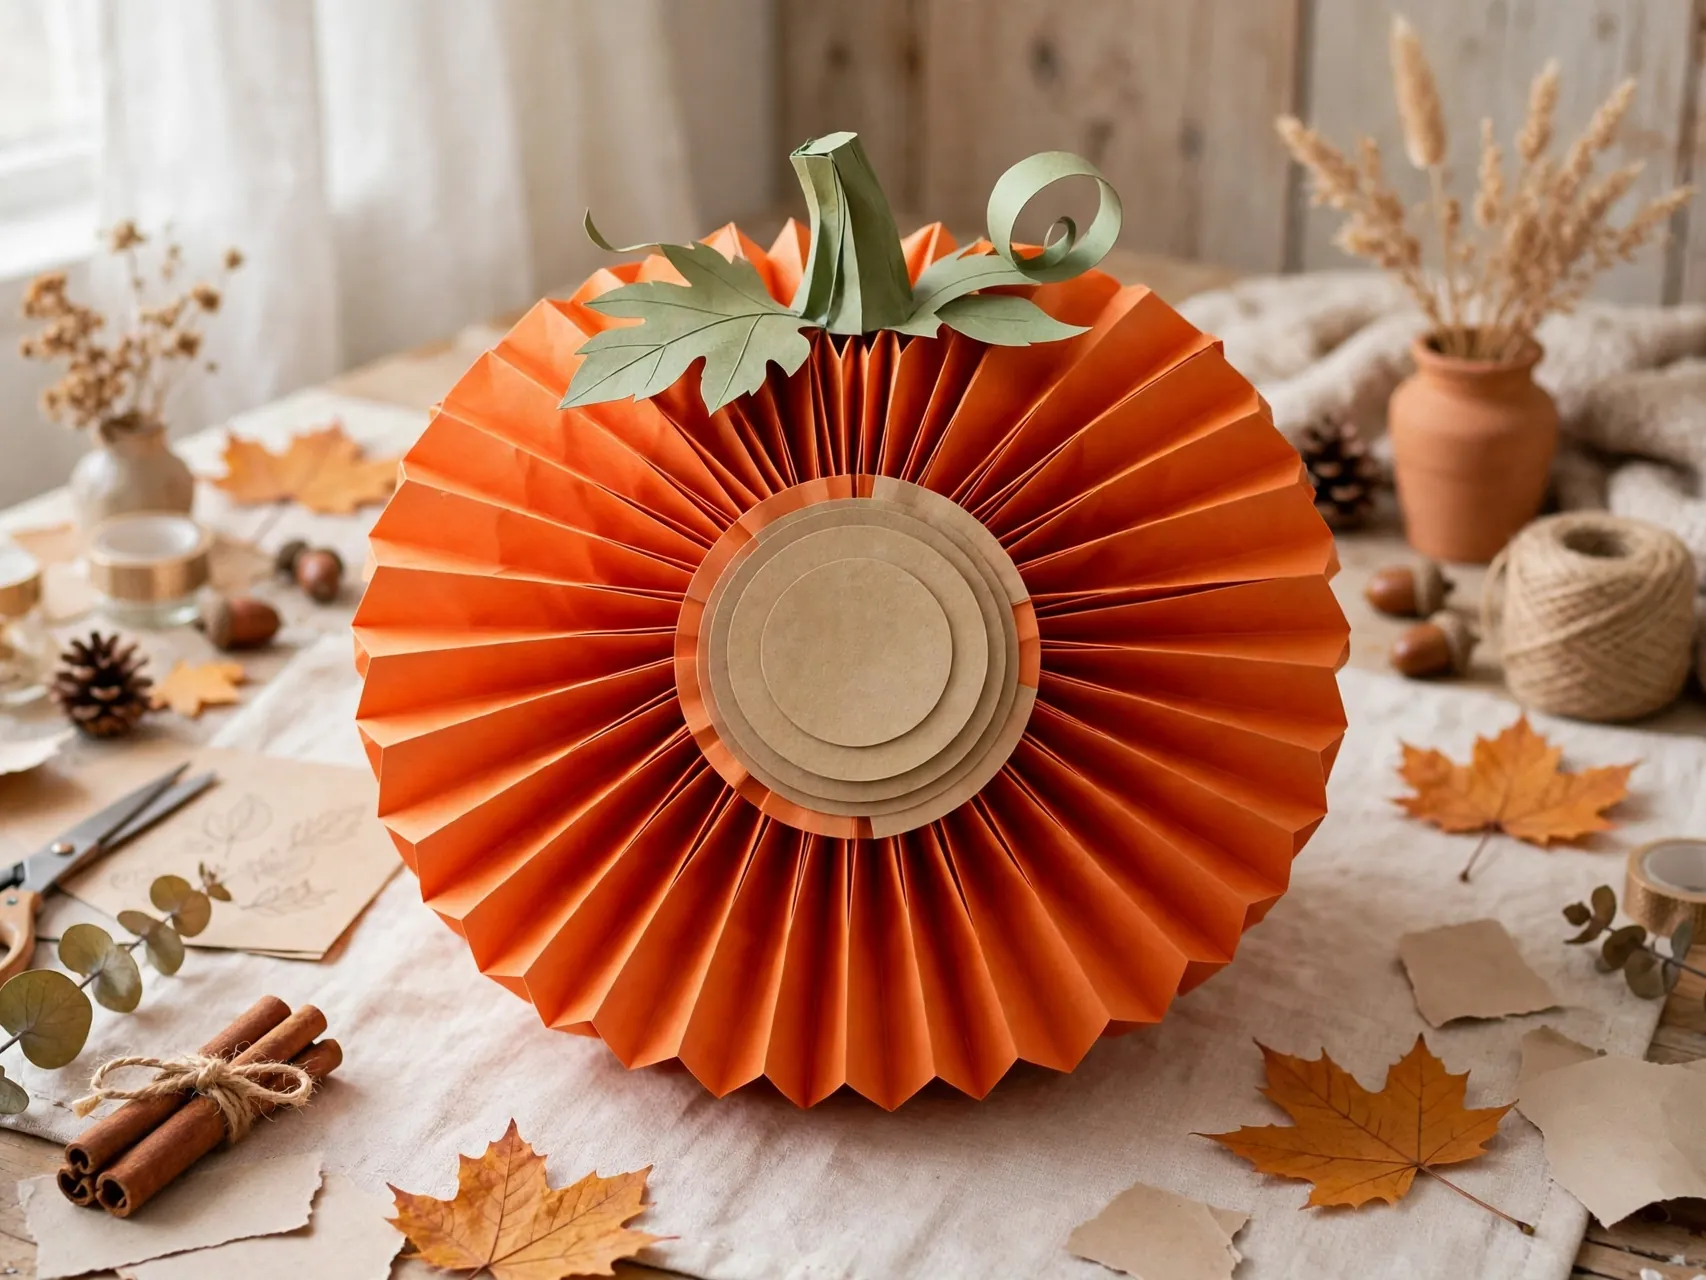
Fold orange paper accordion style, join the folded strips into a round rosette, and glue an orange circle in the center on both sides to hold the shape flat. Add a small stem and leaf at the top, and hang the rosette or prop it on a shelf.
Rosette pumpkins look polished enough for adult fall decor, especially in patterned or textured paper. Make them in two or three sizes and cluster them on a mantel with real mini pumpkins for a mixed, collected display.
6. Large 3D Layered Petal Pumpkin

Cut several large oval petal shapes from orange cardstock, fold each lightly down the middle, and glue the petals together in a ring so they fan into a full, round pumpkin. Heavier paper holds this larger shape better than thin paper.
Finish with a green stem and a curled vine on top. A large 3d paper pumpkin craft makes a strong centerpiece for a dining table or porch step under cover, and it stores flatter than you would expect if you handle it gently.
7. Rolled Paper Curl Pumpkin
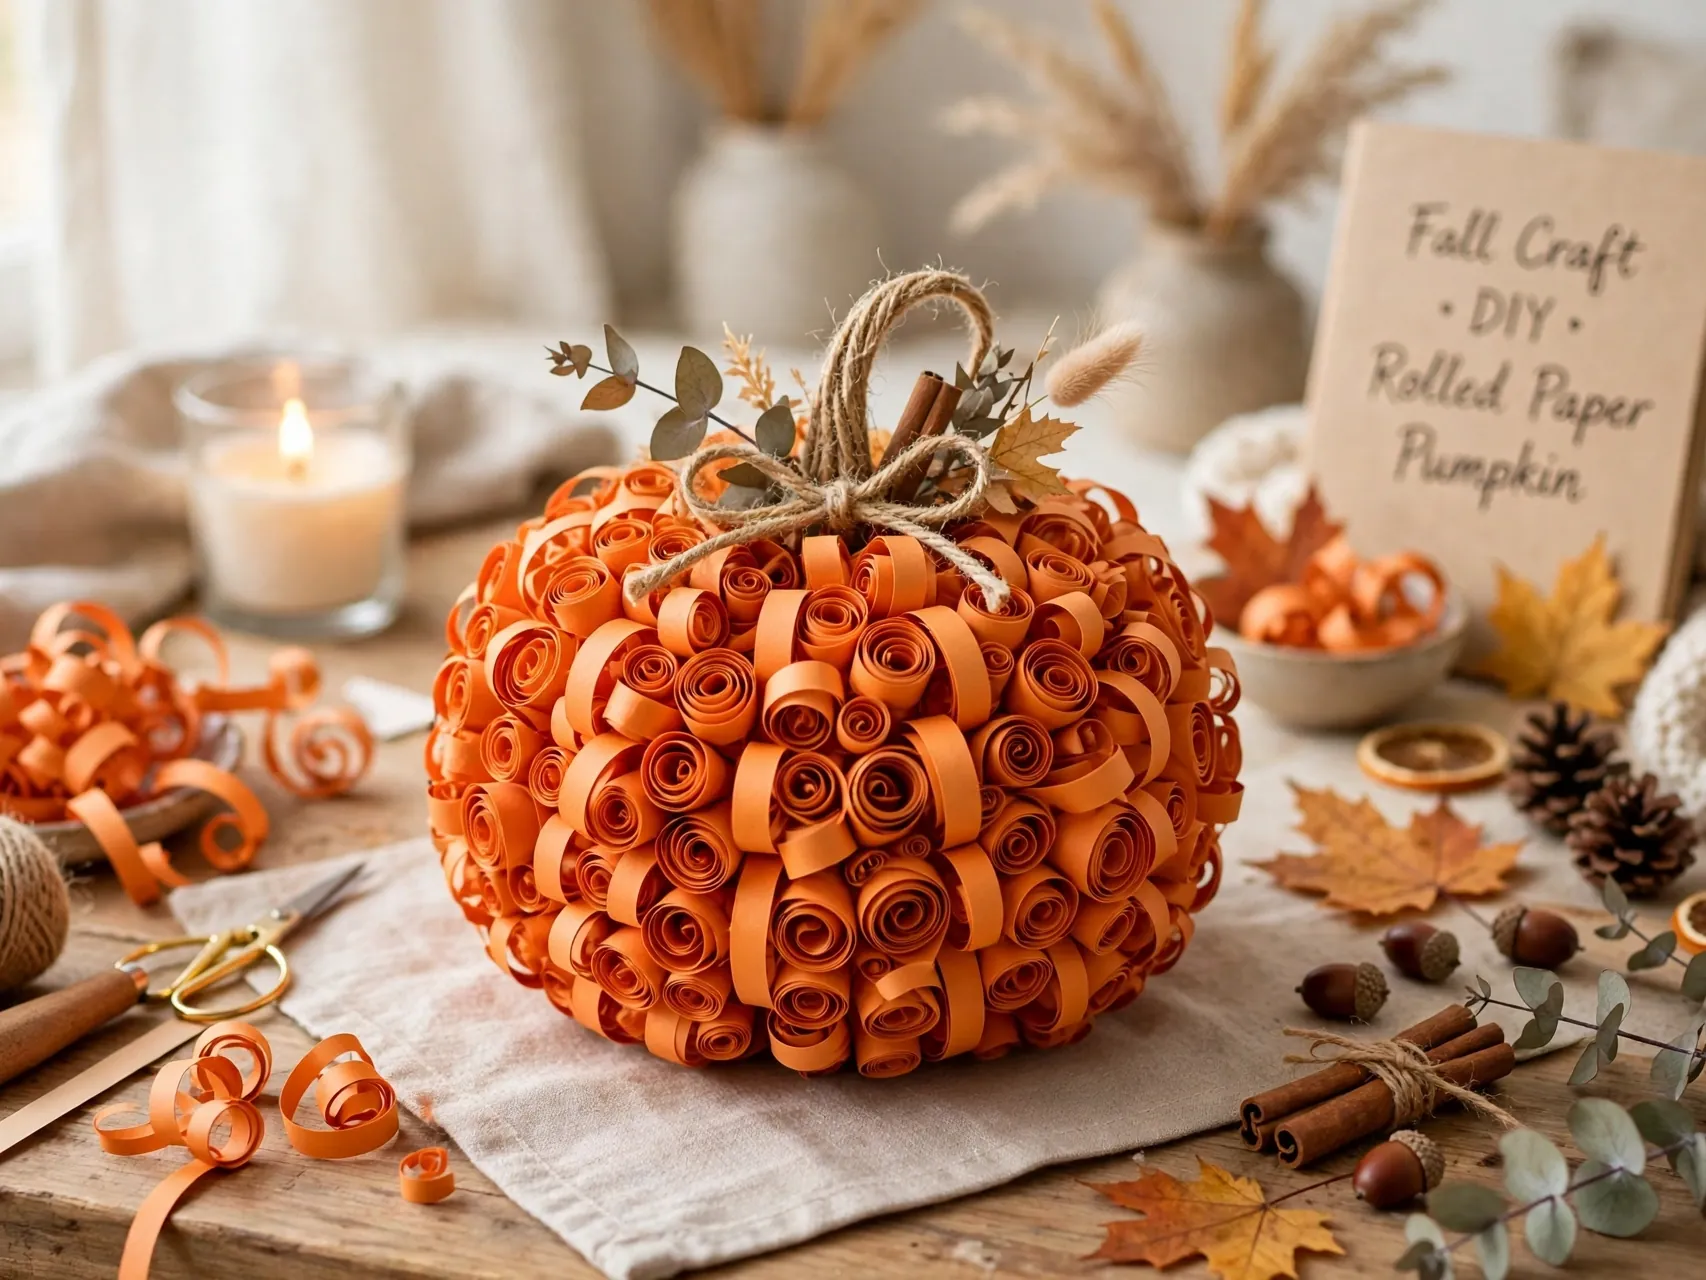
Cut many thin orange strips, roll each one into a loose curl with glue at the end, then glue the curls together in a round pumpkin arrangement on a backing or in a free form cluster. Different curl sizes give the pumpkin handmade character.
Add a brown stem curl and a few green curls as vines at the top. Curl pumpkins take patience, so they suit older kids and adults who enjoy slow, detailed work, and the finished texture is worth the extra time.
8. Stuffed Paper Bag Pumpkin
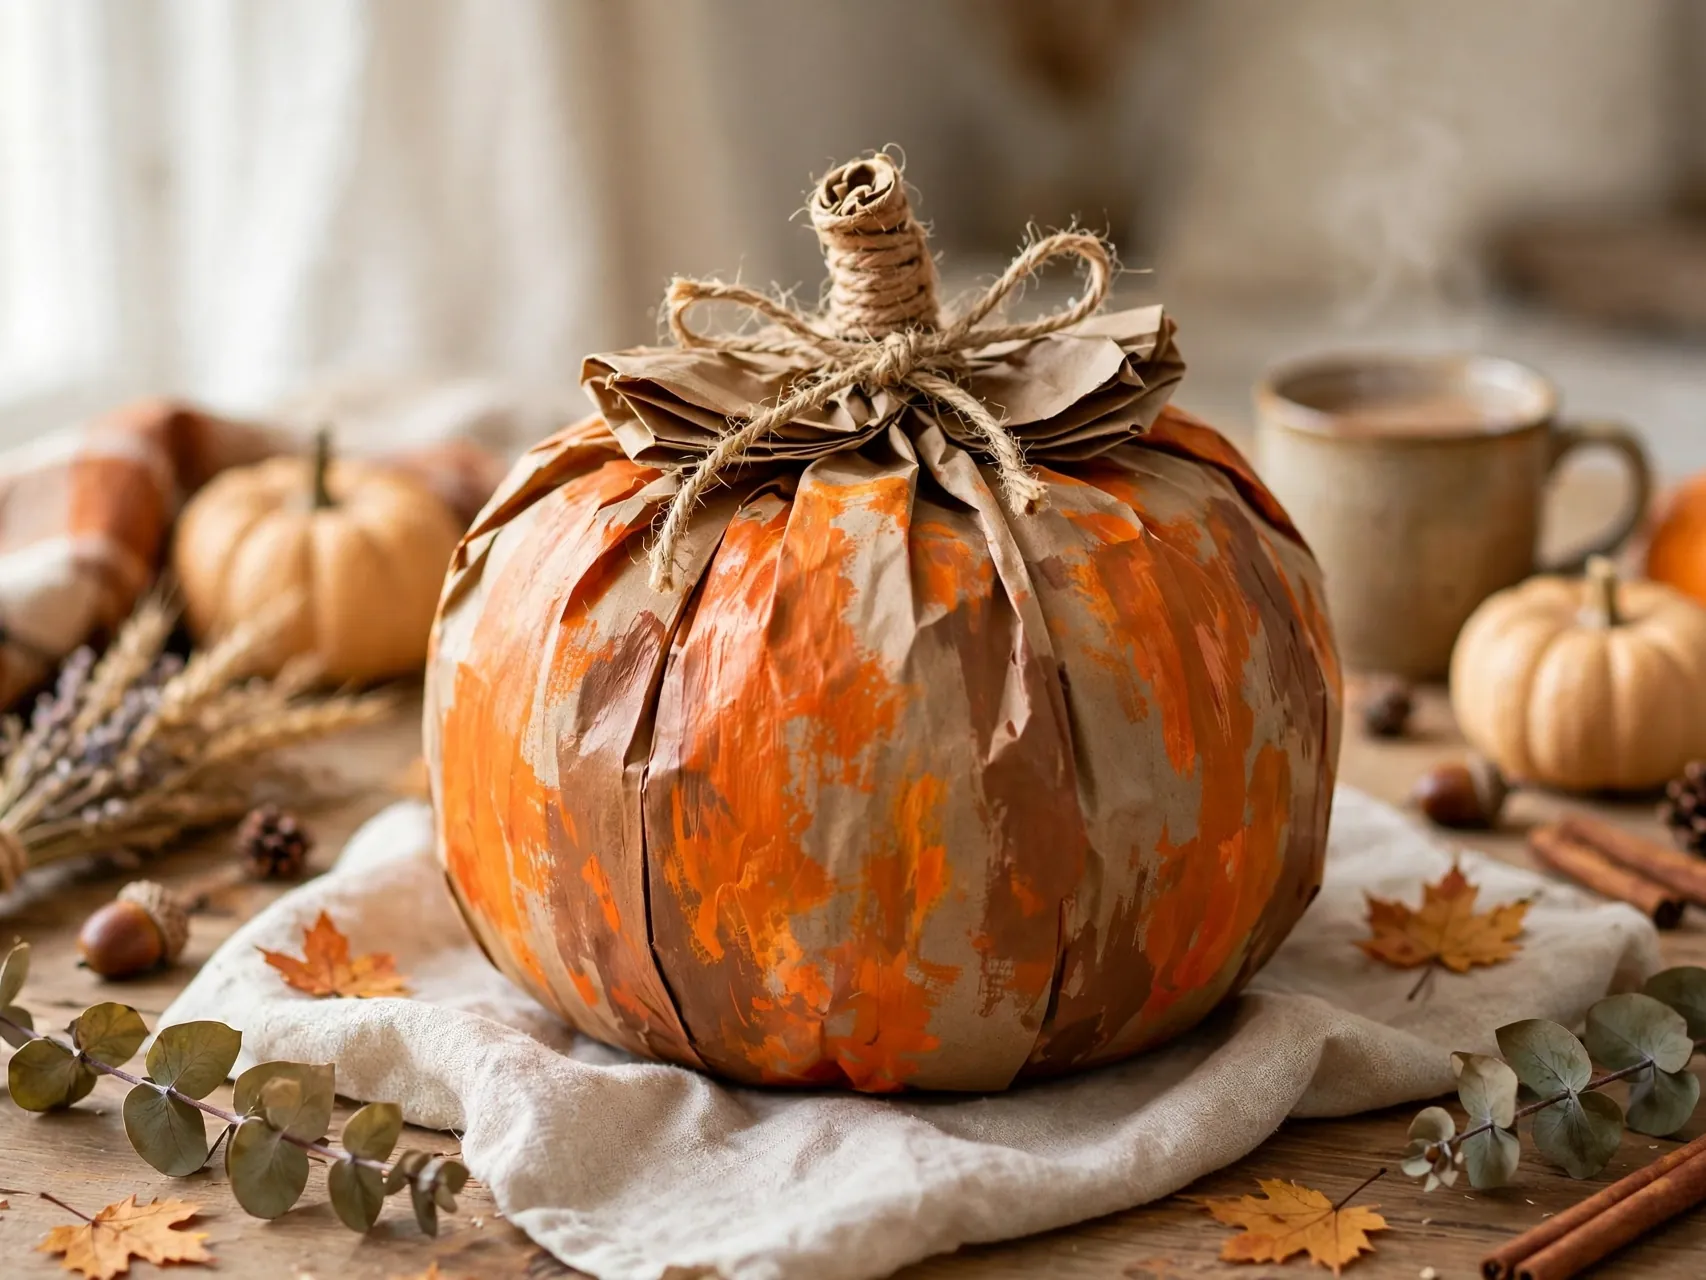
Paint a paper lunch bag orange on the lower part and green or brown at the top, let it dry, then fill it with crumpled newspaper and tie it closed at the border between colors. Twist the tied top into a stem shape and draw a face if you like.
Stuffed bag pumpkins stand up well and can be made quite large, which makes them fun for a front step display under a covered porch. A row of them, one made by each family member, is a cheerful welcome for Halloween visitors.
9. Flat Pumpkin With Scored Ridges for Toddlers

Cut a large orange oval or circle, add a green rectangle stem curled slightly, and draw or lightly score curved ridge lines from top to bottom. Toddlers can decorate the pumpkin with stickers, crayons, or a simple drawn face with help.
Flat pumpkins are the most age flexible easy pumpkin crafts for kids, because adults can pre-cut the shapes and little ones can focus on decorating. Glue finished pumpkins to a big sheet as a shared pumpkin patch poster for a playroom wall.
10. Handprint Stem Pumpkin Keepsake

Make any simple flat or tissue pumpkin, then trace a child hand on green paper, cut it out with adult help, and glue it at the top as a leafy stem. The handprint turns a seasonal craft into a keepsake with a personal touch.
Write the child name and year on the back before you display it. Grandparents especially love handprint versions, and comparing hand sizes across a few years of fall crafts becomes a sweet family tradition each October.
11. Jack-o-Lantern Strip Pumpkin With a Bold Face

Build a classic strip pumpkin, then glue black paper triangle eyes, a triangle nose, and a wide zigzag smile onto the front strips. Choose a friendly grin for young kids or a spookier face for older children and party decor.
Place the face pieces on wider front strips so they sit fairly flat, and use a glue stick for a cleaner hold on curved paper. Group three jack-o-lantern pumpkins with different expressions for a mantel scene that needs nothing else.
12. Pumpkin Patch of Kindness Display

Cut flat pumpkins in orange and yellow, add green stems, and write a kind act or a thankful note on each pumpkin in marker. Glue the pumpkins onto a large board or paper as a patch, with vines and leaves drawn between them.
This version works beautifully in classrooms from fall into Thanksgiving, because the display keeps growing as children add kind ideas. It also gives reluctant crafters a writing first entry point, which often unlocks their interest in decorating too.
13. Mini Pumpkin Garland on Twine

Make a set of small flat or rosette pumpkins, punch a hole near the top of each with adult help, and thread them onto twine with green paper leaves between them. Space the pumpkins evenly so the garland hangs in a neat, gentle swag.
Mini garlands suit classroom doors, kitchen windows, and the front of a party table. Keep garlands hung out of reach of toddlers, store them looped around cardboard, and they will be ready to hang again next fall in minutes.
14. Pumpkin Place Cards for a Fall Table

Fold a small orange card into a tent, draw or glue a simple pumpkin on the front, and write each guest name under the stem. A tiny strip pumpkin glued to a card also works if you want a dimensional place marker.
Place cards are a useful job for kids who want to help with a holiday table, and guests often take them home. Keep the design simple and the names large and clear, because a place card has to work before it charms.
15. White and Gold Paper Pumpkins for Elegant Fall Decor

Not every pumpkin needs to be orange. Build strip or rosette pumpkins in white, cream, and pale gold paper, with brown or gold stems, for a calm, elegant fall look that suits grown up living rooms and Thanksgiving tables.
Metallic paper can be slippery with glue sticks, so use small dots of craft glue and hold joins a little longer, with adult supervision. A trio of white pumpkins at different heights makes a centerpiece that feels seasonal without shouting Halloween.
16. Patterned Scrapbook Paper Pumpkins

Use plaid, polka dot, leaf print, or subtle stripe scrapbook paper for strip or flat pumpkins, and the pattern does most of the decorating work. Keep stems and faces simple so the pattern stays the star of the design.
Patterned pumpkins mix well with solid orange ones in a display, adding variety without new supplies. This is also a smart way to use leftover paper from other fall projects, because a pumpkin shape shows off a pretty pattern at any size.
17. Pumpkin With a Curled Paper Vine and Leaves
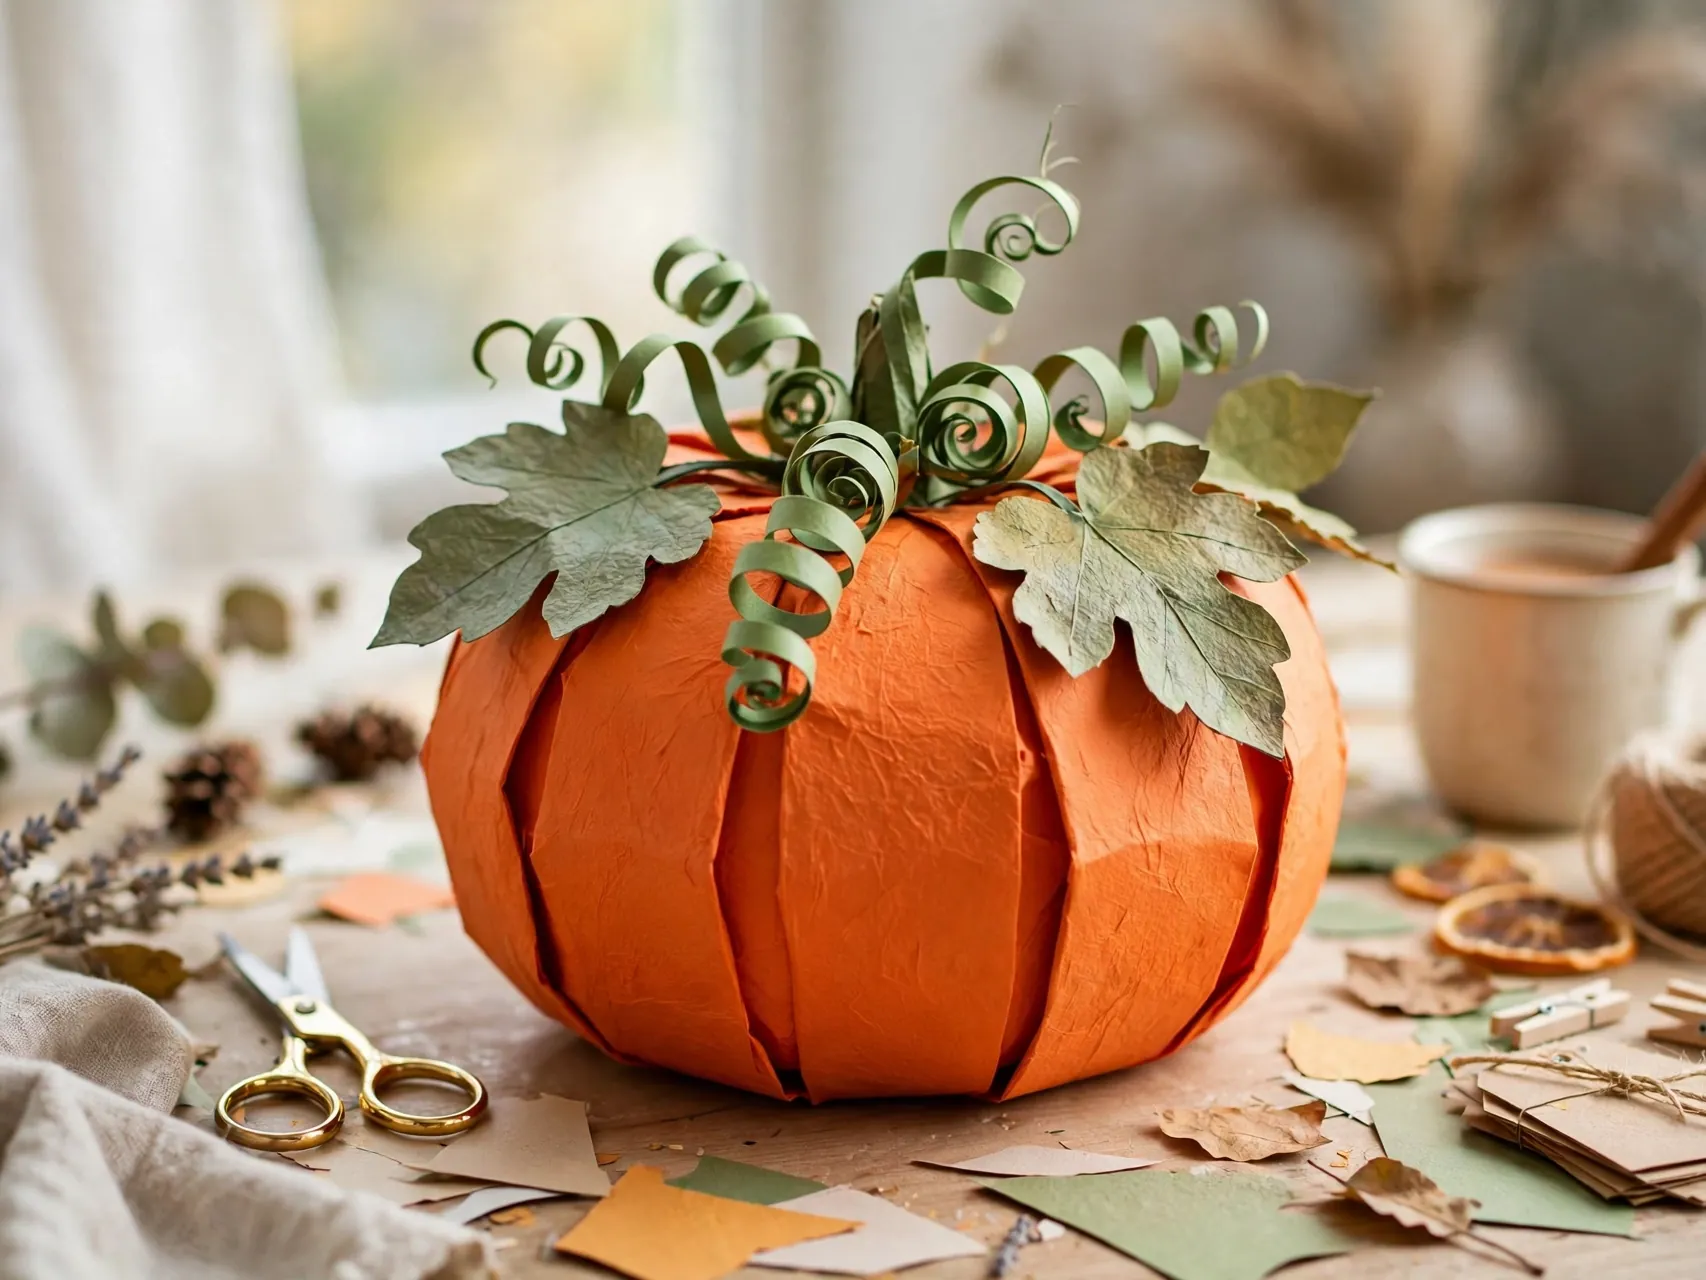
Whatever pumpkin style you choose, a curled vine upgrades it. Wrap a thin green paper strip tightly around a pencil, slide it off, and let it spring into a spiral, then glue it beside the stem with one or two green leaves.
Leaves can be simple ovals with a center fold for dimension. Practicing the curl on scrap paper first helps kids get the tension right, and a pumpkin with a good vine and leaves always looks more finished in photos.
18. Counting Pumpkin Craft With Numbered Sections
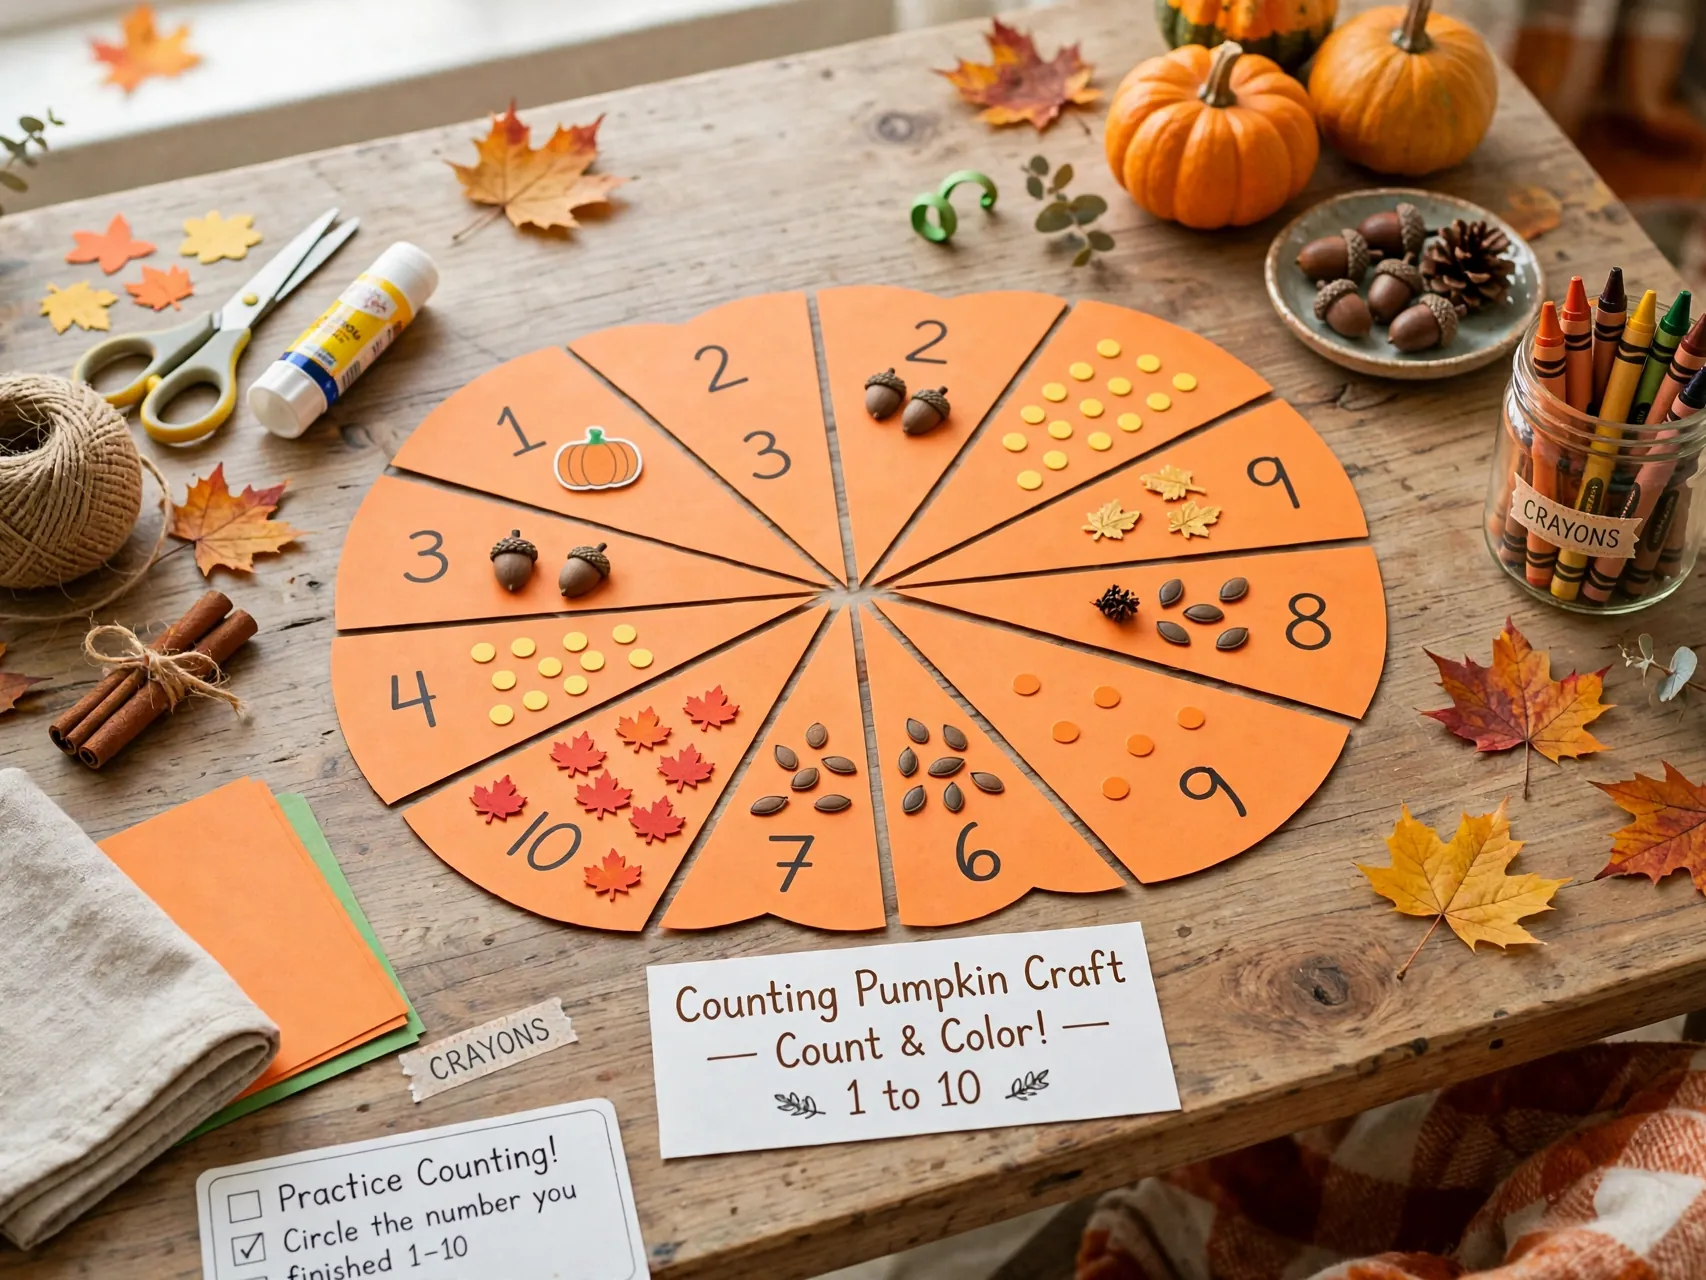
For a learning twist, draw a pumpkin divided into sections and number each section, then let children add that many dots, stickers, or seeds drawn in each part. The finished pumpkin is both decor and a record of counting practice.
Teachers can adjust the numbers to the class level, from simple counting for preschool to addition prompts for older children written on the back. Display the pumpkins together and the patch quietly shows a range of early math skills.
19. Paper Pumpkin Luminary With a Battery Light

Build a strip pumpkin with wider gaps between strips, or cut a face into a paper bag pumpkin, and place a battery tea light on a stable surface inside or behind it. The light shining through the gaps gives a warm, jack-o-lantern style glow.
Use battery lights only with paper crafts, never real candles, and switch them off when you leave the room. Luminary pumpkins look best in the early evening on a porch step under cover or along a party table indoors.
20. Pumpkin Gratitude Chain for Thanksgiving

Cut orange strips and write something you are thankful for on each strip before linking or gluing the strips into a pumpkin or a chain of small pumpkins. By Thanksgiving, the display carries a few weeks of family gratitude in one place.
Start the chain in early November and add a strip a day, which spreads the crafting out and keeps the project meaningful. Photograph the finished chain before you store or recycle it, because the words are the part everyone will want to reread.
21. Giant Paper Pumpkin for a Classroom Wall

Go big with a pumpkin drawn across several sheets of orange paper taped together, cut out by an adult, and finished with a large stem, leaves, and a friendly face. Each child can add a drawn detail, a leaf, or their name along a vine.
A giant pumpkin anchors a fall bulletin board and makes a great backdrop for class photos. Keep it indoors and flat, add the date in a corner, and save it rolled loosely if you have storage, because remaking the scale is the hardest part.
FAQ
What paper works best for paper strip pumpkins?
Cardstock and heavier construction paper hold the pumpkin curve best. Thin paper makes floppy strips that collapse, especially on larger pumpkins. Cut all strips the same width and length for an even shape, and let an adult handle any paper fasteners for younger children.
How do I turn a fall paper pumpkin into a Halloween one?
Add a jack-o-lantern face. Black paper triangles for eyes and nose and a zigzag smile, glued or drawn on the front, are enough. You can also set a battery tea light behind a strip pumpkin for a glow. Remove or cover the face after Halloween and the pumpkin works for Thanksgiving.
Are paper pumpkin crafts safe for toddlers?
Yes, with pre-cut shapes, tearing and gluing jobs, and close supervision. Avoid paper fasteners, small beads, and tiny cut pieces for children under 3, because the CPSC warns small parts can be a choking hazard. Use non-toxic glue and washable paint, and let adults do the cutting.
How long do paper pumpkins last?
Indoor paper pumpkins in cardstock often last a full season and can be stored for another year if kept dry and uncrushed. Tissue and bag pumpkins are more fragile and usually last one season. Store sturdy pumpkins loosely in a box with tissue, not stacked under heavy items.
Can I use paper pumpkins outdoors?
Paper pumpkins do best indoors or on a covered porch for short periods. Rain and dew soften paper and fade colors quickly. For an outdoor party, hang or set pumpkins under cover, bring them in at night, and keep them away from candles, heaters, and hot lights at all times.
Key Takeaways
- Strips are the foundation: Equal orange strips joined at the ends create the classic pumpkin shape in minutes, at any size.
- Texture changes the mood: Tissue, curls, rosettes, and patterned paper turn the same pumpkin idea into soft, elegant, or playful decor.
- One face flips the season: A simple black paper jack-o-lantern face moves a fall pumpkin to Halloween and back again.
- Safety and age fit matter: Adult help for fasteners and cutting, safety scissors, non-toxic supplies, and no small parts for under-3s.
- Battery glow only: Paper pumpkins and real flames do not mix, so use battery tea lights and keep paper away from heat.
- Making a pumpkin patch of your own? Save this guide to Pinterest and pin the paper pumpkin you will craft first this fall.