25 RV Kitchen Organization Ideas for Smooth Road Trips
Introduction
An RV kitchen is a home kitchen shrunk to a few feet, then asked to survive potholes, sharp turns, and hungry travelers. Good RV kitchen organization is what makes that possible. When every pan has a home and every cabinet opens without an avalanche, cooking on the road feels calm instead of cramped.
Start with less. The most organized RV kitchens hold a small, hardworking set of tools that nest, stack, or do two jobs, stored where they are used and secured before the wheels move. Cabinets, drawers, walls, doors, and even the inside of the oven all become storage once you look at the space with fresh eyes.
Work through this list zone by zone: counters first, then drawers, cabinets, pantry, and fridge. Pick the ideas that fit your rig and test them on one short trip.
1. Start With a Ruthless Edit Before You Organize Anything

Pull everything out of the kitchen and keep only what you used on your last two trips. Duplicate spatulas, single-use gadgets, and the big stockpot that never leaves home are taking space your daily tools need. One good skillet, one pot with a lid, and one baking pan cover most camp cooking.
Weigh matters too. Heavy stoneware and extra glass add up fast in a small rig. Choose lighter pieces you truly like, donate the rest, and you will feel the difference in every cabinet you open from here on.
2. Cover the Sink and Stove to Create Instant Counter Space
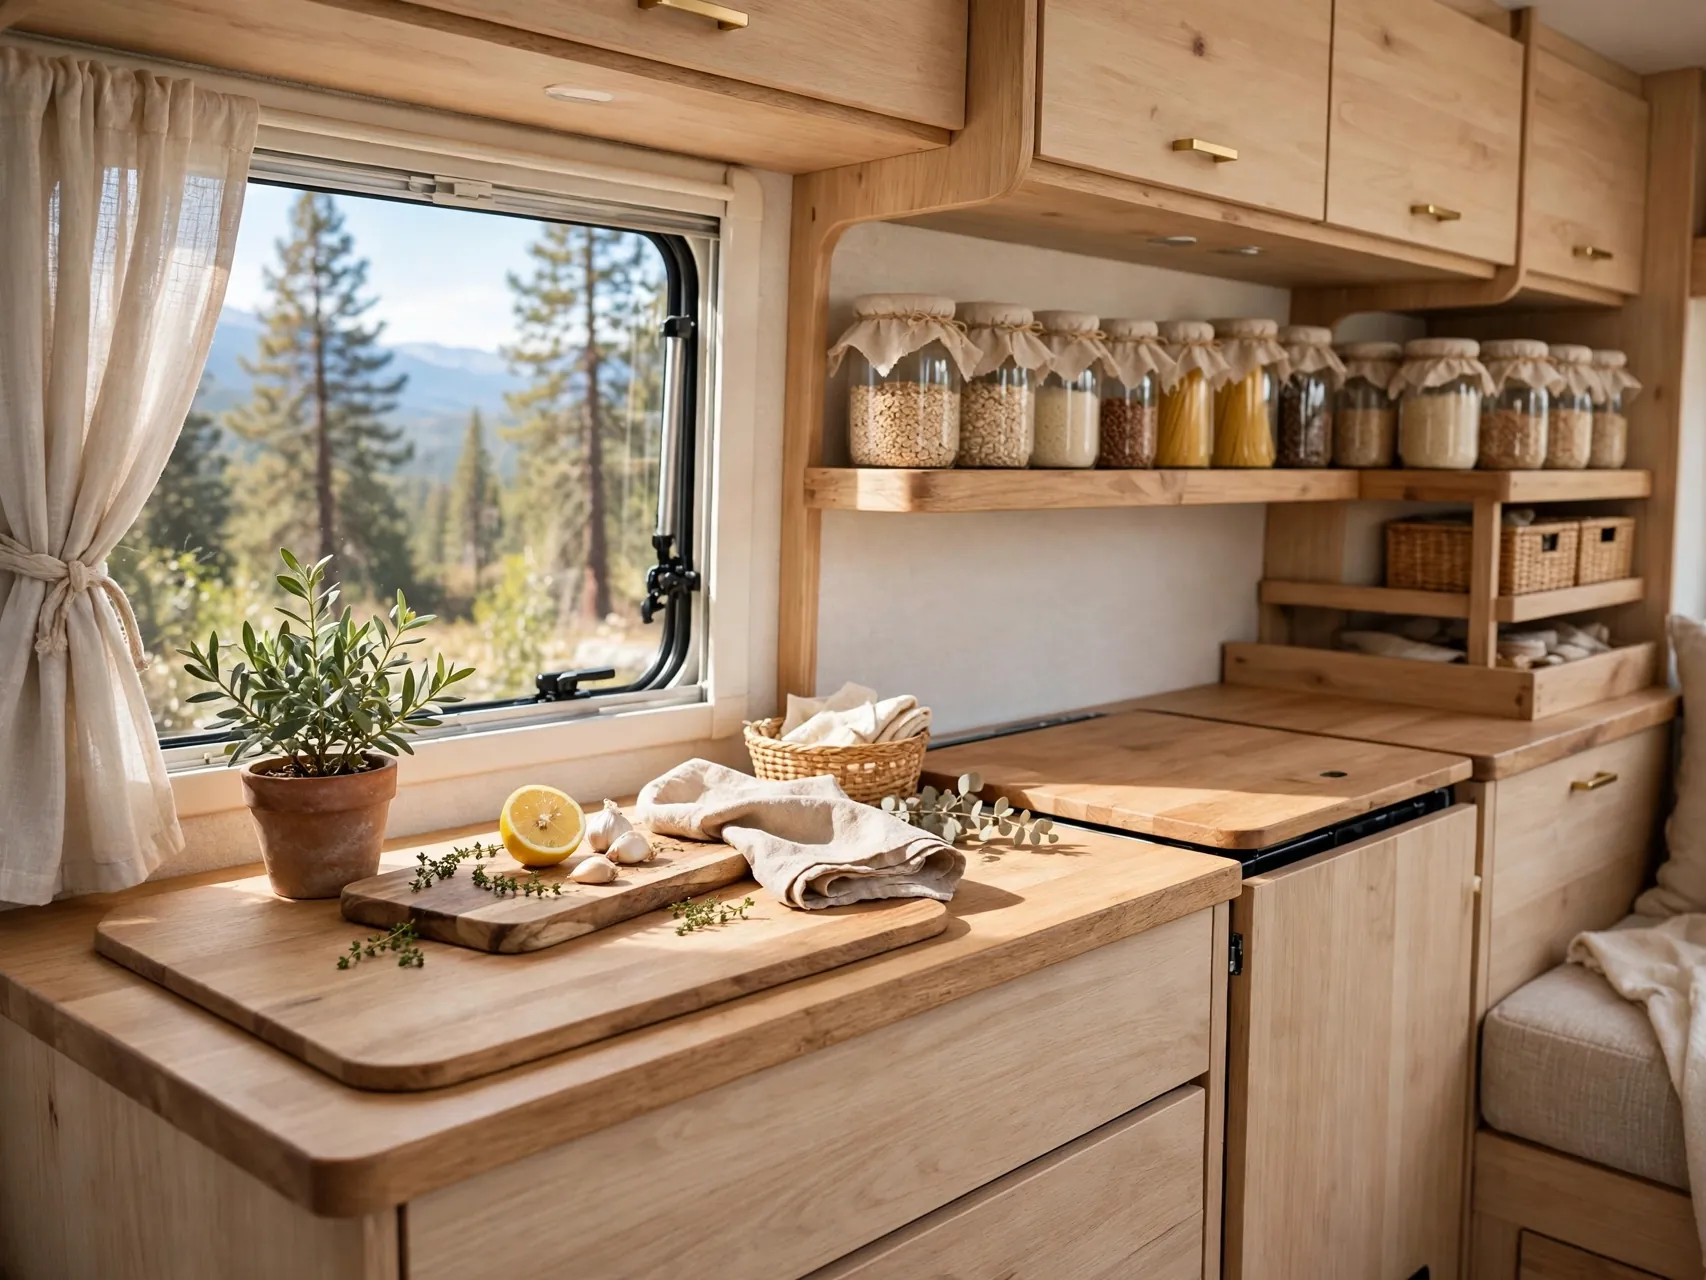
Most RV counters give you about enough room for a cutting board and a coffee mug. A sink cover and a stovetop cover change that in seconds, turning both into flat prep space for chopping, mixing, and setting down hot pans. Many rigs come with matching covers, and simple wooden boards cut to size work just as well.
Put the covers back the moment you finish prepping, and make it a travel rule that nothing rides on them. Clear counters are the fastest way to make a tiny kitchen feel twice its size.
3. Divide Shallow Drawers So Nothing Slides and Clangs
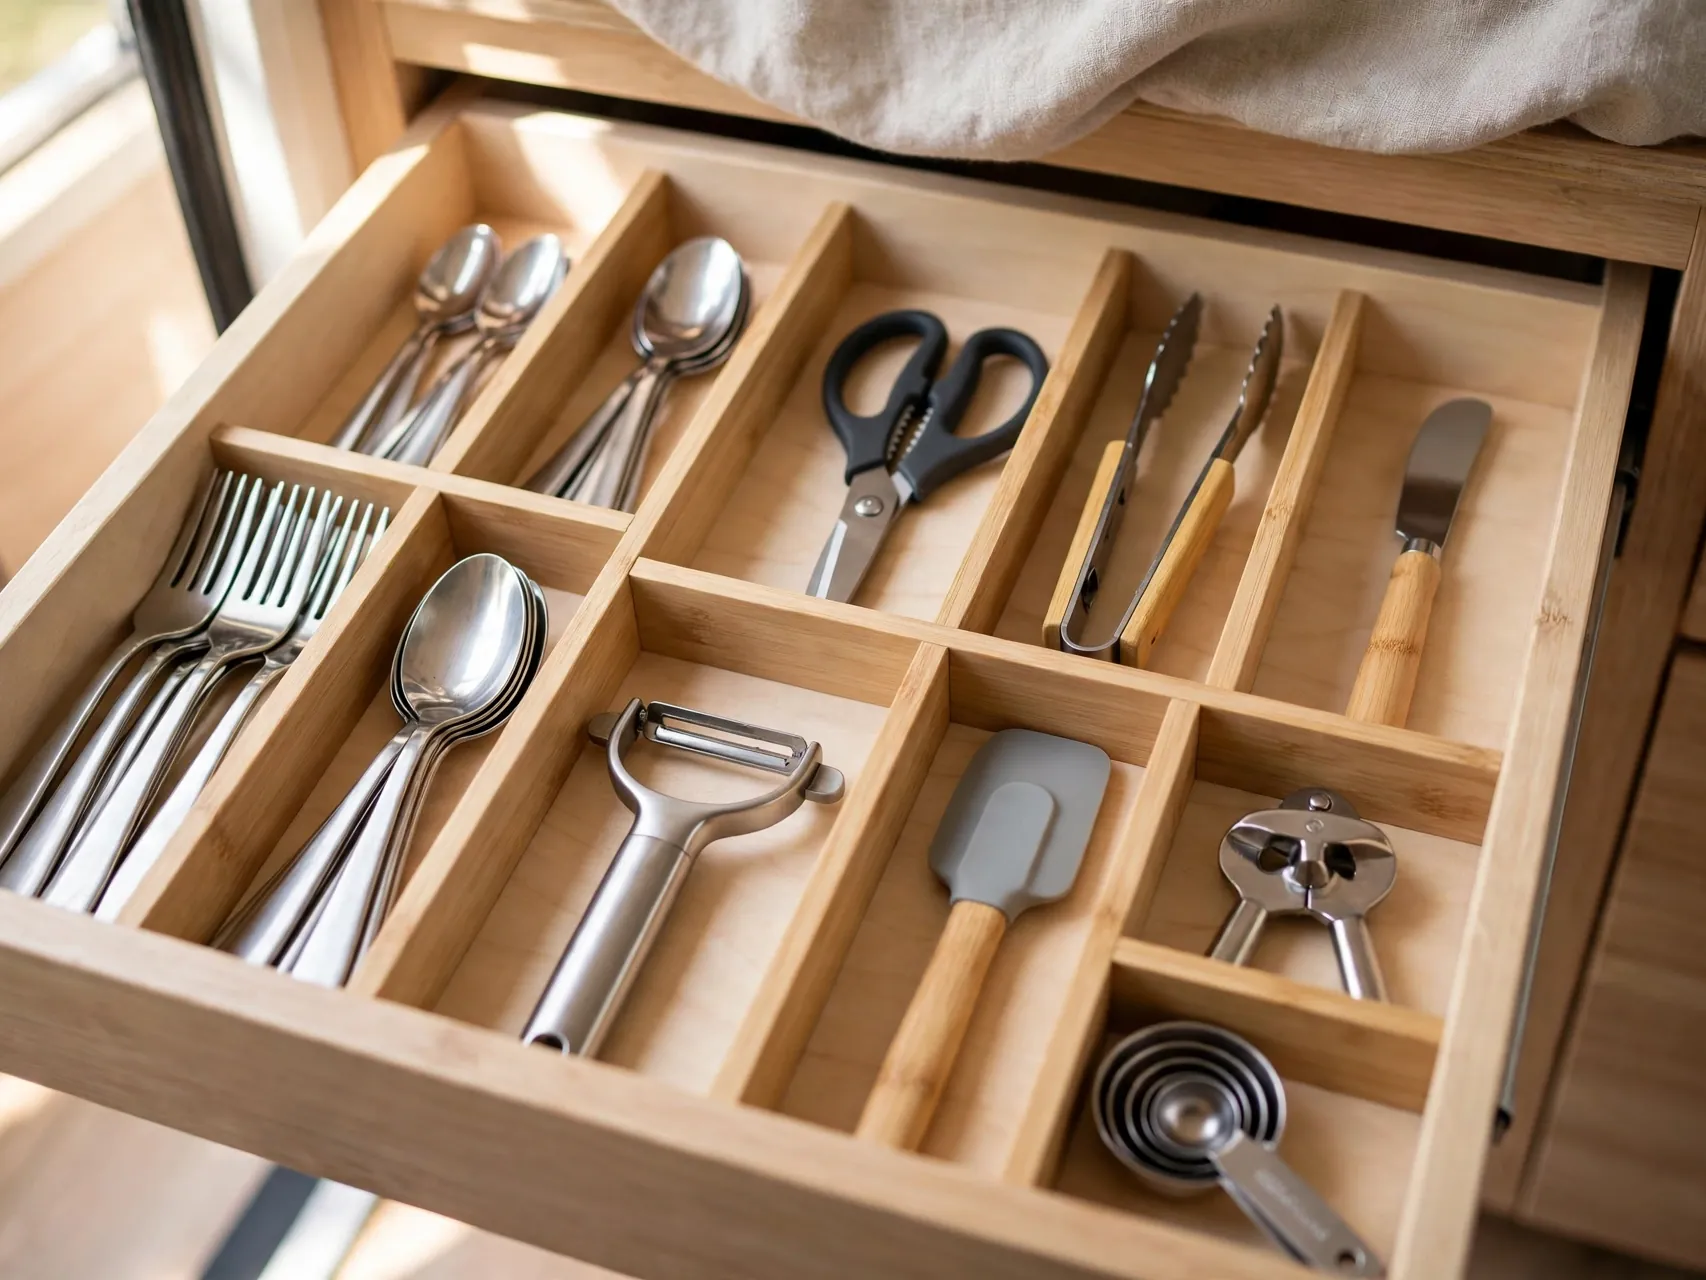
RV drawers are shallow, and undivided drawers become junk drawers by the second day of driving. An expandable utensil tray, a few small dividers, or even cut-to-fit bamboo organizers give every fork, peeler, and lighter its own lane. Daily tools go in the top drawer, specialty tools below.
Line the drawer bottoms with non-slip liner first. It quiets the rattle and keeps the whole system in place when the road gets rough.
4. Store Cutting Boards and Baking Sheets Upright With Tension Rods

Flat items stored flat become a digging project. Stand cutting boards, baking sheets, cooling racks, and pan lids upright instead, held in place by a tension rod or a simple vertical file divider inside a deep cabinet. You can pull out exactly the board you need without unstacking everything.
This trick works especially well in the awkward cabinet beside the oven or under the sink. Measure the space first, leave a finger width of wiggle room, and your flatware file will stay neat trip after trip.
5. Switch to Nesting Pots, Bowls, and Measuring Tools

Nesting gear is the backbone of small RV kitchen organization. A set of pots that stack inside each other, mixing bowls that nest, and measuring cups on a ring can shrink a whole cabinet of cookware into one tidy stack. Removable pot handles free up even more room.
Before you buy a set, list the meals you actually cook on the road. Most campers need two pot sizes, one skillet, and one kettle. When the set matches your real menu, nothing in the stack is wasted space.
6. Choose Collapsible Gear for the Bulky Jobs
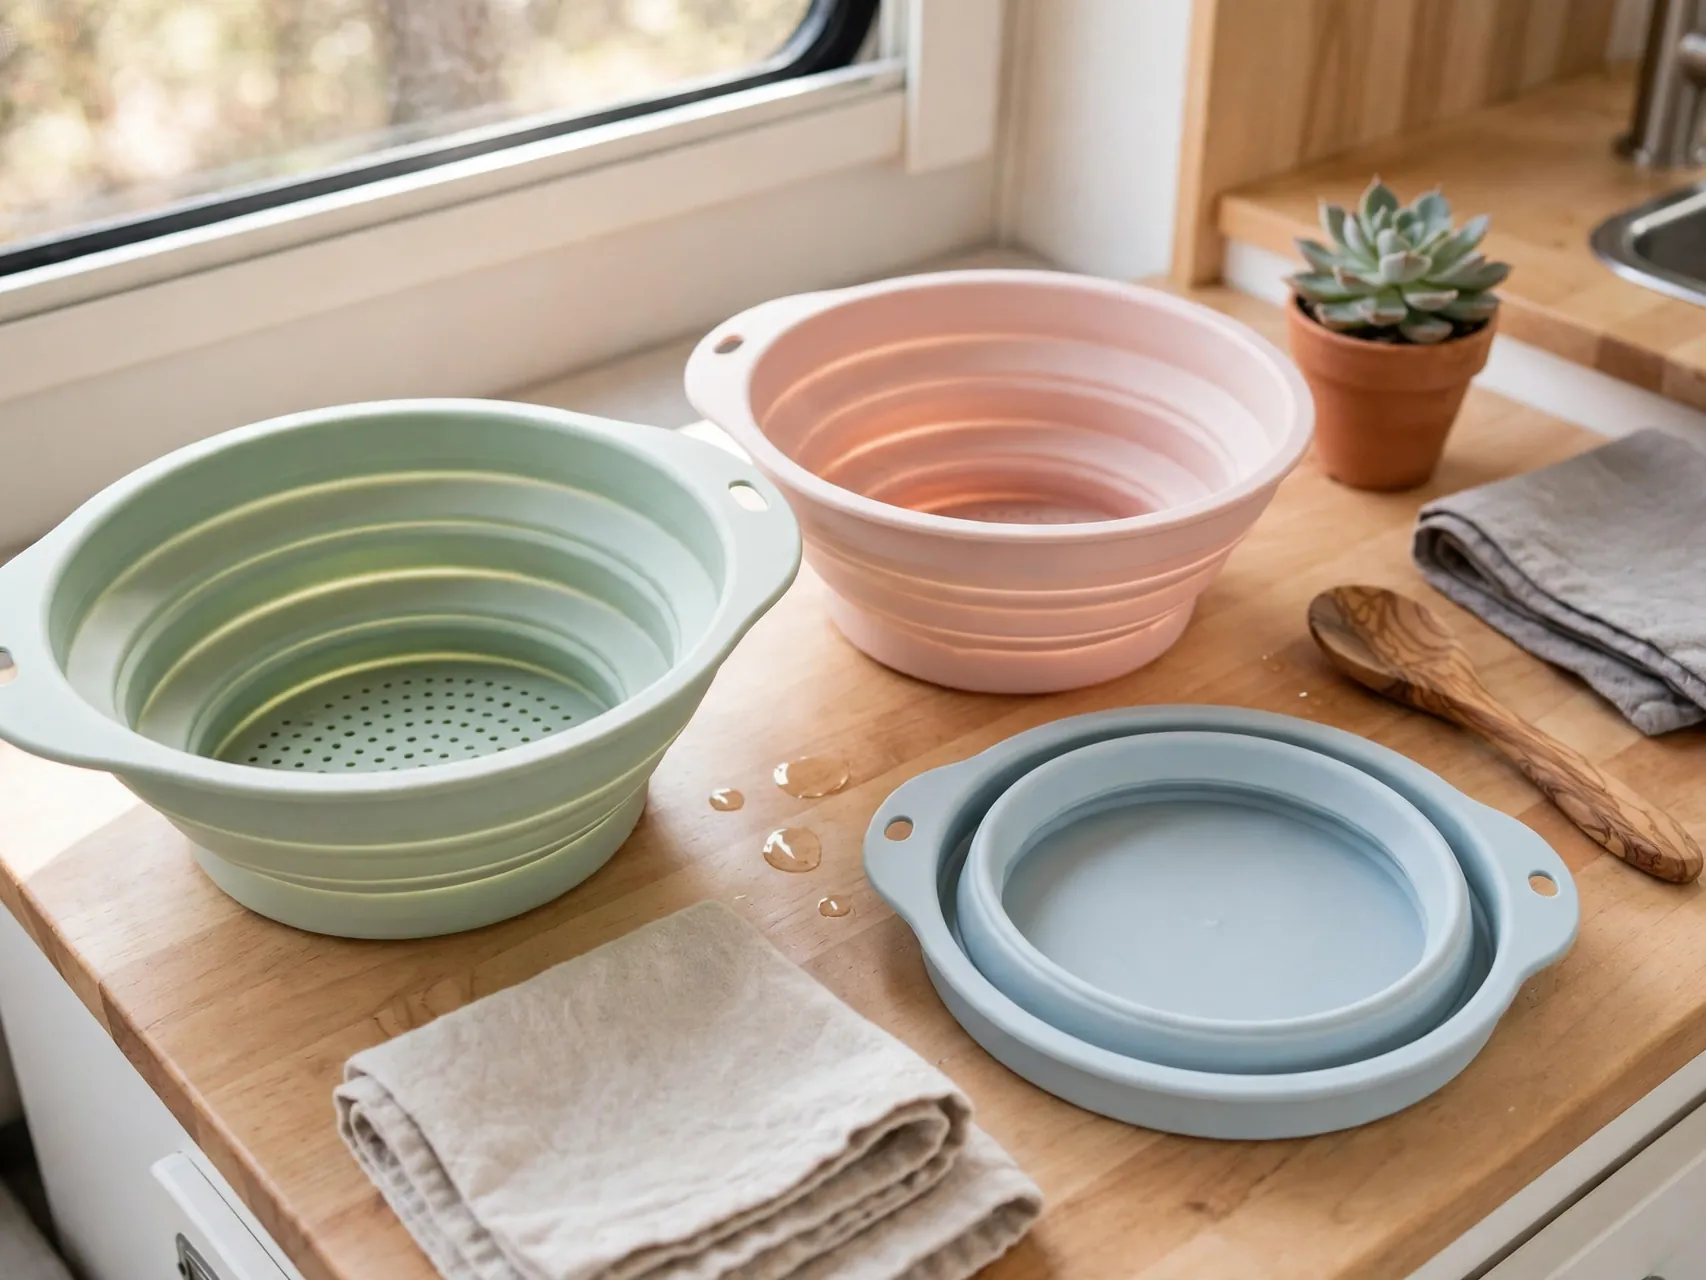
Colanders, dish tubs, measuring cups, and food storage containers are mostly air. Silicone collapsible versions flatten to a fraction of their size and tuck into narrow gaps that nothing else fits. A collapsible dish rack or tub also keeps sink work contained in a kitchen with no spare counter.
Start with the colander and the storage containers, since those two save the most space. Check that lids still seal well after a season of collapsing, and replace any piece that starts to split at the folds.
7. Move Knives and Spices Onto Magnetic Strips
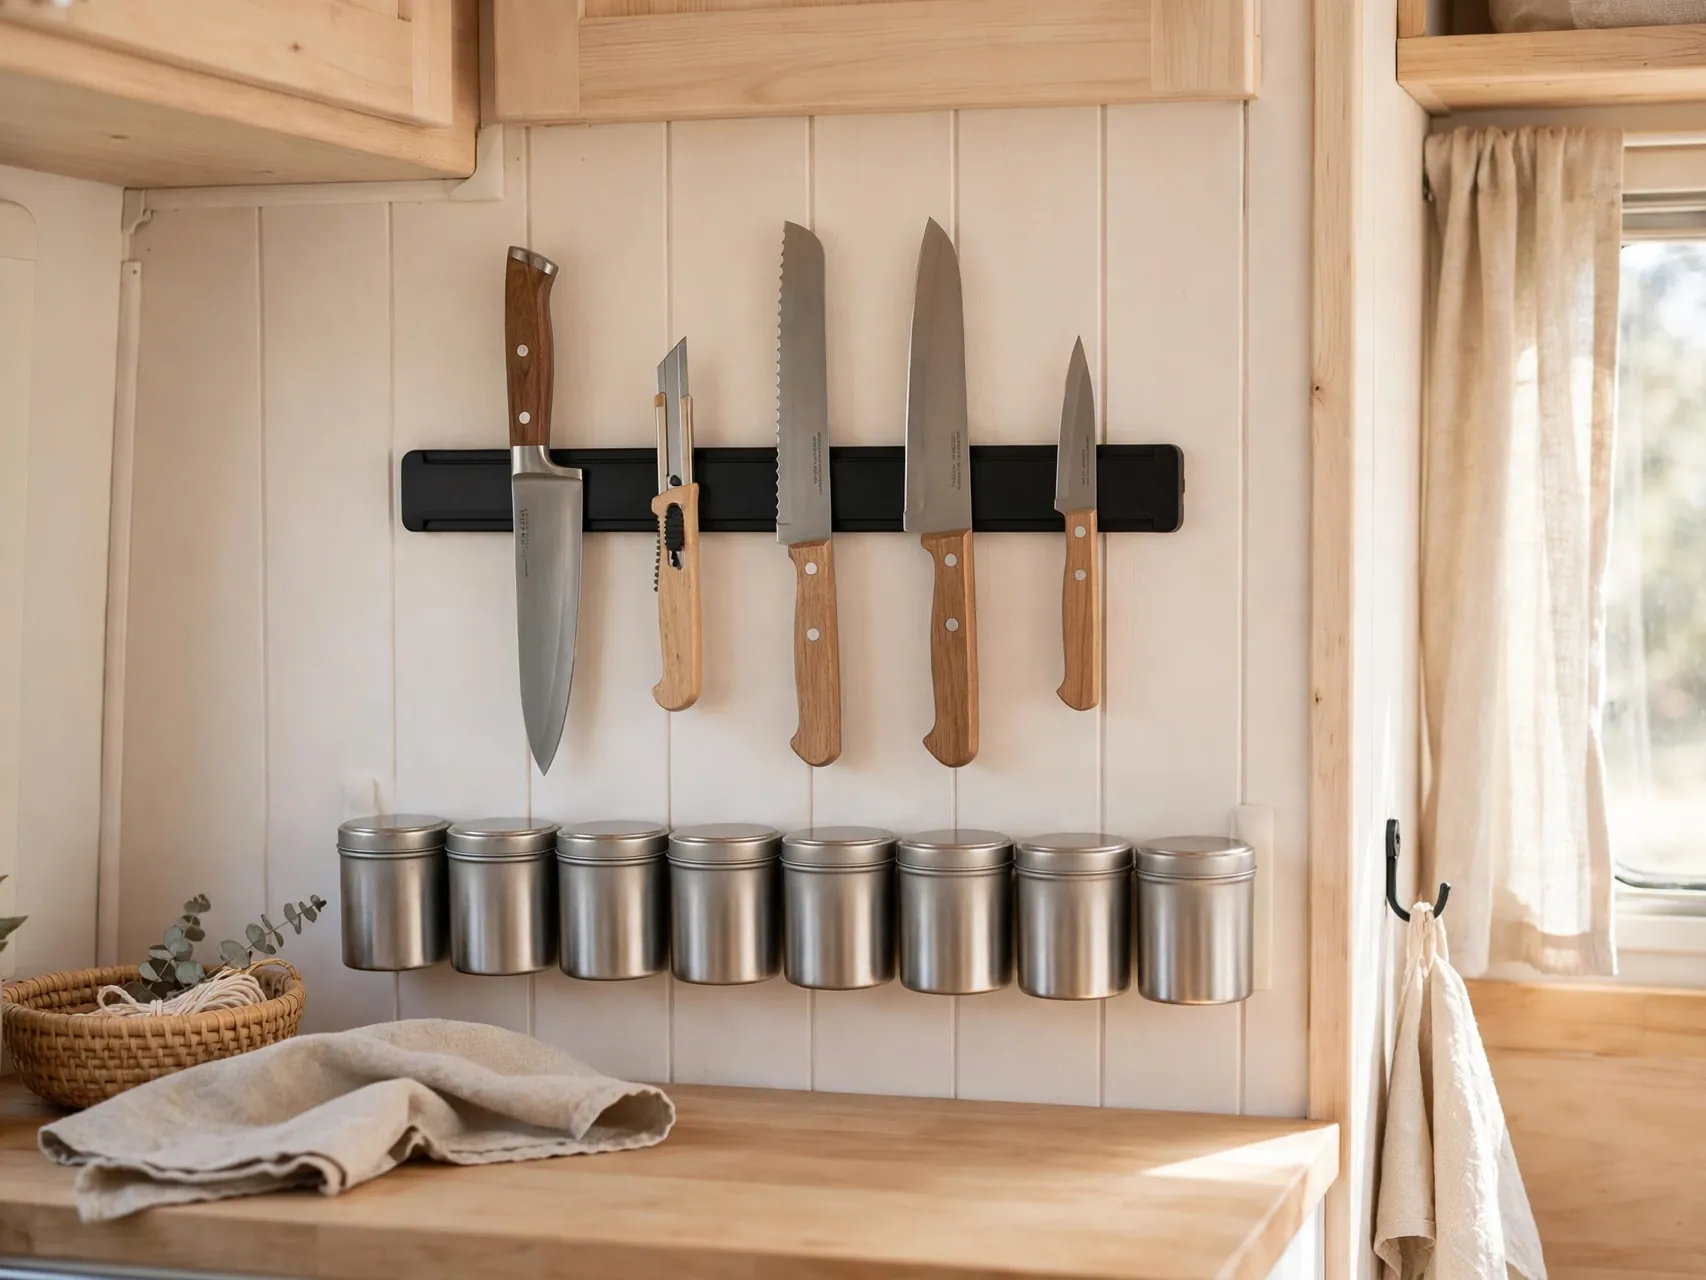
A magnetic strip on the wall or backsplash holds knives safely out of drawers and off the counter, with no bulky block in the way. Small magnetic tins do the same job for spices, sticking to the fridge side or a metal plate inside a cabinet door where they stay visible and easy to grab.
Mount strips with the screws and anchors the maker recommends, not adhesive alone, since knives are heavy and roads are bumpy. Keep handles all facing the same way and the strip becomes one of the most satisfying spots in the kitchen.
8. Add Under-Shelf Baskets to Double Cabinet Layers

Most RV cabinets waste the top half of every shelf. A wire under-shelf basket slides onto the shelf above and creates a second layer for plates, mugs, tea, or snack bars, using air space that was doing nothing. Suddenly a single deep shelf works like two shallow ones.
Use baskets for light, flat, or boxed items rather than heavy cans. Label the front edge of each basket if your household shares cooking duty, so everyone puts things back where they found them without a search.
9. Decant Pantry Staples Into Uniform, Labeled Containers
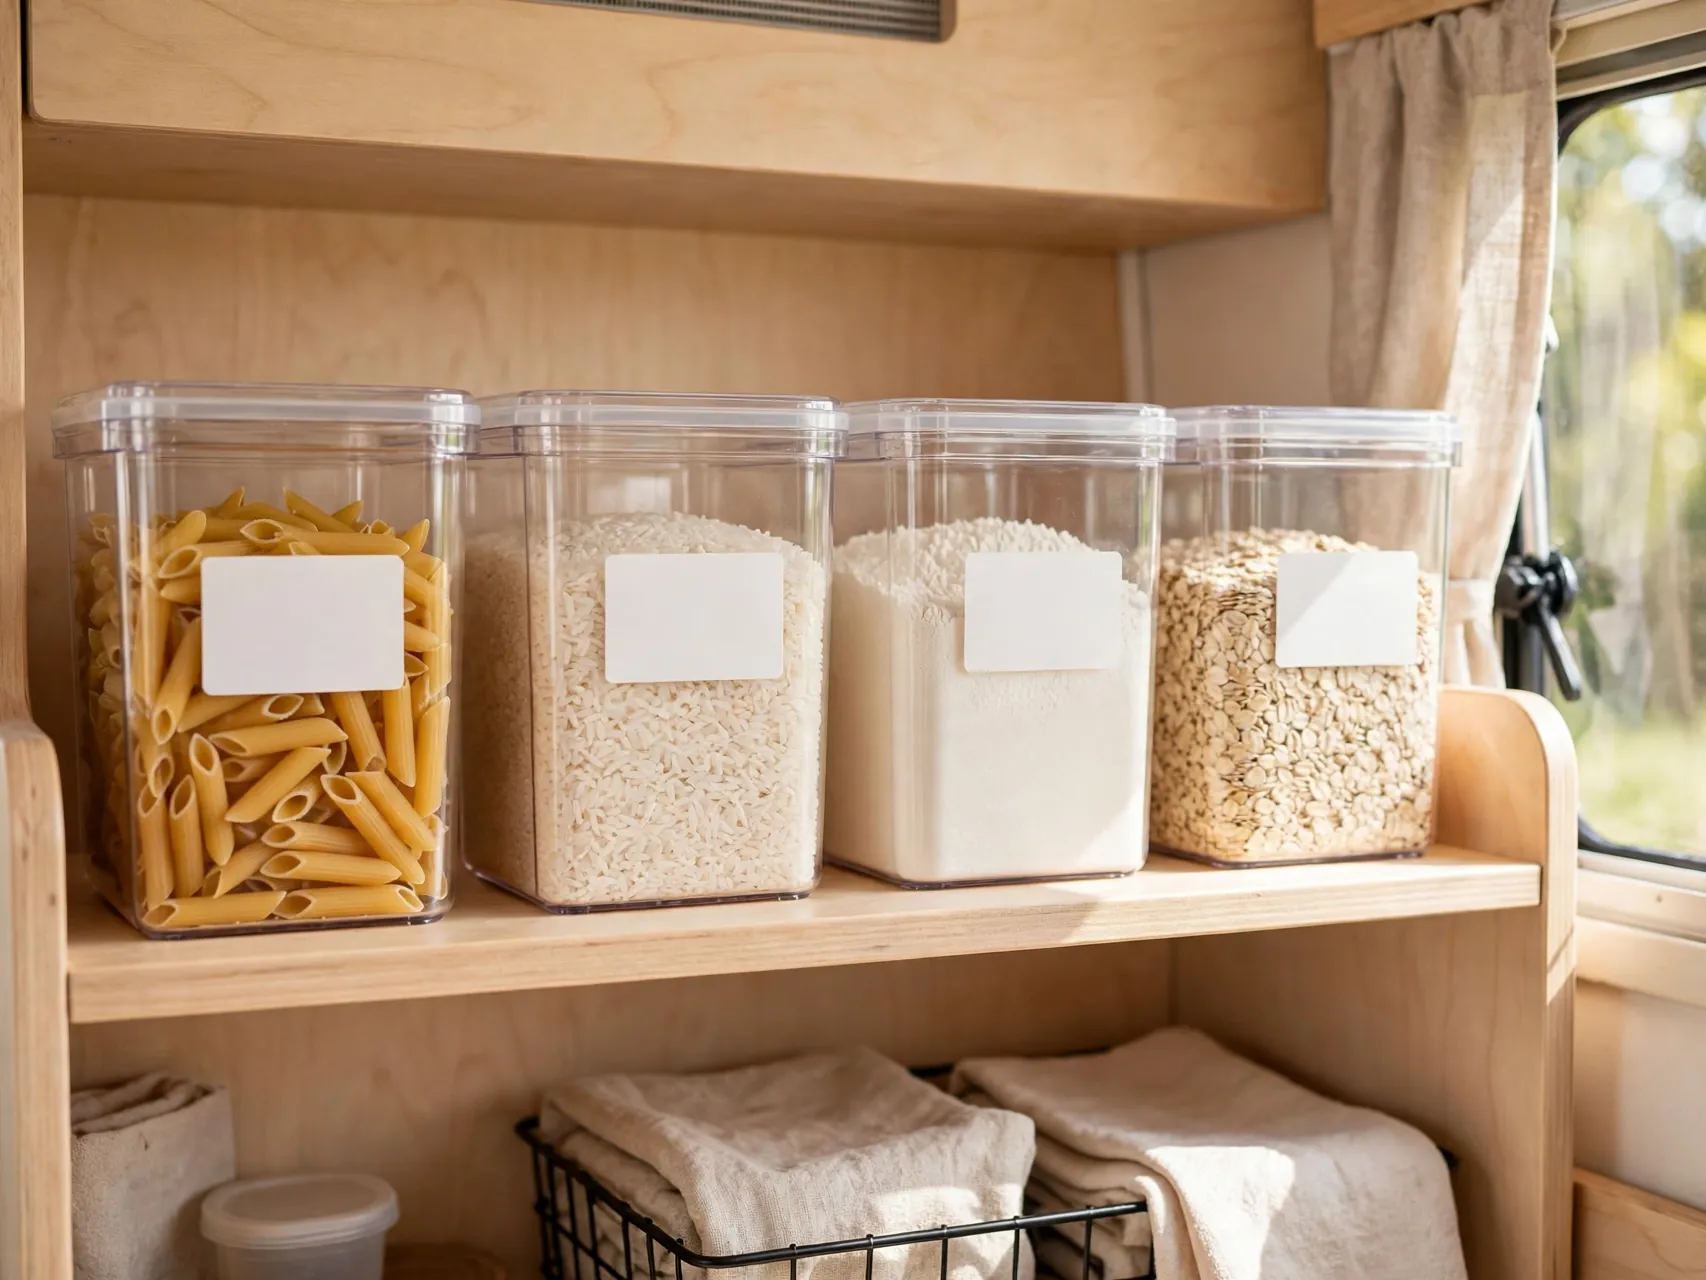
Half-empty bags of flour, rice, and pasta in different shapes are how pantries turn chaotic. Uniform clear containers with snug lids stack neatly, show you what is running low at a glance, and keep pantry moths and moisture out far better than folded bags and clips.
Label each container with the contents and the date you filled it, and keep a small scoop inside the ones you use daily. This is the heart of tidy RV pantry organization, and it travels well because square containers do not roll or tip.
10. Turn a Narrow Gap Into a Rolling Pantry

Many RVs have a slim, useless gap beside the fridge or between cabinets. A narrow rolling cart sized to that gap becomes a pull-out pantry for cans, bottles, and spice jars, all visible in one pull. Measure height, width, and depth carefully, since RV gaps are rarely standard sizes.
Add a small bungee or a strip of non-slip liner across each shelf so bottles stay put while driving. When you park, the cart rolls out for cooking and rolls away for a clean, uncluttered kitchen.
11. Use the Inside of Cabinet Doors for Slim Storage

Cabinet doors are free storage hiding in plain sight. Slim racks and stick-on holders on the inside of a door hold foil and wrap boxes, measuring spoons, spice packets, trash bags, or a small cutting board. Under-sink doors are perfect for a bag holder and a hook for dish gloves.
Check clearance before you mount anything: close the door slowly and confirm the rack clears the shelf edge and the items inside. Keep door storage light and flat, and this camper kitchen organization trick adds a surprising amount of room.
12. Hang a Rail or Hooks for Utensils You Use Daily
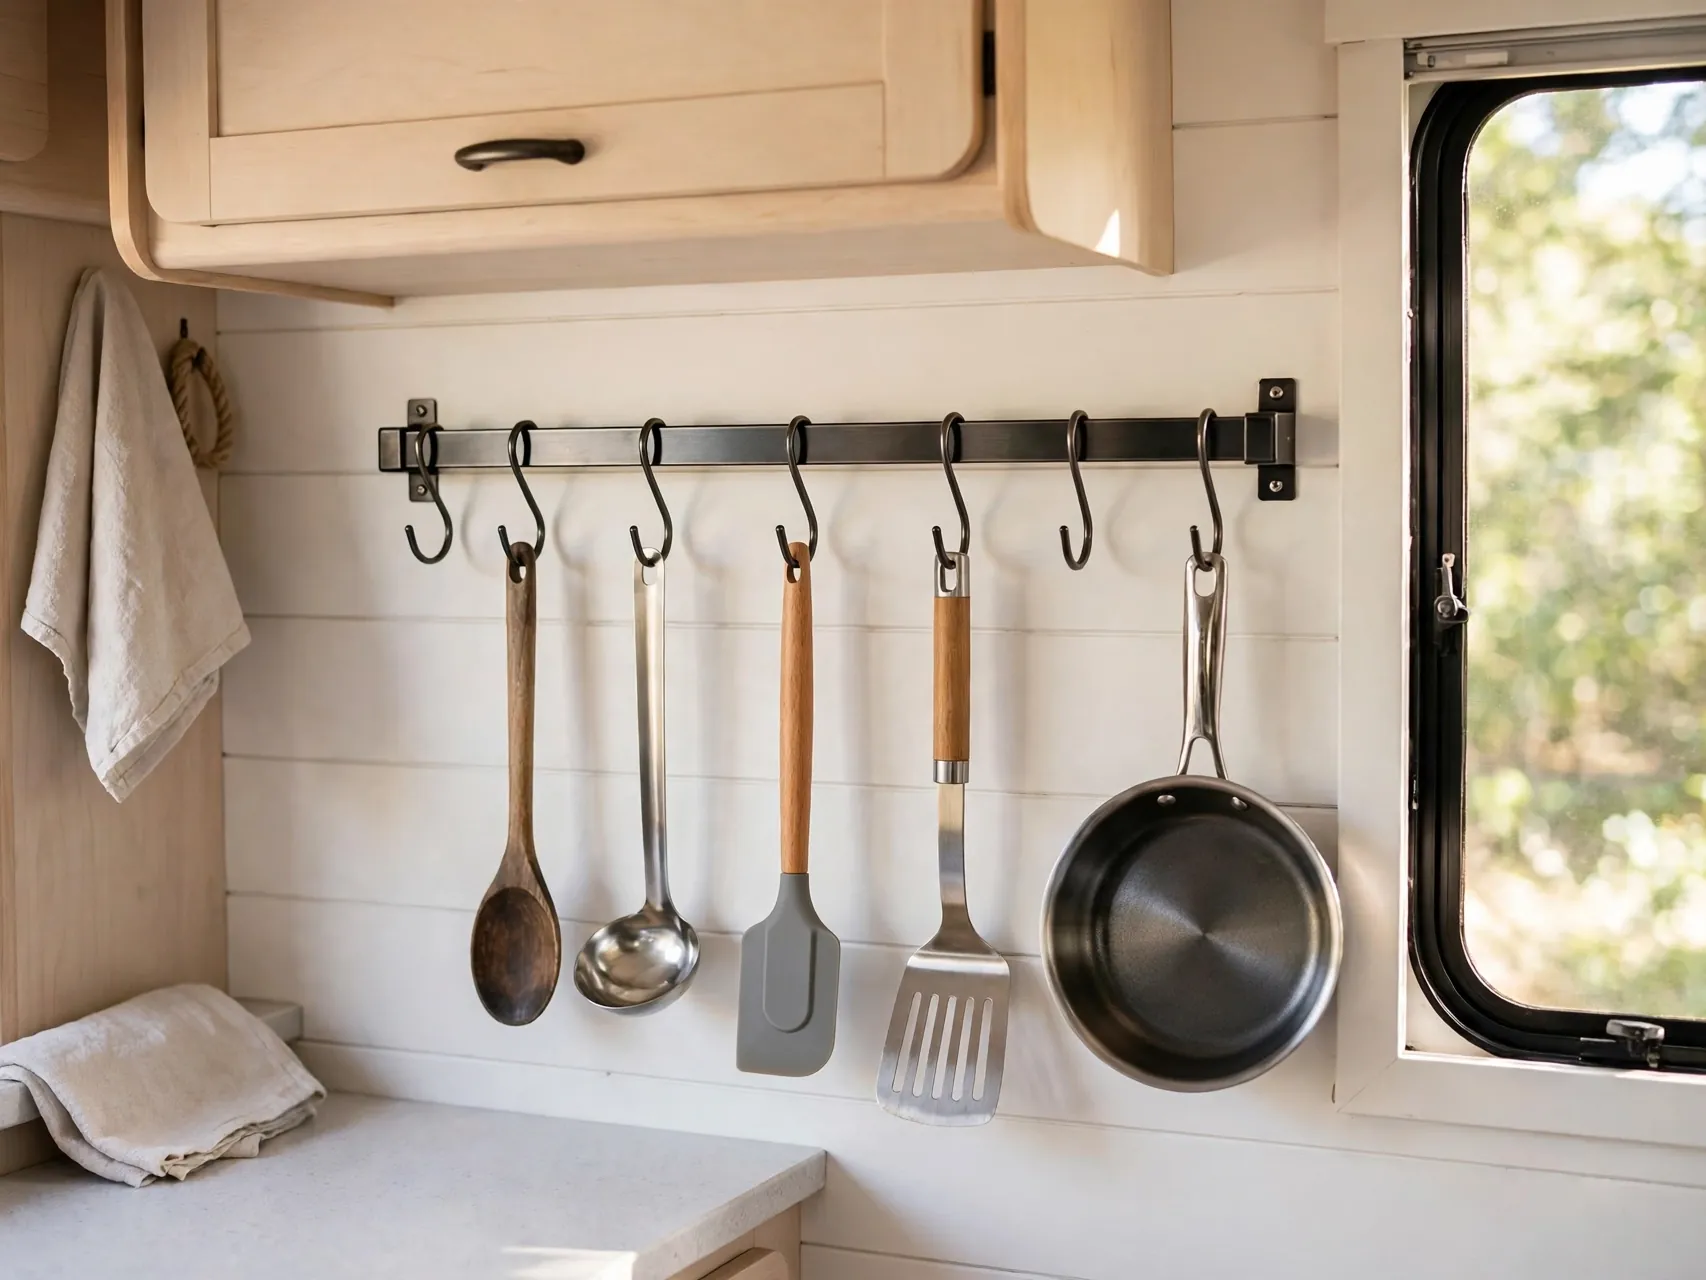
A short rail with S hooks, or a row of sturdy hooks under a cabinet, keeps your spatula, ladle, tongs, and scissors right where you cook. Hanging the daily tools frees a drawer for the items you use less, and it makes cleanup faster because everything returns to a visible hook.
Clean the mounting spot well and follow the hook maker's weight guidance, especially in a moving vehicle. For driving days, drop the utensils into a drawer or add a small elastic loop so nothing swings, taps, or falls en route.
13. Corral Cleaning Supplies Under the Sink With a Caddy
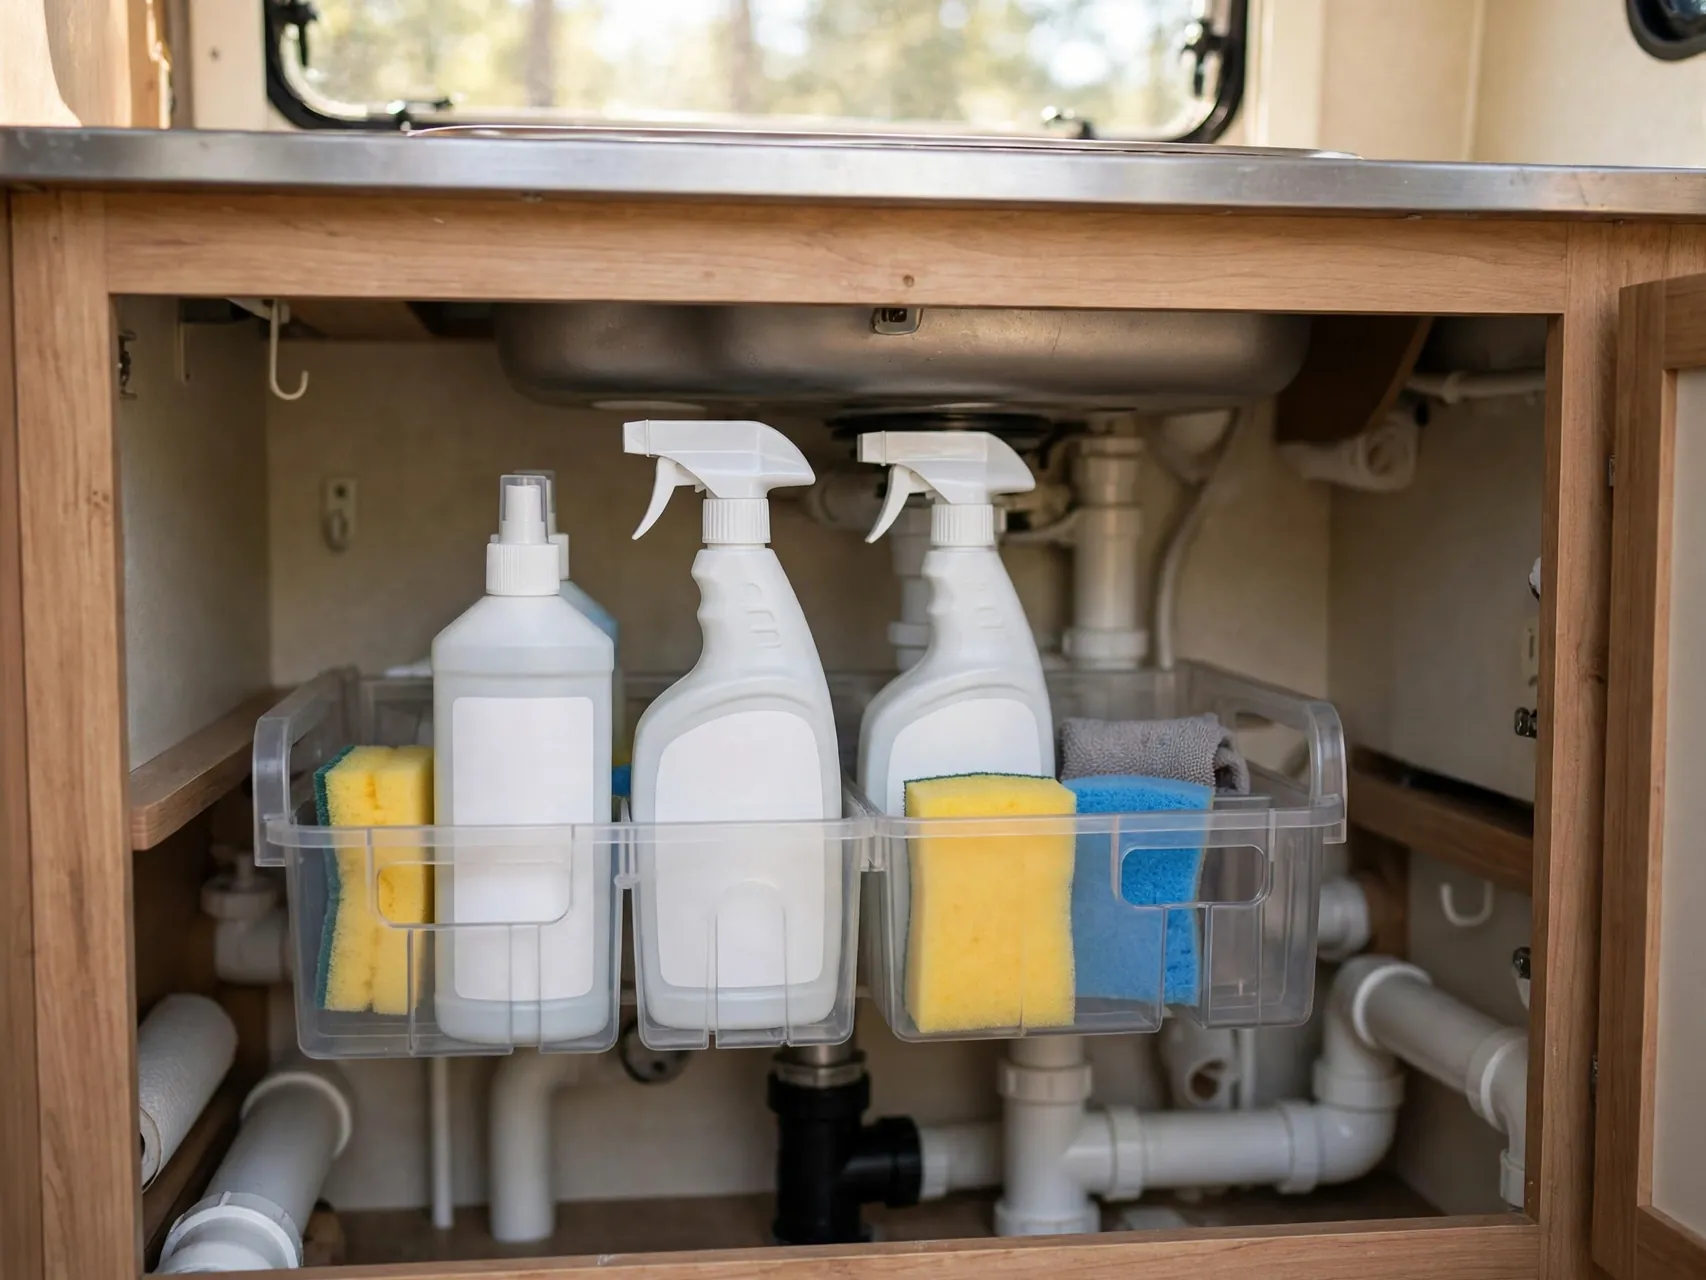
Under-sink space in an RV is small and oddly shaped by pipes, so loose bottles waste most of it. A handled caddy or a small tension rod hung with spray bottles by their triggers keeps dish soap, sponge, scrub brush, and cleaner together and easy to lift out.
Add a small tray under the caddy to catch drips before they reach the cabinet floor. Check under the sink at every fuel stop on long trips: a quick glance catches slow leaks early, before they become a bigger repair.
14. Keep the Fridge Steady With Bars, Bins, and a Thermometer
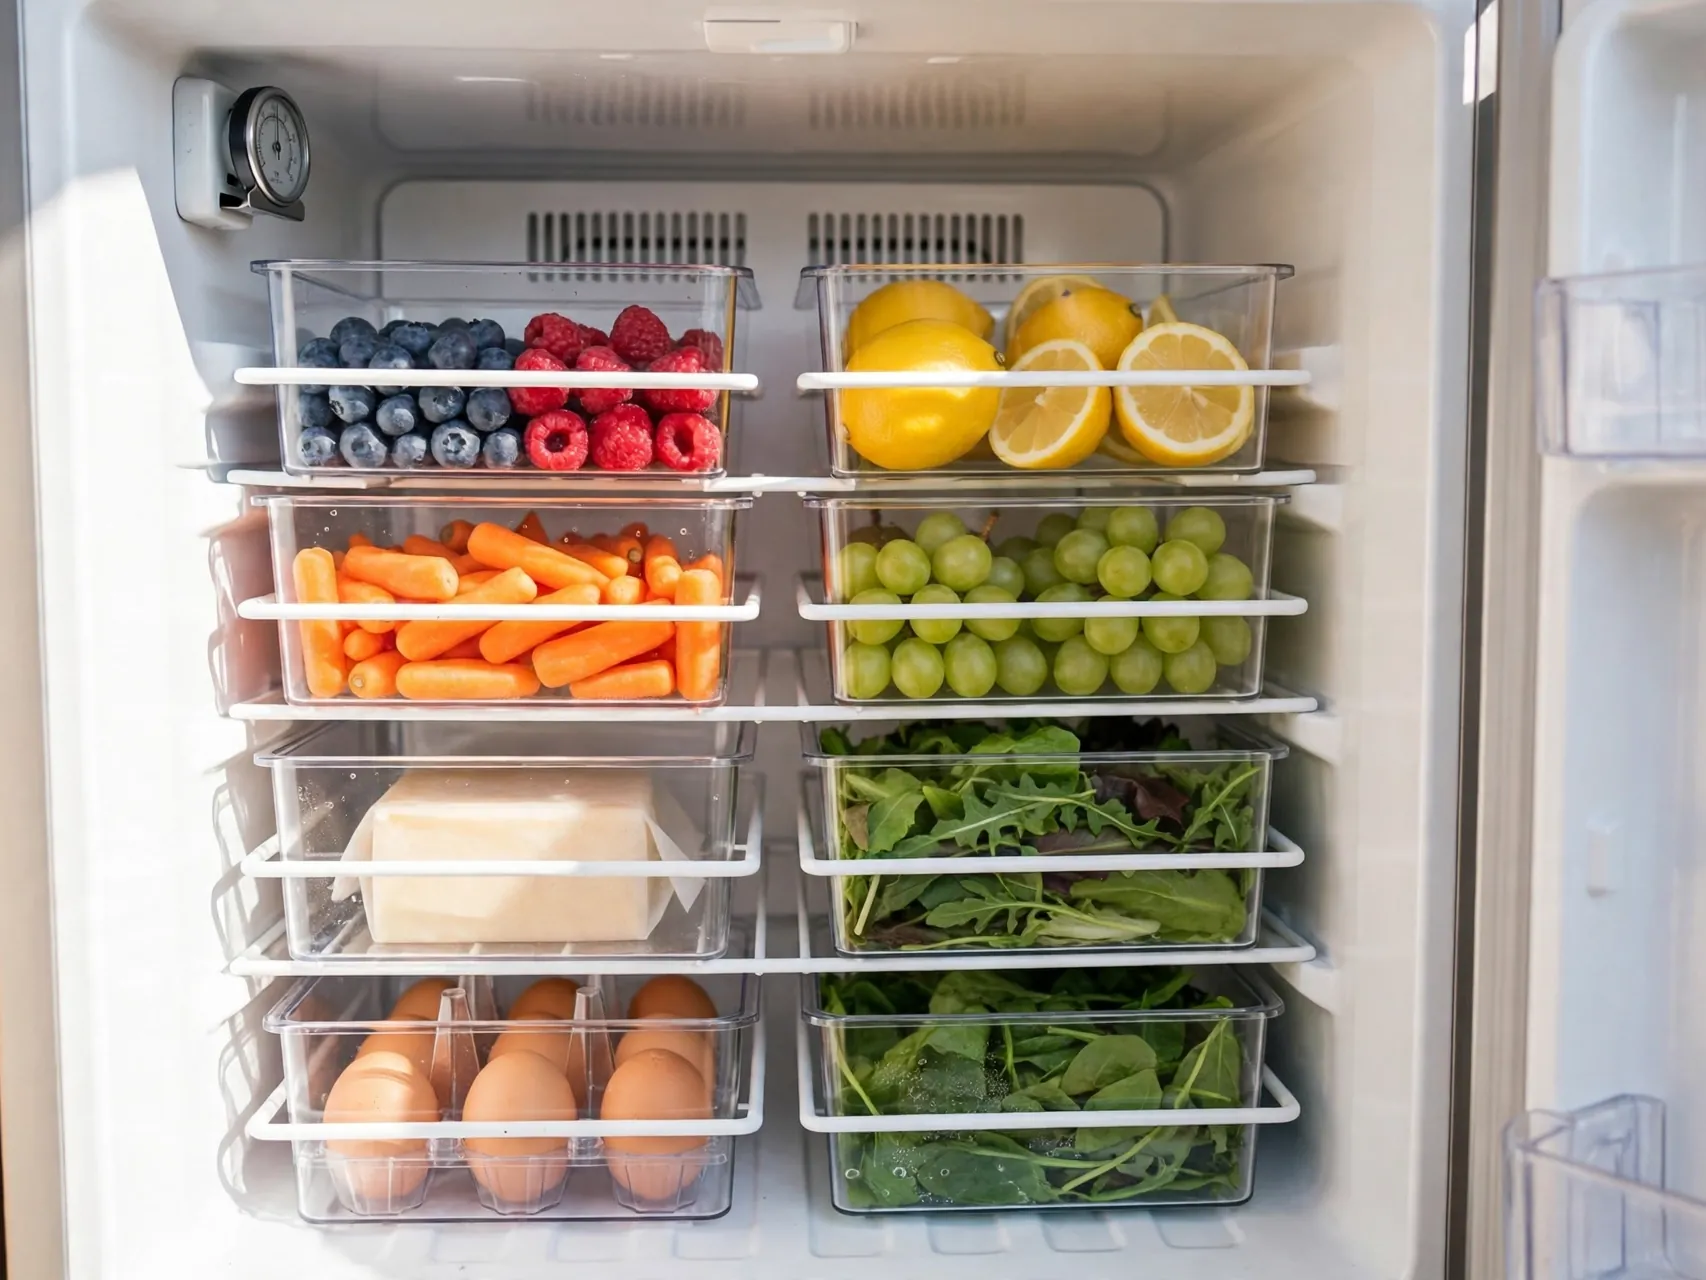
RV fridges are small, and everything in them shifts when you drive. Spring-loaded fridge bars across the front of each shelf hold jars and bottles in place, while clear bins group condiments, cheeses, and leftovers so nothing hides and spoils at the back.
Keep cold food at or below 40 degrees F, and put a small fridge thermometer on the middle shelf so you know the real temperature instead of guessing. Group tonight's dinner ingredients in one bin, and meal prep becomes a single grab instead of a fridge excavation.
15. Build a Small Coffee and Breakfast Station
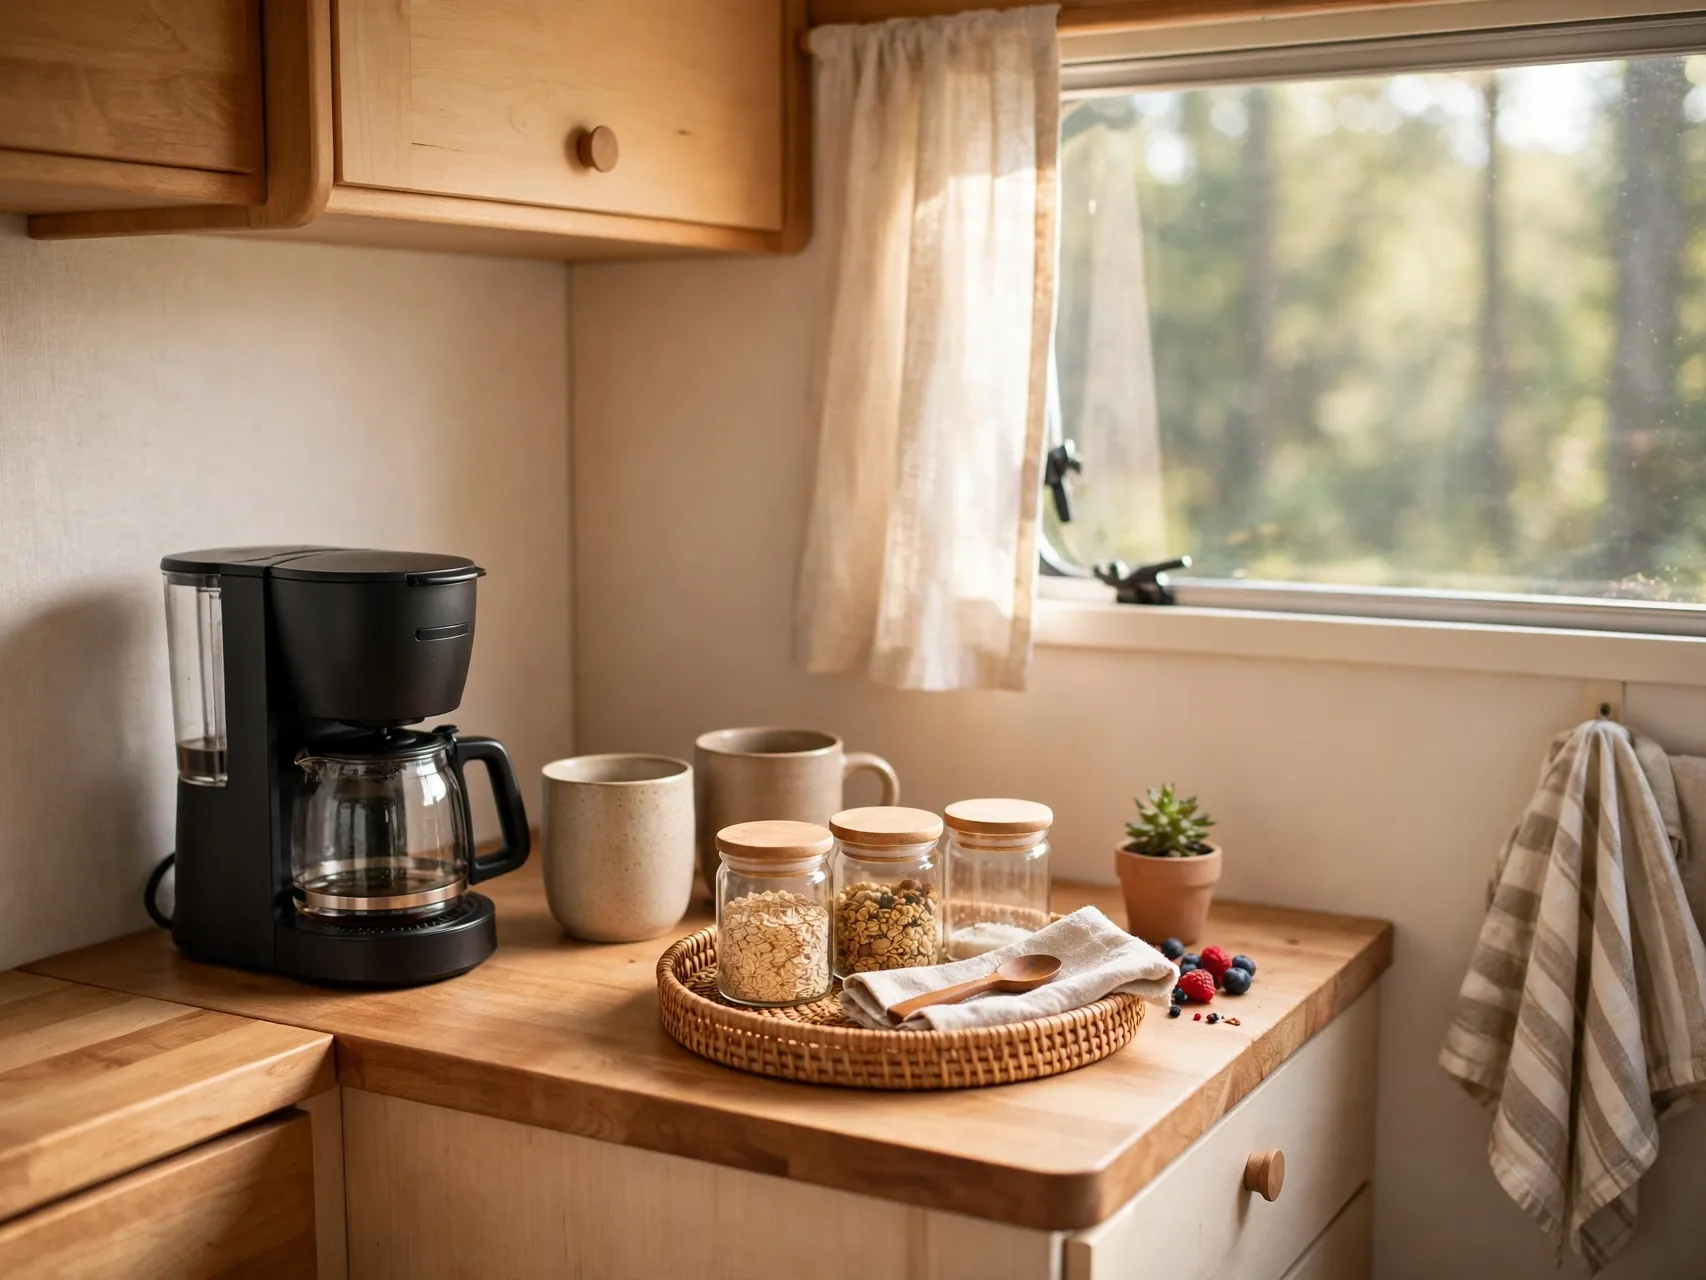
Mornings go better when everything for coffee and breakfast lives in one cabinet or one tray. Keep the maker, mugs, filters, coffee, and sweetener together, plus a small bin with oatmeal packets, granola, and bread. One zone, one motion, no cabinet tour while half awake.
A small tray with raised edges works well for this station because it contains drips and lets you move the whole setup to the picnic table outside. Restock the station on grocery day so it is always ready for an early start.
16. Store Plates Upright in a Rack or Between Soft Dividers

Stacked plates slide, chip, and make a racket in a moving kitchen. A vertical plate rack, a dish cradle, or simple felt or foam dividers between plates keep them upright, quiet, and easy to lift out one at a time. Melamine or enamel plates also lighten the load and forgive bumps.
Whichever system you choose, test it with a short drive before a long trip. If you hear clinking from the kitchen, add padding or tighten the rack. Quiet cabinets are the sign the system is working.
17. Give Every Zone a Label So Everyone Puts Things Back

In a shared tiny kitchen, organization only lasts if everyone follows the same map. Small, neat labels on container fronts, shelf edges, and bin sides tell partners, kids, and guests exactly where the mugs, wraps, and snacks live, no questions and no reshuffling.
A fine marker on masking tape works fine and peels off cleanly when you reorganize. Label by category, not by single item, so the system flexes as supplies change.
18. Use the Oven and Microwave as Bonus Storage, Carefully

In many RVs the oven is really a bread box that occasionally bakes. It can store baking pans, a cast iron skillet, or loaves and wraps, and the microwave can hold paper goods or bread between trips. These sealed, unused boxes are too useful to leave empty.
Add one firm safety habit: a sticky note on the oven knob, or always check inside before preheating, every single time. The moment your routine changes and someone else cooks, that check protects both the stored items and the meal.
19. Add a Fold-Down Counter Extension for Big Cooking Days
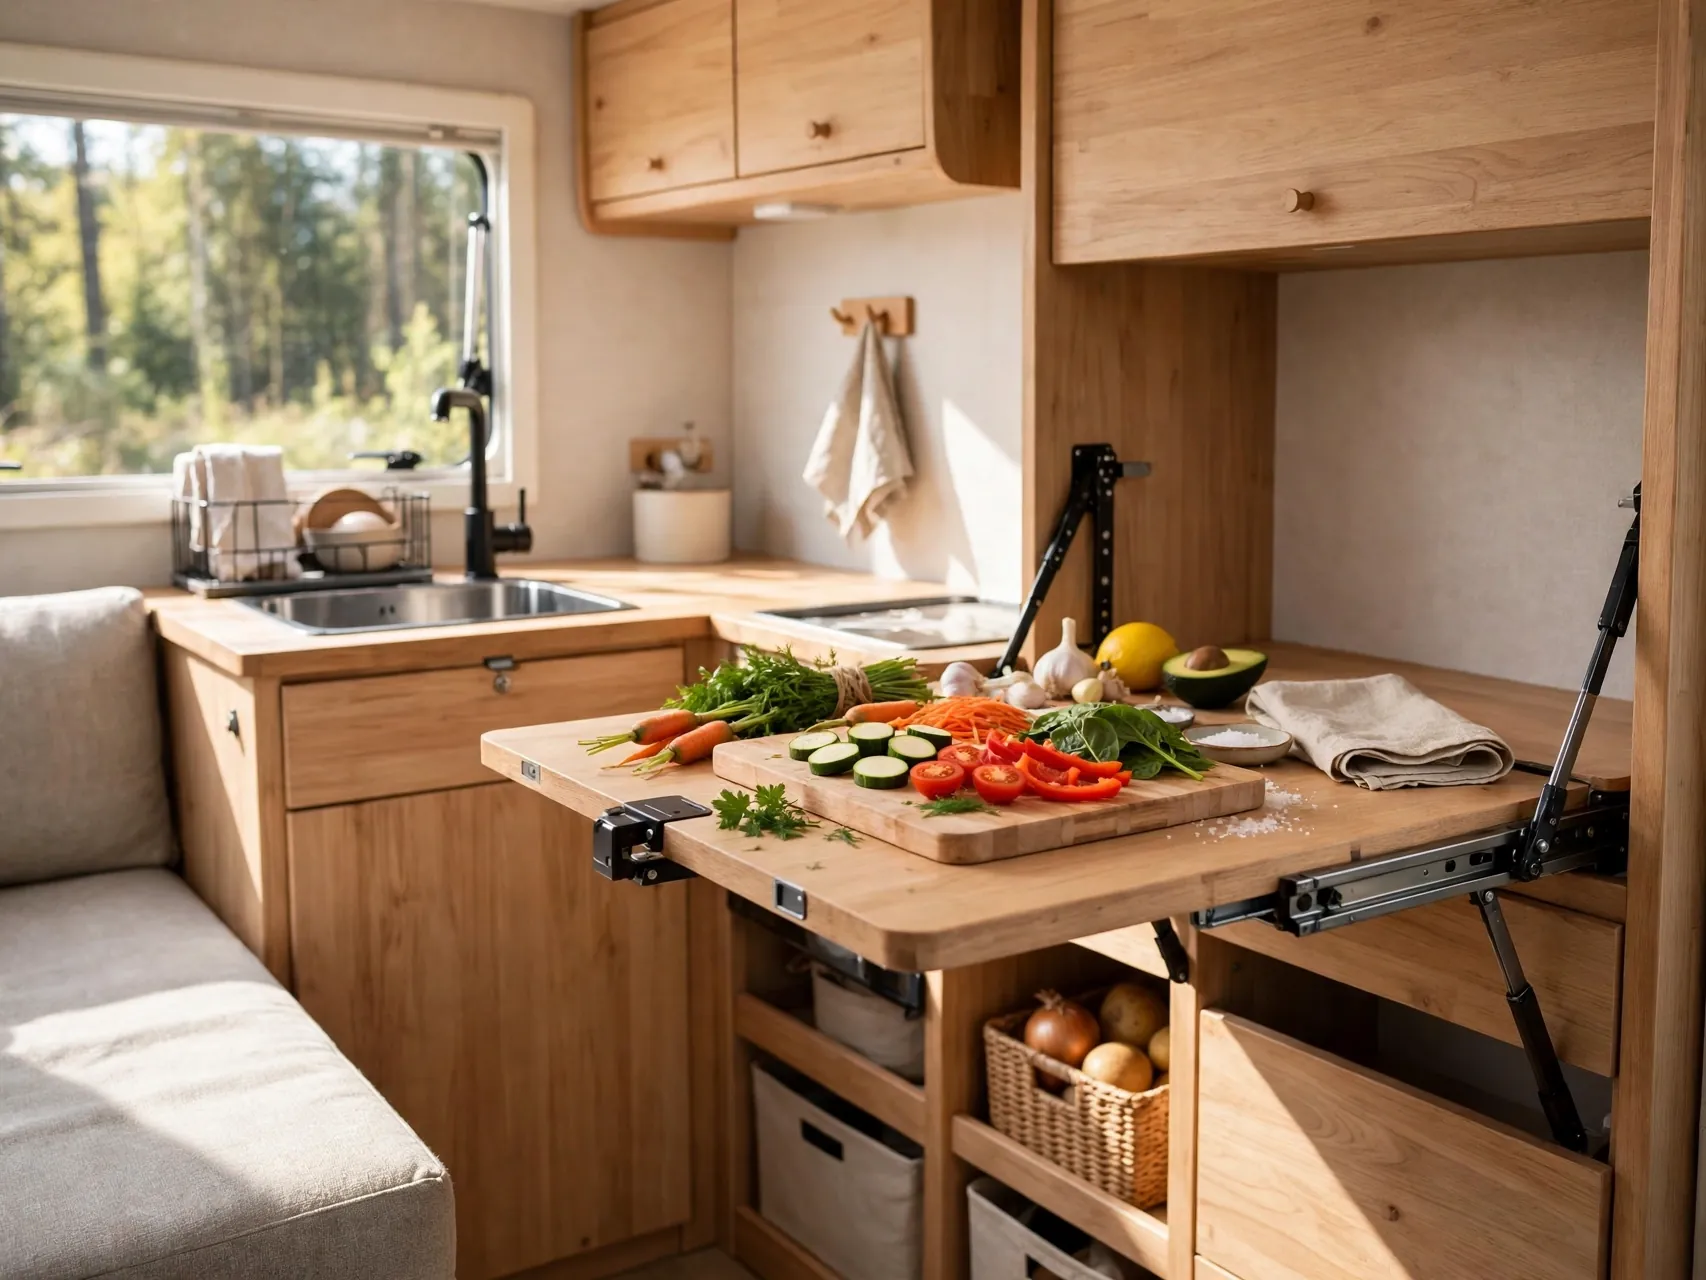
If your rig has a blank wall or cabinet end near the kitchen, a fold-down shelf or a pull-out board adds real prep space for pancake mornings and sandwich assembly lines. When it is folded away, it takes almost no room and stays out of walkways.
Mount brackets into solid material and follow the maker's instructions, since a loaded shelf needs proper support. Even a small extension gives you a landing spot that is not the stove.
20. Keep a Slim Trash and Recycling Setup That Empties Often
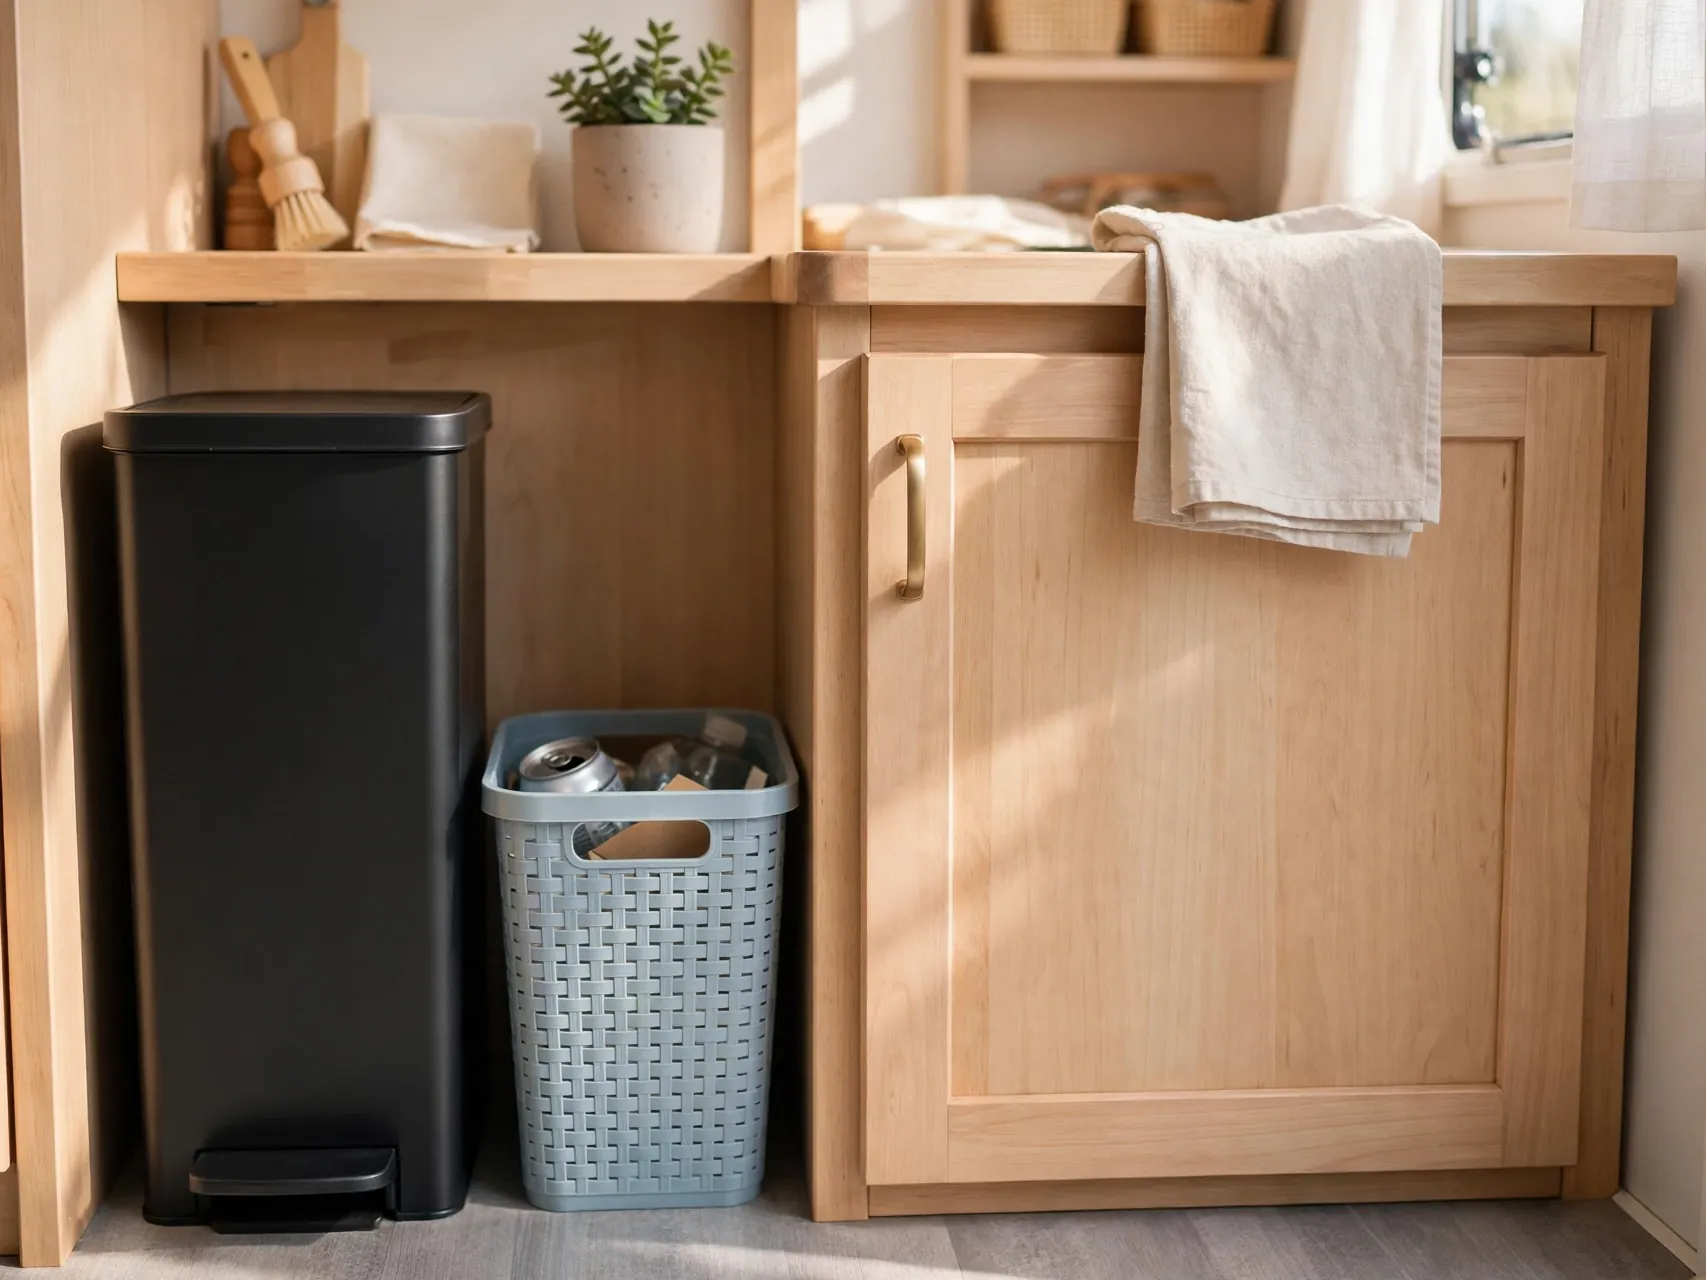
A full-size trash can has no place in an RV kitchen. A slim can that fits under the sink, hangs inside a cabinet door, or tucks beside the fridge keeps waste contained without eating floor space. Line it, tie it, and walk it to the campground bin daily.
Small cans fill fast, which is a feature, not a flaw: frequent emptying keeps odors and fruit flies out of a small space. Keep spare liners in the bottom of the can so the next bag is always right there.
21. Secure Everything With a Five-Minute Travel-Day Routine

Organization that falls apart at the first turn is just decorating. Before every drive, run a five-minute secure routine: counters clear, cabinet latches clicked, fridge bars set, drawers latched, loose items into a sink or a bin, and the coffee maker stowed or strapped per its instructions.
Keep a short checklist on the fridge until the routine is habit. Traveling couples often split it, one person securing the kitchen while the other handles hookups, so nothing is missed and departure stays unhurried and calm.
22. Pack Heavy Items Low and Light Items High

Physics is part of RV kitchen storage ideas whether you plan for it or not. Cans, bottles, small appliances, and cookware belong in low cabinets, where their weight helps stability and a fall means inches, not feet. Paper goods, chips, cereal, and plastic ware belong up high.
This layout also saves your shoulders. The items you lift most often should sit between knee and shoulder height, with the heaviest pots in the lowest, easiest cabinet. Organize by weight first, then by category, and the kitchen works with you.
23. Create a Grab-and-Go Bin for Outdoor Cooking
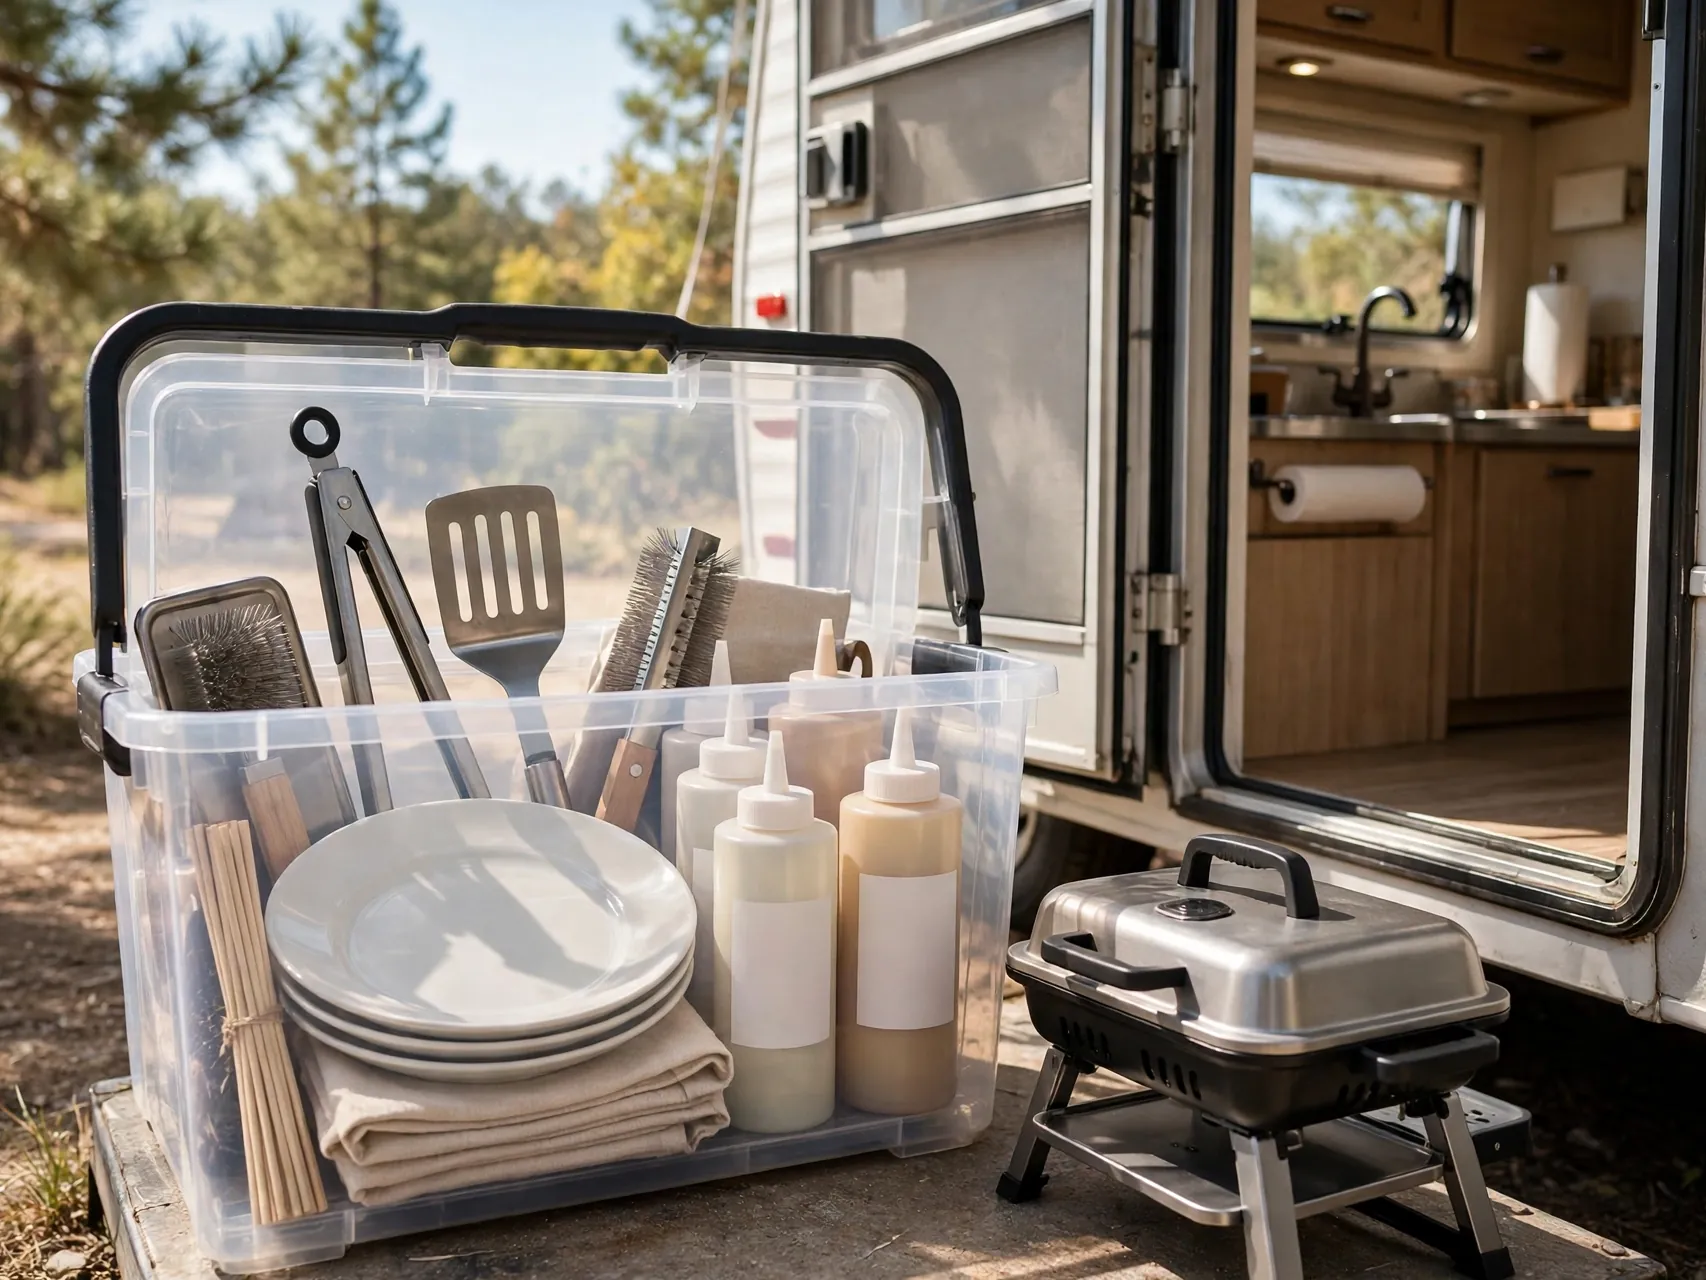
Half of RV cooking happens outside on the grill or camp stove. A single lidded bin with grilling tools, foil, oil, seasonings, a lighter, and paper towels means one trip to the picnic table instead of six trips back inside with the door banging behind you.
Store the bin in an outside compartment or just inside the door, and restock it when you do dishes. Add a small hand towel and a trash bag to the kit, and your outdoor station sets up and cleans up in minutes.
24. Keep Paper Goods in One Spot With a Wall-Mounted Holder

Paper towels, napkins, and plates wander unless they have one fixed home. A wall-mounted or under-cabinet paper towel holder keeps the roll off the precious counter, and a napkin holder or slim dispenser nearby finishes the station. Refills live in one high cabinet, always in the same place.
Mount the holder where splashes from the sink will not reach it, usually beside the stove or on the end wall. Small fixed stations like this are what make a tiny kitchen feel settled instead of improvised.
25. Reset the Kitchen Every Night in Ten Minutes
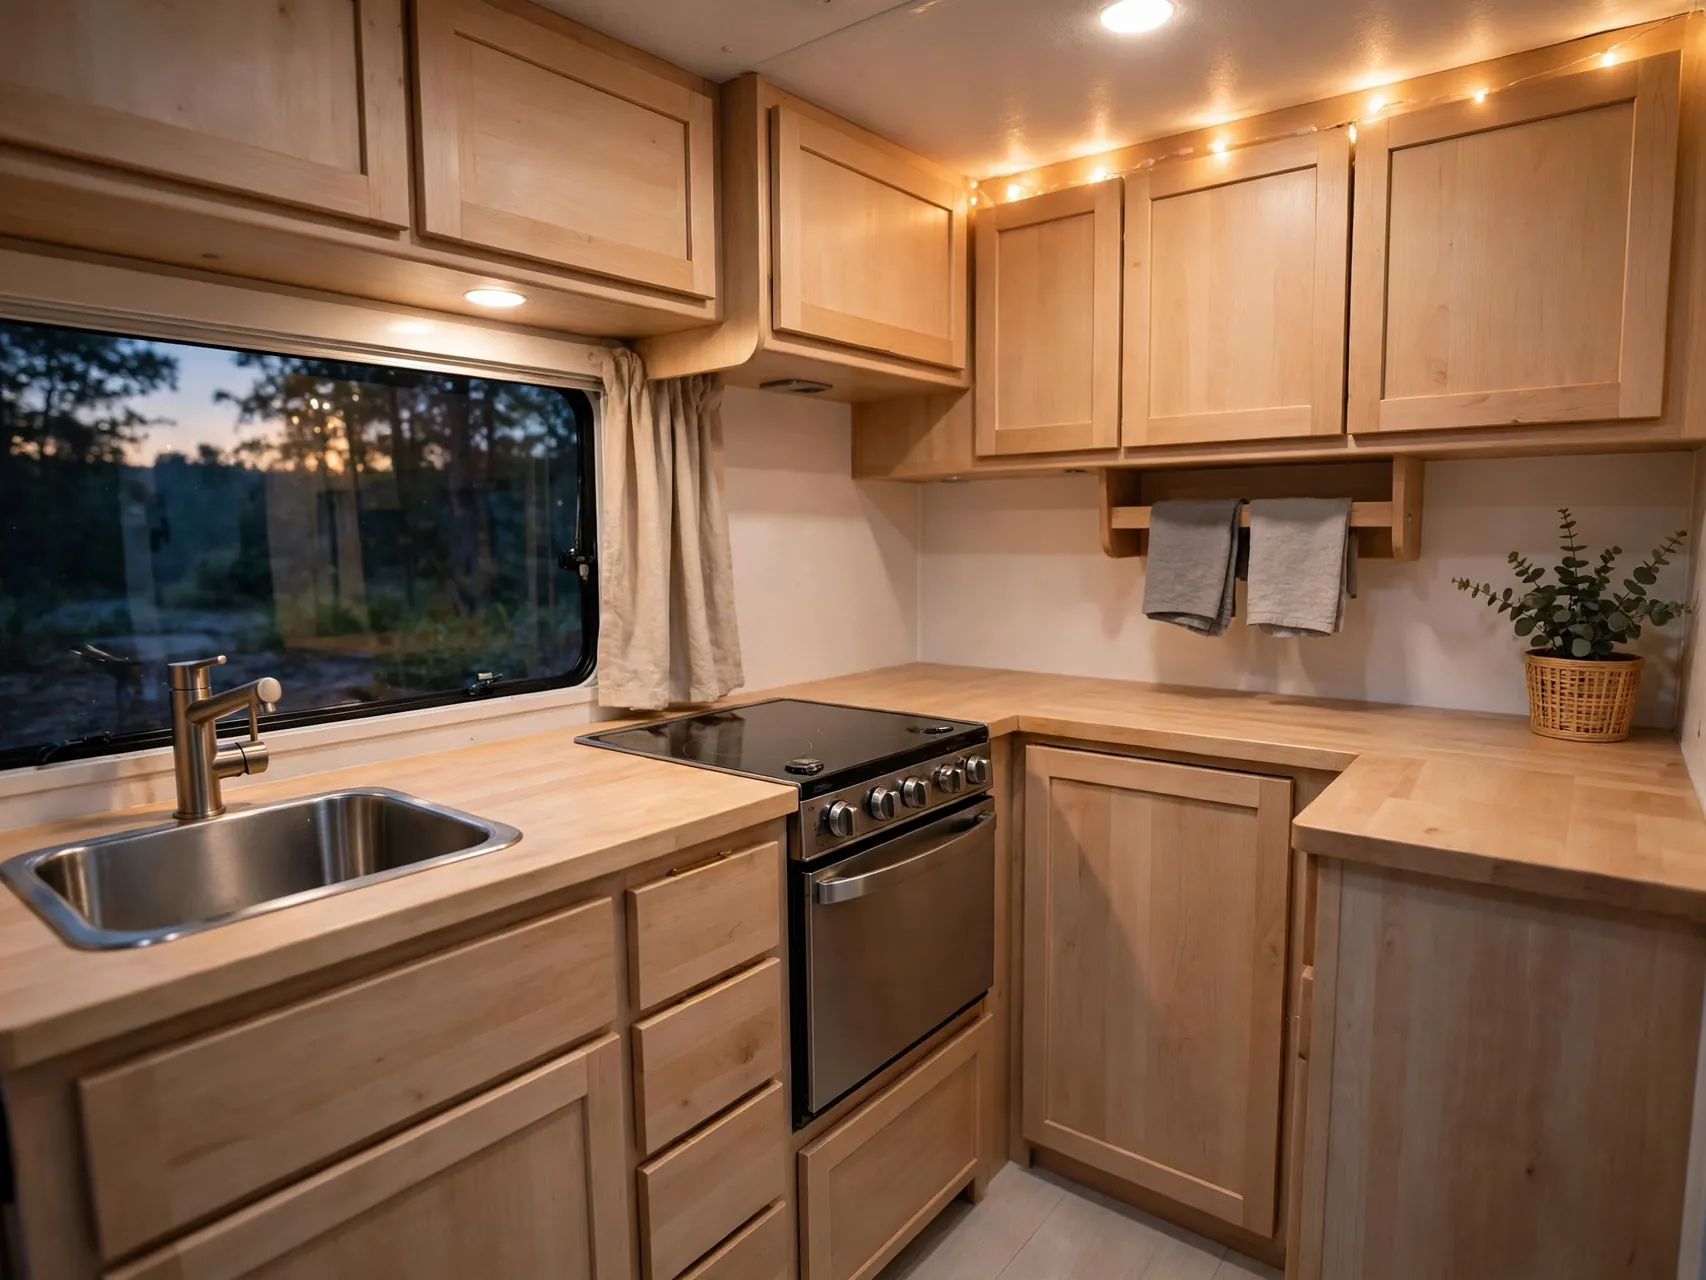
The secret behind every tidy RV kitchen photo is a nightly reset. Wash and put away dishes, wipe the counters and stove, take out the trash, check the fridge temperature, and return every item to its labeled home. Ten unhurried minutes keeps small messes from becoming a Saturday project.
Make the reset part of the evening routine, right after dinner dishes, with music on and the day winding down. You will wake up to a kitchen that is ready for coffee, and the whole trip feels smoother for it.
FAQ
How do I stop dishes and food from rattling while driving?
Use non-slip liner in cabinets and drawers, store plates upright with soft dividers, and add fridge bars across shelves. Mushy or loose items can ride in the sink on a towel. If you can hear it from the driver's seat, it needs padding, a divider, or a lower cabinet.
What should I store in the highest RV kitchen cabinets?
Keep the highest cabinets for light, unbreakable items: paper goods, cereal, chips, plastic containers, linens, and seasonal tools. Heavy cans, bottles, and appliances belong low, where they are safer to lift and better for stability on the road.
How many pots and pans does an RV kitchen really need?
For most couples and small families, two nesting pots with lids, one skillet, and a kettle cover nearly every meal. Add a baking pan only if you truly use the oven. Choosing a nesting set sized to your real menu frees a whole cabinet for food storage.
How do I keep the RV fridge organized on travel days?
Group foods in clear bins by meal or type, set spring bars across each shelf front, and keep a thermometer on the middle shelf. Cold food should stay at or below 40 degrees F. Pack tonight's dinner in one bin so you open the door once and grab everything.
What is the fastest way to make an RV kitchen feel bigger?
Clear the counters completely, cover the sink and stove when you need prep space, and move daily tools onto hooks and magnetic strips. A nightly ten-minute reset keeps it that way. Clear surfaces and closed, latched cabinets make even the smallest galley feel calm and roomy.
Key Takeaways
- Edit first, organize second: The best RV kitchen organization starts with fewer, lighter, nesting tools that match the meals you actually cook.
- Use every surface: Sink and stove covers, cabinet doors, walls, and under-shelf baskets turn wasted air into working storage.
- Secure for motion: Dividers, non-slip liner, fridge bars, and a five-minute travel-day routine keep the system intact at highway speed.
- Weight low, labels everywhere: Heavy items ride low, light items ride high, and labels help every traveler put things back in the same spot.
- Reset nightly: Ten minutes after dinner keeps the kitchen ready for coffee and keeps small messes from growing.
- Love a tidy tiny kitchen? Save this guide to Pinterest and pin your favorite idea before your next road trip.