23 Tips on How to Make Hair Bows That Look Boutique-Made
Introduction
Boutique bows have a certain polish: even loops, a tight neat center, ends cut at a perfect angle, and a clip that stays put. Learning how to make hair bows that look like they came from a shop is less about talent and more about a handful of repeatable habits.
This list follows the order of a real bow making session, from choosing ribbon to storing finished bows. Grosgrain ribbon, a needle and strong thread, sharp scissors, and a lined alligator clip cover most of what you need to begin.
Small safety habits matter too. Heat sealing ribbon ends with a lighter is an adult only job, done away from ribbon spools and fabric, and hot glue deserves respect. Keep tiny embellishments off bows for babies and toddlers, who explore everything with their mouths.
1. Start With Grosgrain Ribbon
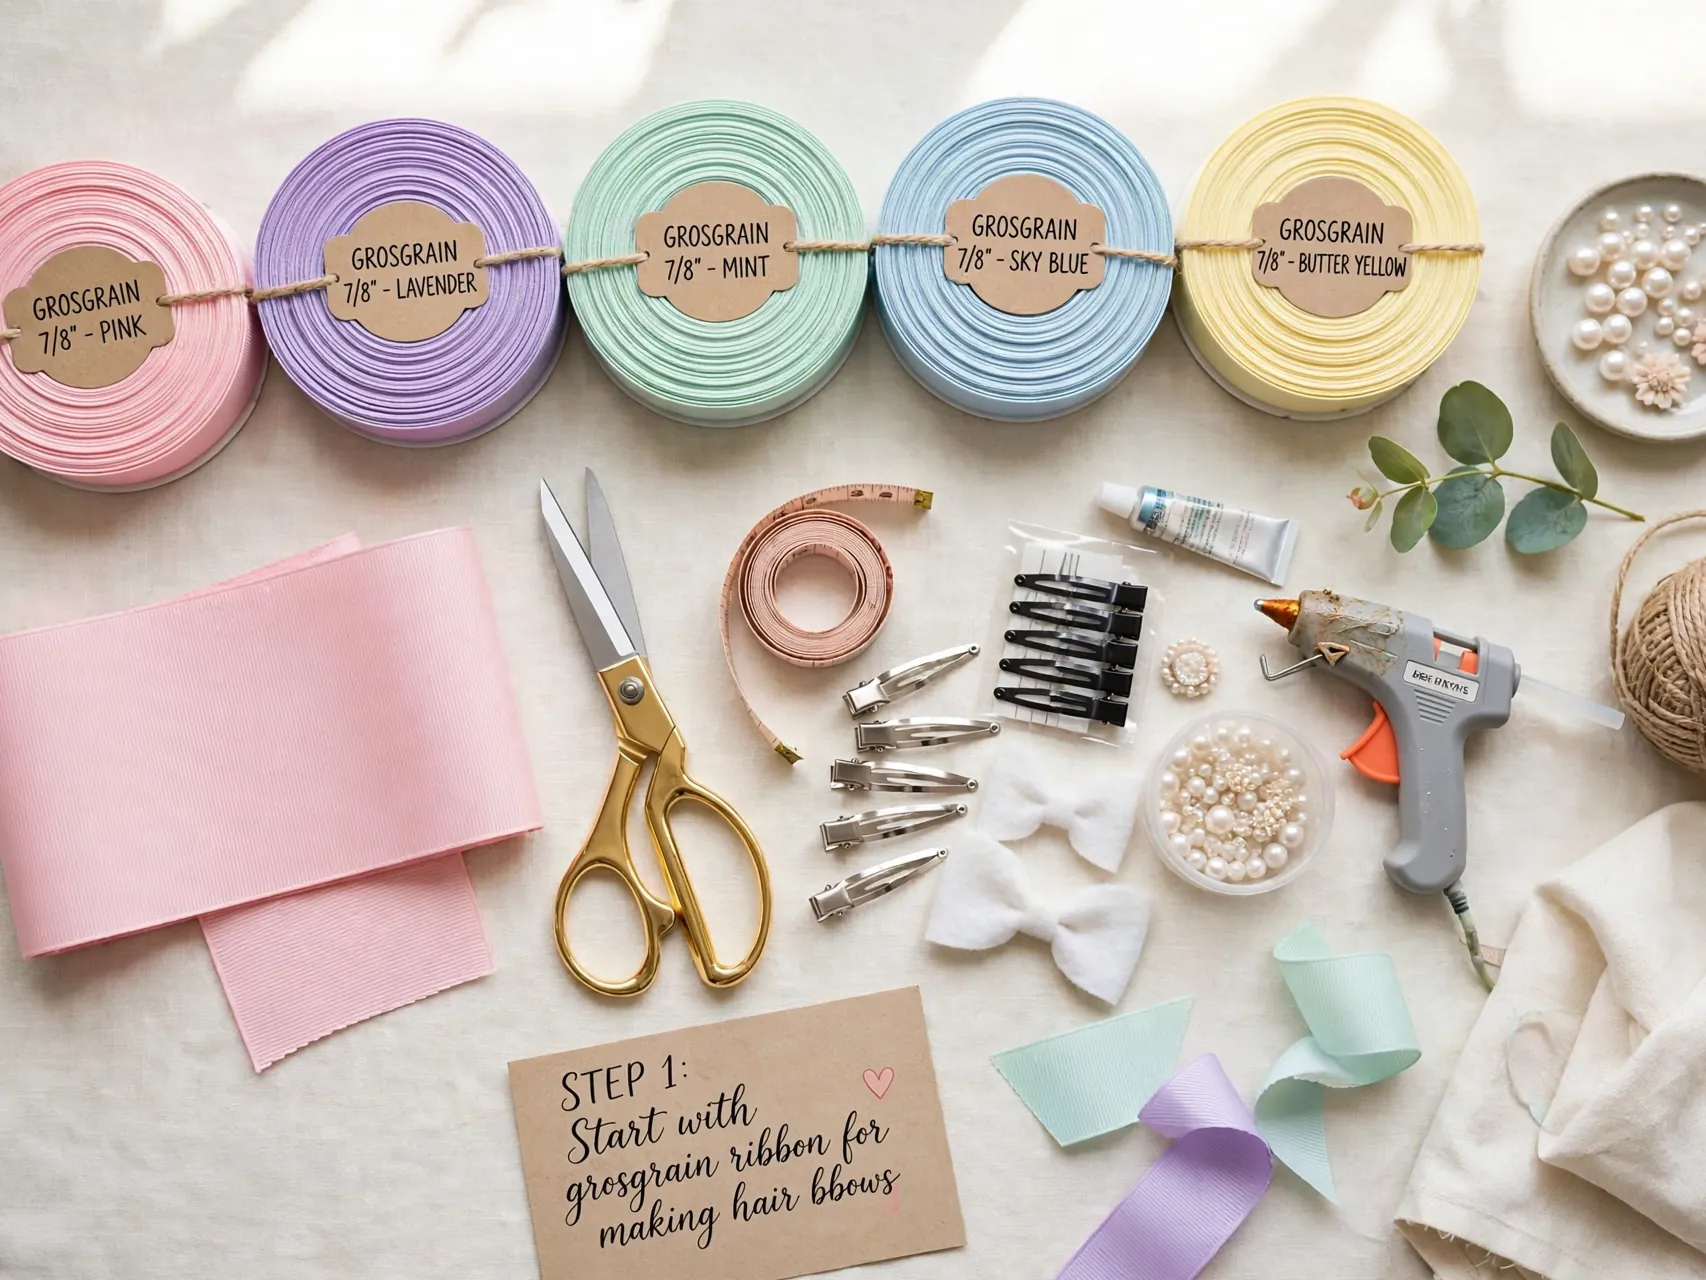
Grosgrain, with its fine ribs, is the beginner friendly ribbon for diy ribbon bows for girls. It holds a crease, hides glue and stitches better than shiny satin, and does not slip loose while you are shaping loops.
Satin is prettier for dressy bows but shows every wobble, and sheer ribbon layers beautifully yet fights beginners. Master shape and centers in grosgrain first, in a medium width, then graduate to slippery and sheer ribbons once your hands know the movements without thinking.
2. Match Ribbon Width to Bow Size
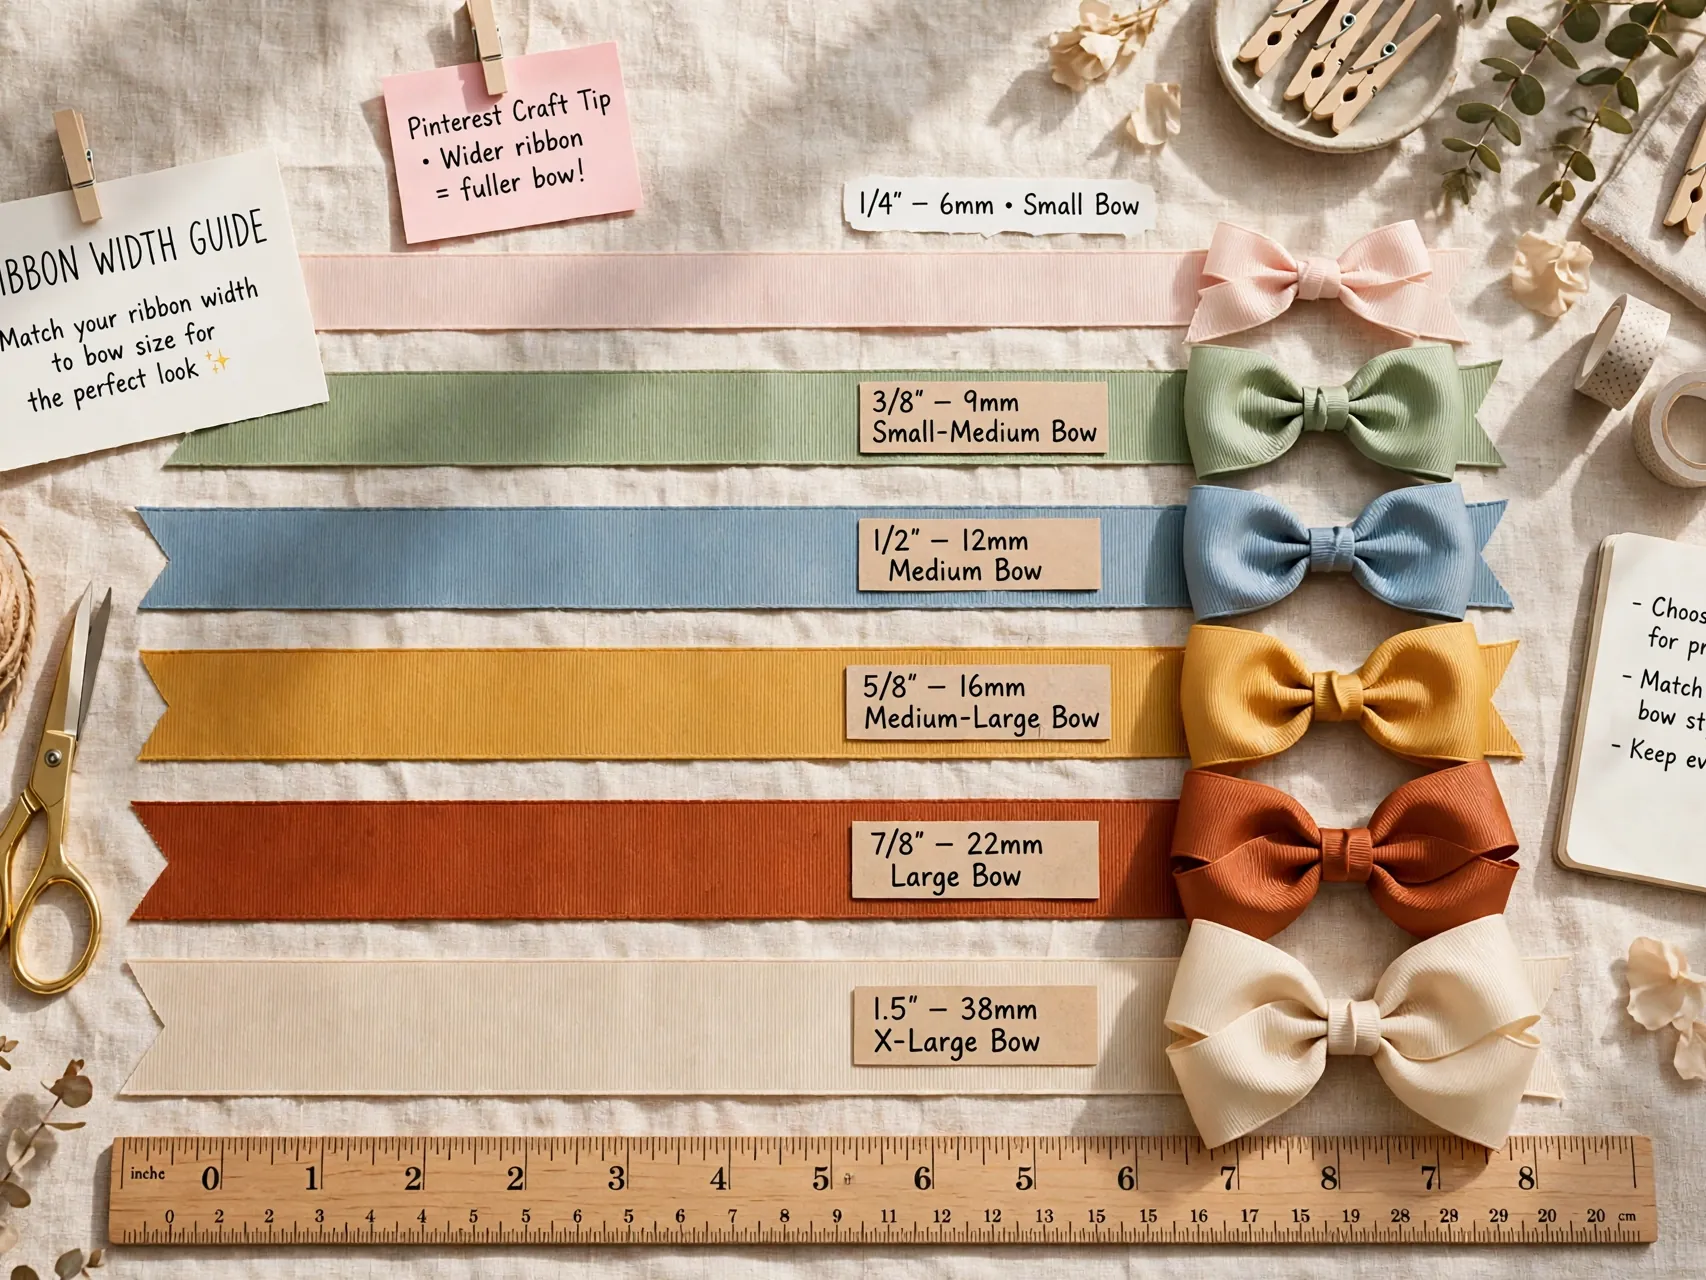
Width sets the personality of the bow. Narrow ribbon around three eighths to five eighths of an inch makes small, neat bows for babies and mini clips. Seven eighths ribbon is the versatile middle, and one and a half inch ribbon makes the big, cheerful bows seen in most boutique photos.
Cut length grows with width: a small bow may need under a foot of ribbon, while a large twisted boutique bow can use well over a yard once layers are added. Make one test bow and write down the width and length that worked.
3. Measure and Mark Before You Fold

Boutique symmetry starts on the ruler, not in your hands. Measure your ribbon length, find and mark the exact center with a pin or a tiny clip, and mark where each loop should end if your style uses set folds.
Work on a cutting mat or a ruler edged board so measuring becomes automatic. Makers who sell bows measure every single time, even after years, because ribbon is unforgiving: a loop a quarter inch longer than its partner will show in every photo.
4. Heat Seal Every Cut End
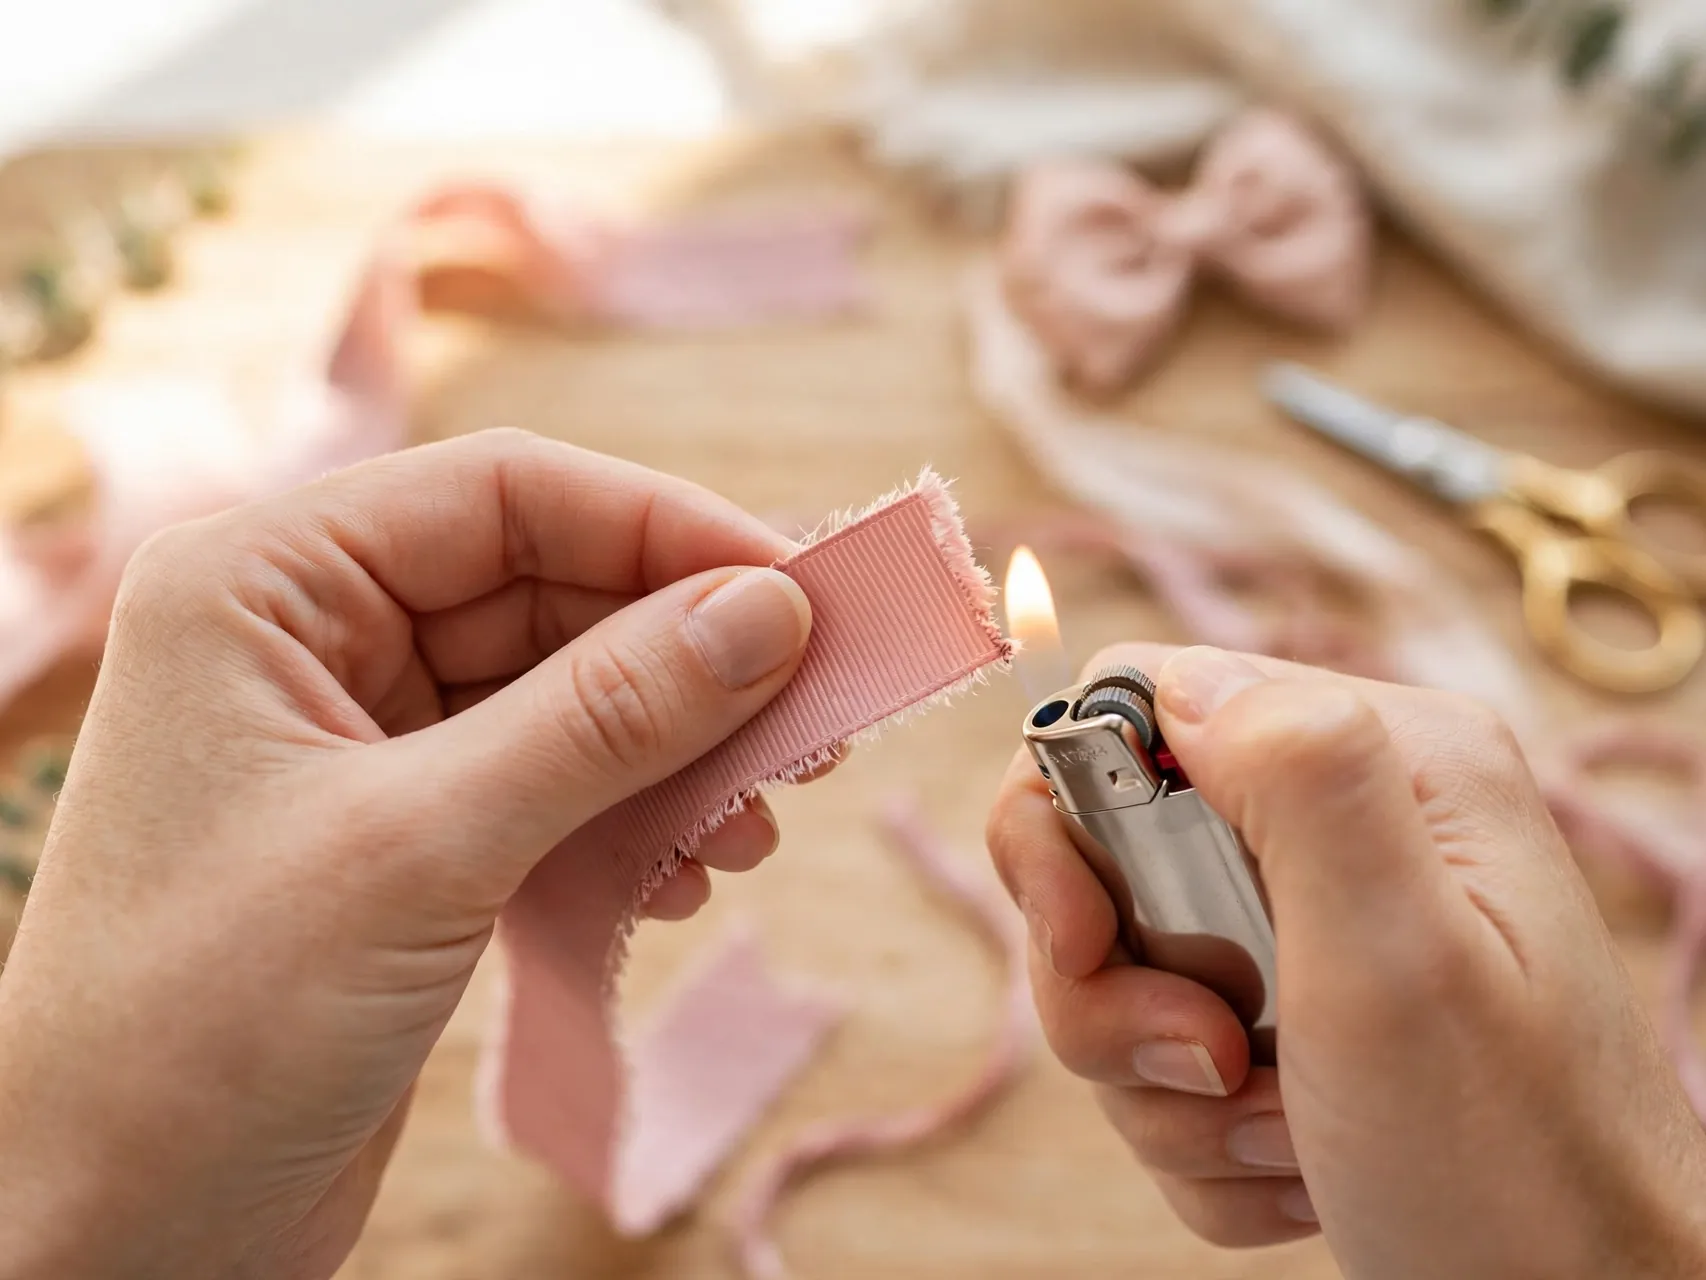
Cut ribbon frays, and frayed ends are the fastest giveaway of a homemade bow. Seal each end by passing it quickly near, not through, the edge of a small flame, or use a fray prevention liquid if you prefer a flame free method.
This is strictly an adult step: work at a clear table away from ribbon rolls and curtains, keep water nearby, and never let children do the sealing. Sealed ends also cut cleaner angles, so seal after your final trim, not before shaping.
5. Cut Tails With a Clean Dovetail

The V cut, or dovetail, at the end of bow tails looks sharp and helps prevent fraying along a single straight edge. Fold the ribbon end in half lengthwise and cut at an angle from the folded edge outward, then open it to reveal an even notch.
Practice dovetails on scrap ribbon first, with the sharpest scissors you own, because dull blades chew ribbon instead of cutting it. Match the depth of the notch on both tails, seal the fresh edges, and your bow already looks a level above basic.
6. Master the Simple Tuxedo Bow First
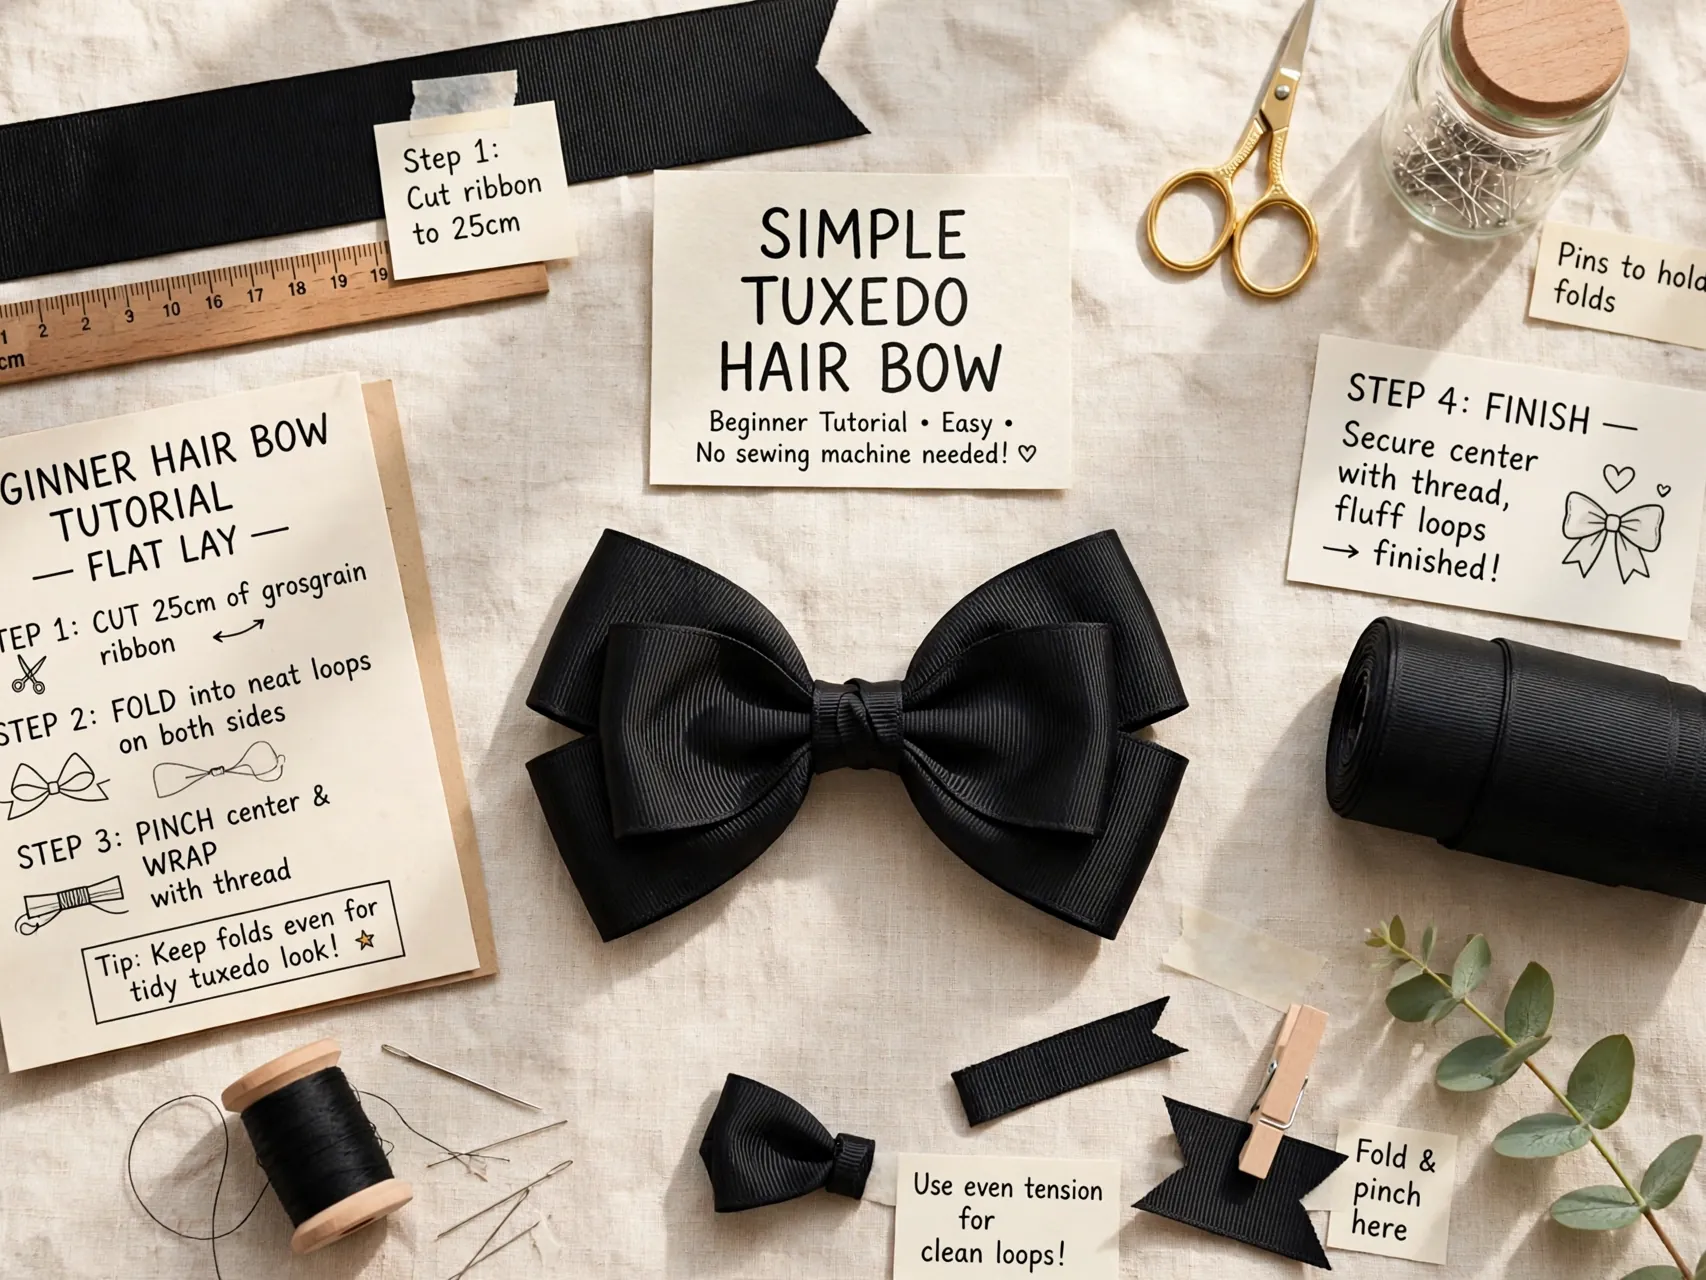
The tuxedo bow is one loop on each side with short tails, pinched and wrapped at the center. It teaches loop balance, center pinching, and wrapping in the simplest possible form, and it looks classic on babies, toddlers, and gift packages alike.
Make five in a row in the same ribbon and compare them. By the fifth, your loops will even out noticeably, and that muscle memory carries directly into every fancier style in this list, which is why every good boutique hair bow tutorial starts here.
7. Learn the Twisted Boutique Fold
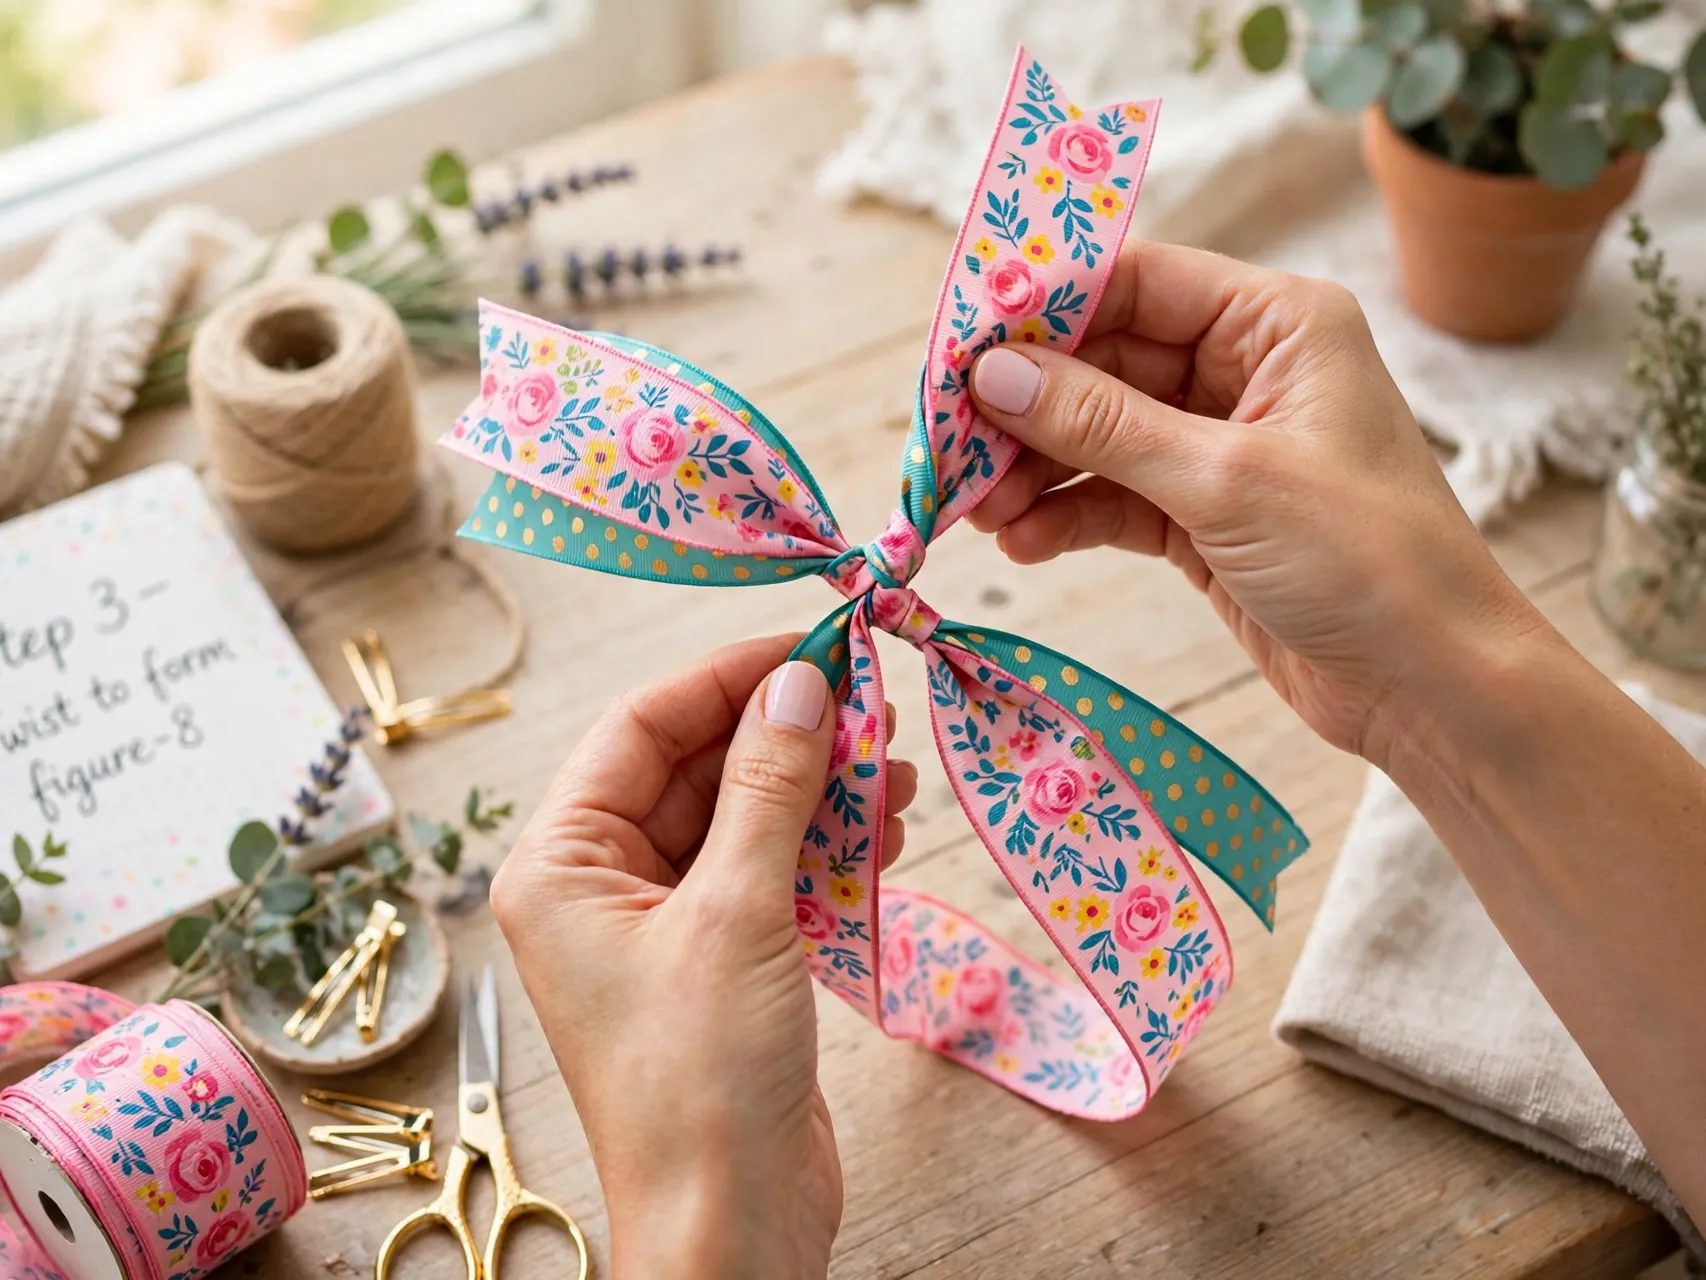
The twisted boutique bow, with its perky upright loops, is made by forming a figure eight style twist as you build the loops, so each loop stands with its front face showing. It looks complicated and is genuinely just one repeated twist, practiced slowly.
Hold the center firmly in a clip while you shape, adjust each loop before stitching, and pull the center thread tight so the twist holds its angle. Your first attempts will sit flat or lopsided, and that is normal: this fold rewards ten patient practice bows more than any other.
8. Pinch Even Creases in the Center

The accordion pinch at the center is what separates boutique bows from squashed ones. Fold the center of the bow into two or three small even pleats with your fingers, like a tiny fan, before you stitch or wrap it.
Even creases make loops fan out symmetrically on both sides. Hold the pinch with a salon clip or clothespin while you thread your needle, because the moment you let go to reach for supplies is the moment the perfect pinch relaxes into a lopsided one.
9. Stitch Through the Center, Do Not Just Glue

Running several strong stitches up and down through the pinched center, then pulling them tight, locks the bow shape in a way surface glue never can. Many experienced makers stitch every layer, then add glue only where parts join, like the clip and the center wrap.
Use strong thread, a sturdy needle, and a thimble if your layers are thick. Pull the stitches to cinch the center narrow, knot securely at the back, and trim. A stitched bow survives toddler tugs, washing accidents, and years in a drawer without unfolding.
10. Build Stacked Bows Layer by Layer

Stacked hair bows layer a base bow, a second smaller bow, and often spiky ribbon pieces between them. Build each layer separately, stitch or secure its own center, shape it fully, and only then join the layers with stitches through all centers at once.
Stacking flat, unshaped layers and hoping the final fluff fixes everything does not work. Shape as you go, keep each layer slightly smaller than the one beneath it, and the finished bow gets that full, rounded boutique silhouette instead of a messy pile.
11. Add Ribbon Spikes for Fullness

Spikes are short ribbon lengths with dovetail ends, layered behind and between bow loops at angles, like rays. They fill gaps, add a second color or a print, and make simple bows look elaborate without another full layer.
Cut spikes a little longer than the bow is wide, arrange them in a fan, and stitch through their centers together before adding them to the stack. Keep spike angles even on both sides, because one stray spike sticking straight up is the detail every eye finds first.
12. Try Korker Ribbon for Curly Pony Bows
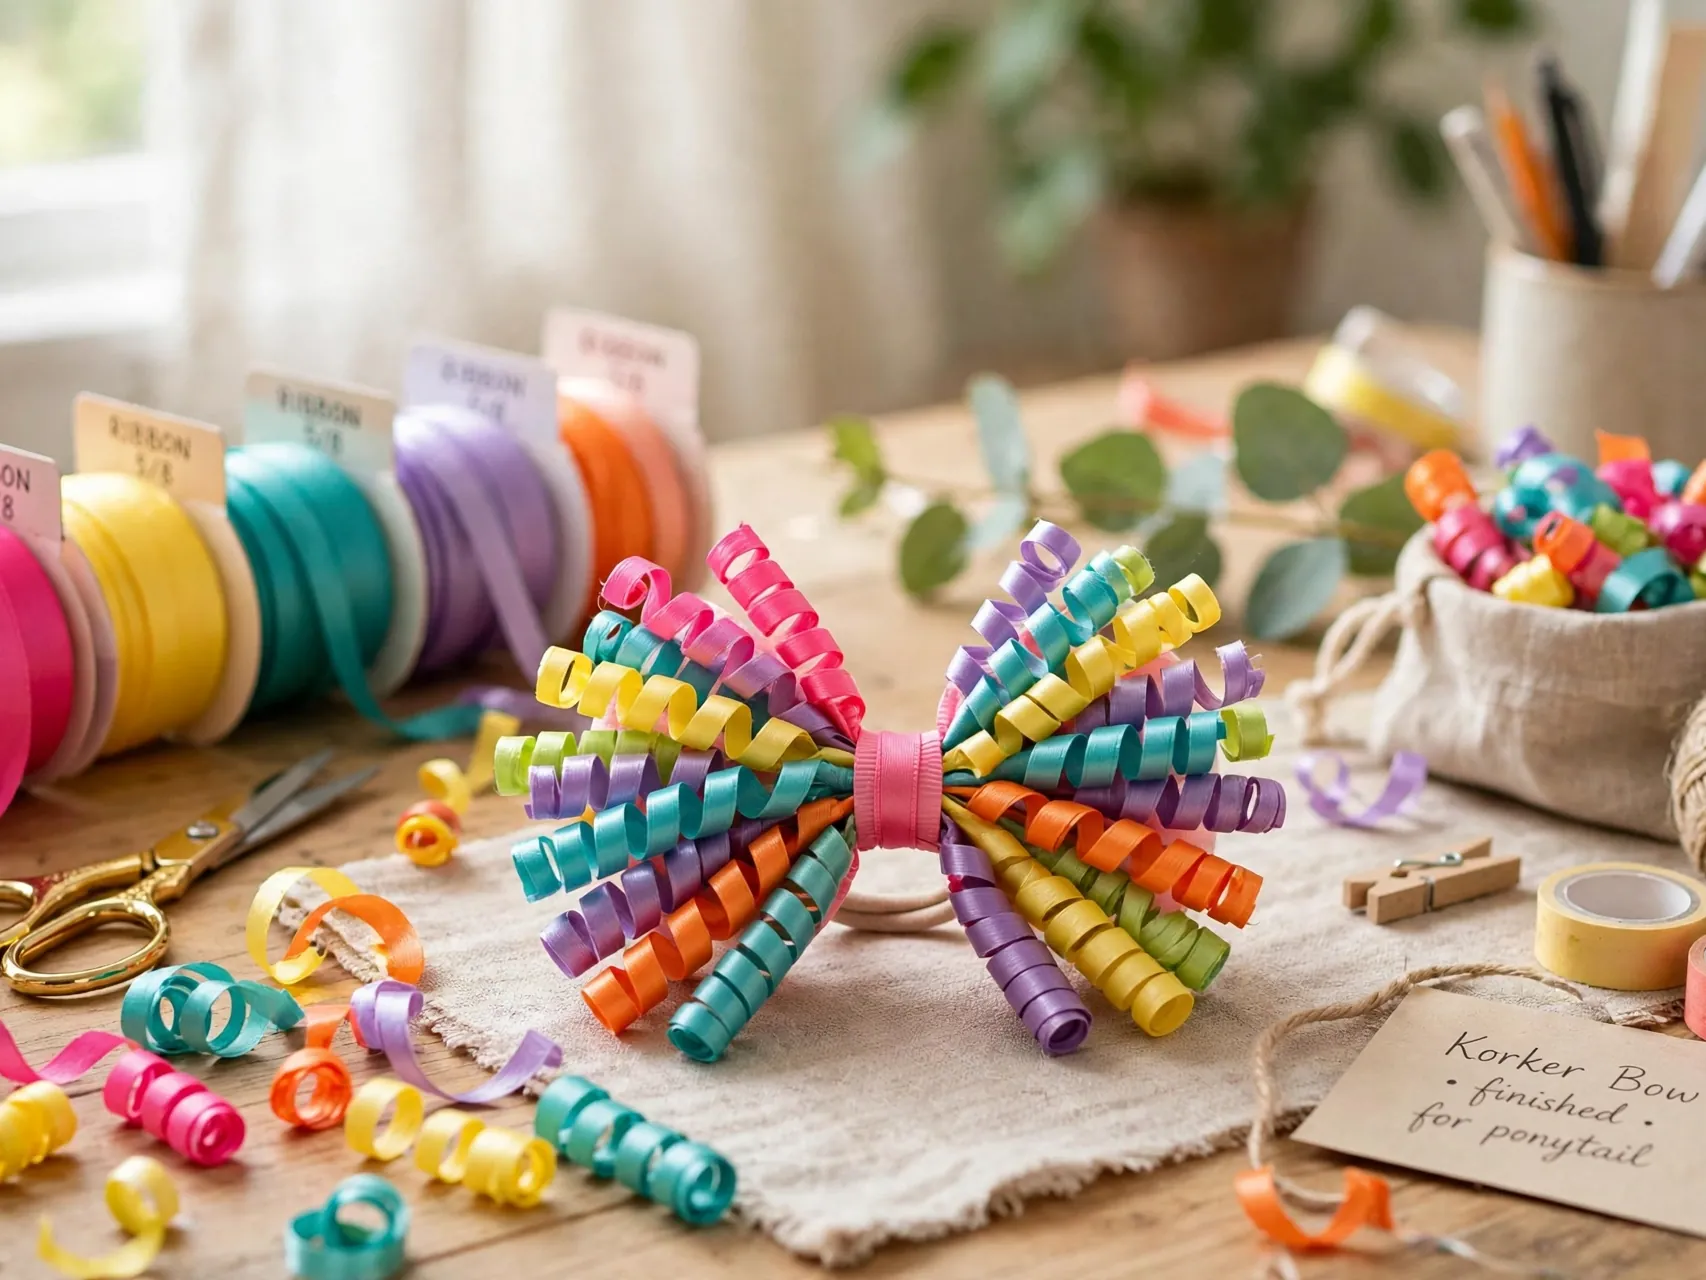
Korkers are ribbons curled into tight spirals, traditionally by wrapping them around a dowel, securing the ends, and baking them at a low oven temperature following a trusted tutorial, adult supervised from start to finish. Bundles of short korker pieces tied at the center make bouncy pony tail bows.
Attach the bundle to a hair elastic or clip and fluff the curls apart. Korker bows forgive uneven cutting, delight younger kids, and use up narrow ribbon scraps that are too short for looped bows, so they earn a permanent place in your scrap bin strategy.
13. Sew Fabric Bows for a Soft Look

Fabric bows use two small rectangles sewn right sides together, turned, pressed, and pinched at the center. They have a softer, puffier body than ribbon and let you match bows exactly to a dress or a holiday outfit sewn from the same fabric.
Leave a small opening for turning, close it with a few neat hand stitches, and press seams flat before pinching so the bow looks tailored. A narrow fabric or ribbon strip wraps the center. Slightly stiffer fabrics hold the prettiest shape, while very soft fabrics make gentle baby bows.
14. Make a No Sew Bow for Craft Days
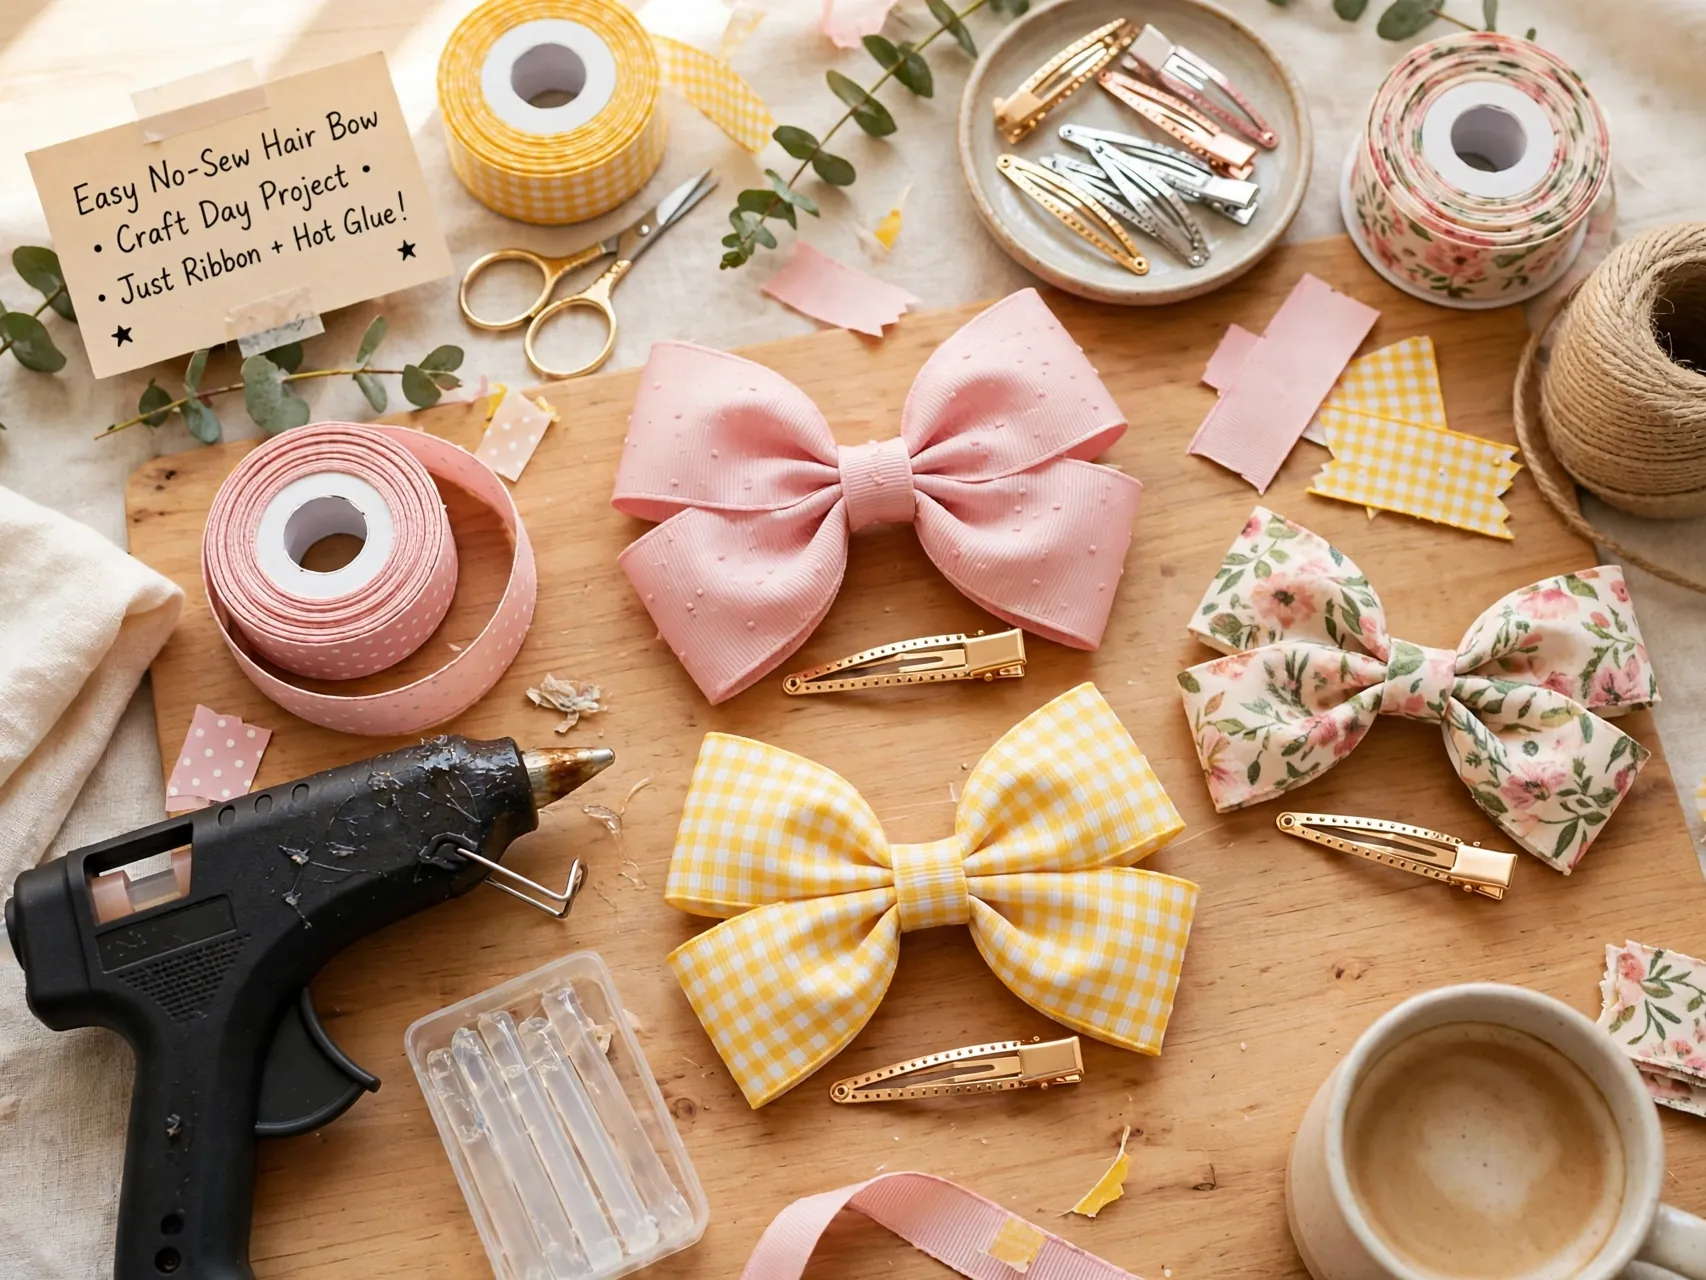
A no sew bow folds ribbon or fabric into loops and relies on a tightly wrapped and glued center to hold everything. It is the right project for craft days, party activities, and anyone whose sewing kit is still theoretical.
Be honest about its limits: wrapped centers loosen faster than stitched ones, especially on bows worn daily. Check and re glue no sew bows now and then, and graduate your favorites to a few center stitches once you see how much sturdier stitching makes them.
15. Layer Tulle for a Party Puff Bow
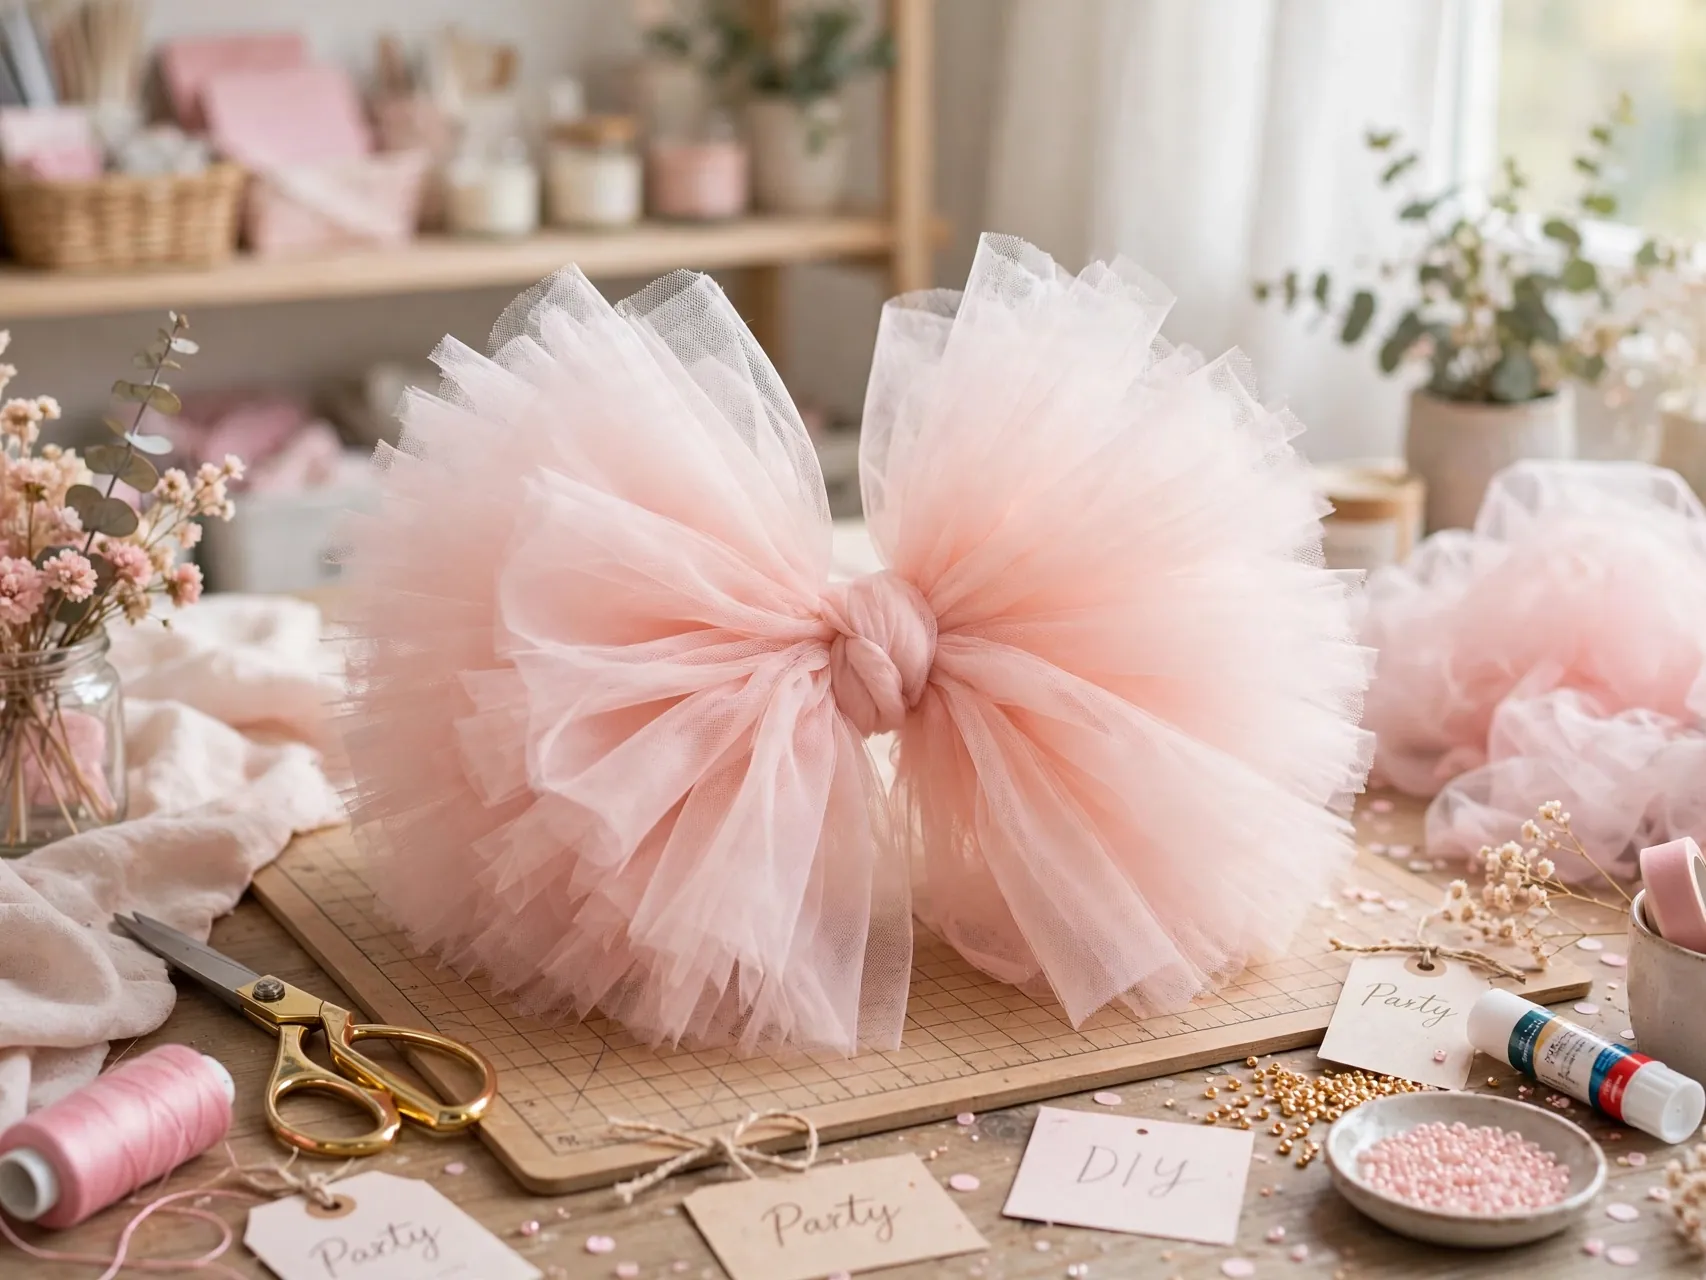
Strips of tulle gathered at the center, alone or under a small ribbon bow, make the airy puff bows that suit birthdays, recitals, and photo shoots. Tulle is forgiving, needs no sealing, and its cut edges disappear into the fluff.
Layer two shades of tulle for depth, trim the puff into a round shape with small snips, and keep tulle bows stored uncrushed so they stay cloud like. Tulle also rescues a slightly plain bow at the last minute: one layer underneath adds party energy instantly.
16. Wrap the Center With a Neat Knot
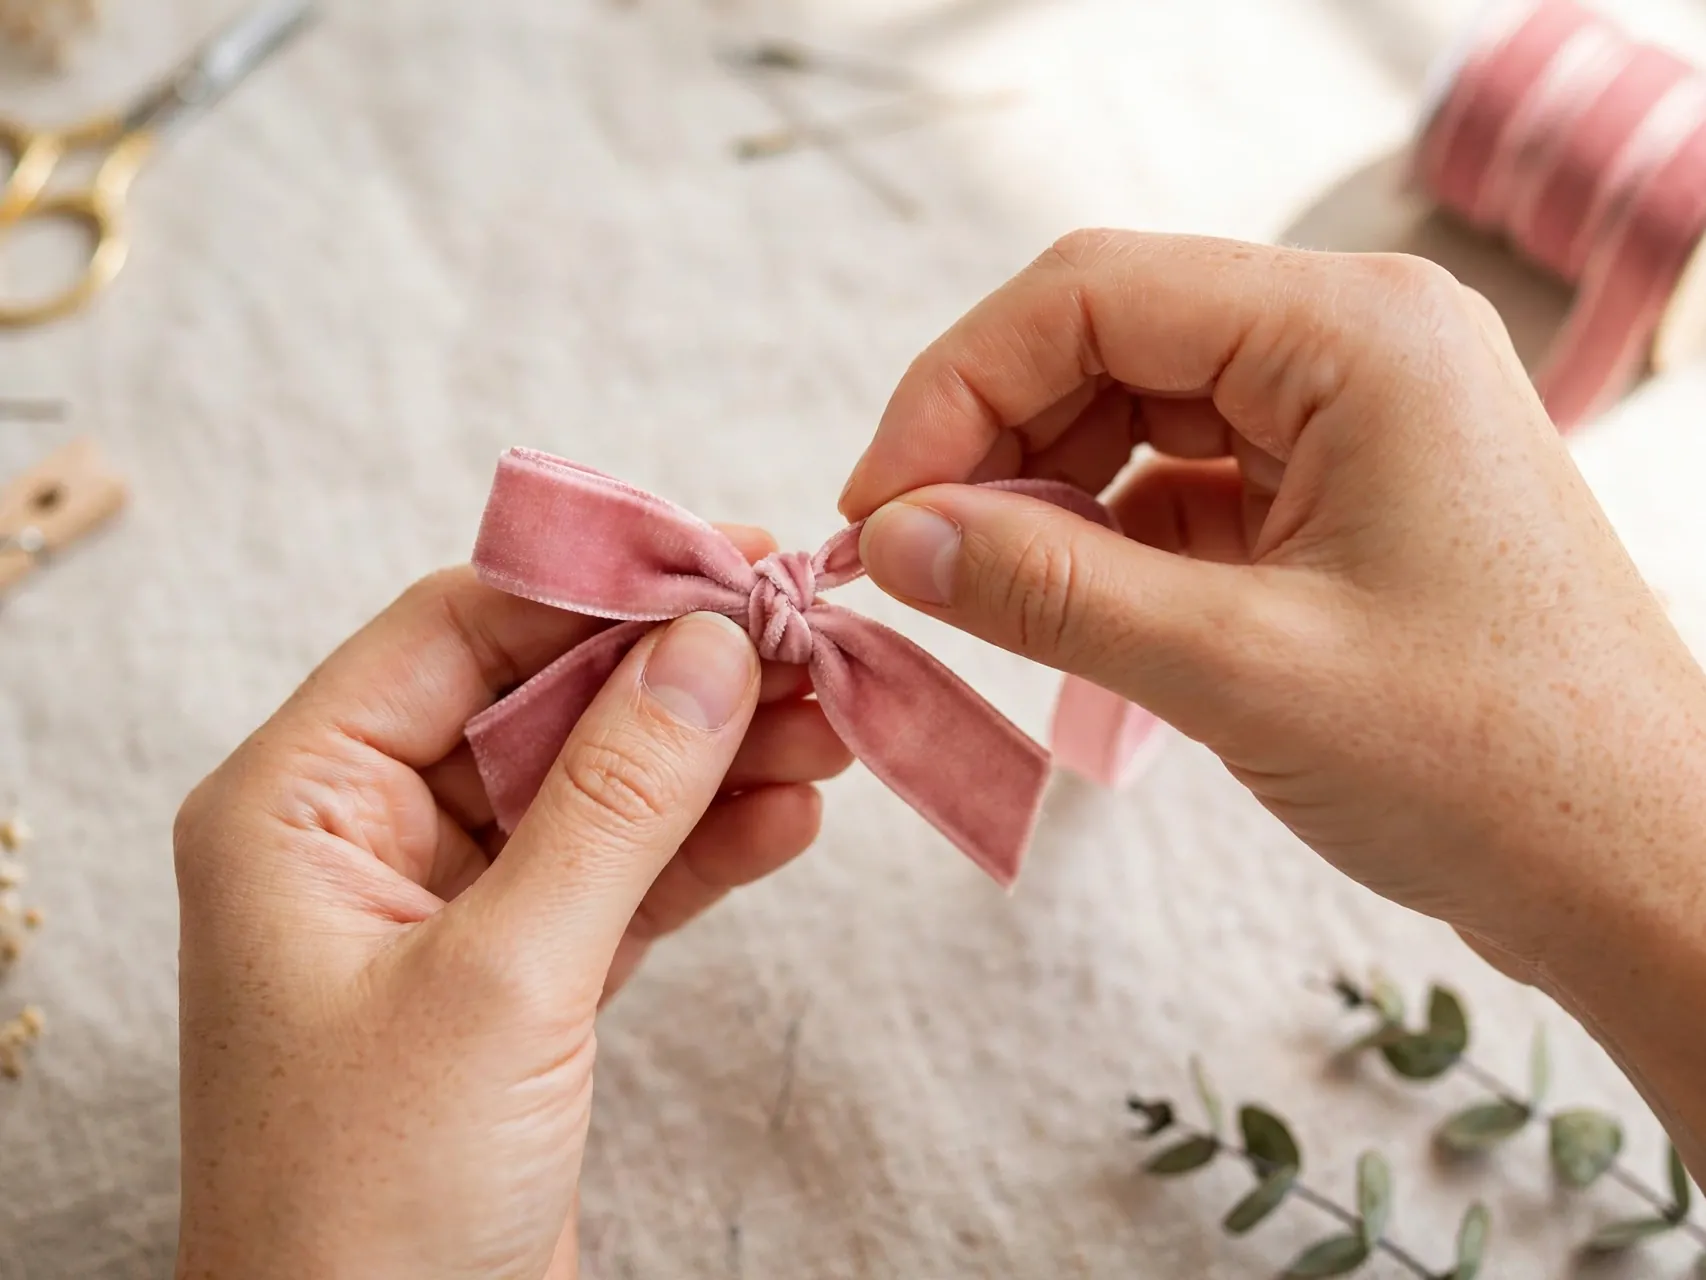
The classic center finish is a small piece of narrow ribbon with a simple knot in its middle, glued at the back of the bow so the knot sits front and center. The knot hides every stitch and gives the bow its finished, store bought face.
For a flat modern center, wrap an unknotted strip instead, gluing the overlap neatly at the back. Whichever style you choose, use the same ribbon or a deliberate contrast, keep the wrap snug without distorting the loops, and let the glue set before handling.
17. Line the Alligator Clip With Ribbon
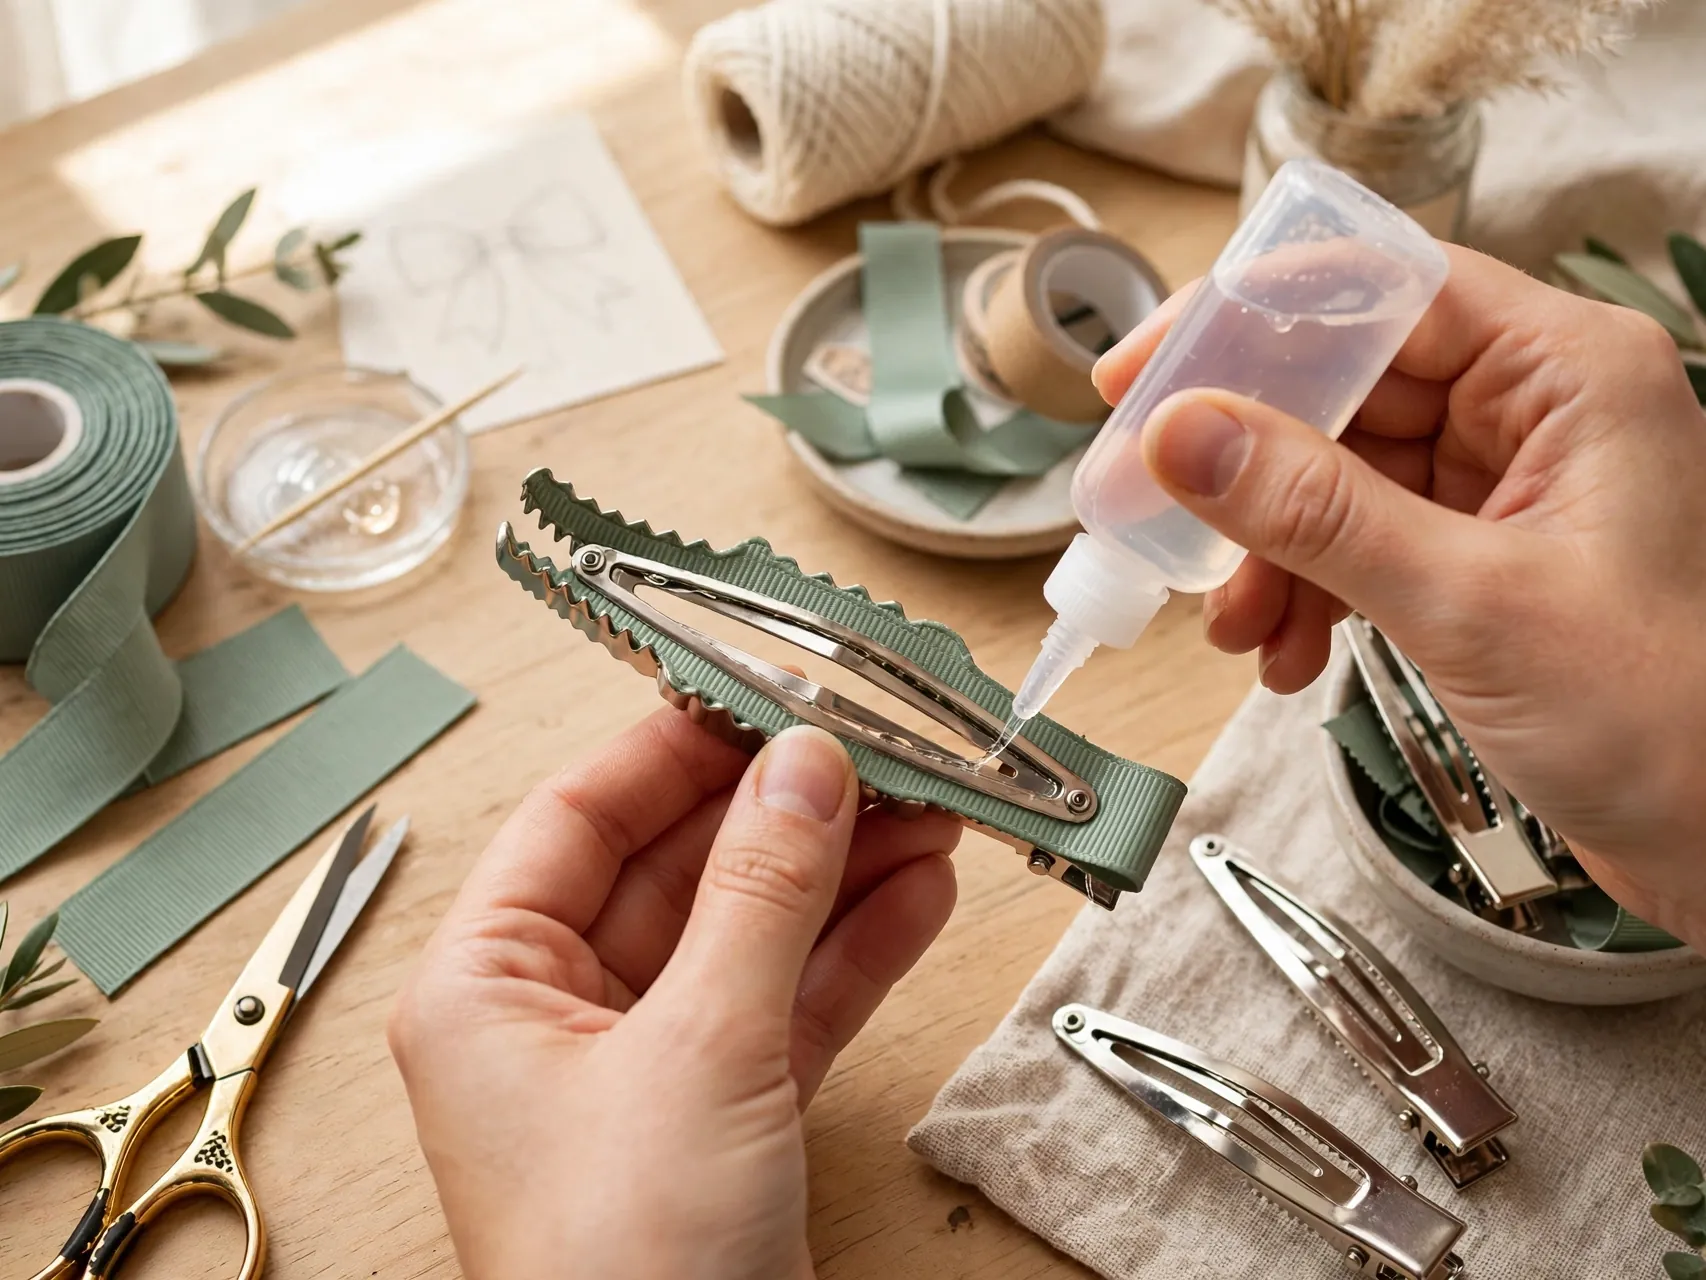
A ribbon lined clip looks finished and grips hair better than bare metal. Glue narrow ribbon along the top of the clip and around its pinch end, following the clips shape, and let it dry fully before attaching the bow.
Check the lined clip opens and closes smoothly and that no glue has sealed it shut, a classic beginner surprise. A lined clip also protects fine hair from catching on metal edges, which parents of toddlers appreciate as much as the pretty finish.
18. Attach the Clip in the Right Direction
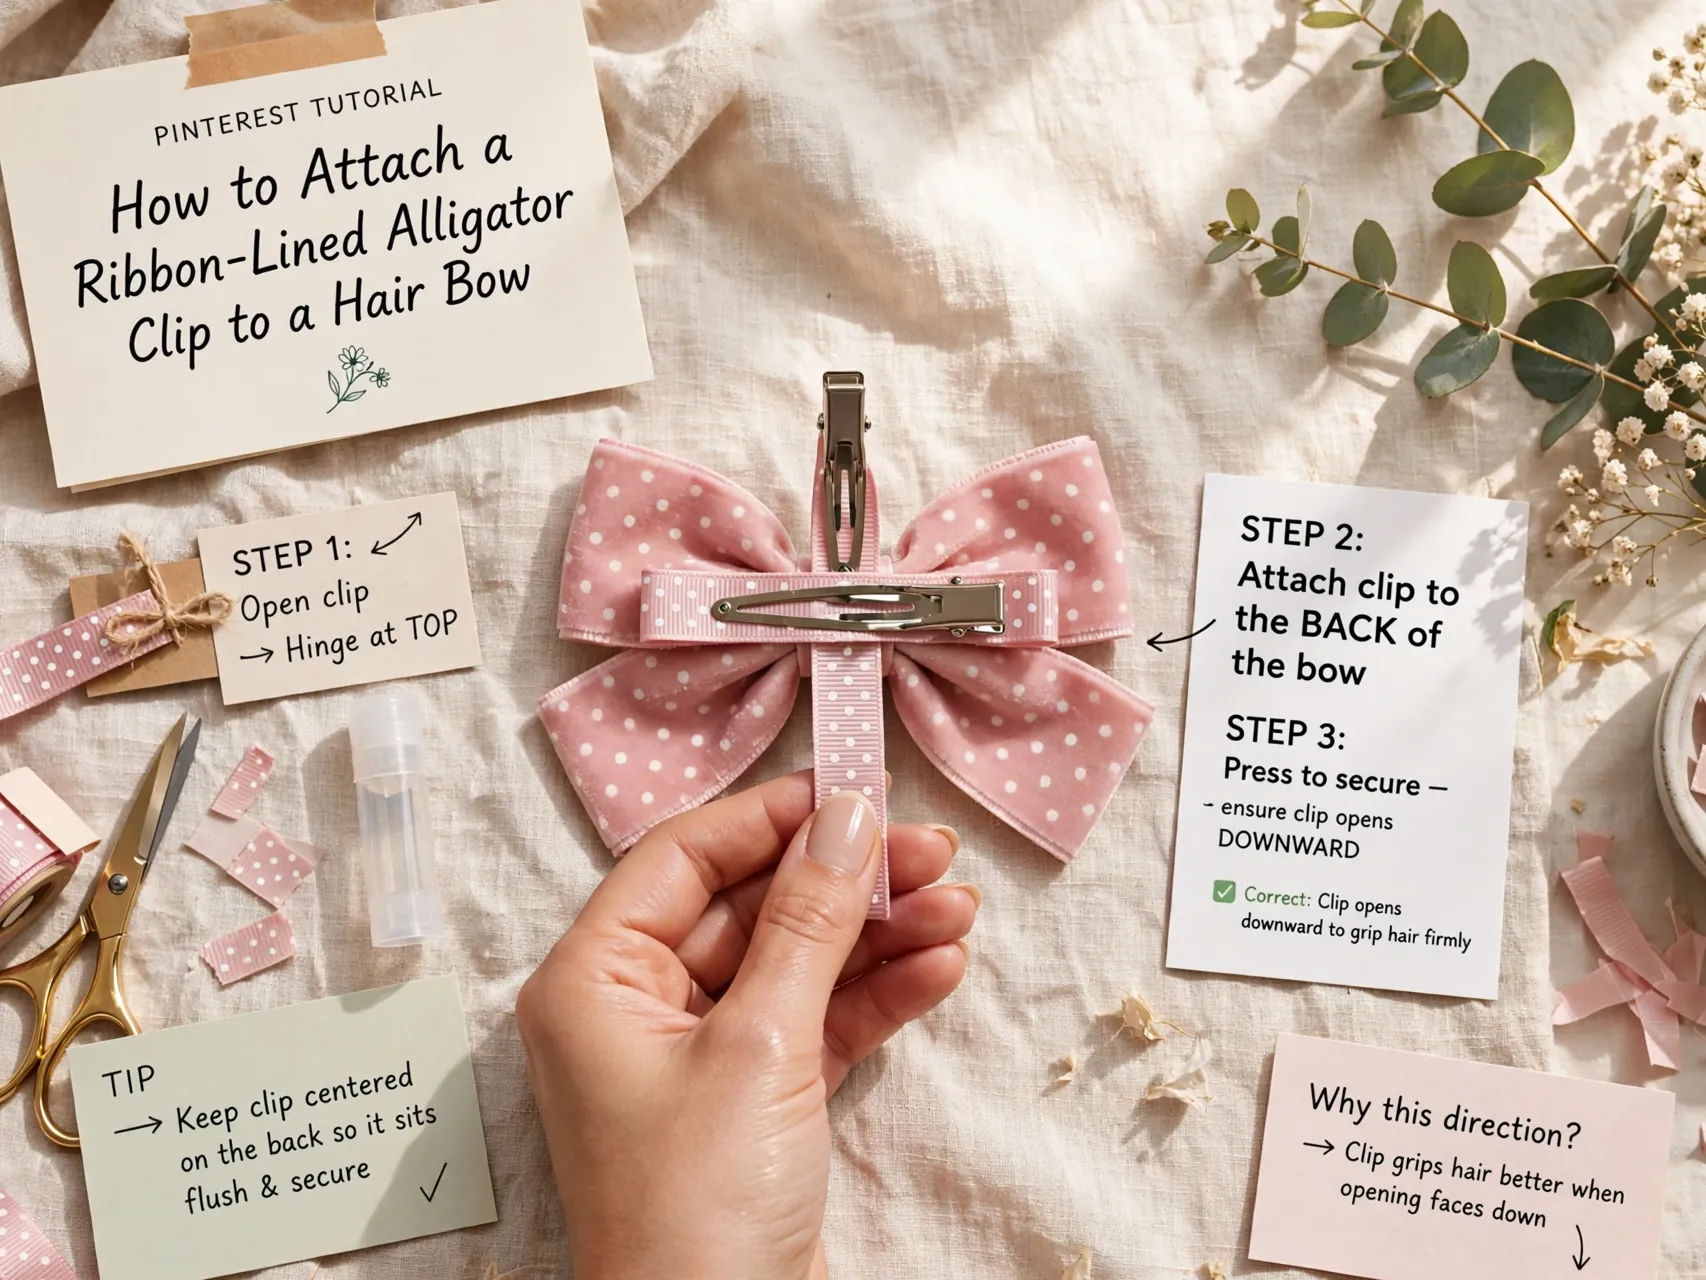
Decide which side of the head the bow will be worn on before you glue, because the clip should open toward the back of the head so it slides in smoothly and the bow faces forward correctly. Mark the back of the bow with a dot if you make matching pairs.
Attach the clip with glue and, for larger bows, a few stitches or a wrap of ribbon around both clip and bow center for security. Let the join cure completely before wearing, ideally overnight for big stacked styles that pull on the bond.
19. Add a Non Slip Grip for Fine Hair
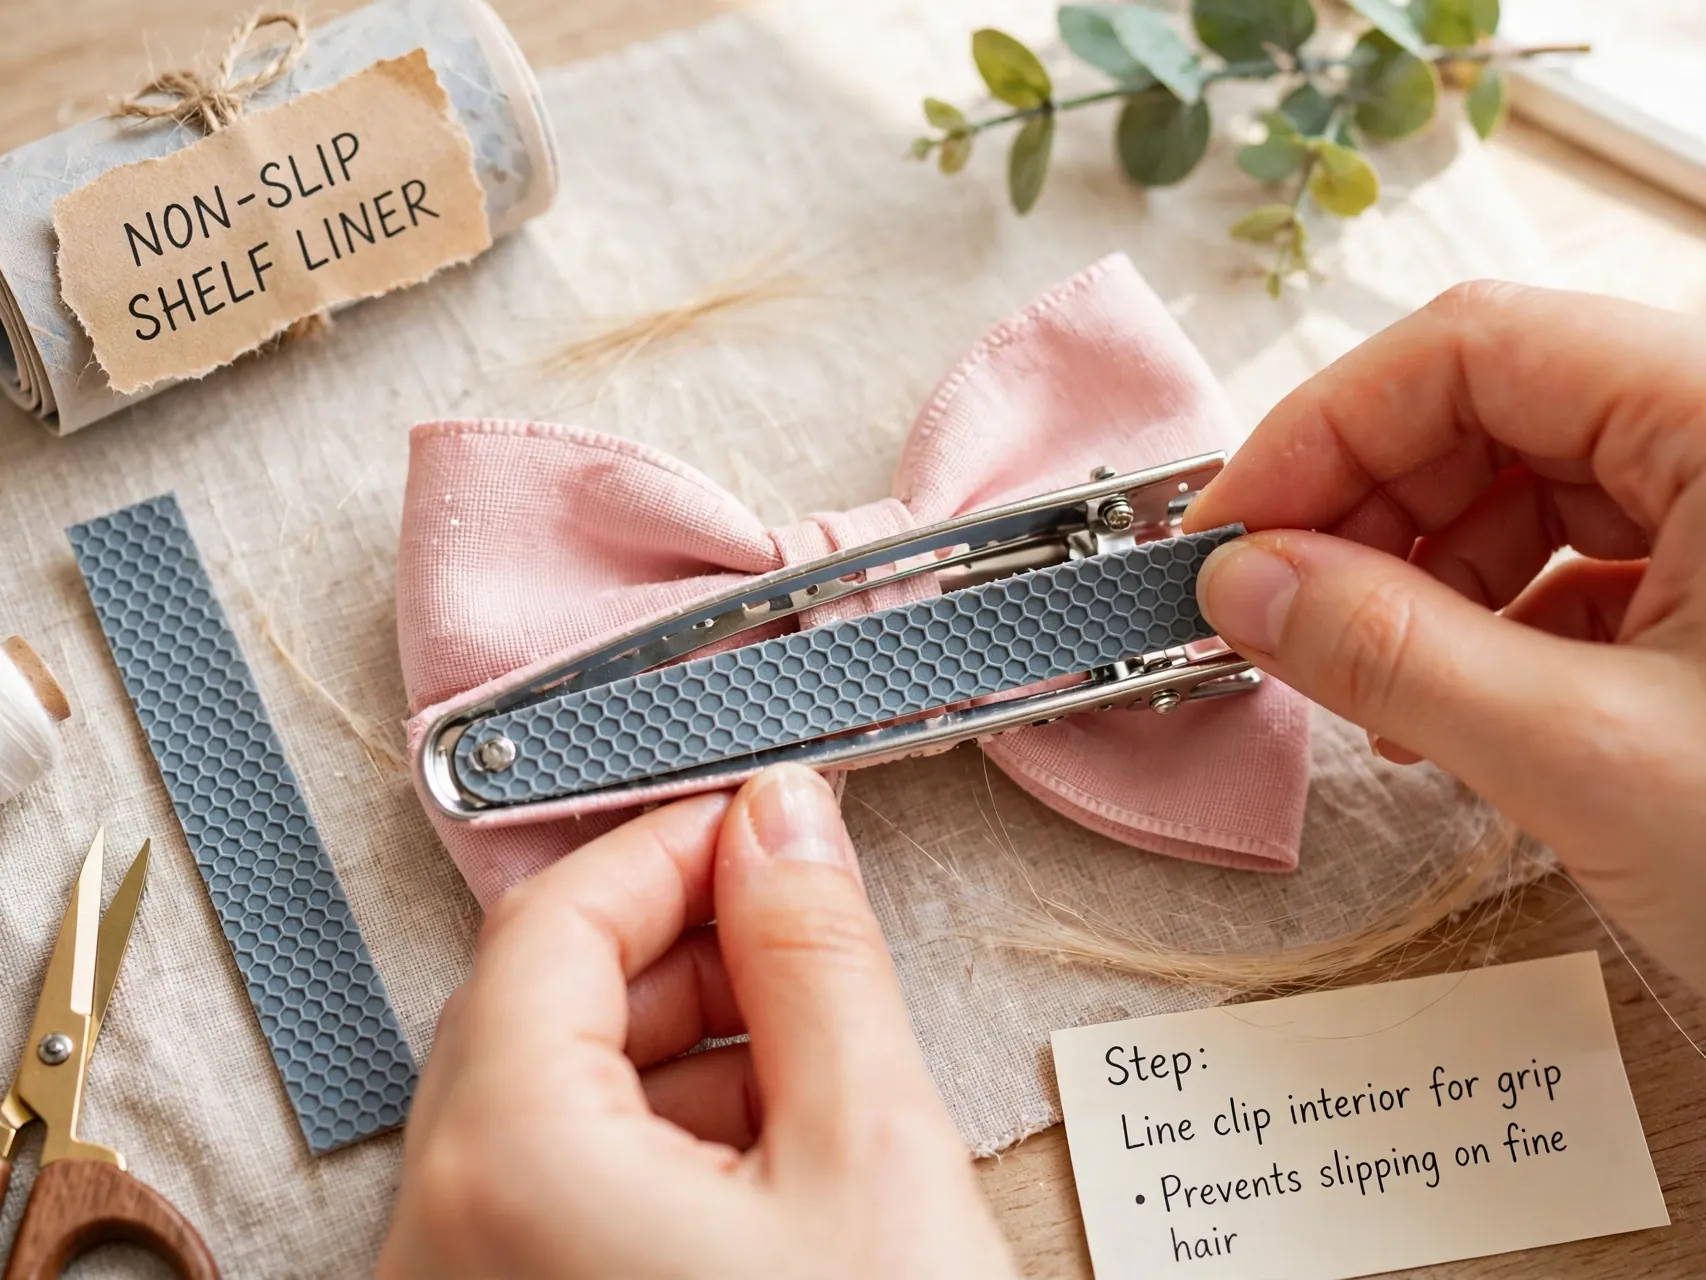
Fine, silky hair sheds bows within the hour. A small strip of grip material, like a piece of shelf liner style grip, velvet ribbon, or a silicone strip made for clips, glued inside the top of the clip, gives the bow something to hold on to.
Keep the grip thin so the clip still closes fully. This one quiet upgrade is a signature of thoughtful makers, and it is among the most useful of all hair bow making supplies tricks for bows meant for toddlers with whispy hair.
20. Fluff, Steam, and Shape Before Wearing

Finished bows need a styling minute. Pull each loop gently into place, angle the tails, puff the layers apart, and check the bow from the front in a mirror, because that is the view everyone else gets.
A light touch of steam from a kettle spout or garment steamer, held at a safe distance by an adult, revives crushed loops, but keep steam and heat tools away from glued centers and from children. Never iron ribbon bows directly unless your ribbon type and a test piece prove it safe.
21. Match Bows to Outfits With a Simple System
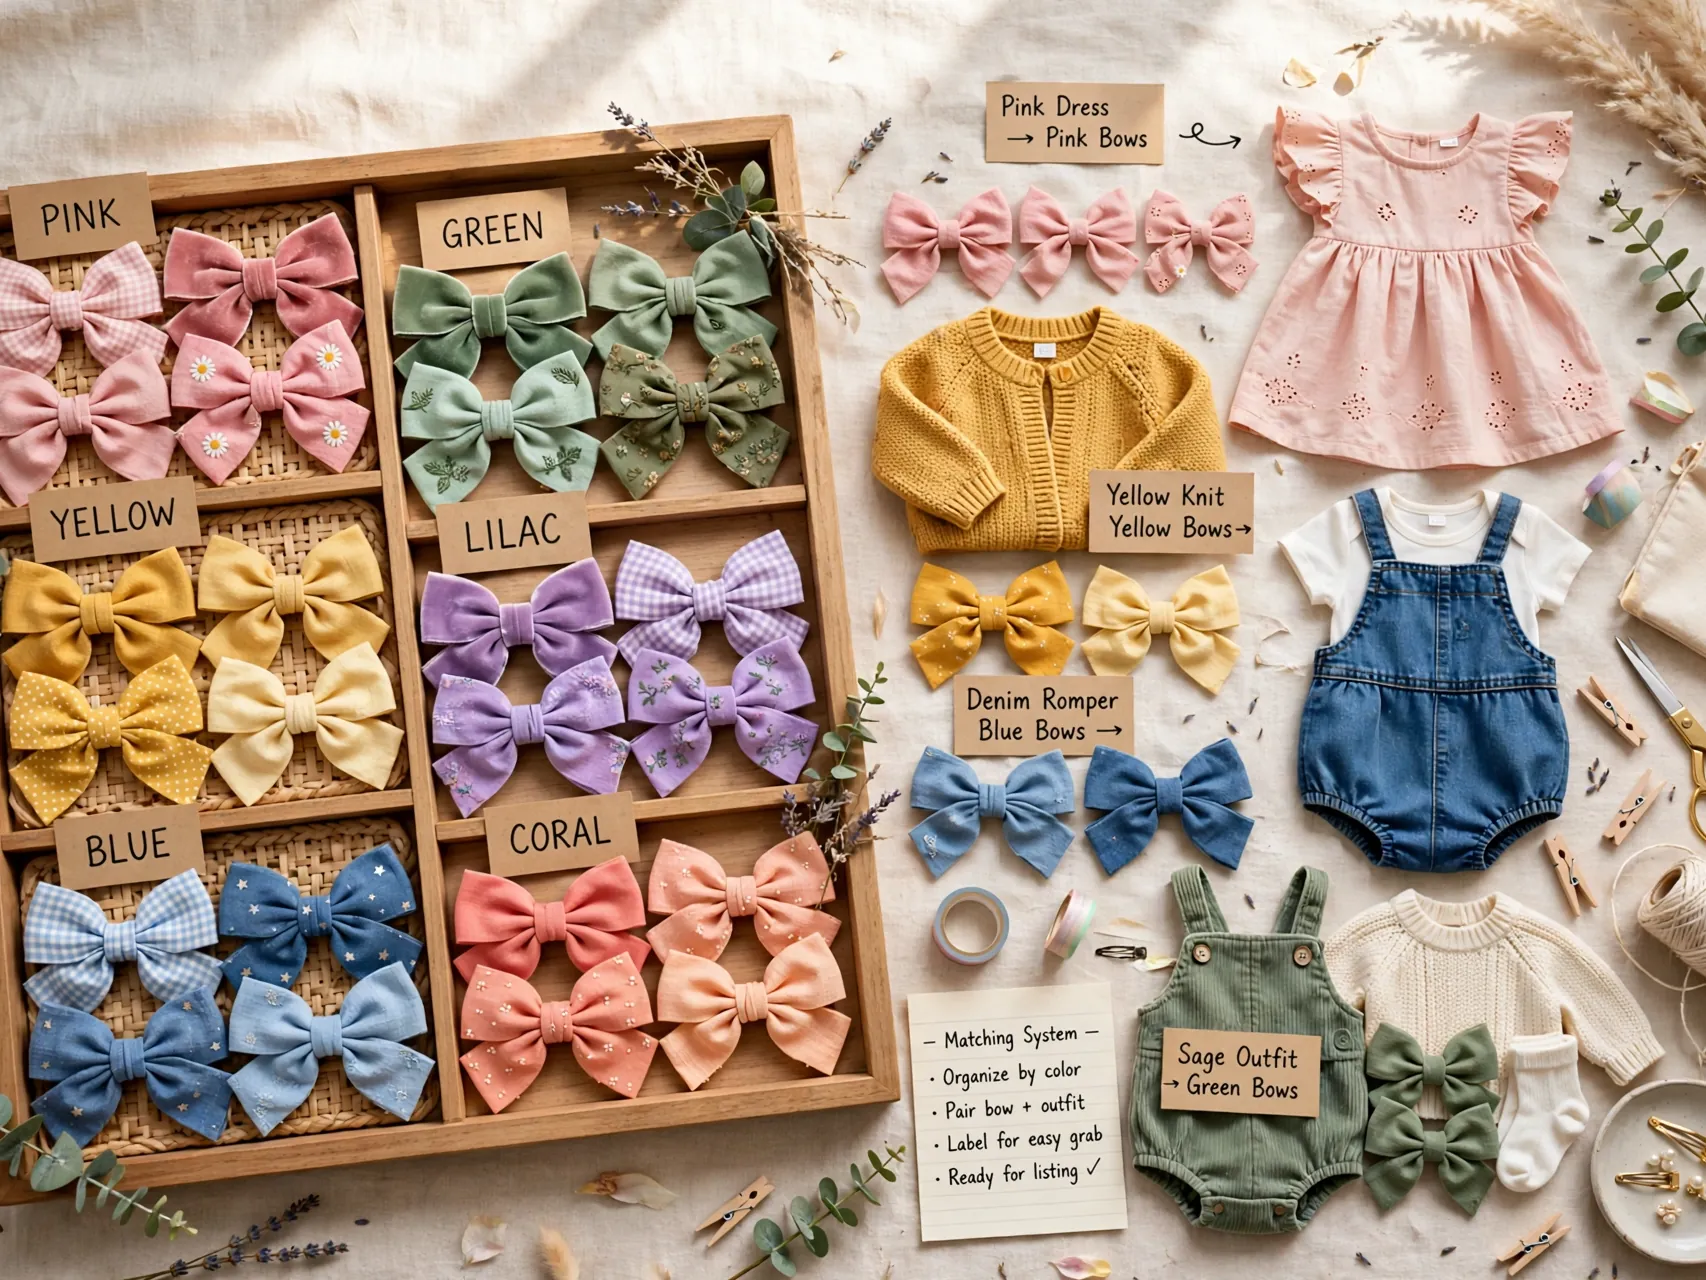
Build a core set first: white, black, navy, red, and a soft pink in your best style and size. Those five cover school, holidays, photos, and most outfits, and they stop the morning scramble of making do with the wrong color.
Then add seasonal and print bows as treats. When you buy an outfit with a tricky color, buy the ribbon in the same trip while the shade is fresh in your mind, and your bow drawer will always have the answer.
22. Store Bows Uncrushed and Visible

Bows stored in a jumbled drawer arrive crushed. Clip them along a hanging ribbon holder, a length of wide ribbon pinned inside a closet, or the edge of a small frame, in color order, where they stay perky and easy to choose.
Keep bows away from direct sun, which fades ribbon over a season, and reshape any flattened loops with fingers and a puff of steam before wearing. A visible holder also shows you at a glance which colors you actually use and which to stop making.
23. Package Bows Prettily for Gifts and Selling
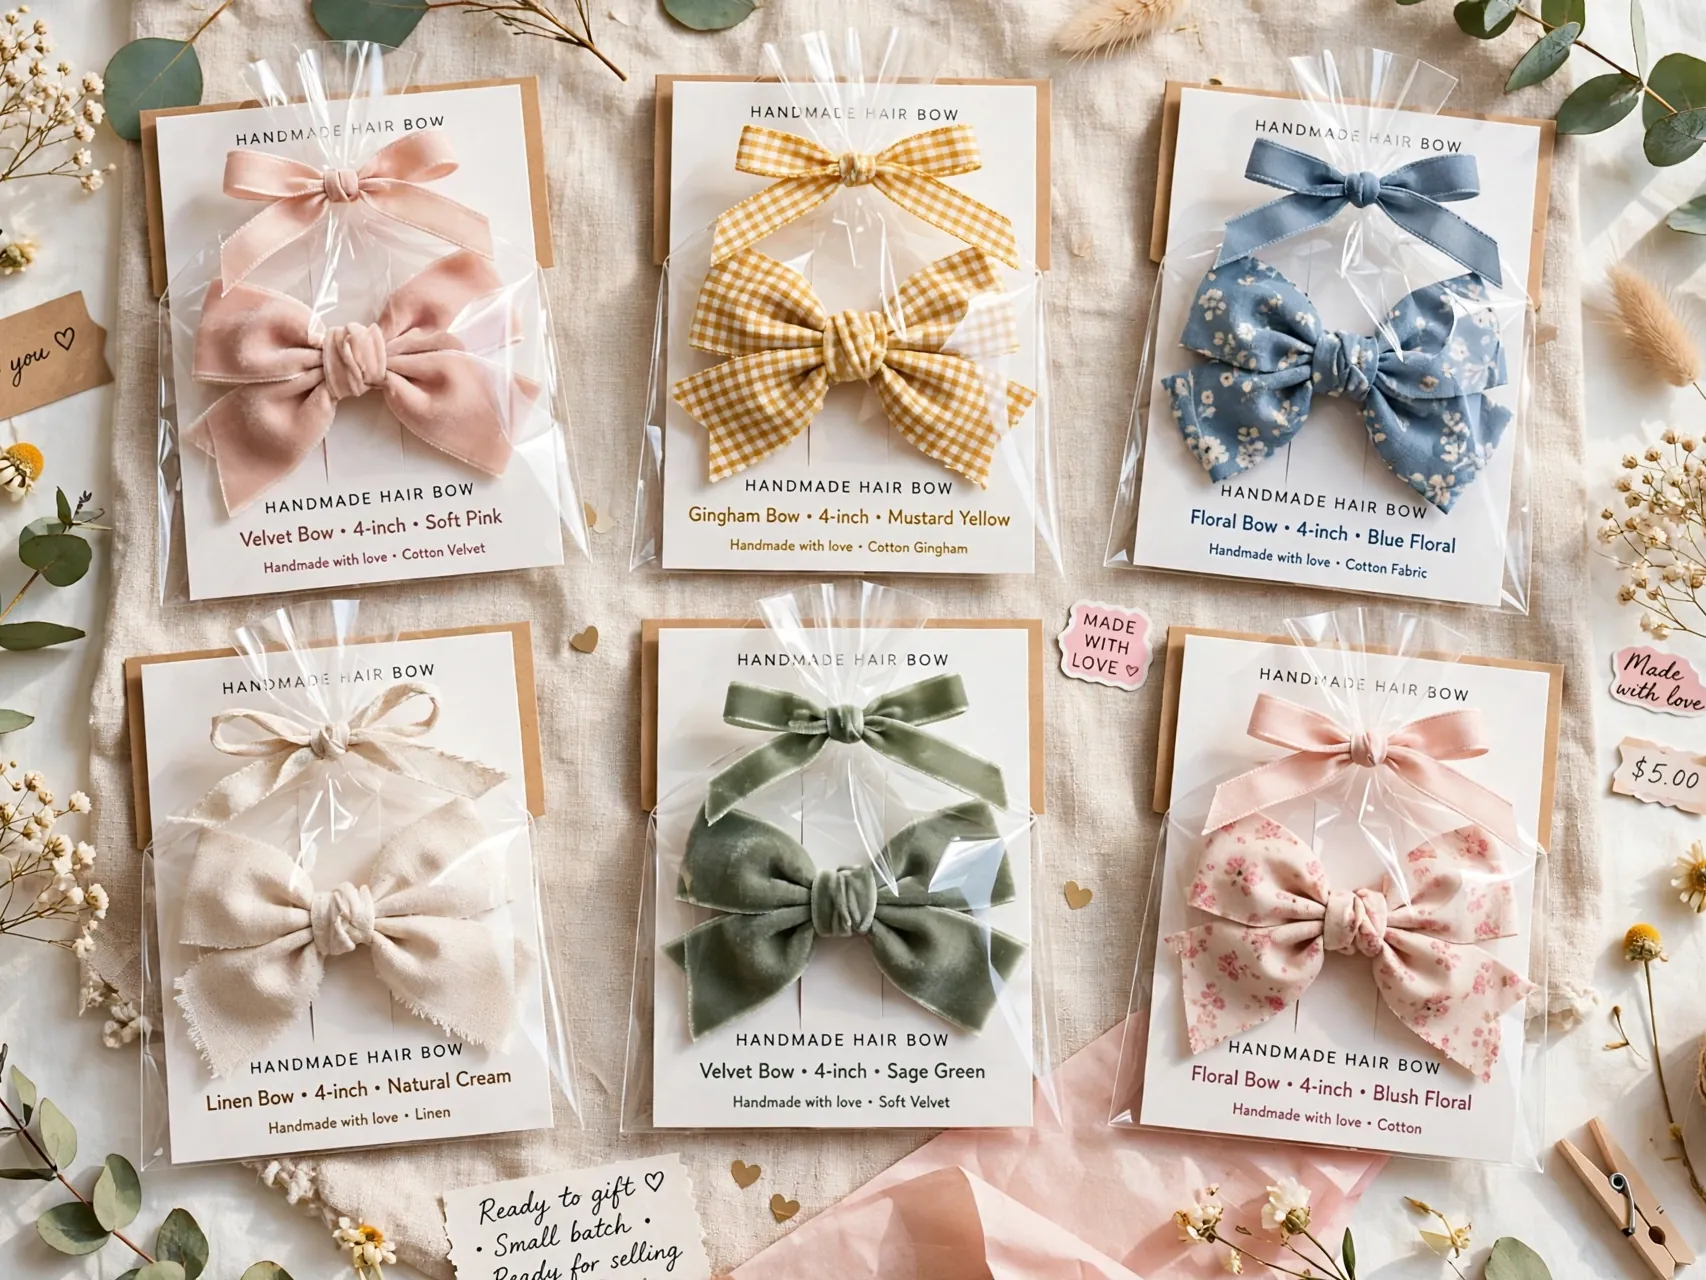
Clip finished bows onto a simple card, slide the card into a clear sleeve or small bag, and add a bow name or size note if you like. Card mounting keeps pairs together, protects loops in transit, and makes a handmade bow feel like a boutique purchase.
If you sell or gift often, keep notes with each style: ribbon width, cut length, and clip type. That record is how your tenth bow matches your first, and it turns the whole craft from happy accidents into reliable, repeatable results, which is the real heart of how to make hair bows like a pro.
FAQ
What ribbon is best for beginner hair bows?
Grosgrain ribbon in a seven eighths or one and a half inch width is the friendliest starting point. It holds its shape, hides stitches and glue, and does not slip while you learn to fold and pinch. Avoid satin and sheer ribbons until your basic bows come out even, because both show mistakes more. Buy a few yards in two or three core colors and practice the tuxedo and twisted styles first.
How much ribbon do I need for one bow?
It depends on the style and the finished size. A small simple bow may use under a foot of narrow ribbon, while a large twisted or stacked boutique bow in wide ribbon can use a yard or more across its layers. The reliable method is to make one test bow, measure exactly what it used, and write that width and length down as your recipe for that style and size.
Why do my bows look lopsided?
Uneven loops almost always trace back to skipping the measuring step or losing the center pinch while stitching. Mark the center of your ribbon, form loops to matching lengths, pinch even accordion creases, and hold the pinch in a spare clip while you sew through the center. Pull stitches tight and shape each layer before stacking. Compare your fifth practice bow to your first and you will see the system working.
How do I keep bows from sliding out of fine hair?
Line the clip with ribbon and add a thin non slip grip strip inside the top jaw of the clip, keeping it slim so the clip still closes. Place bows in hair that is gathered into a ponytail or braid where possible, since clips anchor better against an elastic than on loose strands. Smaller, lighter bows also stay put better on very fine toddler hair than large stacked styles.
Are homemade hair bows safe for babies?
Use them with care and supervision. Choose soft, small bows on fully lined clips, never leave a bow on a sleeping baby, and remove clips for car, nap, and play equipment time. Skip small glued embellishments like gems and buttons on baby bows, because anything that can detach is a mouthing hazard. Many parents prefer soft headband style bows for young babies instead of clips.
Key Takeaways
- Grosgrain and a ruler first: Forgiving ribbon, measured lengths, and a marked center are the unglamorous secrets behind even, boutique looking loops.
- Stitch the center: A few tight stitches through an evenly pinched center hold shape far better than glue alone, especially on stacked hair bows.
- Finish every edge: Dovetail cuts, sealed ends, a neat knotted center, and a ribbon lined clip are the details buyers notice.
- Adults handle heat: Flame sealing and hot glue are grown up jobs, done carefully at a clear table, and tiny embellishments stay off baby bows.
- Store and record: Clip bows on a holder uncrushed, and keep a note of ribbon width and length for every style you love.
- Making bows for a special outfit? Save this guide to Pinterest and pin it before your next ribbon run.