24 Wooden Christmas Decorations You Can Make at Home
Introduction
Wood is the easiest material to make Christmas feel warm. The best wooden christmas decorations do not need a full workshop or expensive lumber. They start with wood slices, scrap boards, sticks, clothespins, and craft sticks, plus paint, glue, and a little patience on a free afternoon.
This list is ordered from no cut projects to simple sawing projects, so beginners can stop anywhere and still fill a tree. Many of these pieces double as gifts and gift tags, and all of them store well for next year if you keep them dry and flat.
Work safely as you go. Wear safety glasses for cutting and sanding, use a dust mask when sanding, and clamp small pieces instead of holding them in your hand near a blade or drill. Keep hands out of the cut path, cut away from your body, and unplug tools or remove batteries before changing bits.
Adults should handle saws, drills, and wood burning tools, and children can join in on painting, gluing, and decorating once pieces are cut and sanded smooth. A quick sanding pass on every edge is what turns a scrap project into a keepsake.
1. Paint Simple Wood Slice Ornaments

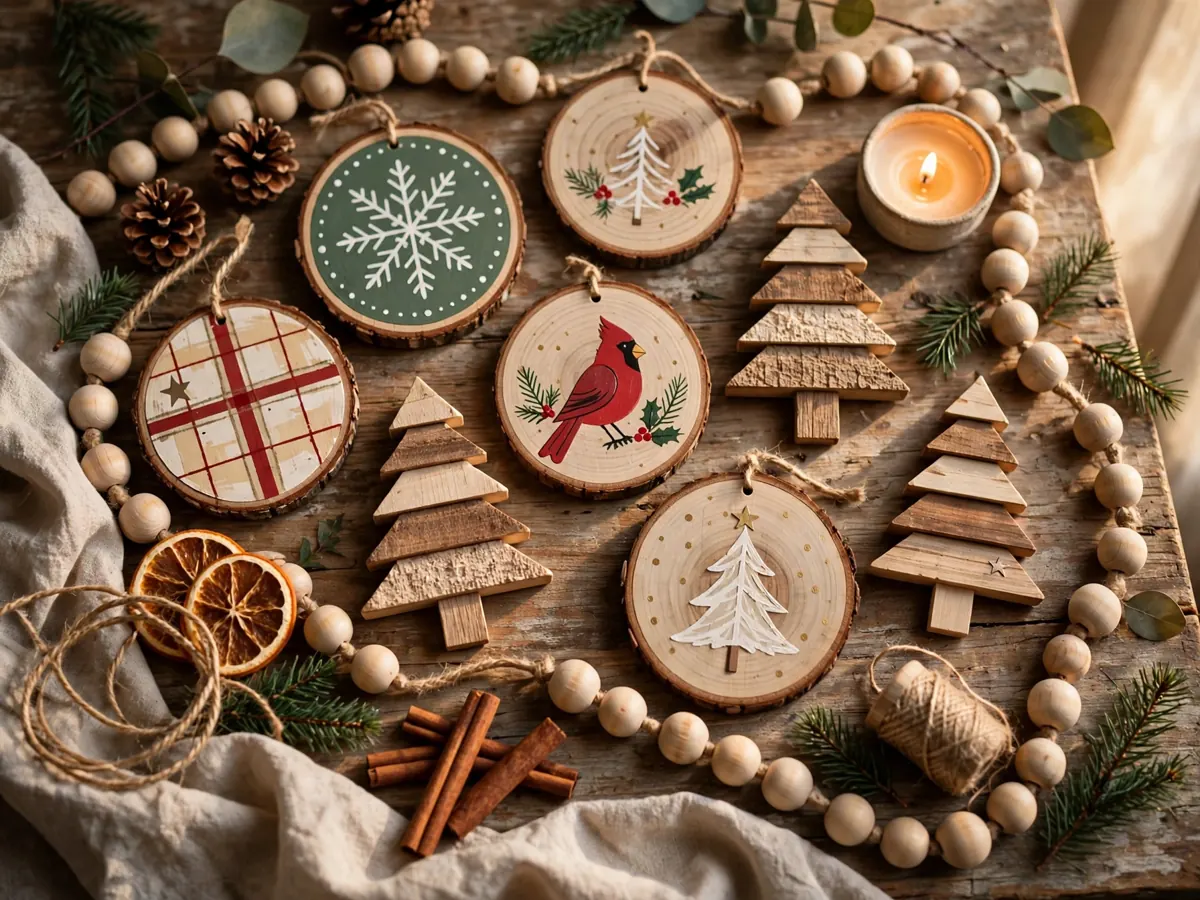
Pre cut wood slices are the friendliest starting point in diy wooden christmas decorations. Sand each slice lightly, paint a simple design like a tree, snowflake, or red berry sprig, and let it dry fully before adding a twine hanger through a drilled hole.
Acrylic paint works well and cleans up with water. Keep designs bold and simple, because fine detail gets lost on bark edged slices. Make a matching set of six for your own tree, then a second set as a gift tied on top of wrapped presents.
2. Burn Designs Into Wood Slice Ornaments

A wood burning tool can trace a transferred design into a wood slice for a rustic, lasting finish. Print a simple motif, transfer it with transfer paper, then follow the lines slowly with the heated tip, working on a heat safe surface.
Treat the tool with respect: it is hot enough to burn skin and wood alike. Adults only, good ventilation, and unplug it to cool on a stand when you pause. Practice on a spare slice first, and seal finished wood slice christmas ornaments with a clear coat if you like.
3. Make Wood Slice Reindeer Faces

Turn a wood slice into a reindeer with two small twig antlers glued to the back, a red pom pom or painted red nose, and simple painted eyes. This is a happy project for kids once an adult has cut and sanded the twigs.
Reindeer slices work as ornaments, place cards, and gift tags, so make more than you think you need. Vary the nose color or add a tiny bow and each one gets its own personality. Keep glue dots small so the faces stay neat from the front.
4. Build Scrap Wood Triangle Trees
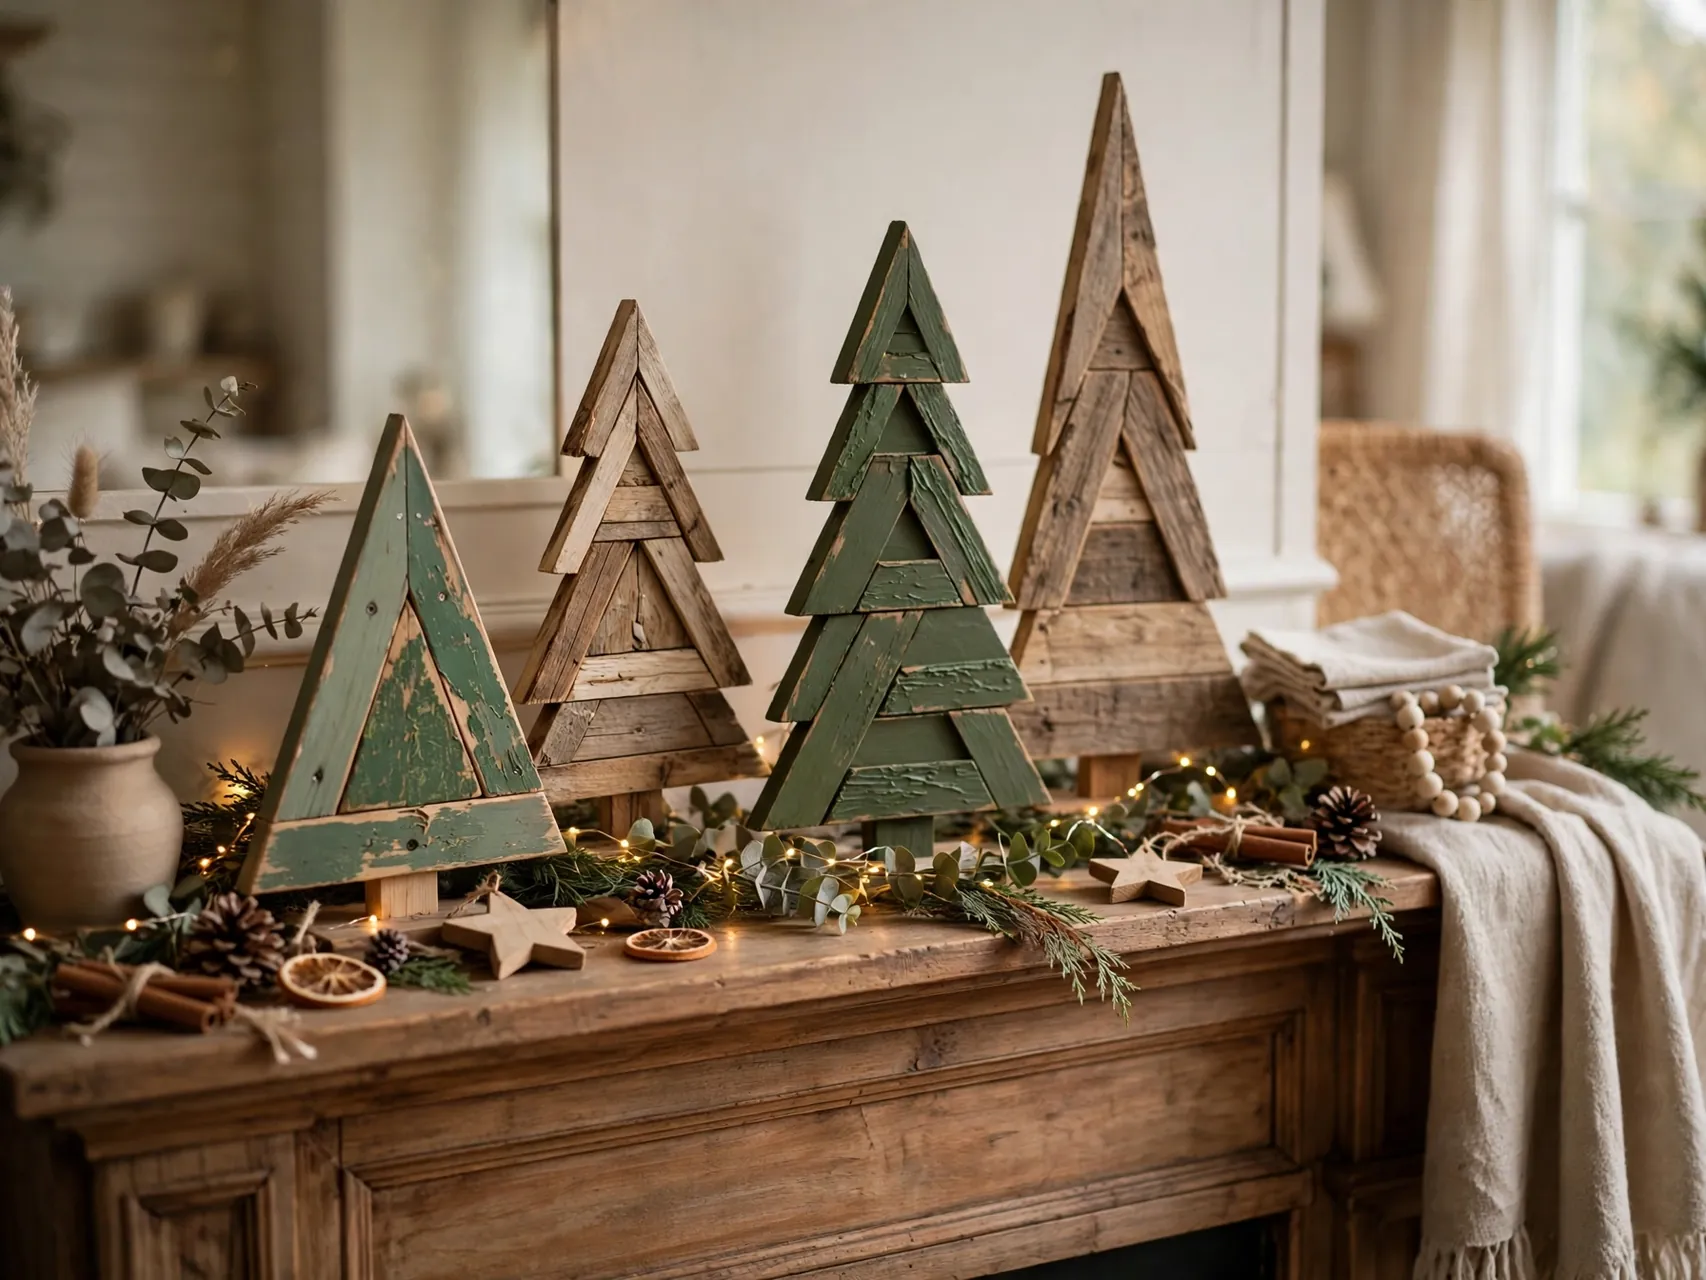
Cut scrap boards into stacked, shrinking lengths and fix them to a central trunk piece to form a flat triangle tree, or cut a simple triangle from a wide board. Paint them green, white, or natural with stain, and stand them on a mantel or shelf.
Three trees in different heights make an instant display. Clamp boards before cutting, sand the edges, and add felt pads if they will sit on furniture. These trees pack flat in a storage box, which is a real gift in January.
5. Stack Wood Block Trees on a Mantel
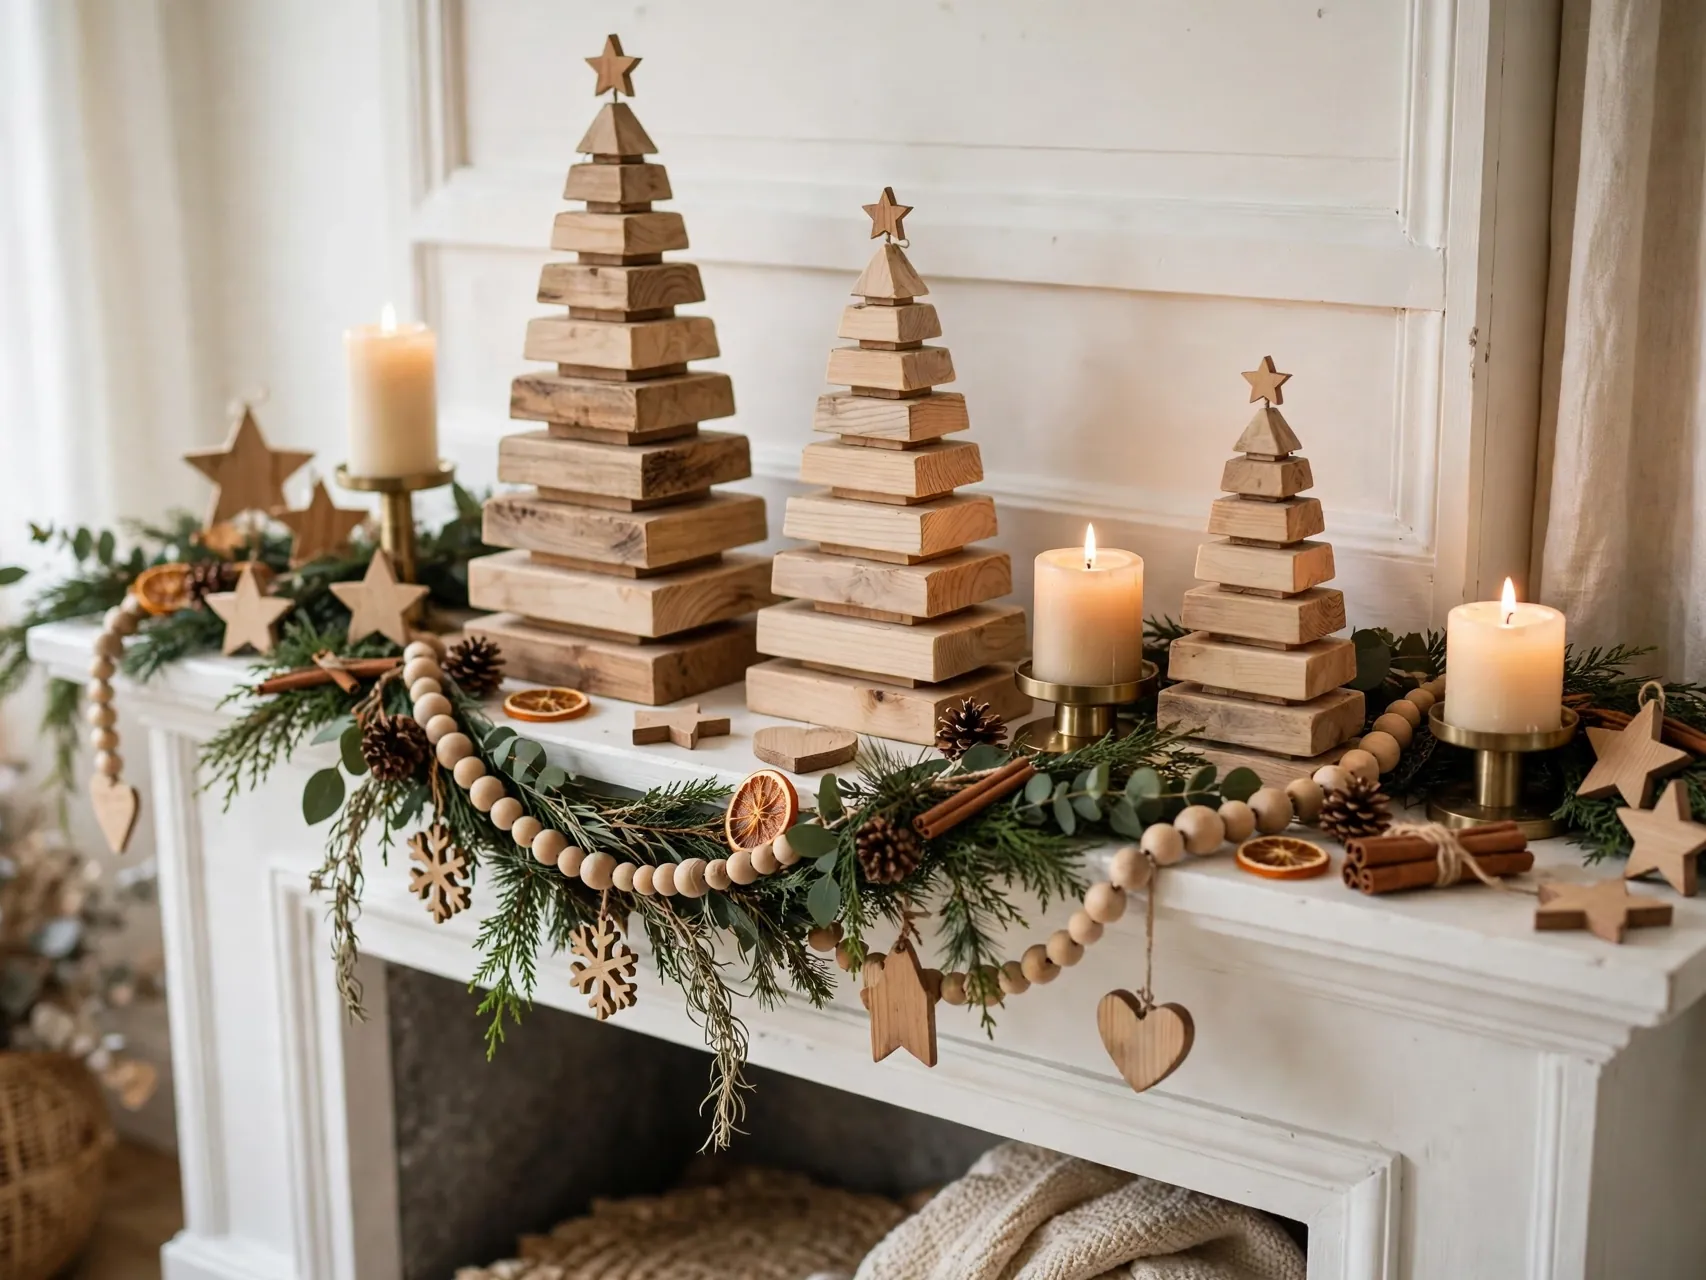
Glue wooden cubes or short blocks in shrinking layers to build a small blocky tree, then top it with a star cut from glitter card or thin wood. Paint each layer the same green or graduate the shades for a modern look.
A back support block at the base keeps the stack stable. This is a good project for using up cube offcuts, and children can do the painting and stacking while glue dries in stages. Group several on a tray with faux snow for a table display.
6. String a Wooden Bead Garland With Tassels
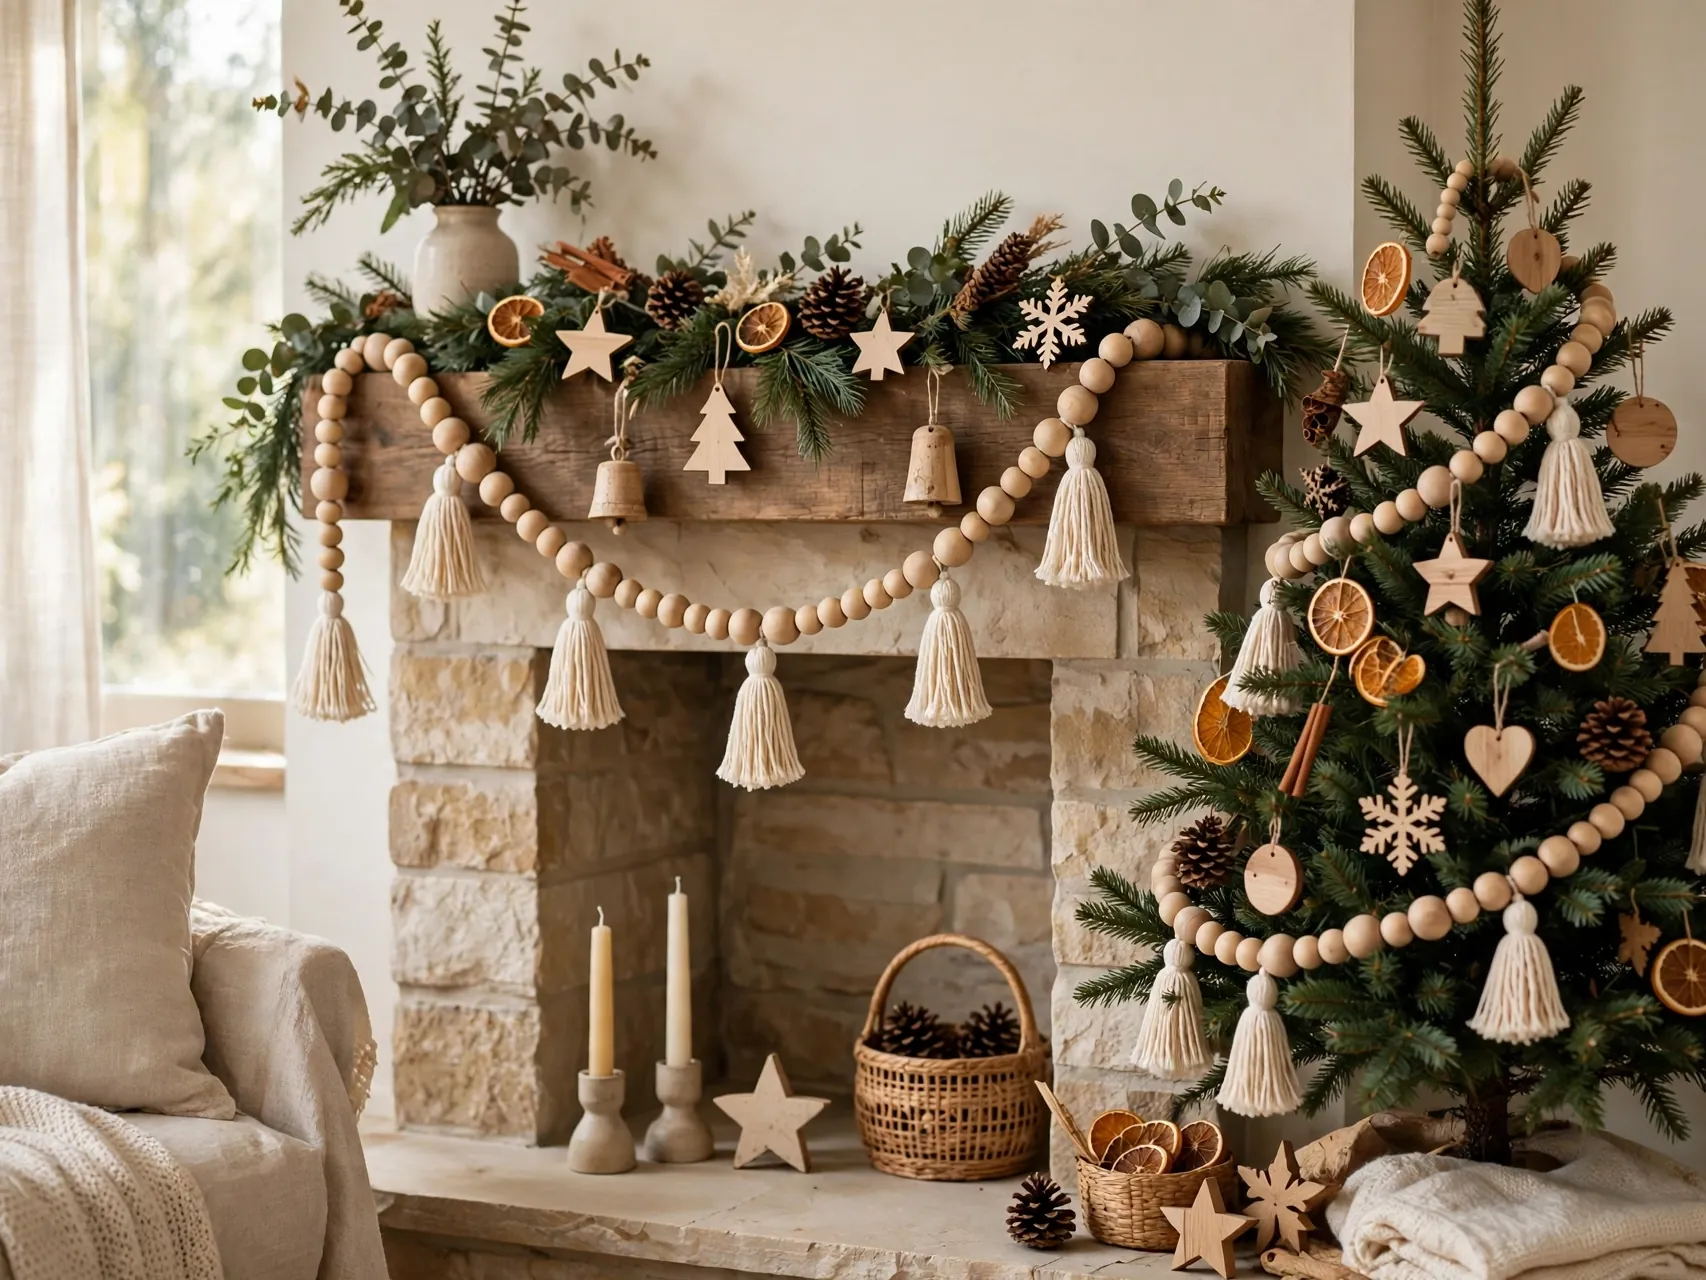
Thread unfinished wooden beads onto twine or thin cord, tying a knot every few beads or leaving them free to slide, and finish each end with a simple yarn tassel. Drape it on the tree, across a mantel, or around a wreath.
Paint every third bead red, gold, or white if you want color without covering the wood. Bead garlands suit almost every style in this list of rustic wooden christmas decor, and they store in a small bag without tangling if you coil them loosely.
7. Turn Wood Beads Into Snowman Ornaments
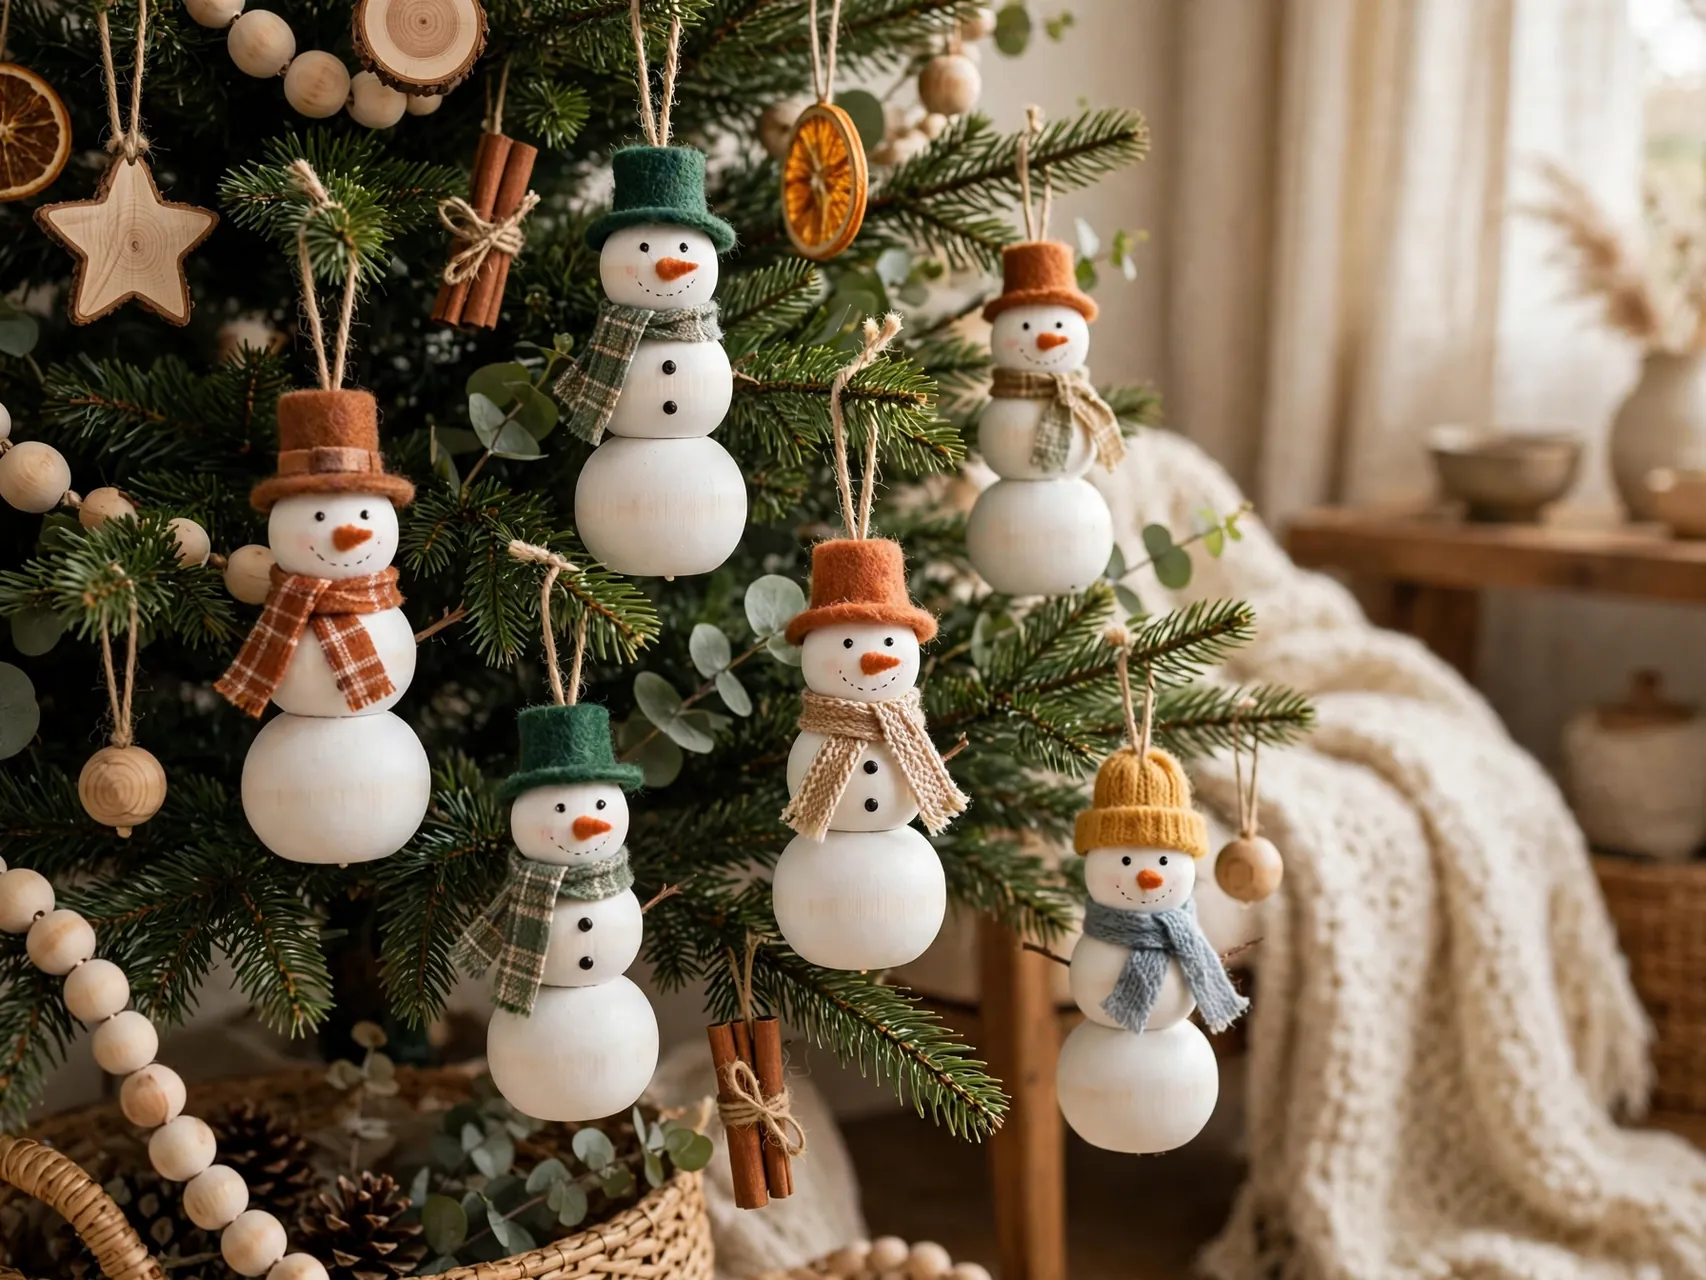
Thread three white painted beads in shrinking sizes onto cord, draw on a tiny face and buttons with a fine paint pen, and add a scrap fabric scarf. A loop at the top makes it an ornament, and a flat base makes it a shelf sitter.
These snowmen are quick to batch, so they work well as party favors and stocking extras. Let paint dry fully between steps so faces do not smudge. Small hands can thread beads on a pipe cleaner version with no needle involved.
8. Cut Wooden Star Ornaments From Scrap Boards
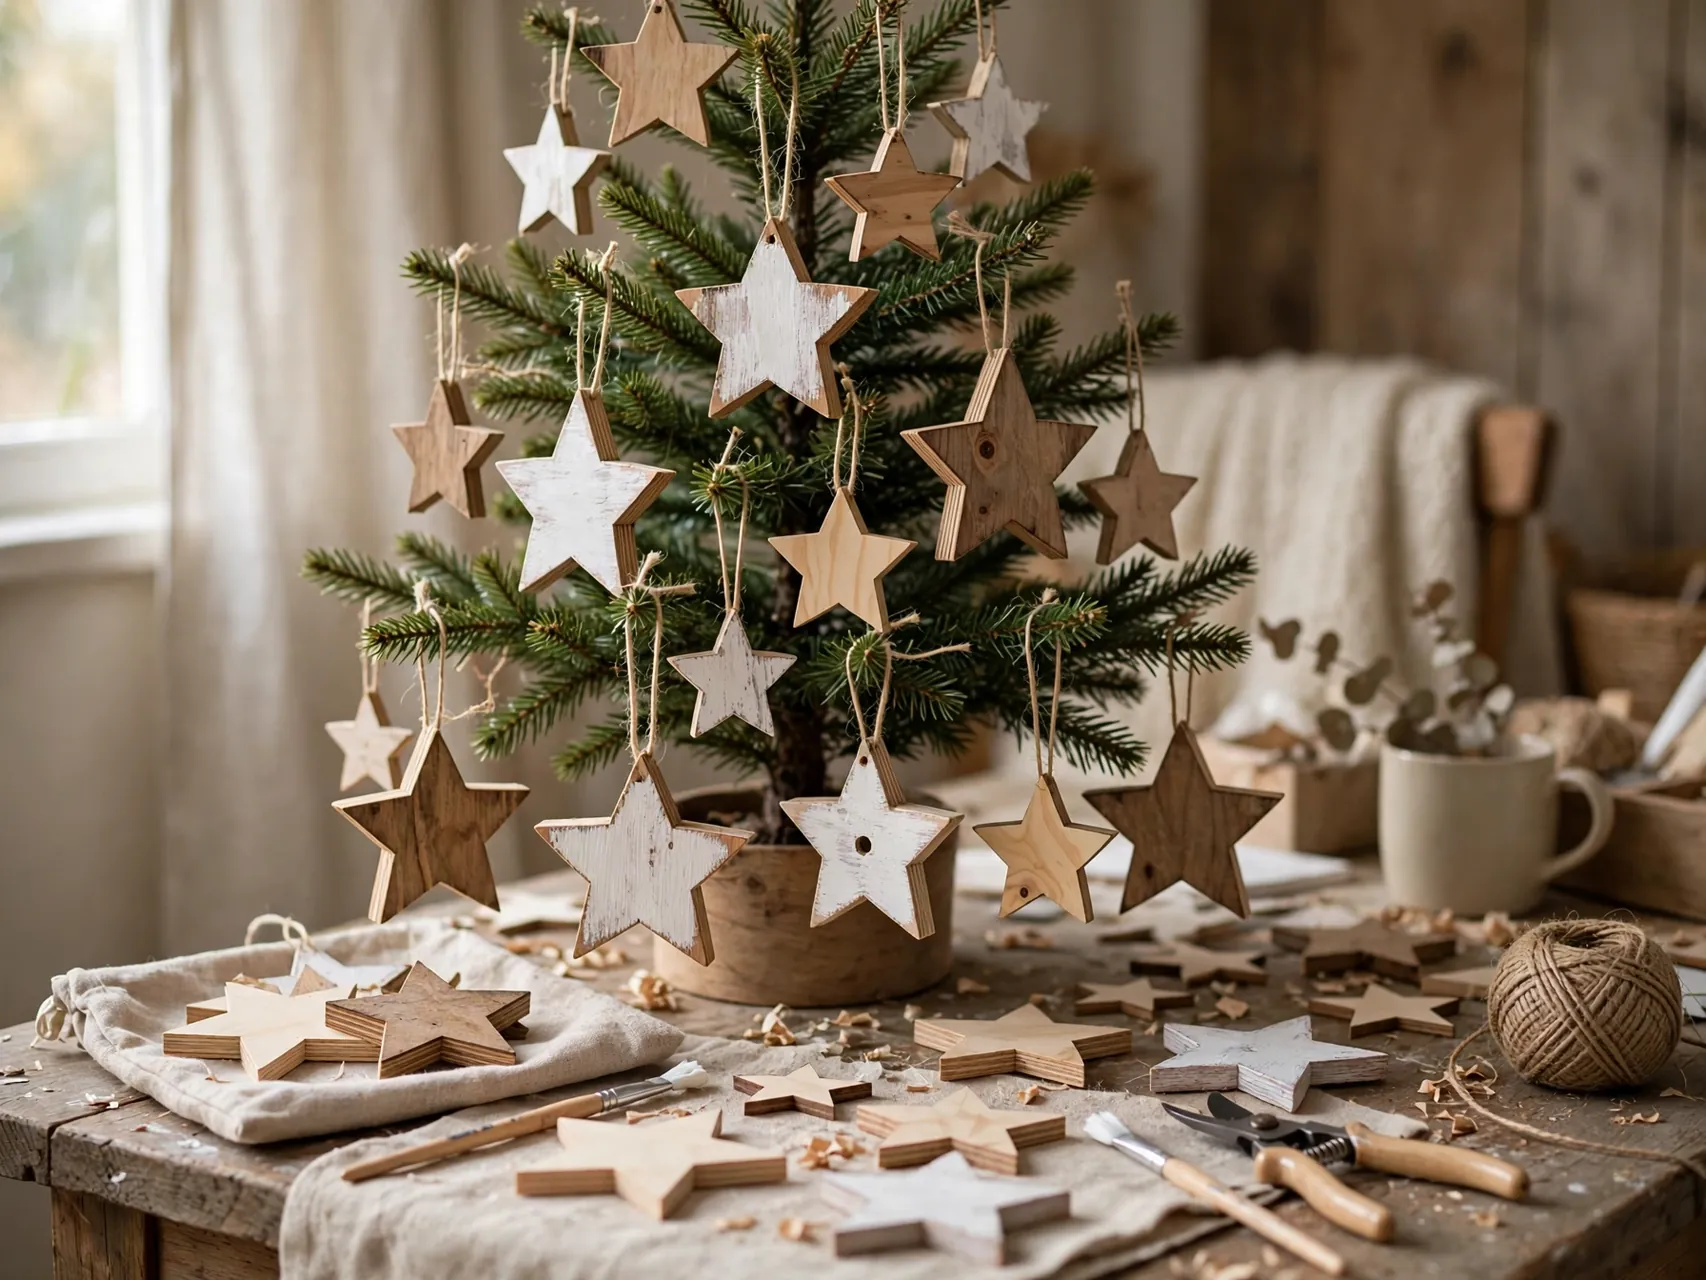
Trace a star using a cookie cutter or paper template, cut it with a hand saw, then smooth it with a rasp and sandpaper. Drill a small hole, thread ribbon, and leave the star natural, stained, or lightly distressed for a rustic finish.
Stars are forgiving shapes for a first sawing project. Work with the piece clamped, cut away from your body, and expect the first star to be your practice one. A set of stars in mixed sizes looks beautiful on a simple green tree.
9. Weave a Twig and Branch Wreath

Gather straight, flexible twigs or buy a grapevine base, then wire or glue twigs in a circle and add pinecones, berries, and a bow. A twig wreath brings the woodland feel of wooden christmas decorations to a front door or over a mantel.
Use prunings that are clean and dry, and check local rules before gathering anywhere beyond your own yard. Keep wreaths with real greenery away from heat sources and open flame. A grapevine base is the fastest route if bending twigs is new to you.
10. Paint a Pallet Wood Holiday Sign
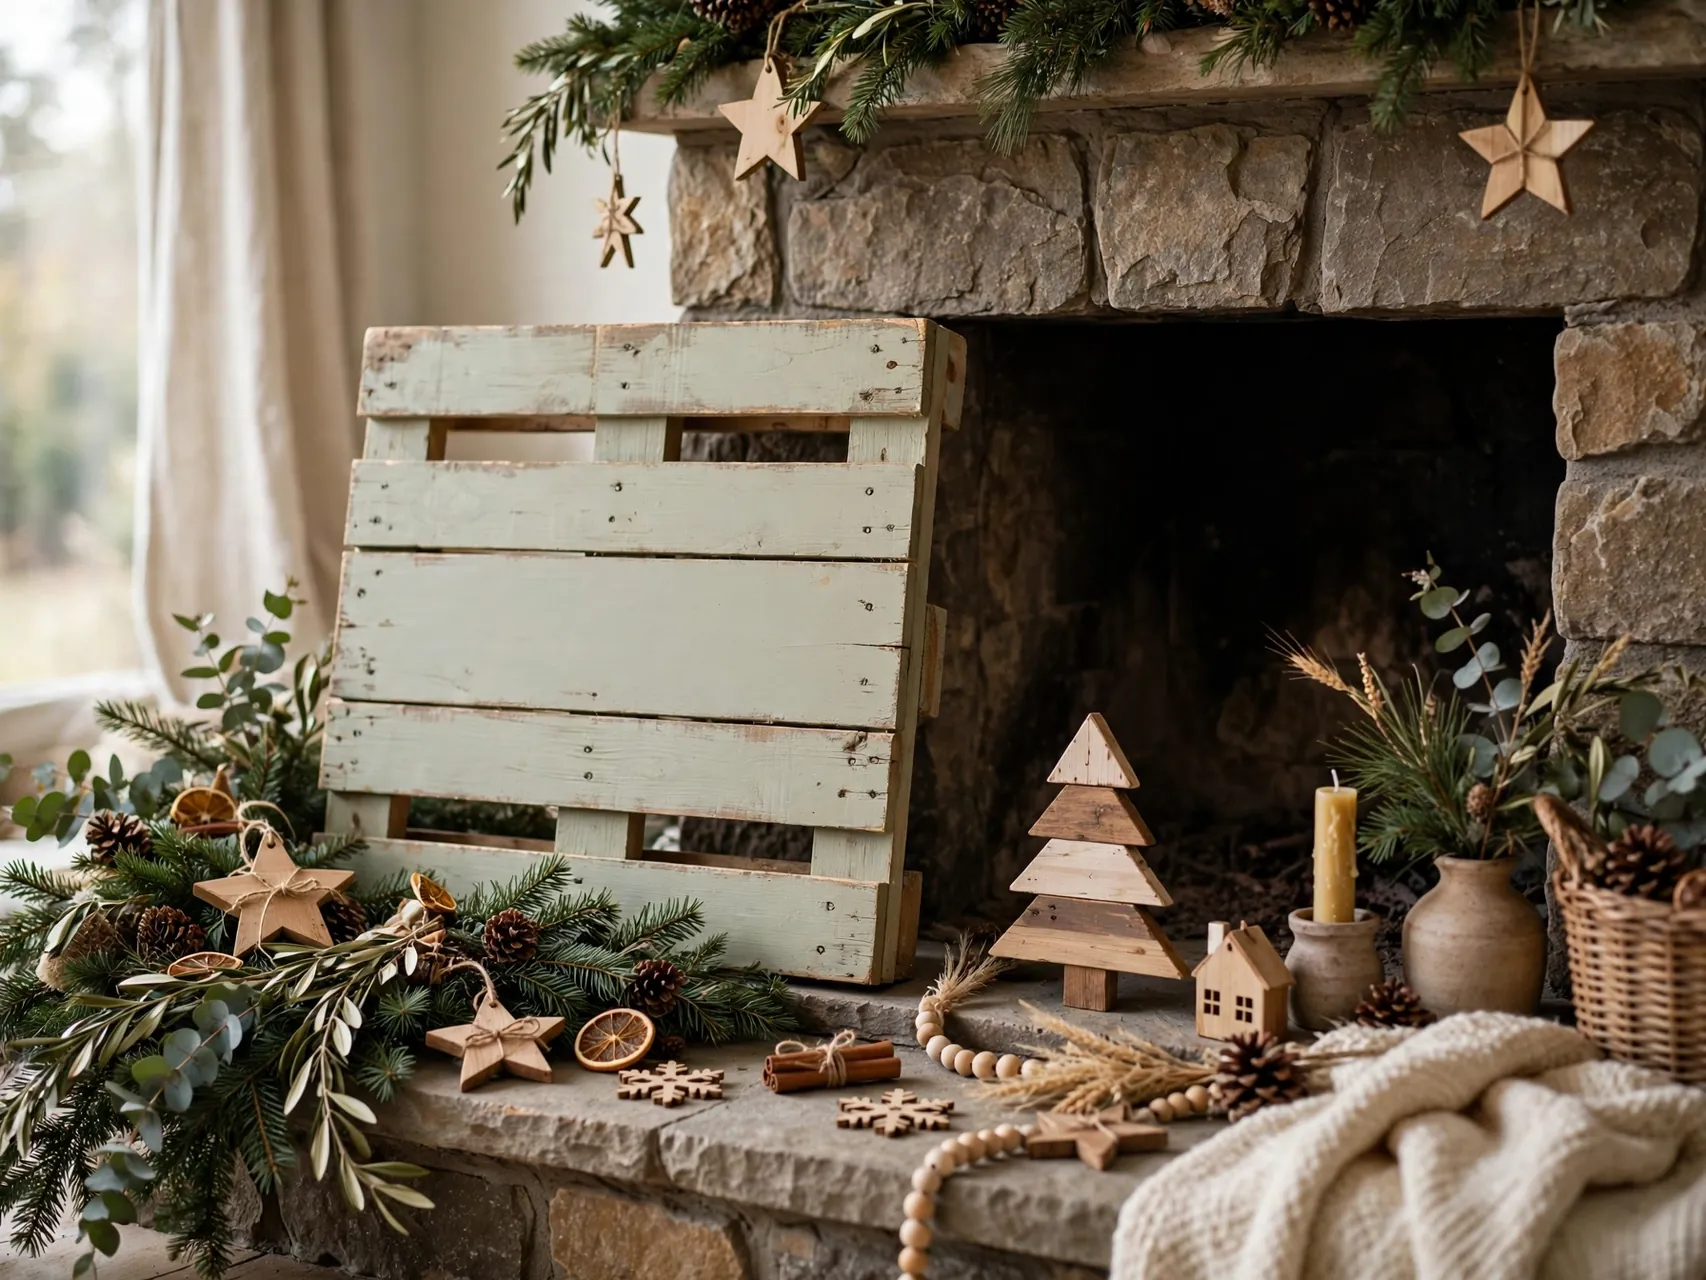
Join two or three pallet or fence boards, sand them well, and paint a short word like Joy, Noel, or Merry in a simple stencil or freehand letters. Add a small painted tree or star and a twine hanger on the back.
Use pallet wood only if you know its source and it is clean and untreated, and sand splinters thoroughly before painting. Signs lean beautifully on mantels and porches, and they make strong gifts because the words can be personalized for each family.
11. Build a Wooden Advent Tree With Tiny Bags

Fix horizontal slats in shrinking lengths to a tall central board to make a flat tree, add small nails or hooks in rows, and hang 25 tiny numbered bags or envelopes, one for each December day.
Stencil numbers carefully and put a barrier like wax paper inside bags if ink might bleed through. Fill bags with notes, small treats, or activity ideas rather than only sweets. Hang the tree where small hands can reach the lower bags and adults handle the hanging fixings.
12. Stamp Log Slice Coasters for Holiday Drinks
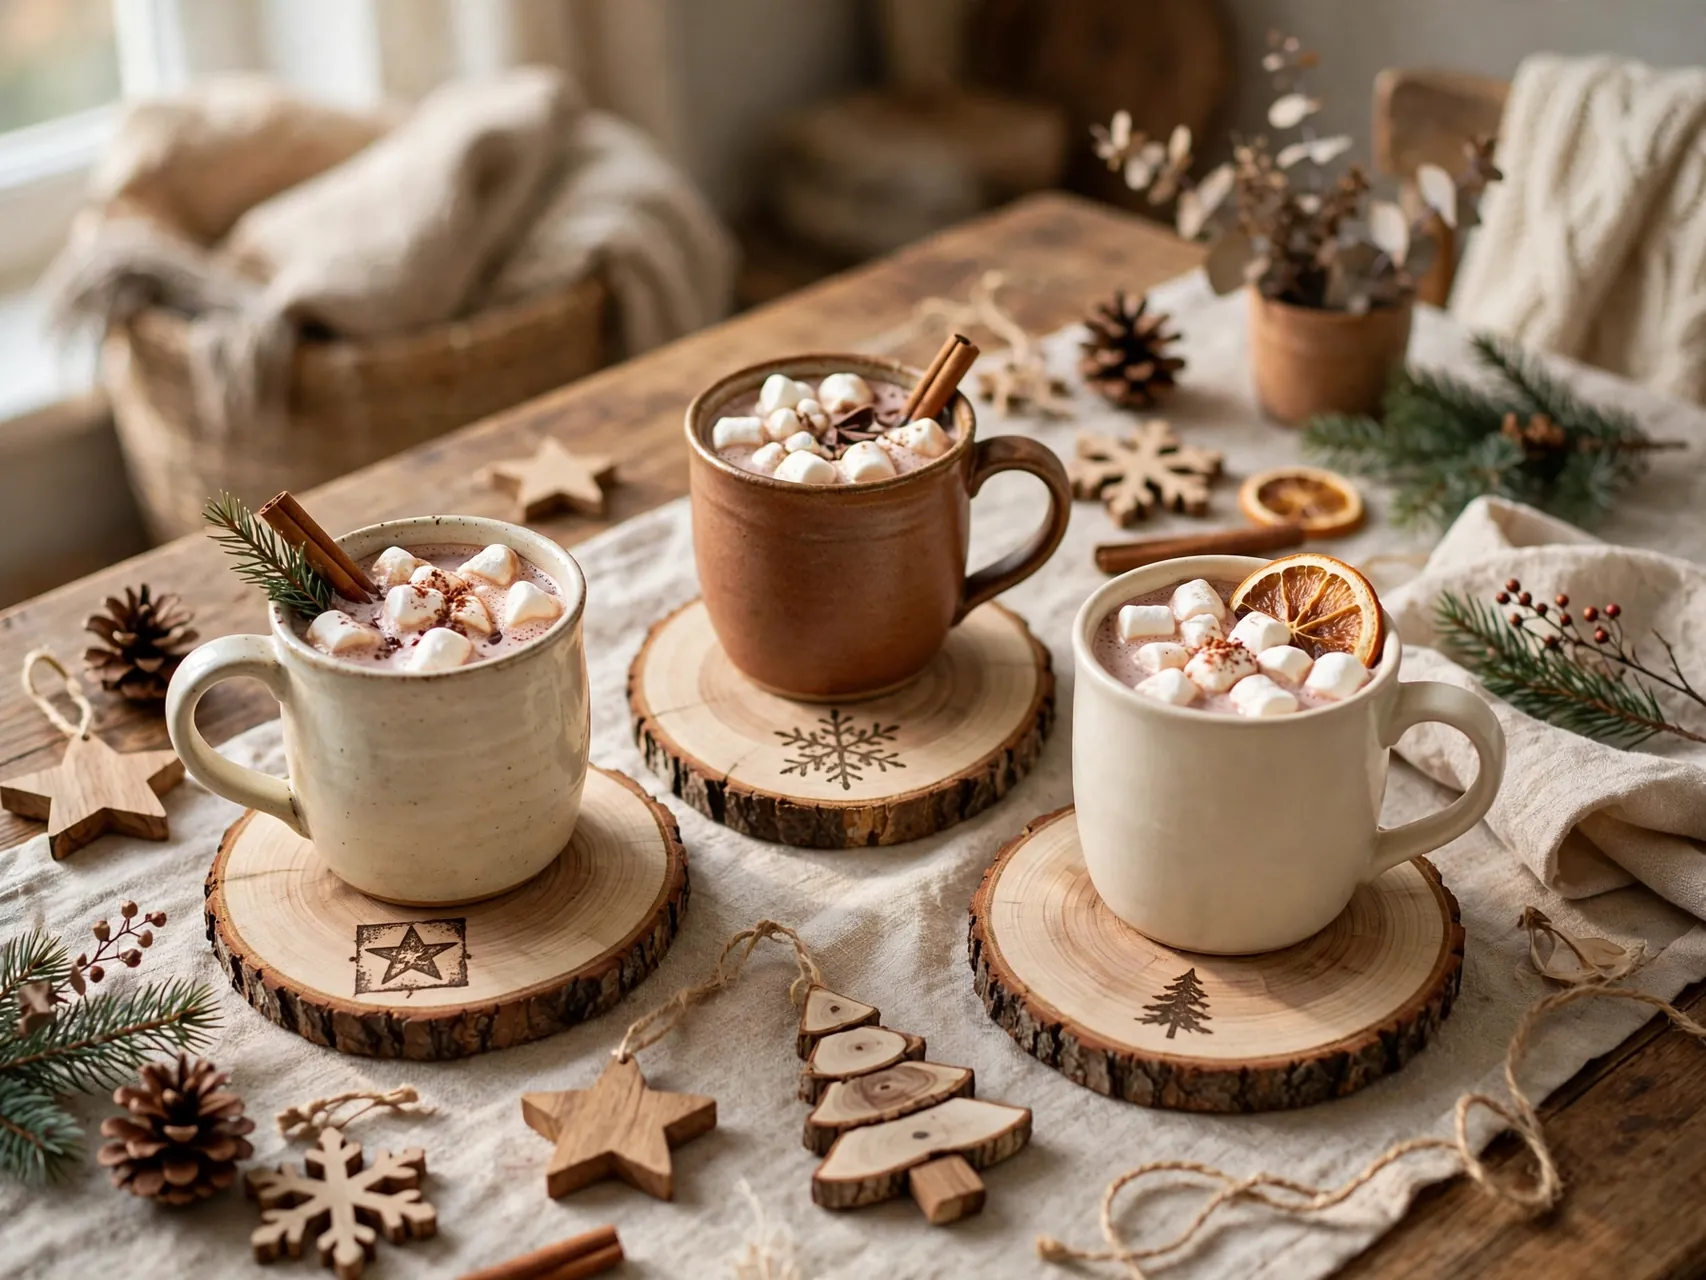
Larger wood slices become coasters with a stamped snowflake, tree, or initial and a good coat of water resistant sealer. Sand them very smooth, stamp or paint the design, and let the sealer cure fully before the first mug lands.
Add felt pads underneath to protect tables. Coasters are among the most useful homemade wooden christmas crafts to give, because everyone needs them during party season. Tie a stack of four with ribbon and a sprig of greenery for a ready made host gift.
13. Assemble a Wood Block Snowman Family

Paint two or three stacked blocks white per snowman, add painted faces and buttons, fabric scarves, and twig arms fixed with glue. Make one block stack per family member, tallest to smallest, and line them up on a porch or entry table.
Exterior paint helps porch snowmen handle damp air, and a sheltered spot helps them last. This project uses up chunky offcuts that are too short for other builds. Personalize each scarf color and the family grouping becomes the photo everyone takes.
14. Stack Wood Block Presents That Never Need Wrapping

Paint solid blocks in red, green, gold, or cream, then glue or tie real ribbon around them in a cross, finished with a bow on top. Group three presents at the base of the tree, on a hearth, or beside a front door.
Reusable wooden presents solve the empty space under the tree before the real gifts arrive, and they never tear or fade. Use blocks with well sanded edges if children will handle them, and check ribbon ends are fixed firmly so nothing pulls loose.
15. Craft Clothespin Reindeer and Star Ornaments

Wooden clothespins become reindeer when two pins form antlers on a third pin body, with a red pom pom nose and tiny eyes. Pins also clip together into star and snowflake shapes that paint up beautifully in white and gold.
This is a low cost, low mess project for classrooms and family craft nights. Use wood glue or hot glue handled by an adult, and let each child sign the back with a date. Clothespin ornaments are light, so even the smallest tree branches can hold them.
16. Paint Popsicle Stick Snowflakes That Scale Up
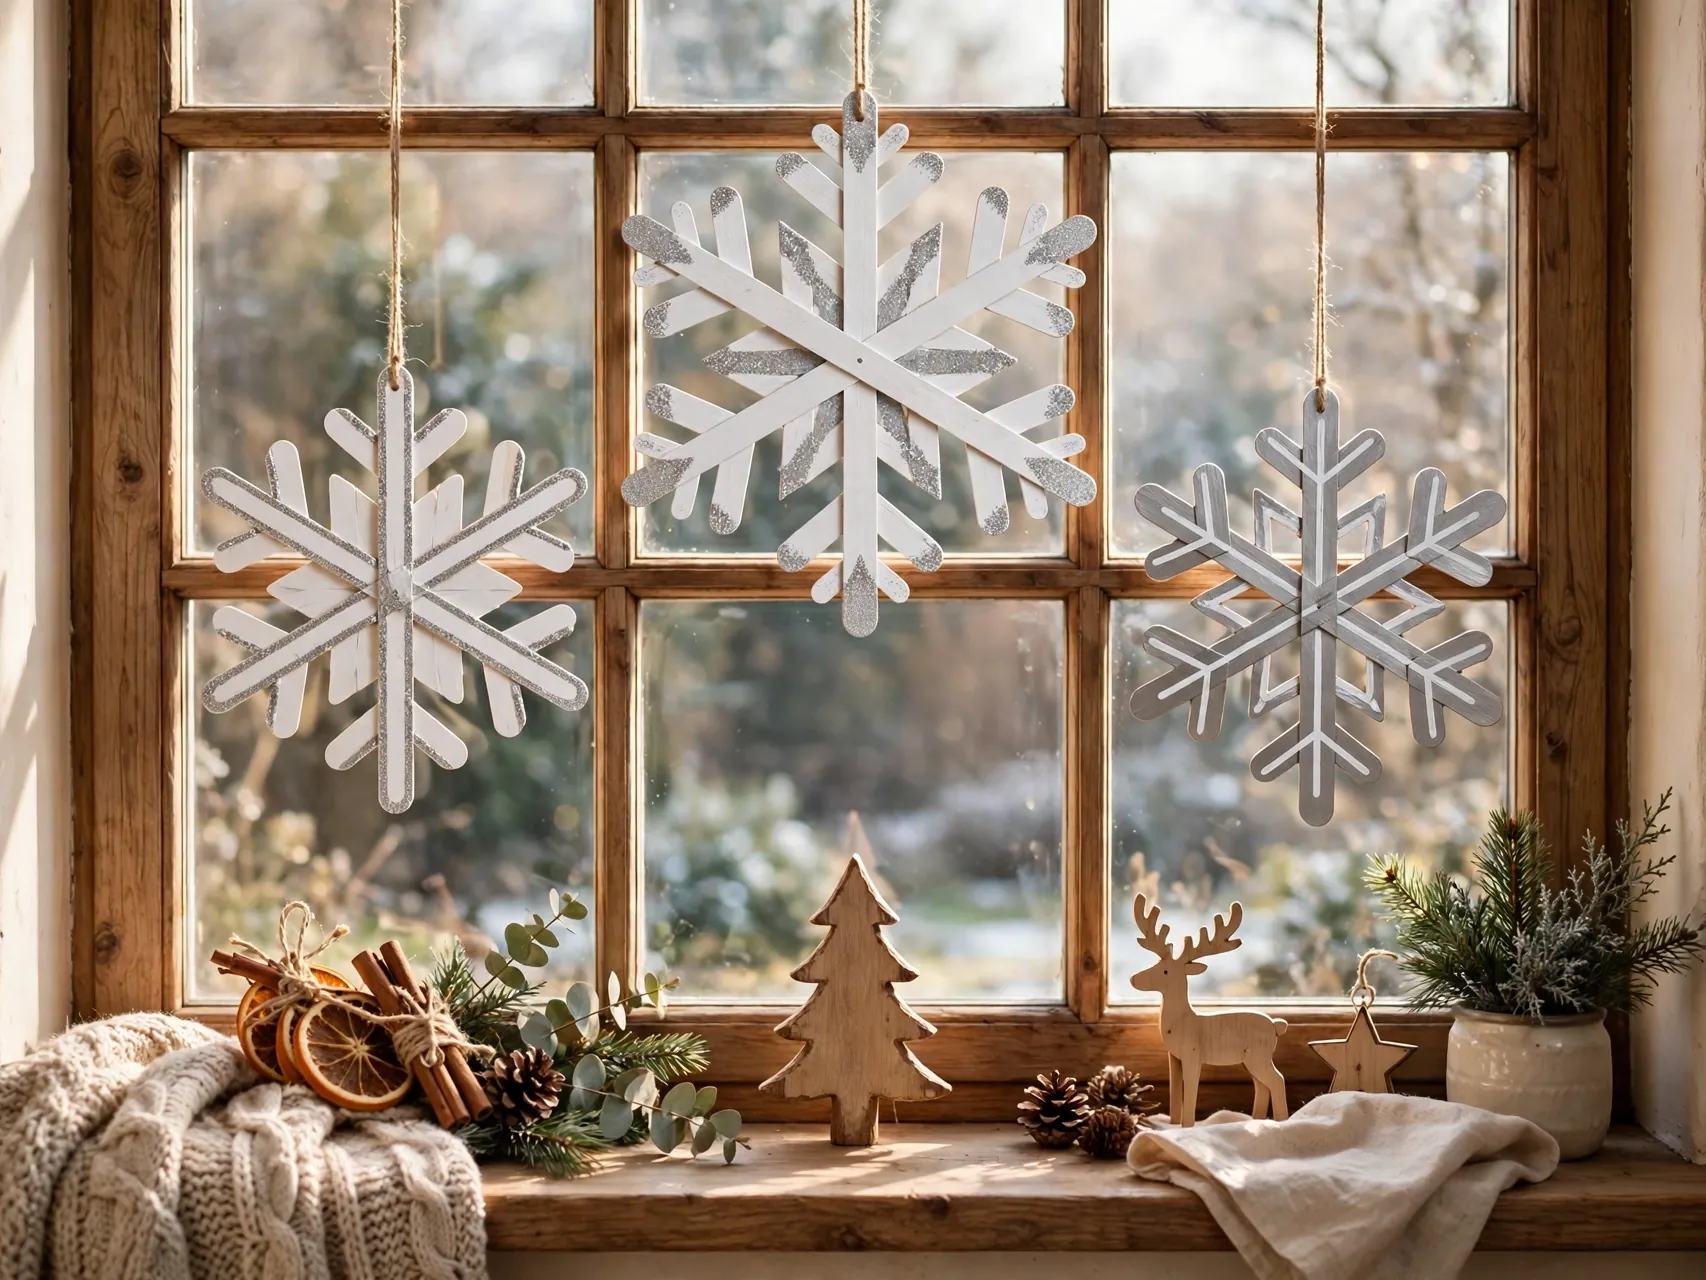
Glue craft sticks in layered star patterns to make snowflakes, then paint them white, silver, or pale blue and add a little glitter if you like sparkle. Small flakes become ornaments, and big flakes made with wide sticks become wall and window decor.
Lay the pattern out dry before gluing, because symmetry is what sells a snowflake. A dab of glue at each crossing point is enough. These are some of the lightest diy wooden christmas decorations you can make, so they hang happily from a single small pin.
17. Build Popsicle Stick Sled Ornaments

Line up craft sticks for a sled deck, fix two runner sticks underneath at an angle, paint the sled red, and add a twine pull and a tiny sprig of greenery or a mini gift on top. The result is a classic ornament with real charm.
Sleds take a little patience while glue sets, so build them in stages on wax paper. Write a name and year on the back and they become keepsake favors for a holiday party. Mini sleds also sit sweetly on tiered trays and mantel villages.
18. Make a Wooden Cube Nativity Set for Small Hands

Paint simple, sturdy figures on wooden cubes and blocks: a stable from stacked blocks, rounded figures suggested with color and minimal faces, and a star on top. Keep the painting simple and the pieces large, sanded, and sealed with a child friendly finish.
A block nativity can be handled and rearranged by children in a way a fragile set cannot. Store the pieces in a small basket near the tree so the story gets retold all season. Follow the finish maker instructions for curing time before play.
19. Build a Rustic Wood Lantern Centerpiece Box

Join four corner posts with slatted sides to make an open lantern box, then set a battery LED candle inside with greenery and pinecones around it. LED light gives the glow of a lantern without any flame near wood and dry greens.
Measure your candle or LED pillar first so the box fits with air around it. If you ever use a real candle in a glass holder inside a lantern, keep it attended and well clear of the wood, but LED is the better default for a wooden piece. Sand and stain before assembly for the cleanest finish.
20. Lay a Wood Slice Table Runner Centerpiece
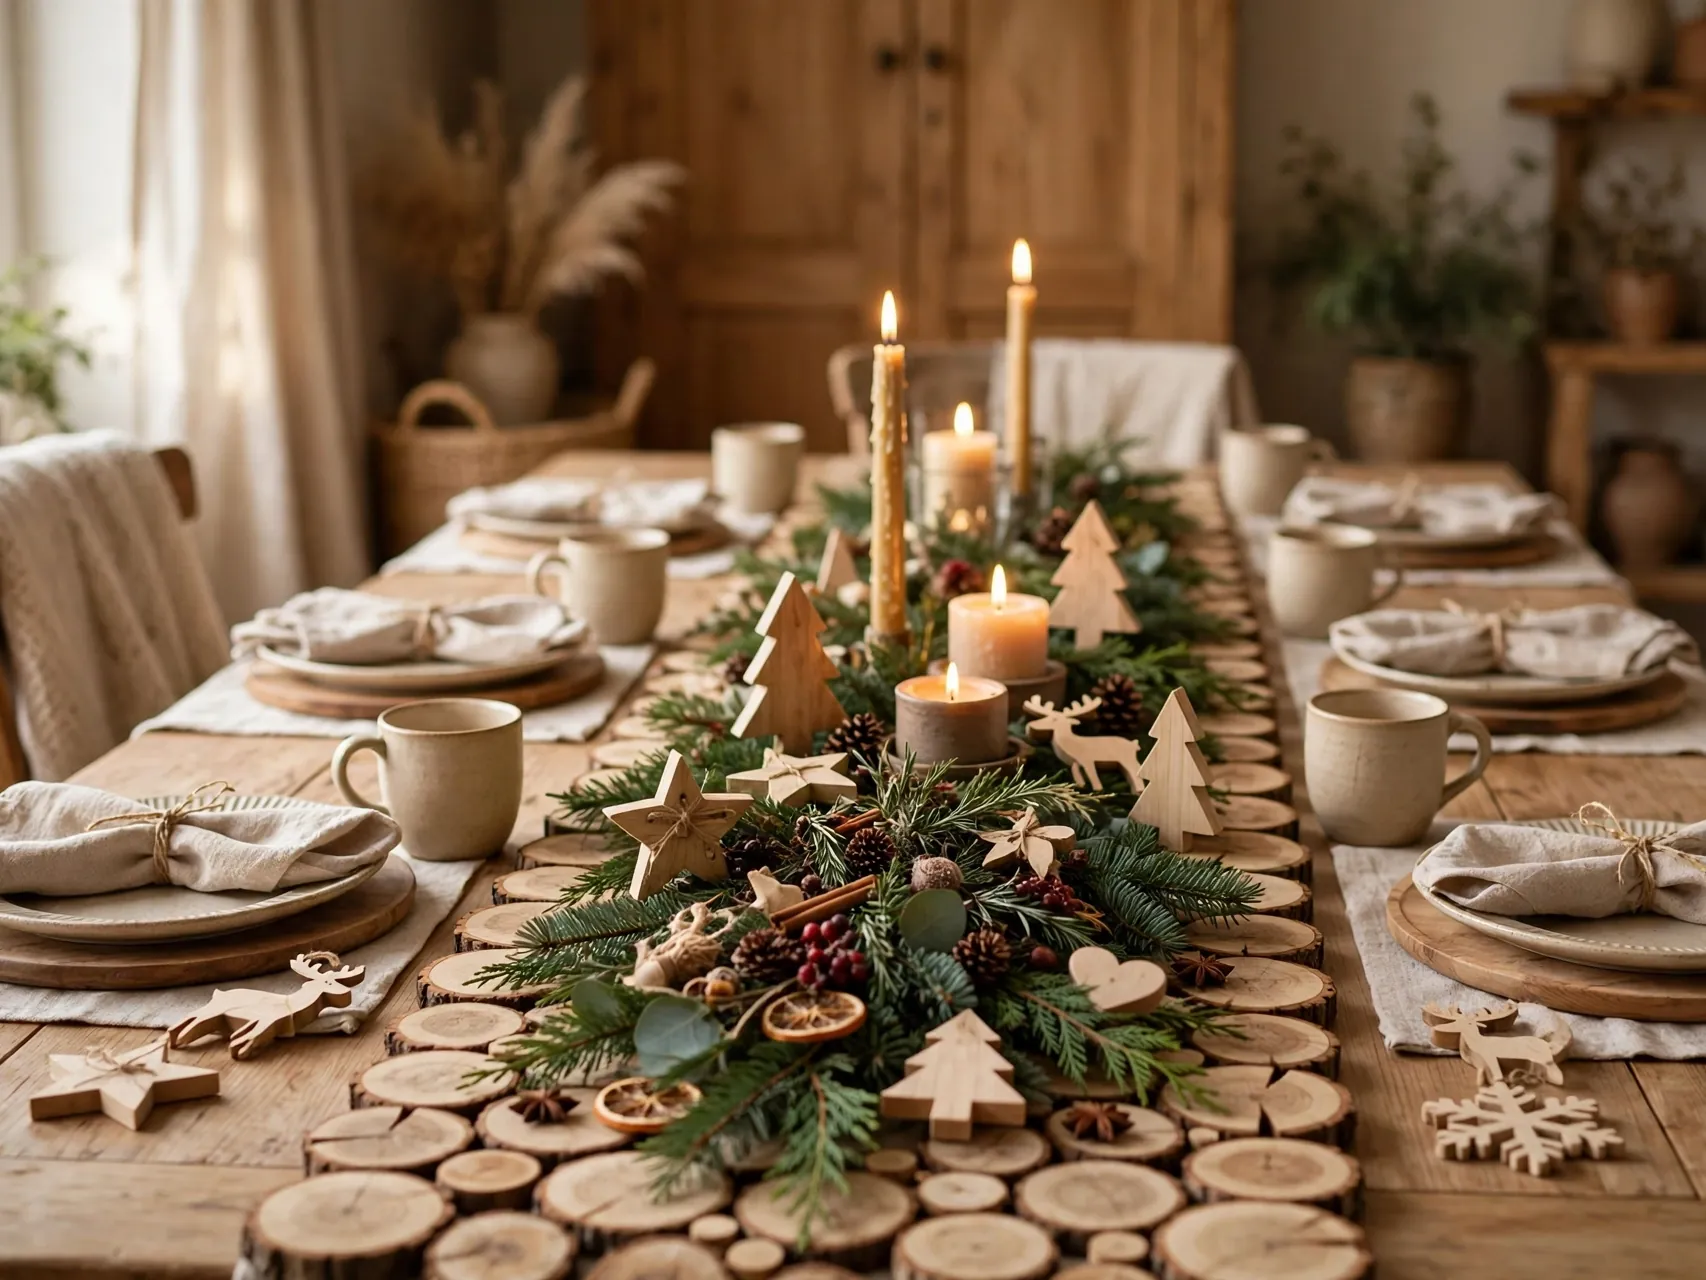
Overlap large wood slices down the center of the table as a runner, then layer greenery, pinecones, LED tealights, and a few small ornaments on top. The slices protect the table and ground the whole arrangement in warm, natural texture.
Vary slice sizes for an organic edge, and keep real flame away from the arrangement by choosing LED lights. This centerpiece builds in ten minutes and clears away just as fast, which dinner hosts appreciate. It is the fastest win in this whole list of wooden christmas decorations.
21. Build a Mini Wood House Village
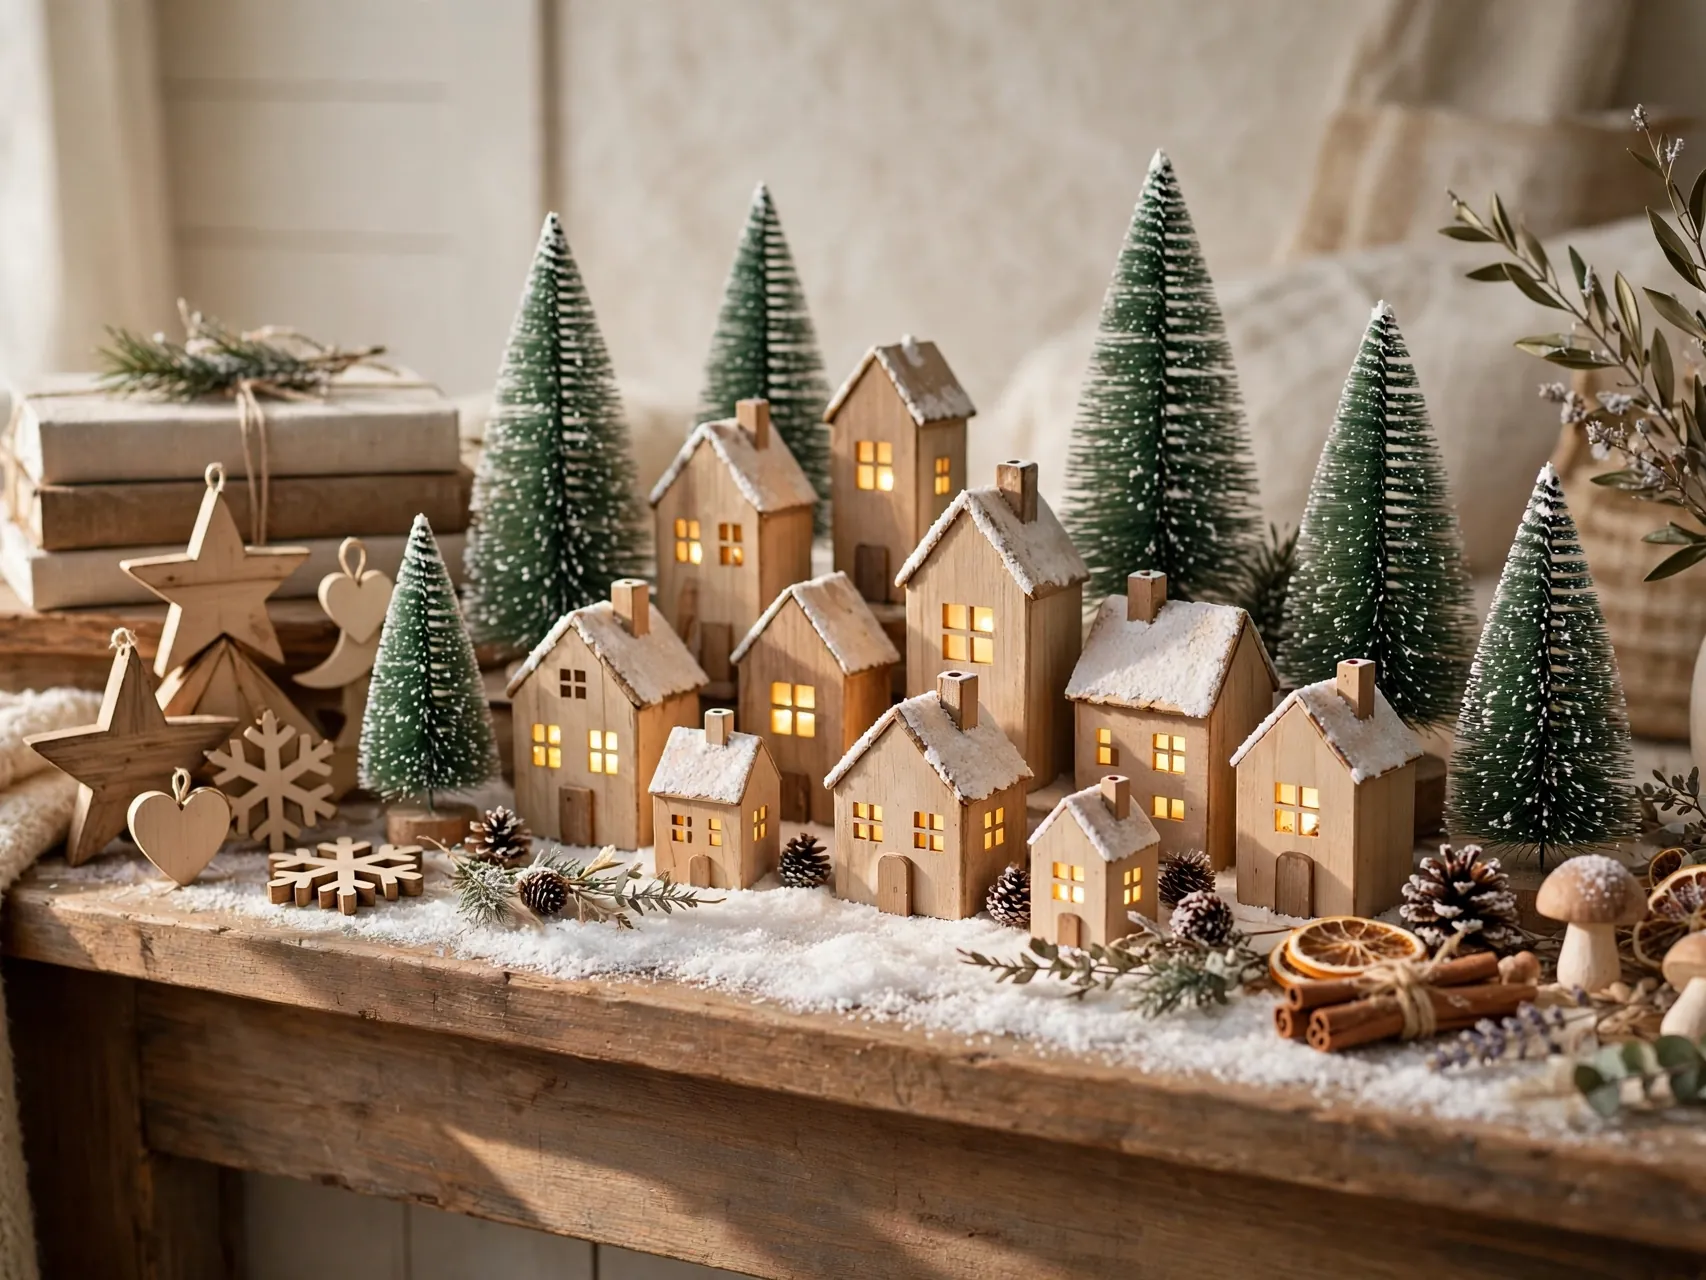
Cut simple house shapes from thick board, or glue block bodies to triangle roofs, then paint them in soft village colors with tiny white windows and doors. A row of houses on a mantel or windowsill, with LED tealights behind them, glows like a tiny street.
Adults should do the cutting, and everyone can paint. Add cotton or faux snow along the bases and a few bottle brush trees between houses. Villages grow happily year by year, one or two new houses each December.
22. Form a Wooden Ring Wreath With Greenery
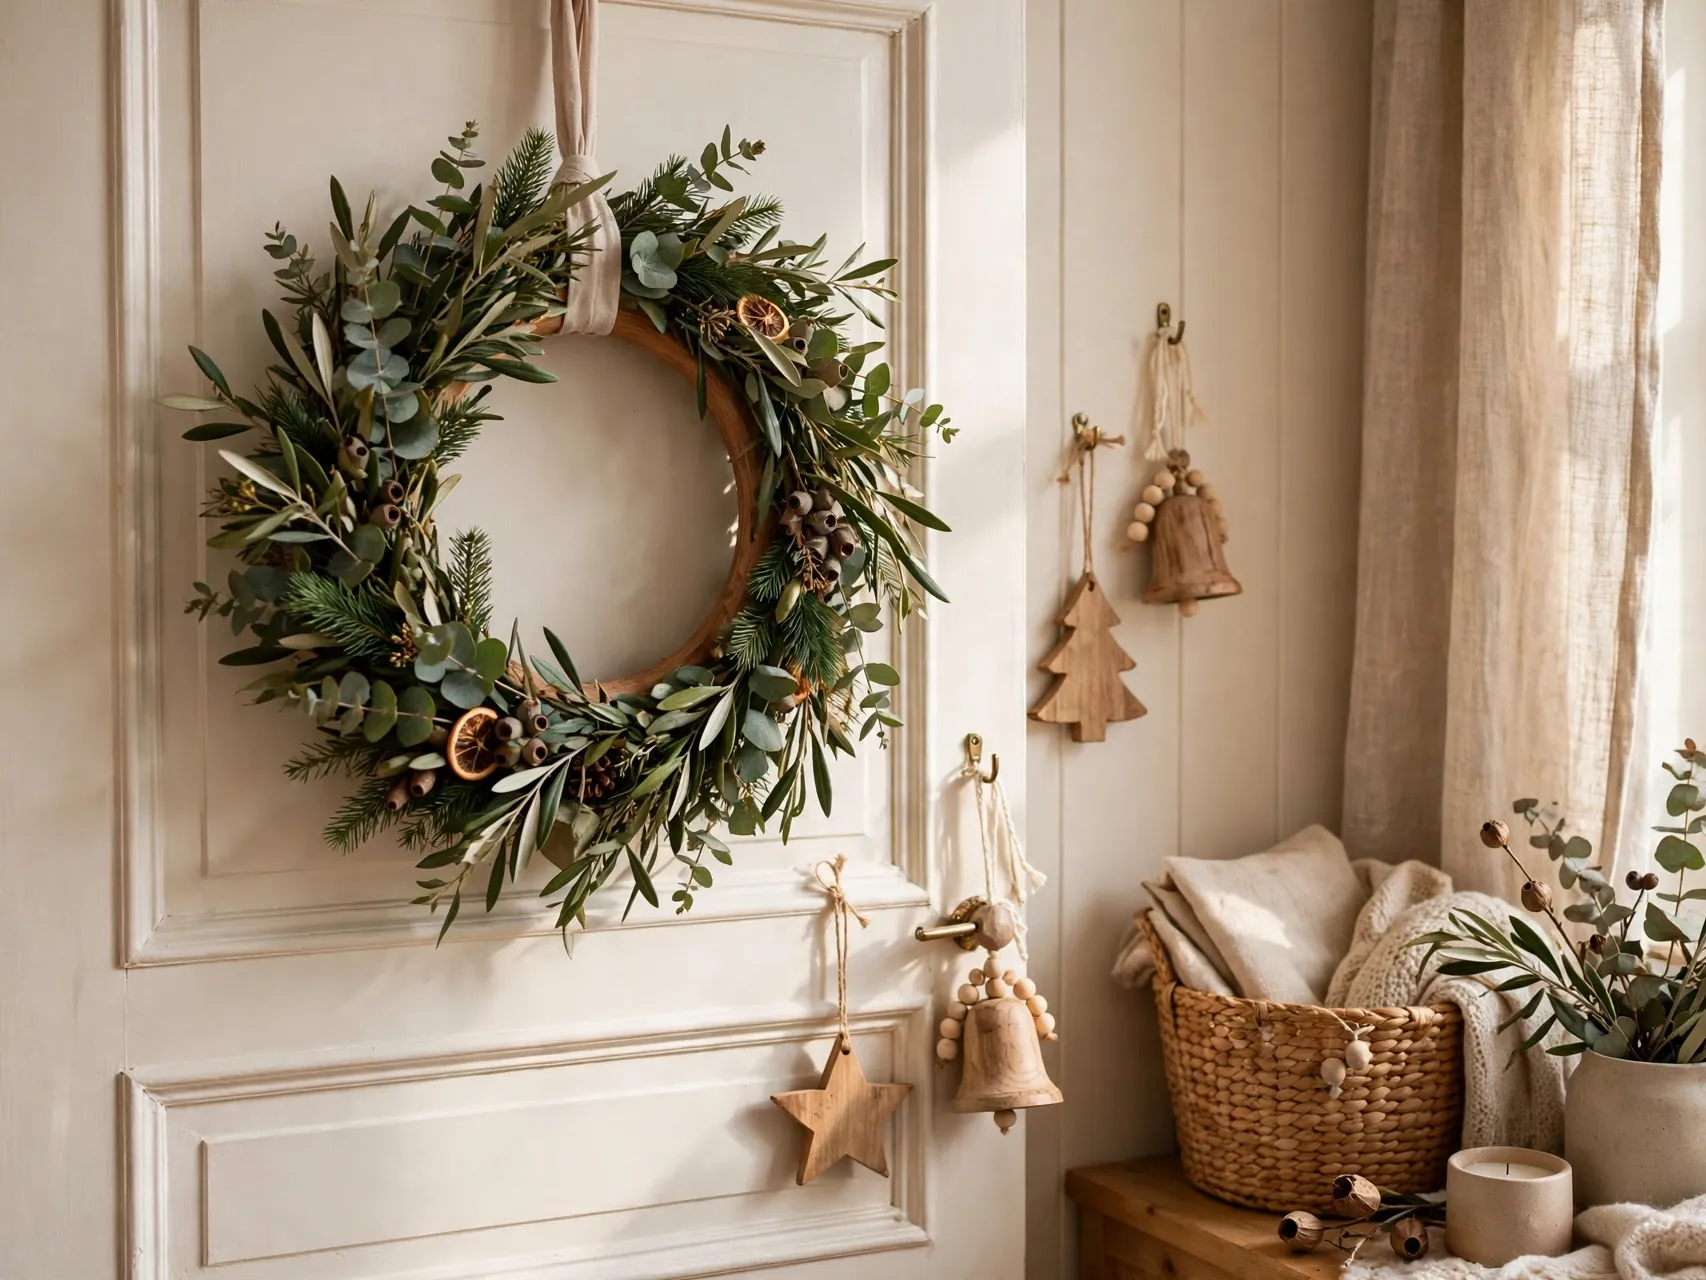
A plain wooden craft ring becomes a modern wreath when you wire greenery, berries, or dried orange slices to one lower section and leave the rest of the ring bare. Add a linen bow and hang it on a door or above a mantel.
The half dressed style suits modern and Scandinavian rooms where a full wreath feels heavy. Use floral wire rather than glue for greenery so you can refresh it each year. Keep fresh greenery misted lightly if your home heating dries the air.
23. String a Wood Disc Garland for the Mantel

Drill two holes in small wood discs, paint or stamp a letter, number, or simple motif on each, and thread them onto twine to spell a word or count the days to Christmas. A disc garland works on a mantel, a staircase, or across a window.
Clamp discs firmly before drilling and keep fingers well away from the bit. Paint pens give the neatest letters on small discs. Alternate plain and painted discs if a full word feels busy, and the garland still reads festive and handmade.
24. Carve Time for a Simple Wooden Angel or Tree Figure

A simple standing figure, cut from a thick board in a tree or angel outline, sanded silky, and finished with oil or soft white paint, becomes the piece people ask about. Trace the outline, cut slowly with a suitable saw, and refine the edges with rasps and sandpaper.
Let this be an adult project with full safety gear and clamped work. Simple outlines age gracefully and suit every style of rustic wooden christmas decor. One beautiful figure on a side table can carry a whole room, and it will come out of storage with joy every year.
FAQ
What wood is best for beginner Christmas decorations?
Pine, poplar, and pre cut craft wood are the easiest to cut, sand, and paint, and they are widely available as slices, cubes, sticks, and boards. Avoid wood you cannot identify, especially for indoor use, and skip any pallet wood unless you know it is clean and untreated.
What basic tools do I need to start?
For the no cut projects you need only paint, glue, brushes, and twine. For simple builds, add a hand saw, a drill, clamps, a rasp, and sandpaper in medium and fine grits. Wear safety glasses for cutting, drilling, and sanding, and use a dust mask when sanding.
How do I stop wood slices from cracking?
Buy slices that are already dried, or dry fresh cut slices slowly away from direct heat so they lose moisture evenly. Some checking can still happen with natural wood. Sealing both faces after painting helps, and storing slices flat in a dry place between seasons reduces new cracks.
Are wooden decorations safe around candles and lights?
Keep wood well away from open flame, hot bulbs, and heat sources. Battery LED candles and tealights are the safer choice inside lanterns, villages, and centerpieces made of wood and greenery. Check light strings for damage, use listed lights, and switch decor lighting off before bed.
How should I store wooden Christmas decorations?
Clean and fully dry each piece, wrap fragile painted items in tissue or soft cloth, and store them flat in a dry box away from heat and damp. Wood that is stored damp can warp or mildew, while dry, flat storage keeps most handmade pieces ready for many seasons.
Key Takeaways
- Start with no cut projects: Wood slices, beads, clothespins, and craft sticks deliver beautiful wooden christmas decorations before you touch a saw.
- Safety shapes every build: Safety glasses, clamped work, dust protection, and adult handled cutting and burning tools keep craft days happy.
- Batch the small things: Ornaments, coasters, and snowmen are faster and neater made in sets, and they make ready gifts.
- Choose LED glow: Battery candles give lanterns, villages, and centerpieces their light without flame near wood and greenery.
- Simple finishes win: Natural wood, soft white, and one or two paint colors keep rustic wooden christmas decor timeless rather than dated.
- Making a wooden piece this year? Save this list to Pinterest and pin the project you want to build first.