21 DIY Fairy Garden Ideas That Are Simply Enchanting
Introduction
A tiny house, a pebble path, and plants that stay small enough to feel like trees. That is the whole charm of a diy fairy garden, and it works in a wide bowl on the porch just as well as it does at the base of a real tree in the yard.
Start with three decisions: the container or spot, the light in that spot, and one house or door as the main feature. Everything else, paths, fences, furniture, and figures, is decoration you add around that anchor. Matching the plants to the light matters more than any accessory, because a garden that stays alive stays enchanting.
Keep the planting simple. Choose low, slow growing plants with similar water needs, leave soil or gravel showing between pieces so details do not get lost, and water gently so tiny furniture is not washed away. The ideas below move from easy containers to in-ground scenes, so you can start small this weekend and grow your village over time.
1. Start With a Shallow Bowl Planter Village

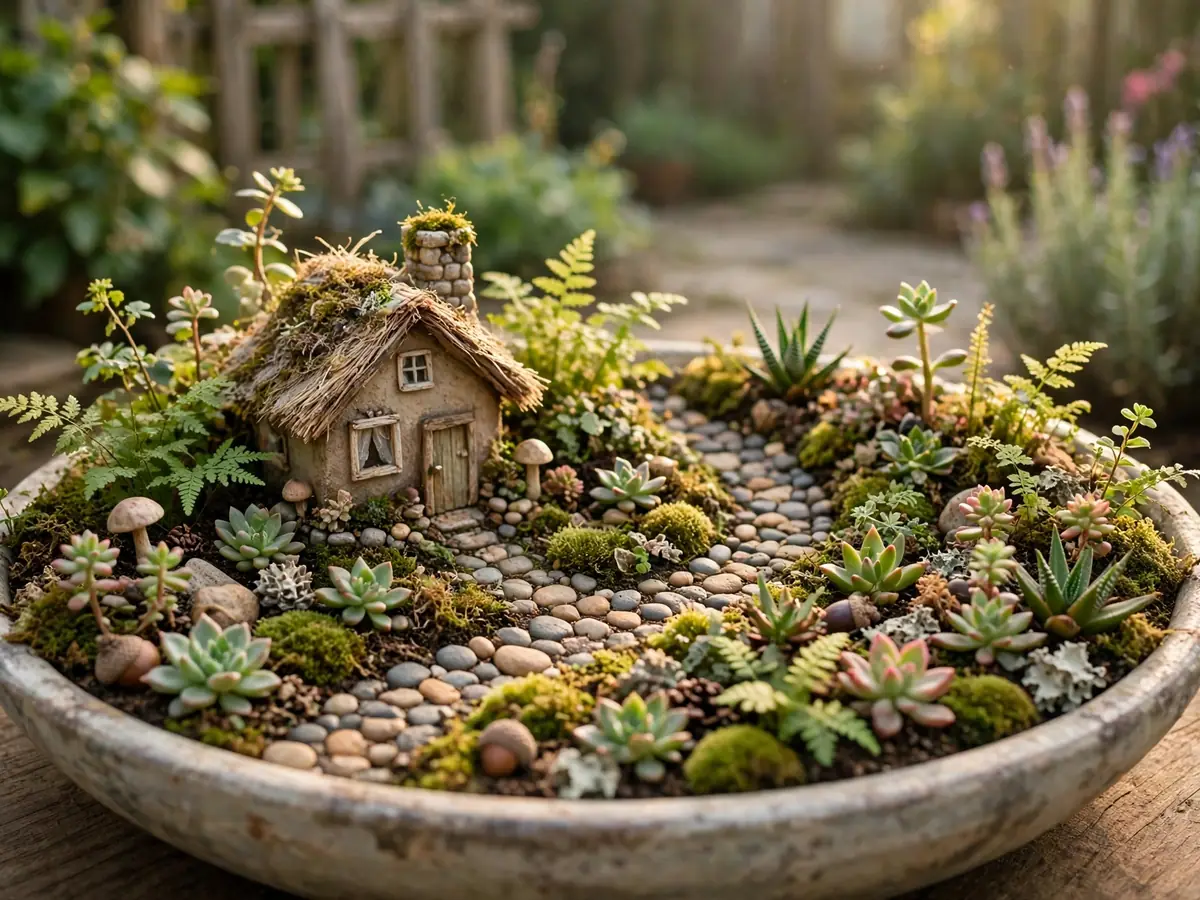
A wide, shallow bowl is the friendliest first container because you can see the whole scene at once and reach every corner. Add drainage holes if it has none, a thin layer of gravel, then potting mix filled close to the rim.
Place one house, a short pebble path, and two or three low plants, then stop and look. A bowl reads best with open space left in it. This is the classic beginner miniature fairy garden, and it is easy to move to shelter during heavy rain or strong sun.
2. Build a Broken Pot Tiered Garden
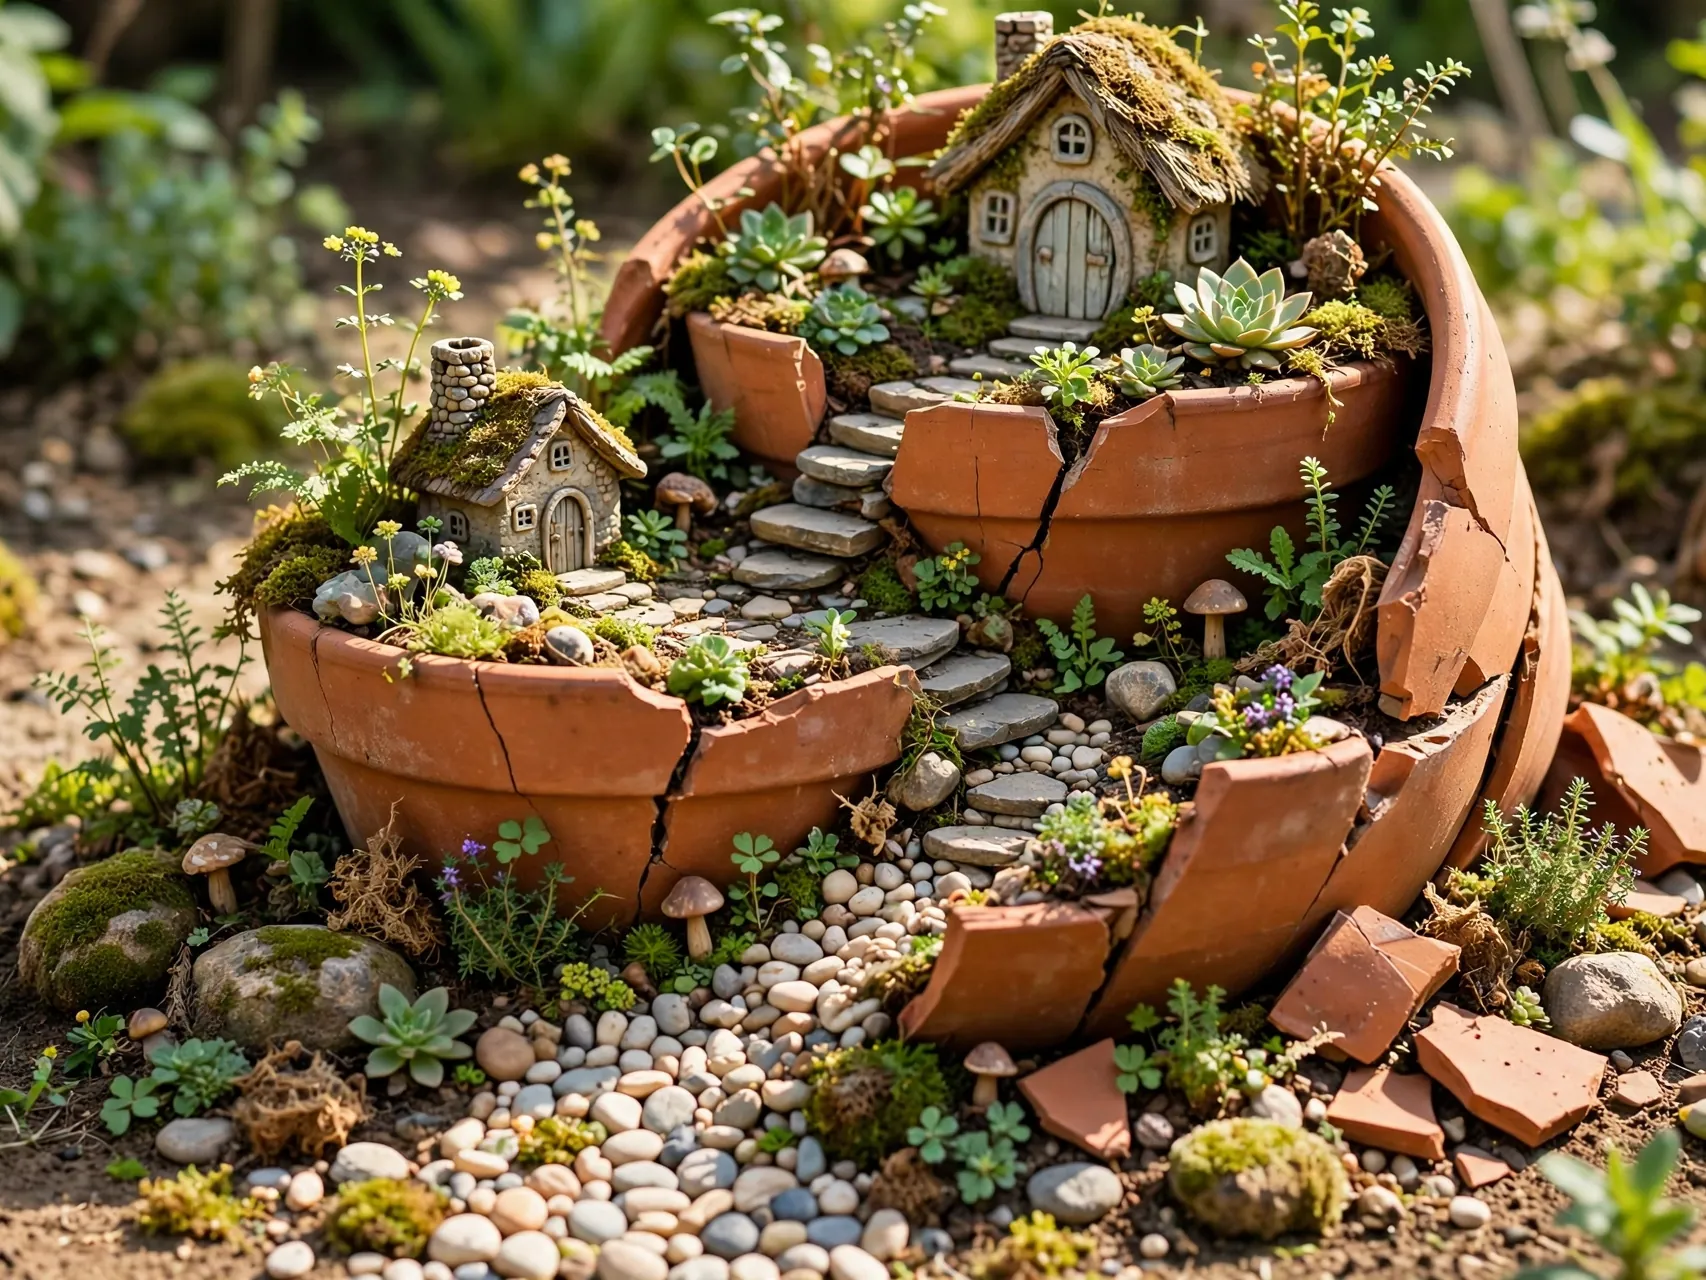
A cracked terracotta pot is not ruined, it is a staircase waiting to happen. Set the broken piece inside the main pot at an angle, fill behind it with soil, and plant each level like a tiny terrace with a house on top.
Creeping thyme and small sedums suit the steps because they stay low and forgive missed waterings. Broken pot gardens are some of the most saved fairy garden ideas online for a reason: they cost almost nothing and the layers do all the storytelling for you.
3. Turn a Wheelbarrow Into a Rolling Village
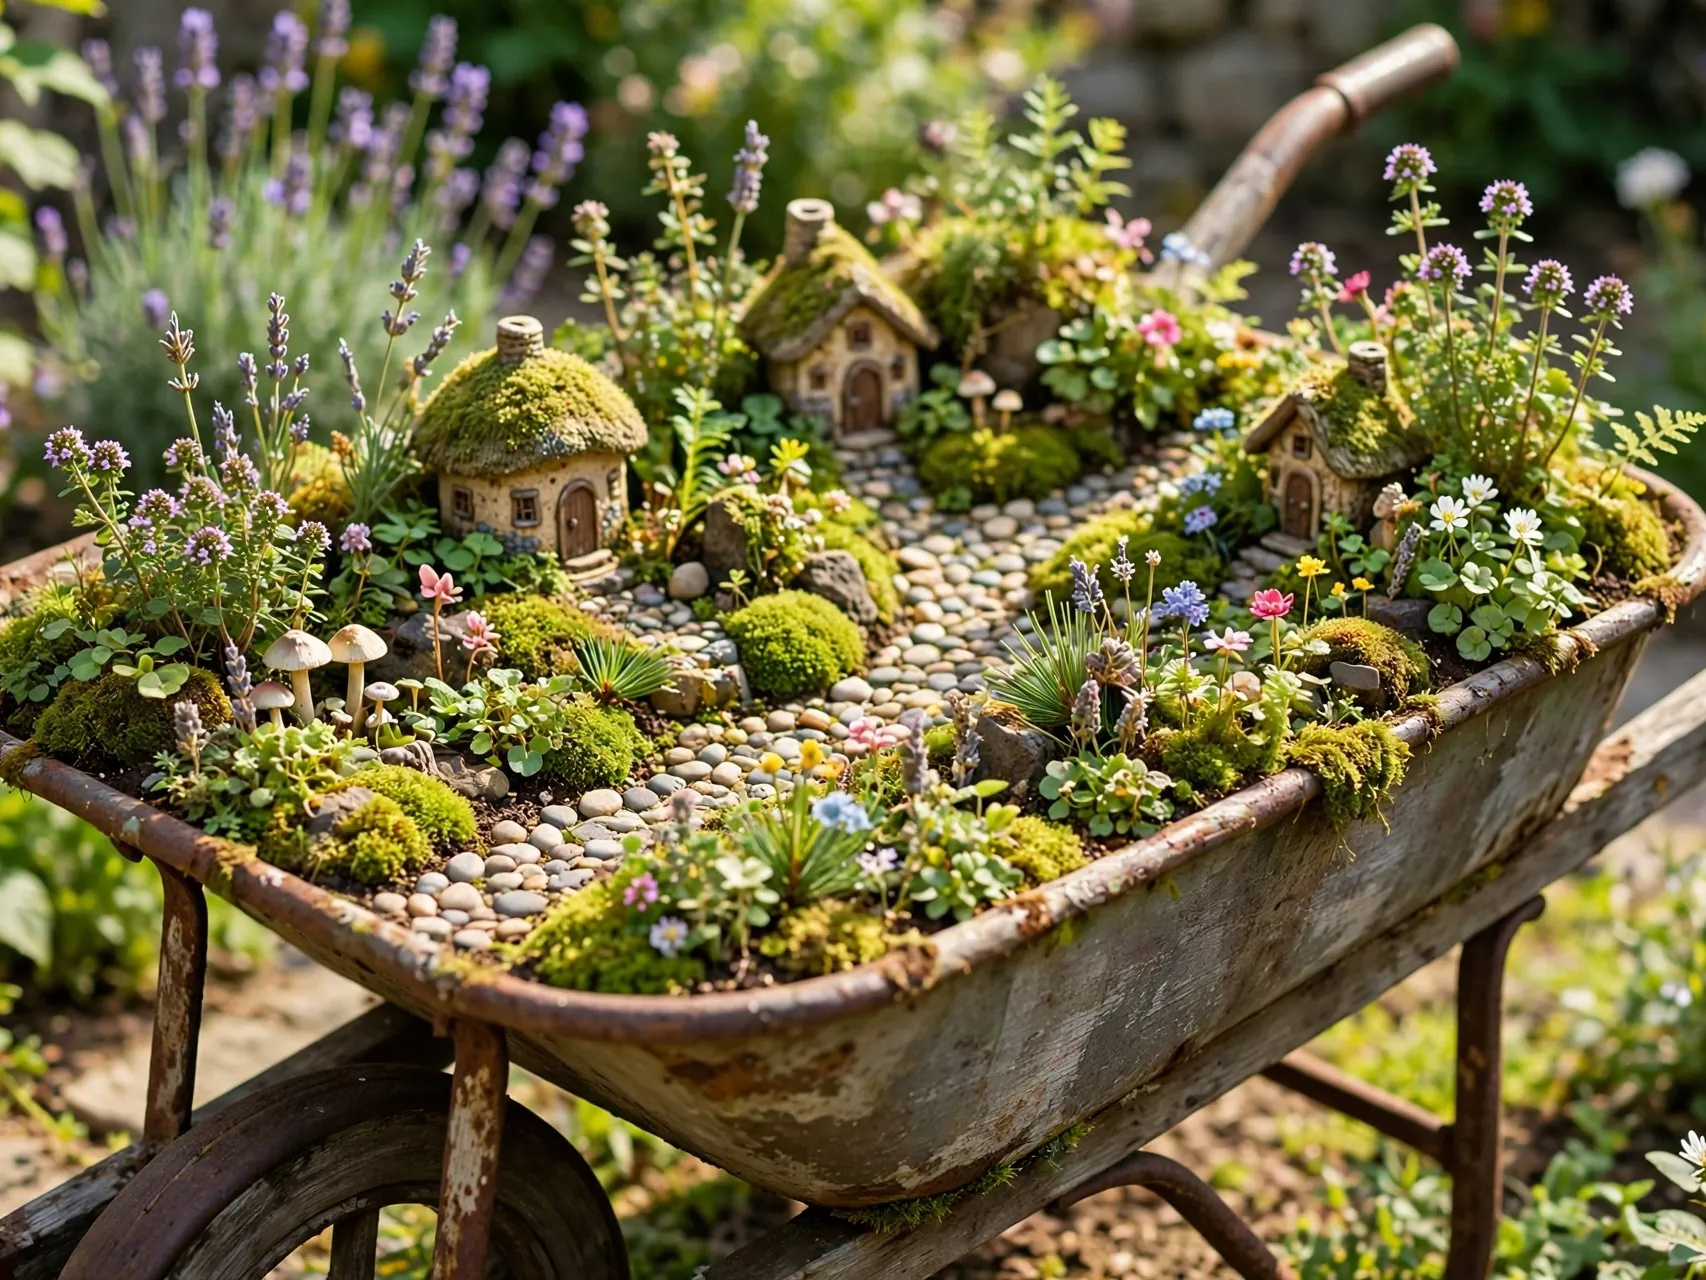
An old wheelbarrow gives you a raised, movable garden with room for a real village layout. Drill a few drainage holes, line the base with gravel, and plan streets before you plant, with houses along a pebble road and taller plants at the back.
The best part is mobility. Roll it into morning sun, out of a storm, or next to the porch steps for a party. Wheelbarrow gardens hold more soil than pots, so plants dry out more slowly and small scenes stay put instead of tipping.
4. Add a Fairy Door to a Tree Trunk
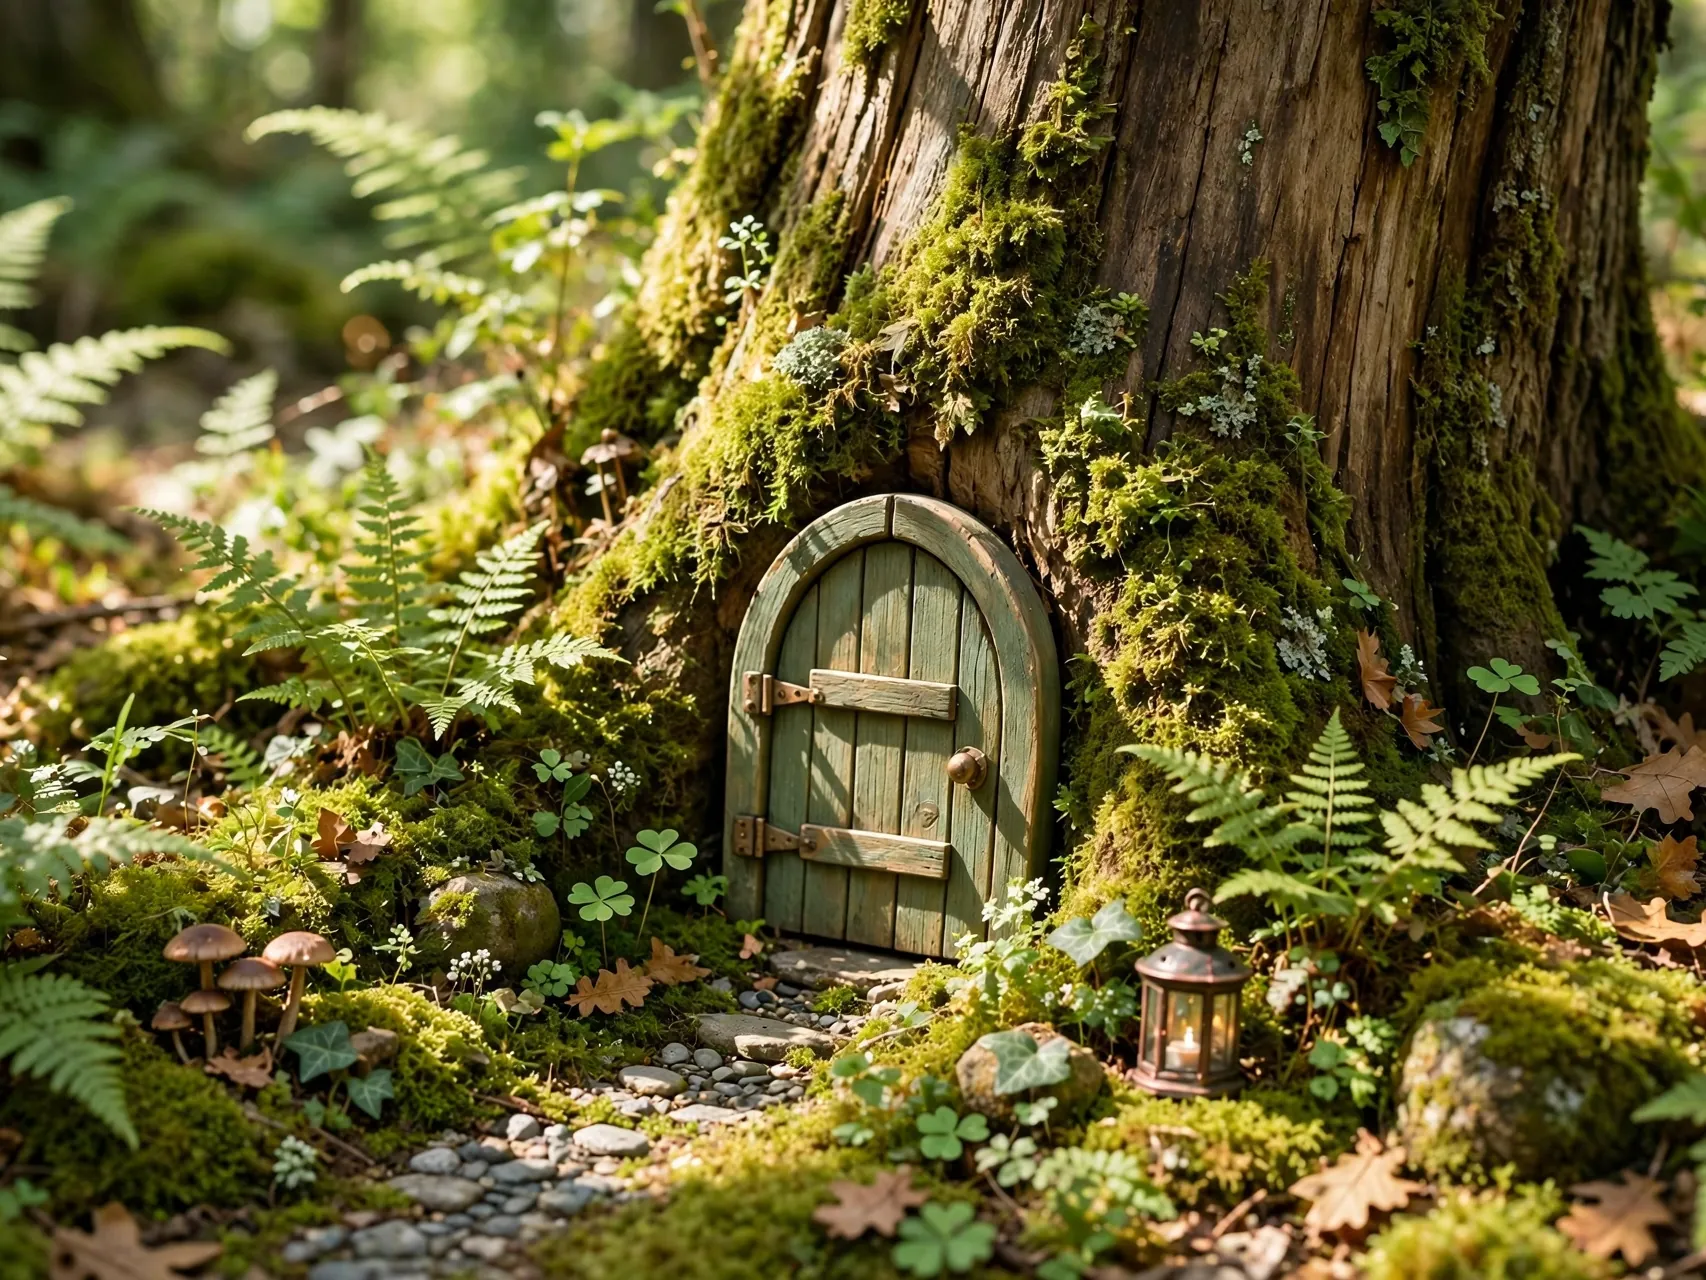
Sometimes the garden is just a door. A small wooden door fixed at the base of a tree, with a pebble path leading to it and a tiny fence on each side, suggests a whole home hidden inside the trunk.
Make the door from craft wood or a small bought piece, seal it for outdoor use, and attach it without driving deep fixings into a healthy tree. Add a miniature lantern or a small welcome stone, and children will check that door every single day.
5. Create a Teacup Garden for a Tabletop
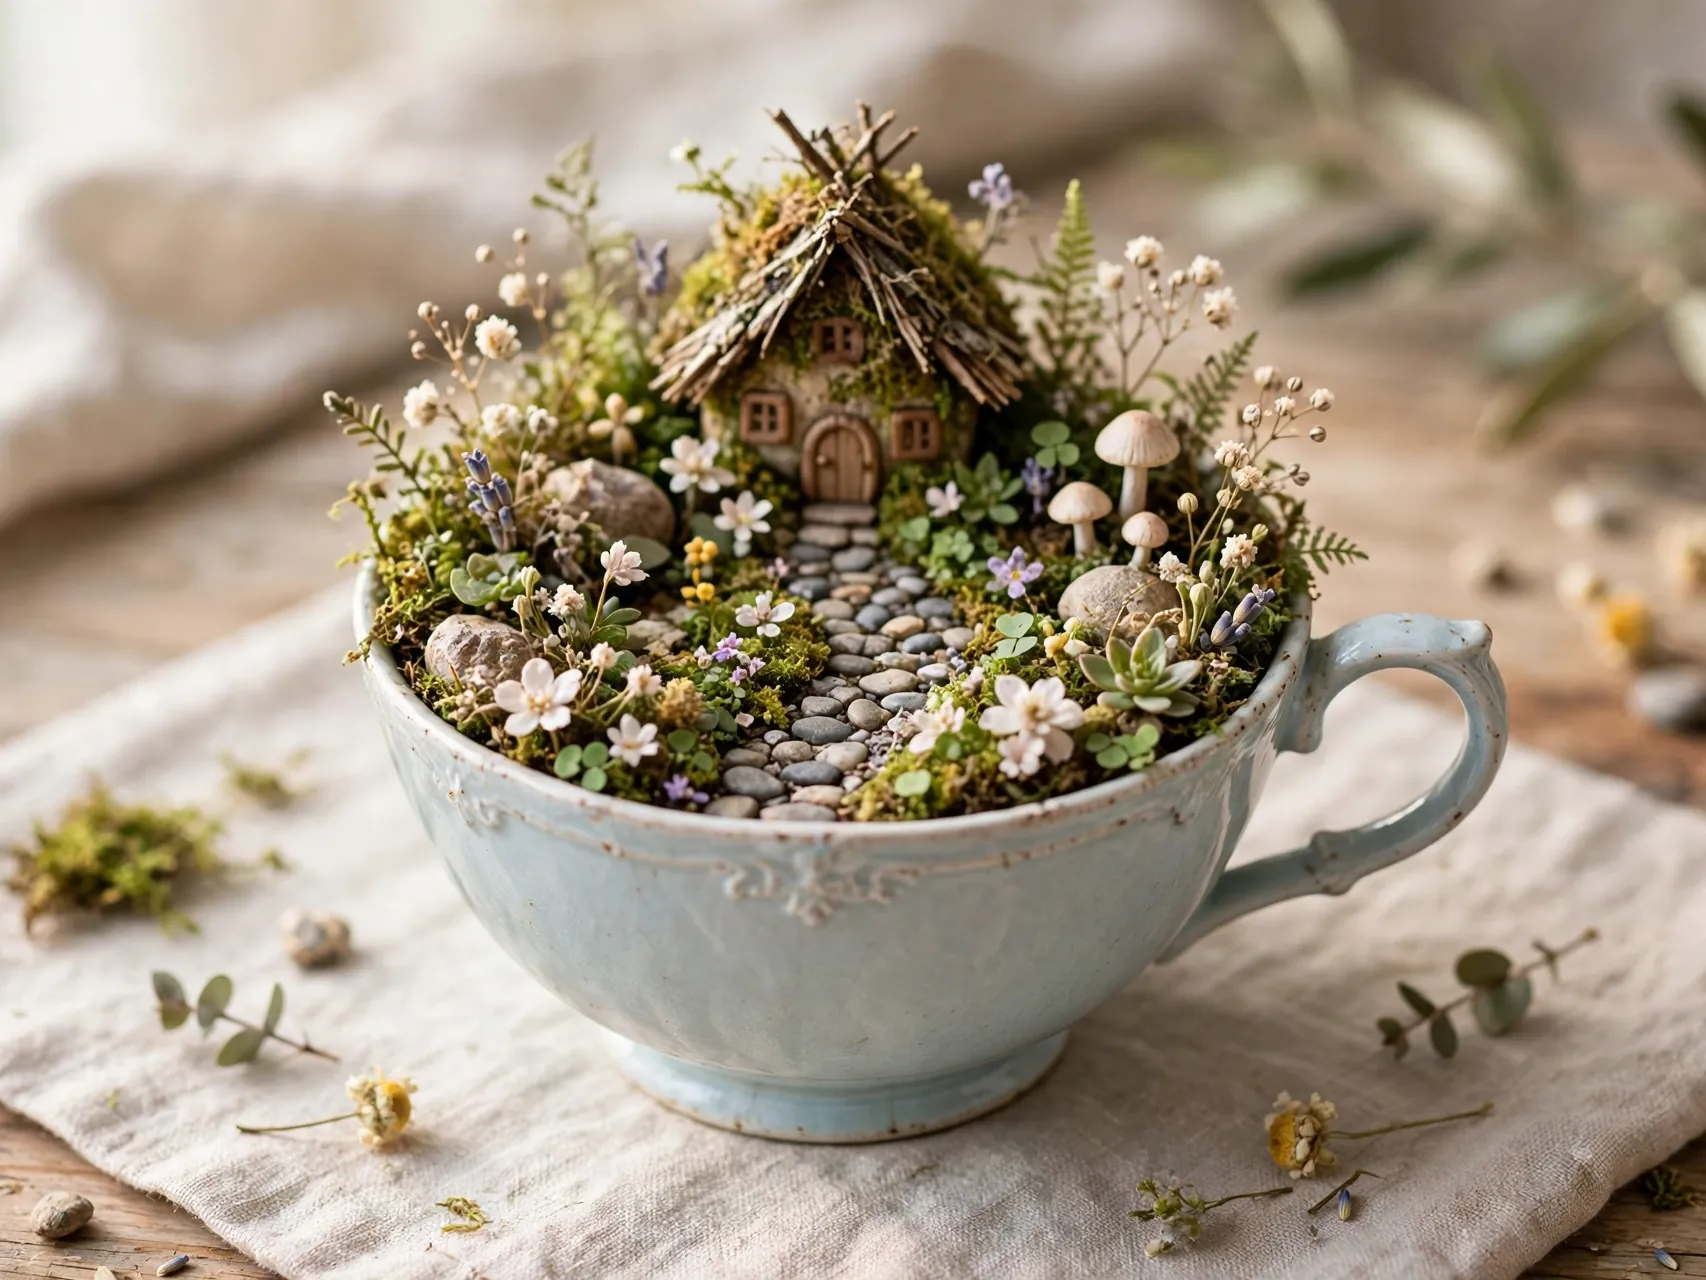
A large teacup or a chipped soup mug makes a sweet indoor scene for a sunny windowsill. Because cups rarely have drainage, add a generous gravel layer, use a small succulent or air plant, and water with a spoon rather than a can.
One tiny house, a pinch of moss, and three pebbles for a path are enough at this scale. Teacup gardens make lovely gifts and party favors, and they are a gentle way to test how to make a fairy garden before you commit to a bigger container.
6. Use a Birdbath as a Raised Fairy Oasis

A birdbath that no longer holds water well can hold a garden instead. Fill the bowl with a shallow layer of mix, plant succulents and moss around the edge, and set a cottage in the middle with a gravel clearing in front.
The height is the advantage. Details sit at a level where guests actually notice them, and rabbits are less likely to rearrange your furniture. Keep the planting light so the bath stays stable, and check that the pedestal is firm before you start.
7. Plant a Woodland Scene With Moss and Ferns

For a shady corner, lean into woodland. Moss as the lawn, miniature ferns as the forest, a bark house, and a few toadstool pieces create a scene that looks gathered rather than bought.
Use plants that truly like shade and steady moisture, and mist rather than soak so the moss stays green. A short log slice makes a good base for an in-ground version. Woodland scenes suit the quiet end of a garden, where the surprise of finding them is half the pleasure.
8. Make a Beach Fairy Garden With Sand and Shells

Swap soil paths for sand, add a small blue glass dish as a pond, and scatter real shells and a tiny chair for a coastal scene. A whitewashed pot keeps the look light, and air plants or small succulents handle the bright light beach themes usually sit in.
Keep sand as a top layer over potting mix so plants still root well. Beach gardens are cheerful on patios and porches, and they are a fun change for families who already have a classic green village elsewhere in the yard.
9. Stack Terracotta Pots Into a Fairy Tower

Stack pots at playful angles, secured on a central rod or packed firmly with soil, and each tilted rim becomes a small balcony garden. Trail plants over the edges, put a house on the top level, and add tiny steps or a ladder between floors.
Terracotta dries out fast in sun, so this design does best with succulents and sedums, or in light shade with regular checks. A tower uses vertical space well on a small patio where a wide bowl would crowd the table.
10. Fill a Lantern With a Glowing Night Scene

A large lantern with glass panels makes a protected indoor scene and a lamp in one. Layer moss or fine gravel, add a small house and one or two faux plants, then tuck in battery fairy lights on a timer for evening glow.
Use faux planting inside closed lanterns, because live plants struggle without air flow and drainage. Keep batteries and lights dry and out of reach of small children. At night this little scene does what every fairy garden promises: it makes a corner feel quietly magical.
11. Build a Fairy Garden in a Raised Bed Corner
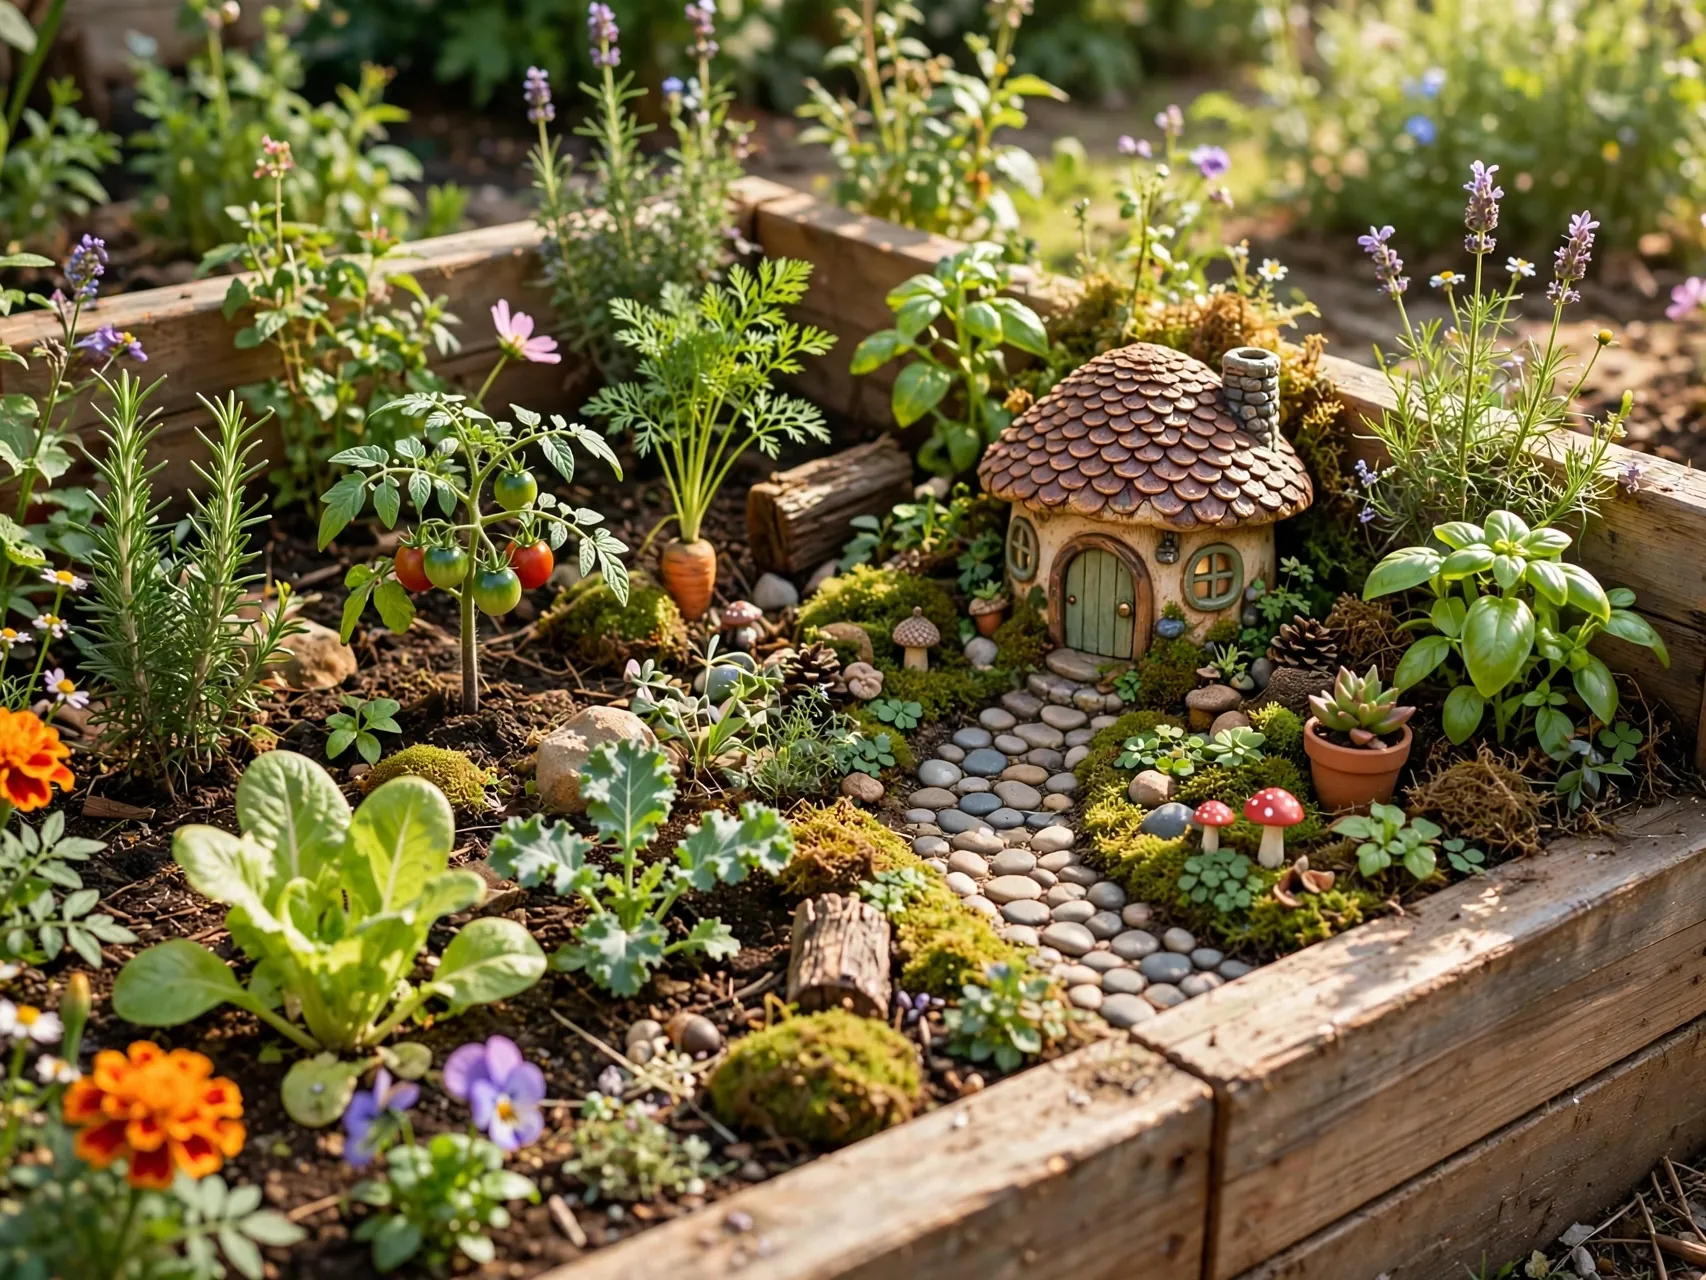
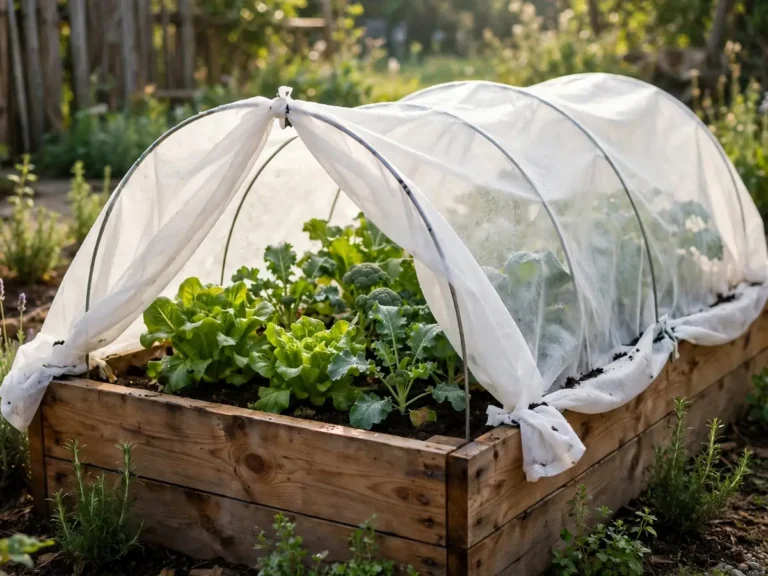
Give one corner of a raised bed to the fairies and you get structure, good soil, and easy watering for free. Edge the corner with small stones, plant low herbs as shrubs, and let a cottage, a path, and a tiny fence mark the village boundary.
Raised beds keep scenes neat and visible, and the surrounding vegetables or flowers act as a giant forest around the village. Just leave working room so harvesting dinner does not mean stepping through someone's front garden.
12. Craft Tiny Furniture From Twigs and Acorns
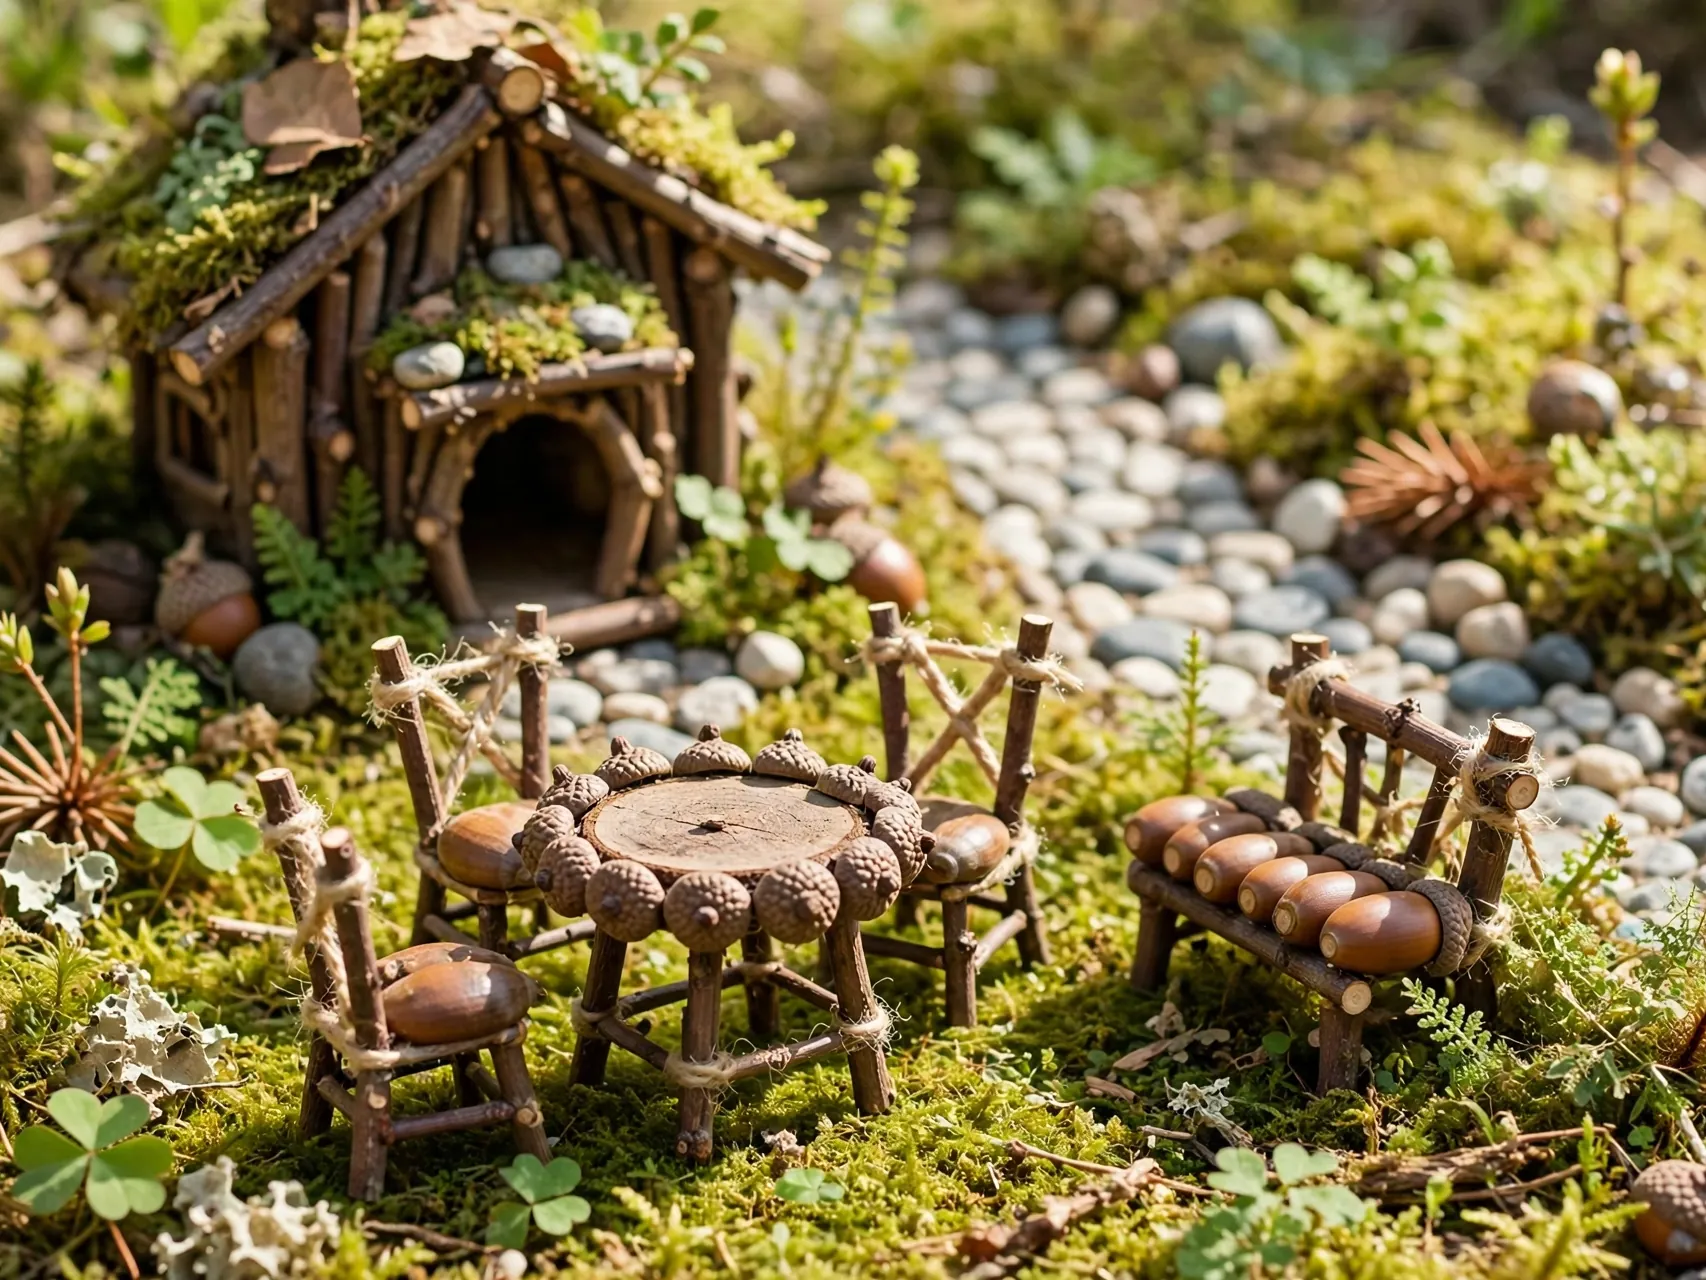
Homemade furniture gives a garden its one of a kind feel. Twig benches tied with twine, acorn cap bowls, a flat stone table, and a bark chair cost nothing and suit woodland and cottage scenes perfectly.
Build pieces a little sturdy, glue joints well, and expect to remake a favorite or two each season if they live outdoors full time. Making the furniture is also the part children remember most, long after the plants have filled in around it.
13. Lay a Winding Pebble Path With Stepping Stones
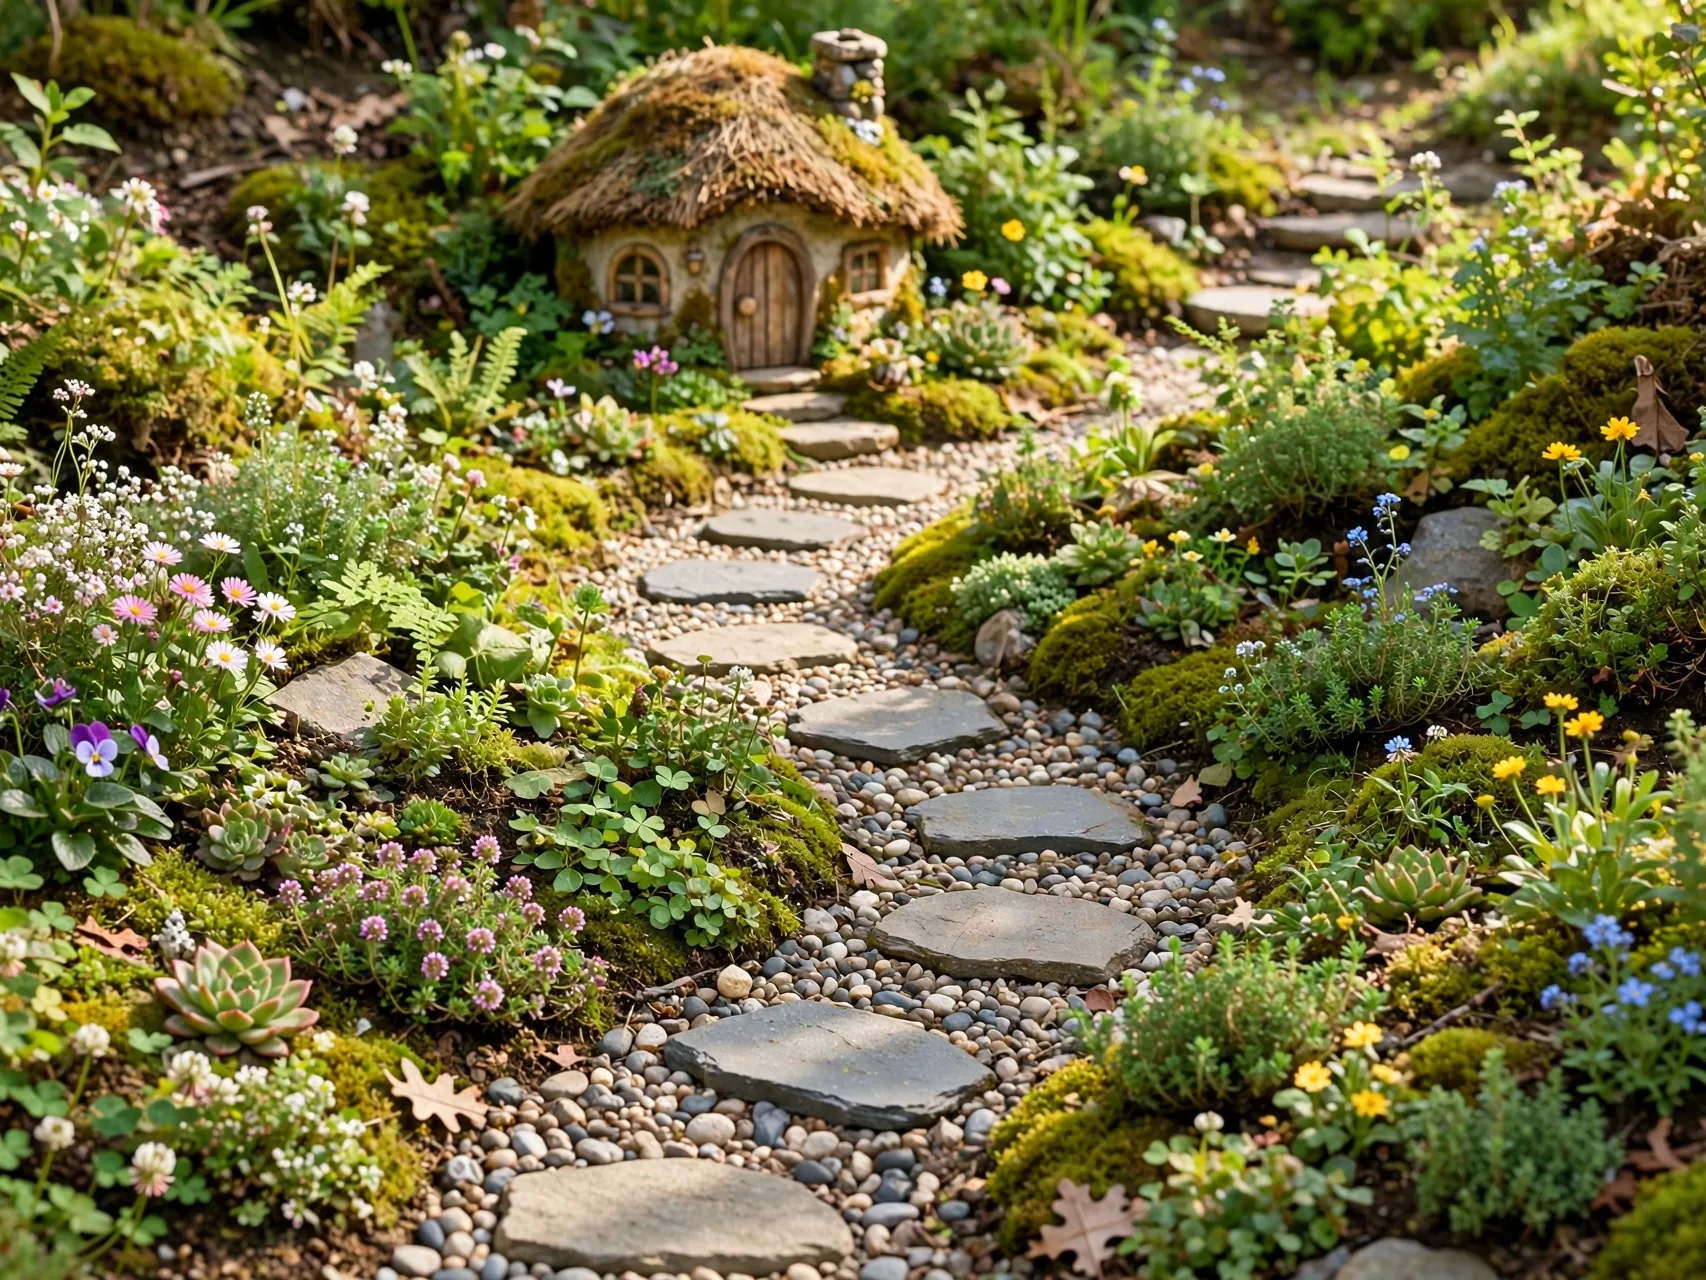
A path is what turns scattered pieces into a place. Lay a winding line of fine pebbles, flat stones, or tiny sliced wood rounds from the edge of the container to the house door, curving it so the whole route is not visible at once.
Keep paths slightly sunken so pieces stay put when you water. A small bridge where the path crosses a blue glass stream is a classic extra. Of all fairy garden containers upgrades, a good path is the cheapest way to make a simple scene look planned.
14. Add a Mini Pond With Blue Glass and Stones

A pond needs no real water. A shallow dip lined with blue glass gems or a small mirrored disc, ringed with pebbles, reads instantly as water and never goes green or spills when the container moves.
Add a tiny dock, a miniature bucket, or one small frog figure at the edge and the scene tells its story. If you prefer real water outdoors, use a small sealed dish, change it often, and keep it shallow so it stays a decoration rather than a chore.
15. Grow a Living Lawn of Creeping Thyme and Moss
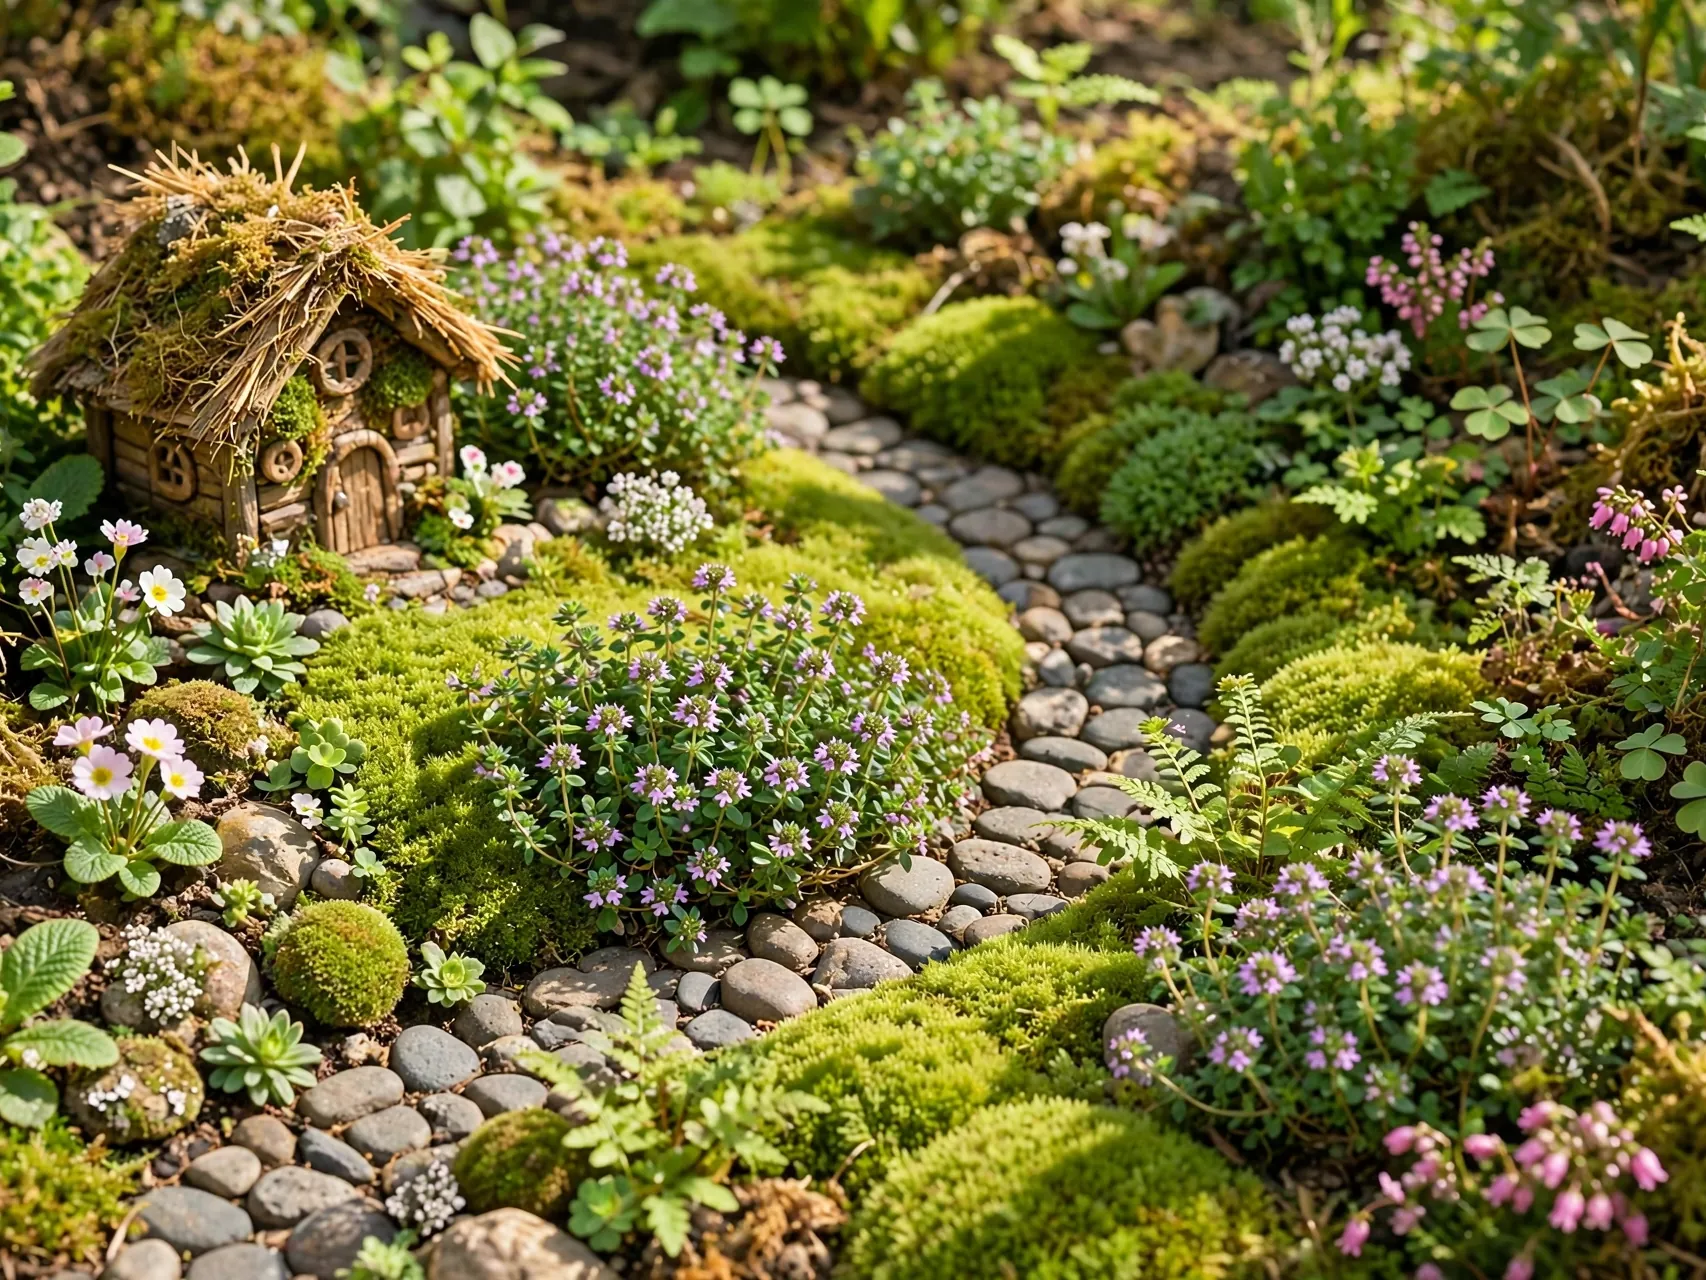
Ground cover plants are the lawn and carpet of a fairy garden. Creeping thyme handles sun and light foot traffic from small fingers, moss suits shade and moisture, and baby tears give a lush look indoors where light is soft.
Plant ground cover last, tucking small plugs around houses and paths, and trim it back when it starts to swallow furniture. Living ground cover is what separates a planted garden from a tray of ornaments, so give it time to spread before you judge the scene.
16. Hang a Fairy Garden Basket by the Door

A hanging basket by the front door puts a tiny world at eye level for every visitor. Line the basket, add light potting mix, and choose trailing and low plants so the scene spills a little over the edge.
Keep pieces small and secure so nothing drops when the basket moves in wind, and remember hanging baskets dry out quickly in summer. Water gently from the top with a small can. A door basket is a warm welcome and an easy seasonal swap through the year.
17. Make a Pumpkin House Garden for Fall

In fall, a real or faux pumpkin becomes a house with a cut or attached door, tiny windows, a moss roof line, and a pebble path through fallen leaves. Set it in a bed or a wide pot and add small gourds as village extras.
A real pumpkin is a short season decoration, so take the photo early and enjoy it while it lasts. A faux pumpkin returns every year. Either way, the warm color against green plants makes this one of the coziest scenes in this whole list.
18. Design a Succulent Desert Fairy Scene
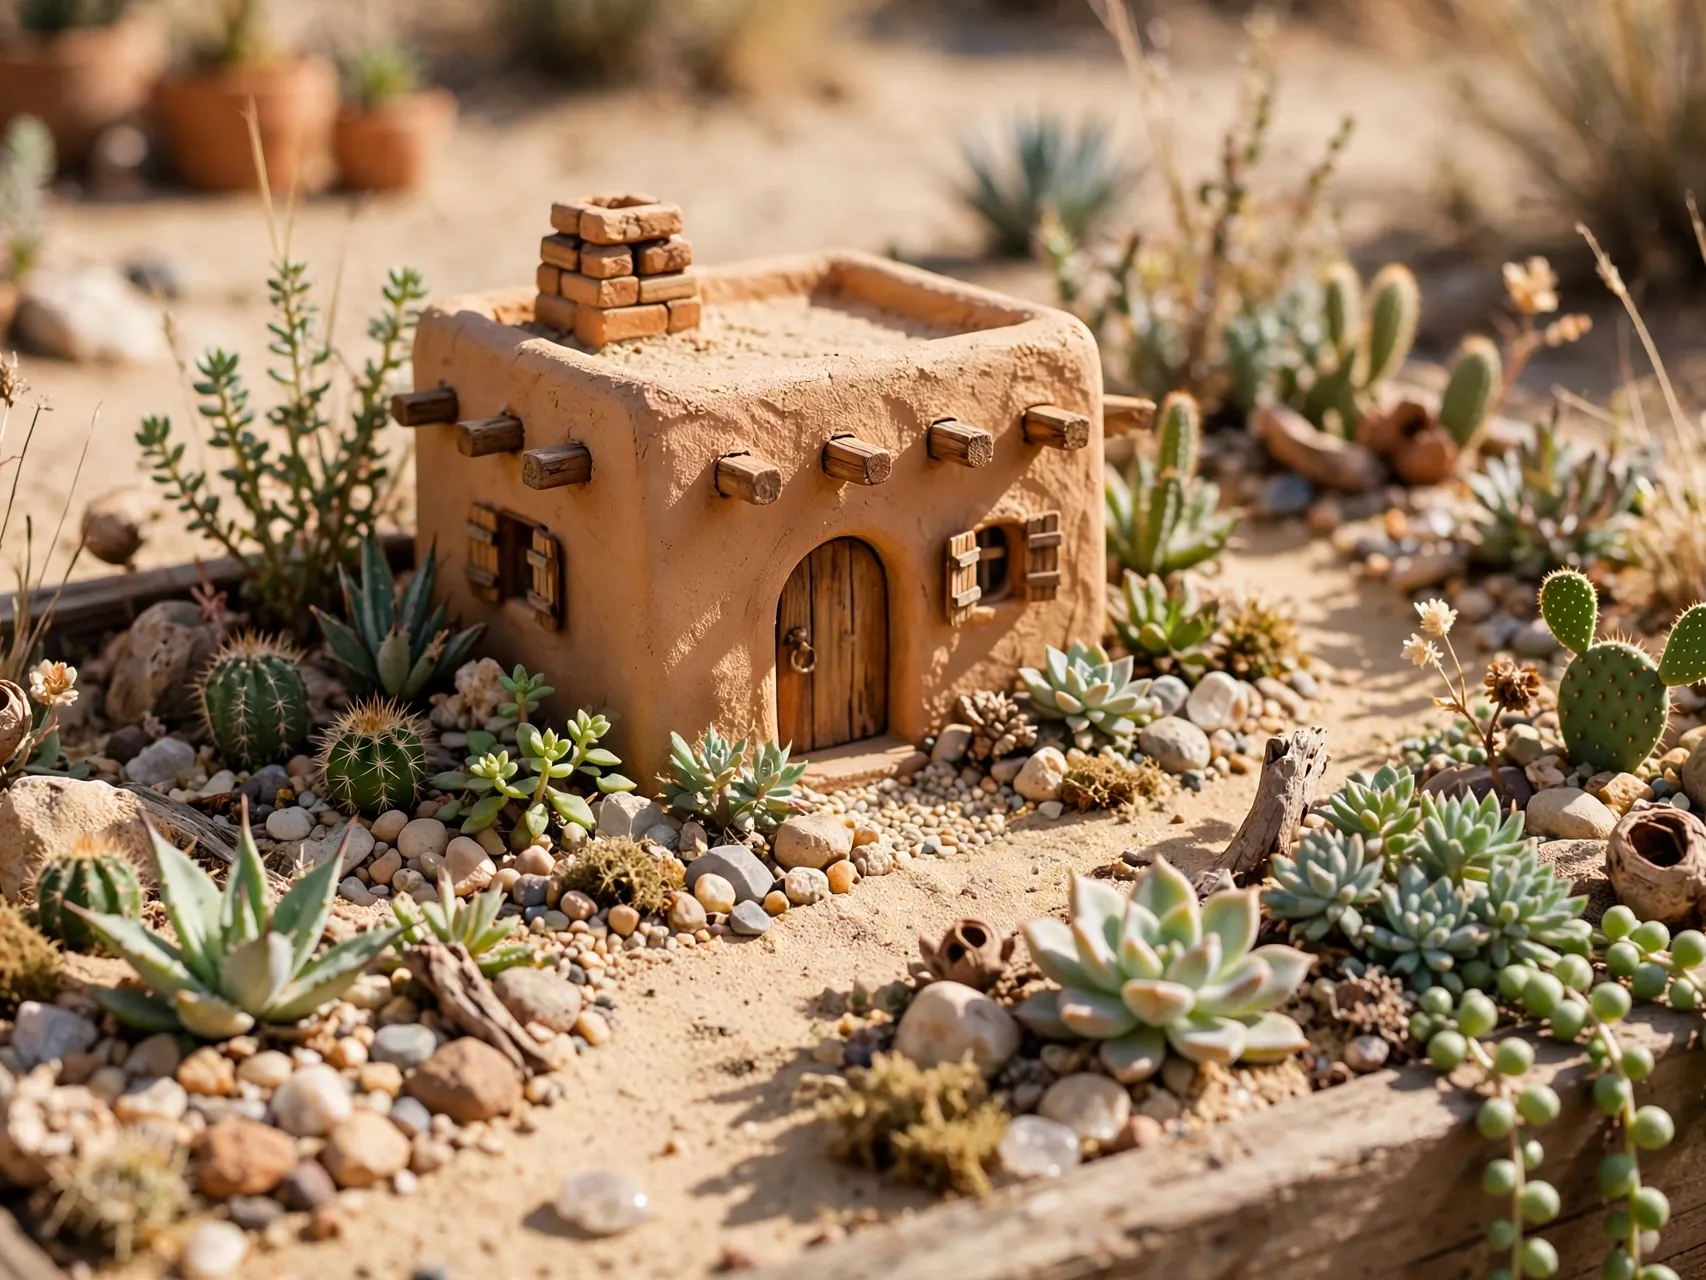
For a hot, sunny spot, build the garden around succulents. Gritty, free draining mix, a shallow wide pot, sand colored gravel, and a small adobe style house create a desert village that actually likes the heat on a south facing step.
Water sparingly and only when the mix is dry. Succulents stay small for a long time, which keeps the scale right with very little trimming. This is the most forgiving outdoor scene for busy gardeners and warm climates.
19. Add a Tiny Swing, Ladder, and Hidden Details
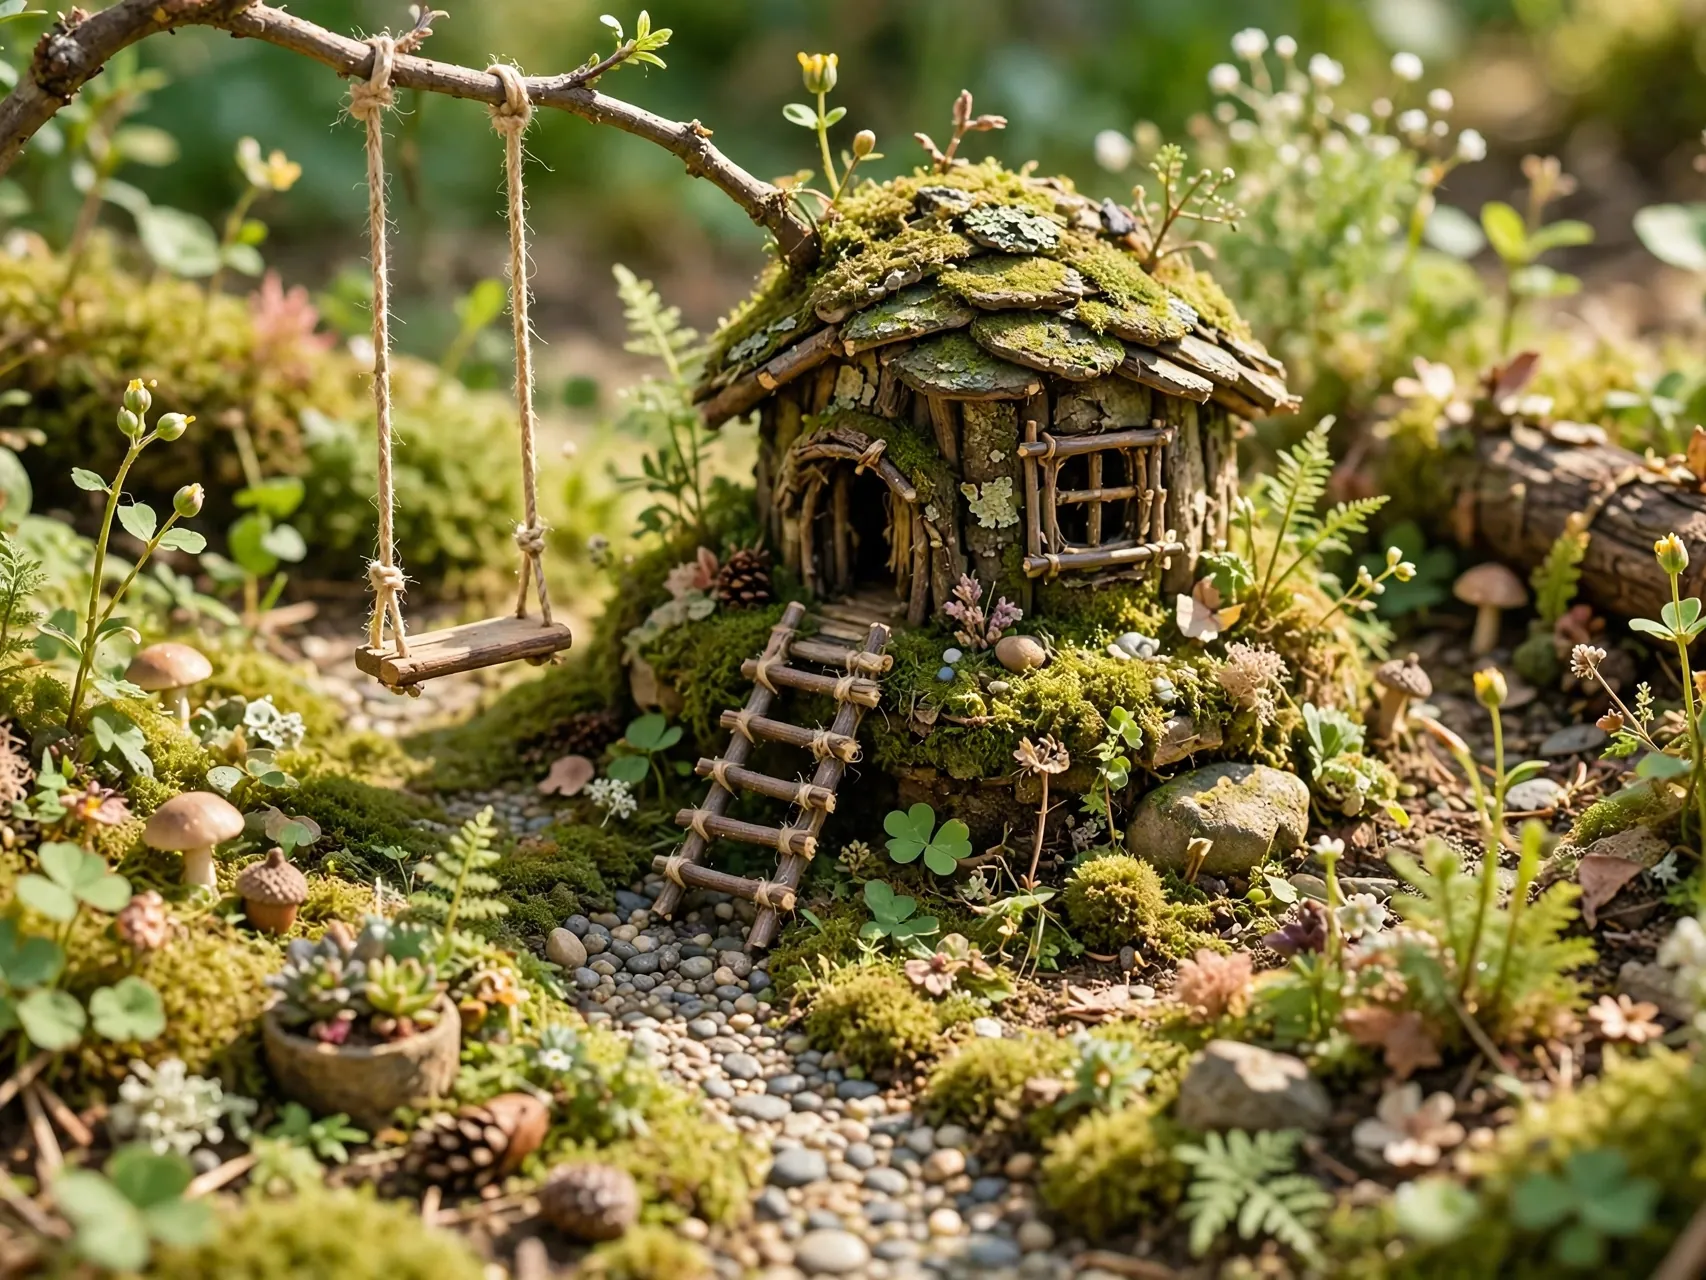
The details people lean in for are the hidden ones: a twig ladder against a pot rim, a small swing under a branch, a miniature book on a bench, a tiny mailbox by the path. Place a few where only a close look will find them.
Rotate small details with the seasons, a tiny pumpkin in fall, a small sled in winter, and the garden stays interesting without a full rebuild. Hidden details are also an easy, low cost way for children to keep adding to the story.
20. Light It With Solar Stakes and Fairy Lights
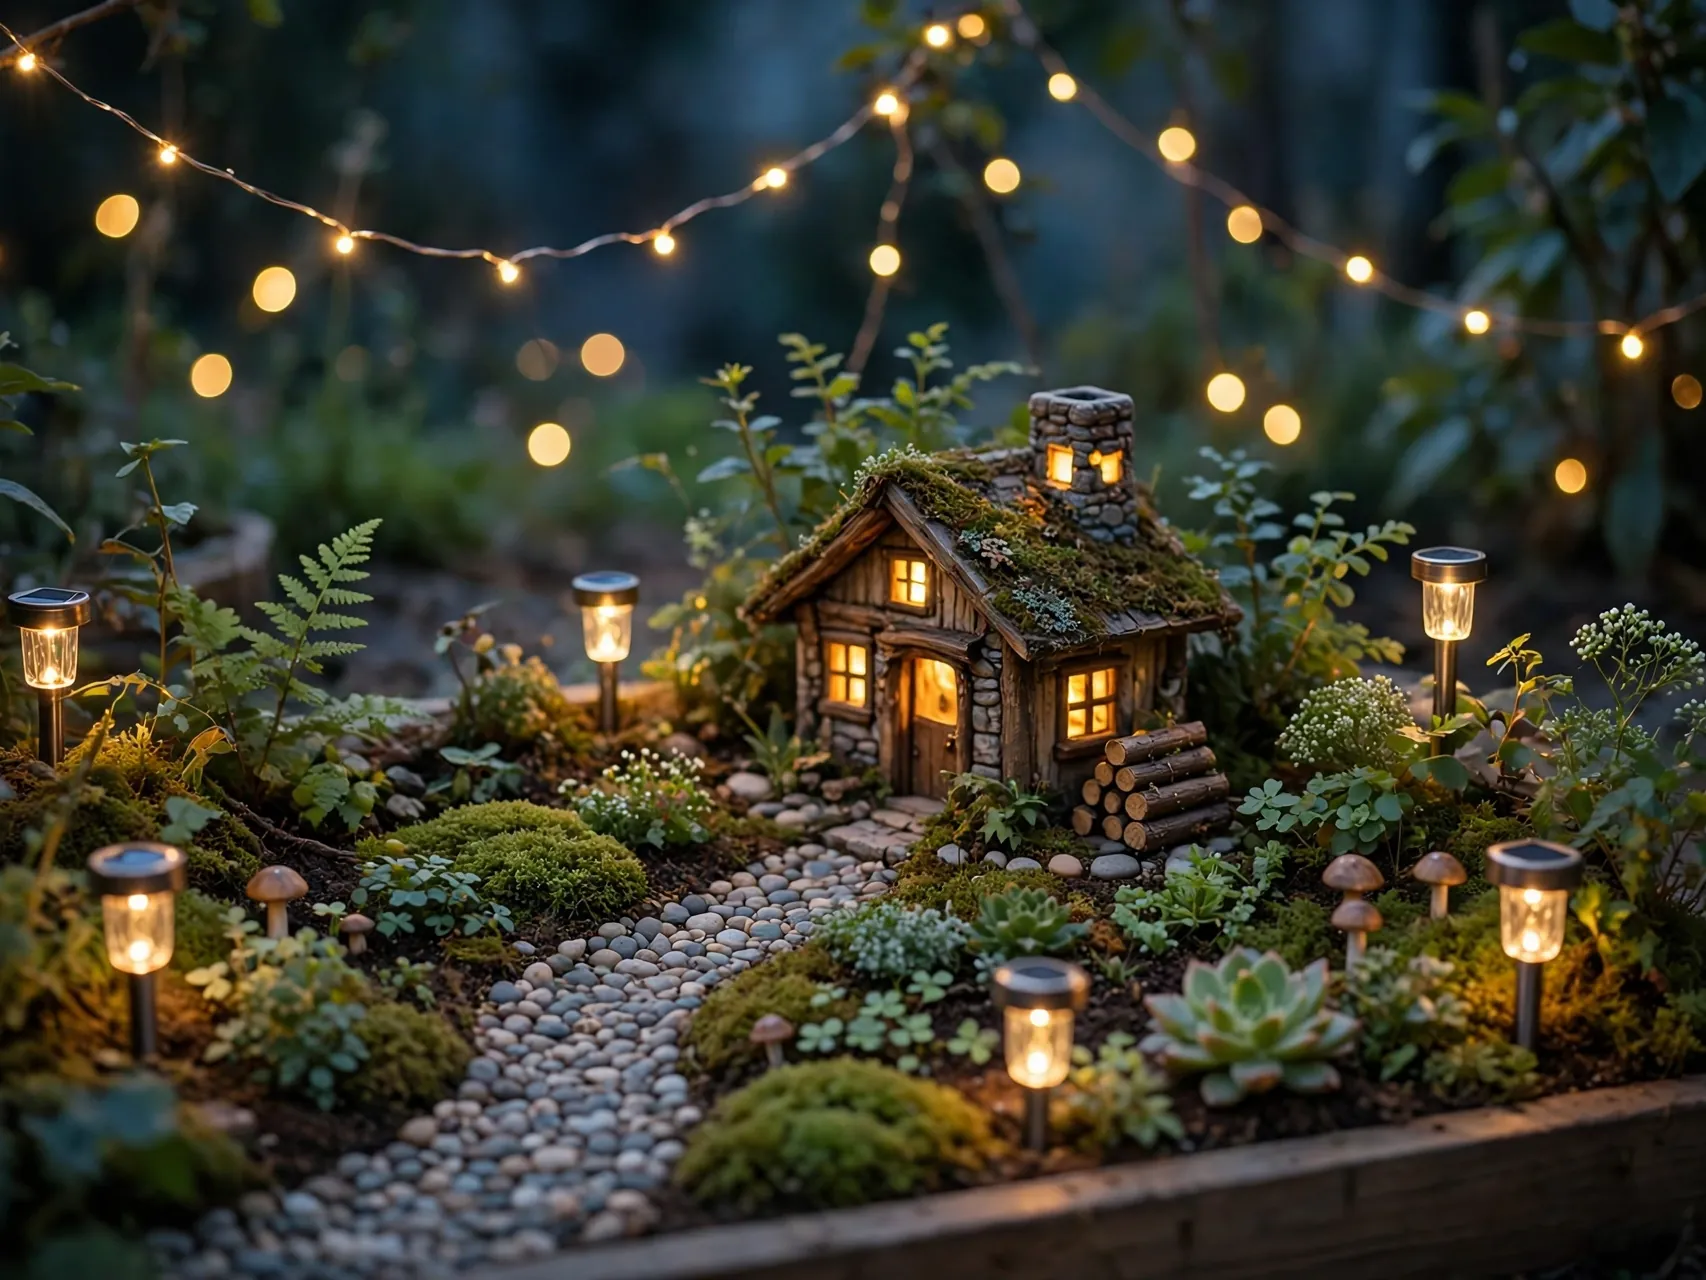
A fairy garden earns its name after dark. One or two small solar stakes near the house, or a short string of outdoor fairy lights woven through the planting, turn an evening walk past the porch into a small event.
Keep solar panels in real sun during the day and choose lights made for outdoor use, following the maker directions for batteries and weather. Soft warm light suits these scenes best. During the day the fittings nearly disappear among the plants, which keeps the daytime scene natural.
21. Keep It Alive With Gentle Water and Seasonal Refreshes

The last idea is the habit that keeps the other twenty looking good. Water with a mister or a small can with a fine rose, trim any plant that starts to hide the house, and top up gravel and moss where they thin out.
Every season, wash dusty pieces, replace anything broken, and swap one small feature so the scene feels new. Store delicate pieces indoors over winter in cold climates. A diy fairy garden that gets five minutes of care now and then will outlast a bigger garden that gets none.
FAQ
What is the best container for a beginner fairy garden?
A wide, shallow bowl or pot with drainage holes is the easiest start. It holds enough soil for low plants, shows the whole scene at once, and can move to shelter in bad weather. Add gravel at the base, fill with potting mix, place the house first, then add a path and plants around it.
Which plants stay small in a fairy garden?
Look for moss, creeping thyme, baby tears, miniature ferns, and small succulents or sedums. The key is matching the plant to the light in your chosen spot and picking slow growing types. Even small plants need trimming now and then, so pinch back anything that starts to cover houses or paths.
Can a fairy garden live outdoors all year?
The container and hard pieces can, but delicate accessories and tender plants may not survive hard frost or long wet spells. In cold climates, move container gardens to a sheltered spot, store small pieces indoors, and choose hardy plants for in-ground scenes. Faux pieces made for outdoor use handle weather best.
How do I water a fairy garden without ruining it?
Use a mister, a squeeze bottle, or a small can with a fine rose, and aim at the soil rather than over the furniture. Heavy spray knocks over tiny pieces and washes paths away. Water when the top of the mix feels dry, and water less for succulent scenes than for moss and fern scenes.
How can I make a fairy garden with kids safely?
Build together with larger pieces, non toxic craft materials, and plants that are safe to handle, and keep very small loose pieces away from toddlers and pets who mouth objects. Let children design the path and furniture, check the garden together, and wash hands after handling soil. The building is the activity, so simple and sturdy beats tiny and fragile.
Key Takeaways
- Anchor first, decorate second: One house or door, a path, and matched plants create the scene, everything else is detail.
- Match plants to light: Moss and ferns for shade, succulents and thyme for sun, and always group plants with similar water needs.
- Containers need drainage: Gravel, holes, and gentle watering keep a miniature fairy garden alive without washing it away.
- Paths make it a place: A winding pebble path is the cheapest way to make scattered pieces feel like a village.
- Care little and often: Mist, trim, and refresh one small feature each season and the garden stays enchanting.
- Loved these scenes? Save this guide to Pinterest and pin the fairy garden you want to build first.