25 Tips to Remove Drywall Anchors Without Wrecking Walls
Introduction
Old anchors are the small plastic and metal reminders of every shelf, TV and curtain rod that used to hang in a room. When you repaint, rearrange or move out of a rental, those anchors need to go, and the wall needs to stay smooth enough to patch with a tiny, invisible repair.
Learning how to remove drywall anchors the right way starts with one idea. Each anchor type holds differently, so each type leaves differently. Pulling a molly bolt like a plastic plug will tear a wide hole. Pushing a simple plug out with the right trick leaves almost nothing to fix.
This guide gives you 25 tips in working order, from identifying the anchor to priming and matching paint at the end. Keep renter repairs within your lease. If your landlord prefers to handle wall repairs, photograph the anchors and ask before you fill anything.
Work slowly and stop the moment a method starts to damage the paper facing. A clean small hole is always the goal.
1. Identify the Anchor Type Before You Pull

Look closely at the visible head. A simple ribbed plastic plug has a small round collar. A self drilling anchor has a wide head with a screwdriver slot and coarse threads. A molly bolt has a metal flange, and a toggle bolt has a spring wing hidden inside the wall.
Identification decides everything that follows. Plastic plugs often pull out, self drilling anchors unscrew, and molly and toggle parts usually need to drop into the cavity. Spend thirty seconds looking before you spend thirty minutes repairing a torn hole.
2. Remove the Screw and Fixture First

Take the shelf, bracket or fixture down and remove its screw fully before you touch the anchor itself. For plastic expansion anchors, removing the screw lets the body relax and shrink slightly, which loosens its grip on the gypsum.
Keep screws in a small container as you work. Work one anchor at a time so you always know which method you are using on which hole.
3. Gather Needle Nose Pliers and Basic Tools

You need very little for most drywall anchor removal work: needle nose pliers, Phillips and flat screwdrivers, a utility knife, a putty knife, lightweight spackle, a damp cloth and a small trash cup for removed pieces.
Add a hammer for gentle tapping and a drill only for rare last resort cases. Good light matters too, because seeing the collar and paper edge clearly prevents rough pulls.
4. Try Unscrewing Self Drilling Anchors in Reverse

Self drilling metal and sturdy plastic anchors went in like screws, and they usually come out like screws. Fit the correct screwdriver snugly into the head, press lightly and turn counterclockwise with steady, slow pressure while supporting the anchor face.
The threads should back the anchor out along its original path. If it spins in place without moving, the gypsum threads are stripped. Stop turning, move to the pliers method in the next tips, and avoid grinding the hole wider with repeated spinning.
5. Reinsert the Screw a Few Turns for Plastic Plugs

For a standard ribbed plastic plug, put the screw back in for only two or three turns. The threads should grip the inside of the plug without expanding it against the wall again. Leave the screw head sticking out about a quarter inch.
That proud screw head becomes a clean handle. It gives pliers something solid to hold and spreads the pulling force through the plug body, instead of letting plier teeth chew the soft collar and snap it off.
6. Grip the Screw Head and Pull Straight Out
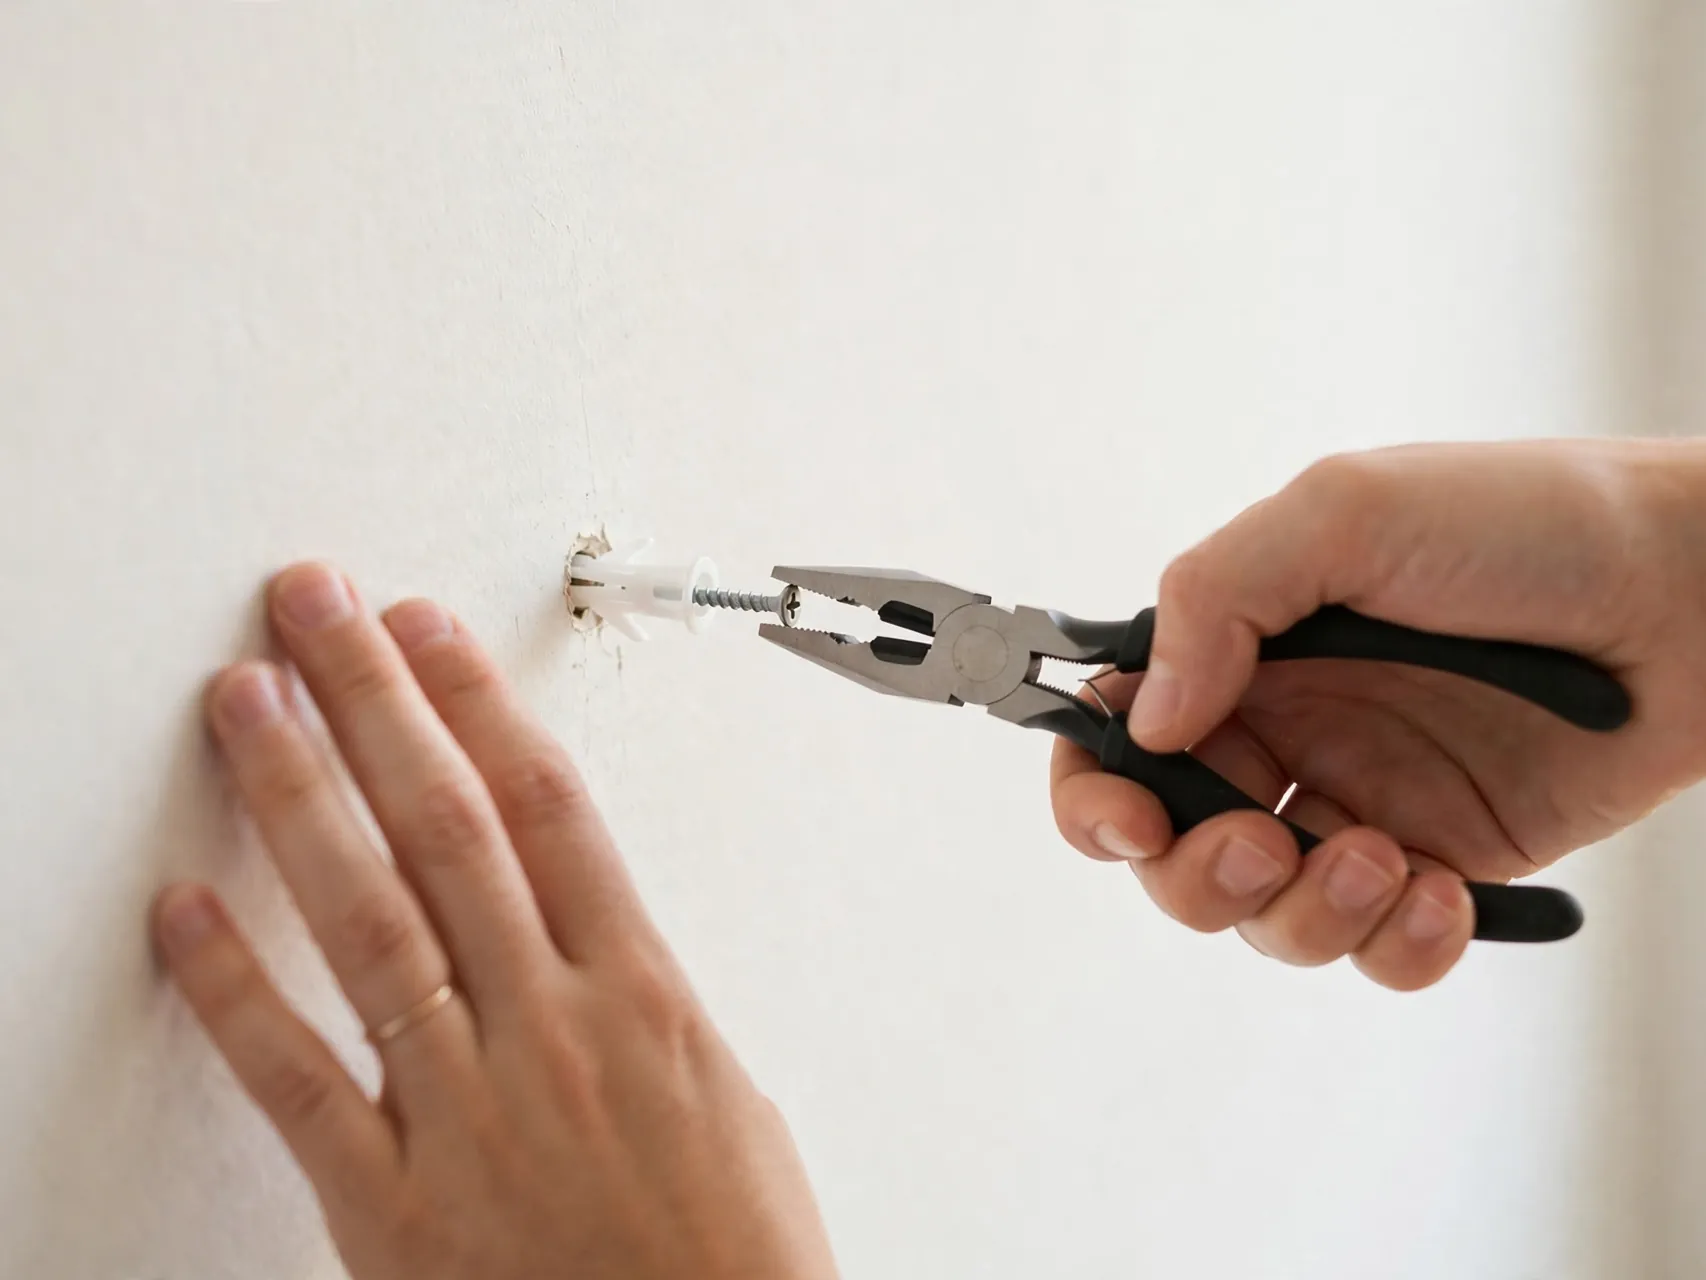
Grip the exposed screw head firmly with needle nose pliers and pull straight out from the wall, in line with the hole. Steady pressure works better than a jerk. Many plugs slide out in one smooth motion once the ribs release their friction hold.
Keep your other hand flat on the wall beside the hole for support and feel. If the plug moves a little then sticks, do not force the last part. Add the gentle wiggle and twist from the next two tips and let the plug work itself free.
7. Wiggle Gently Instead of Yanking
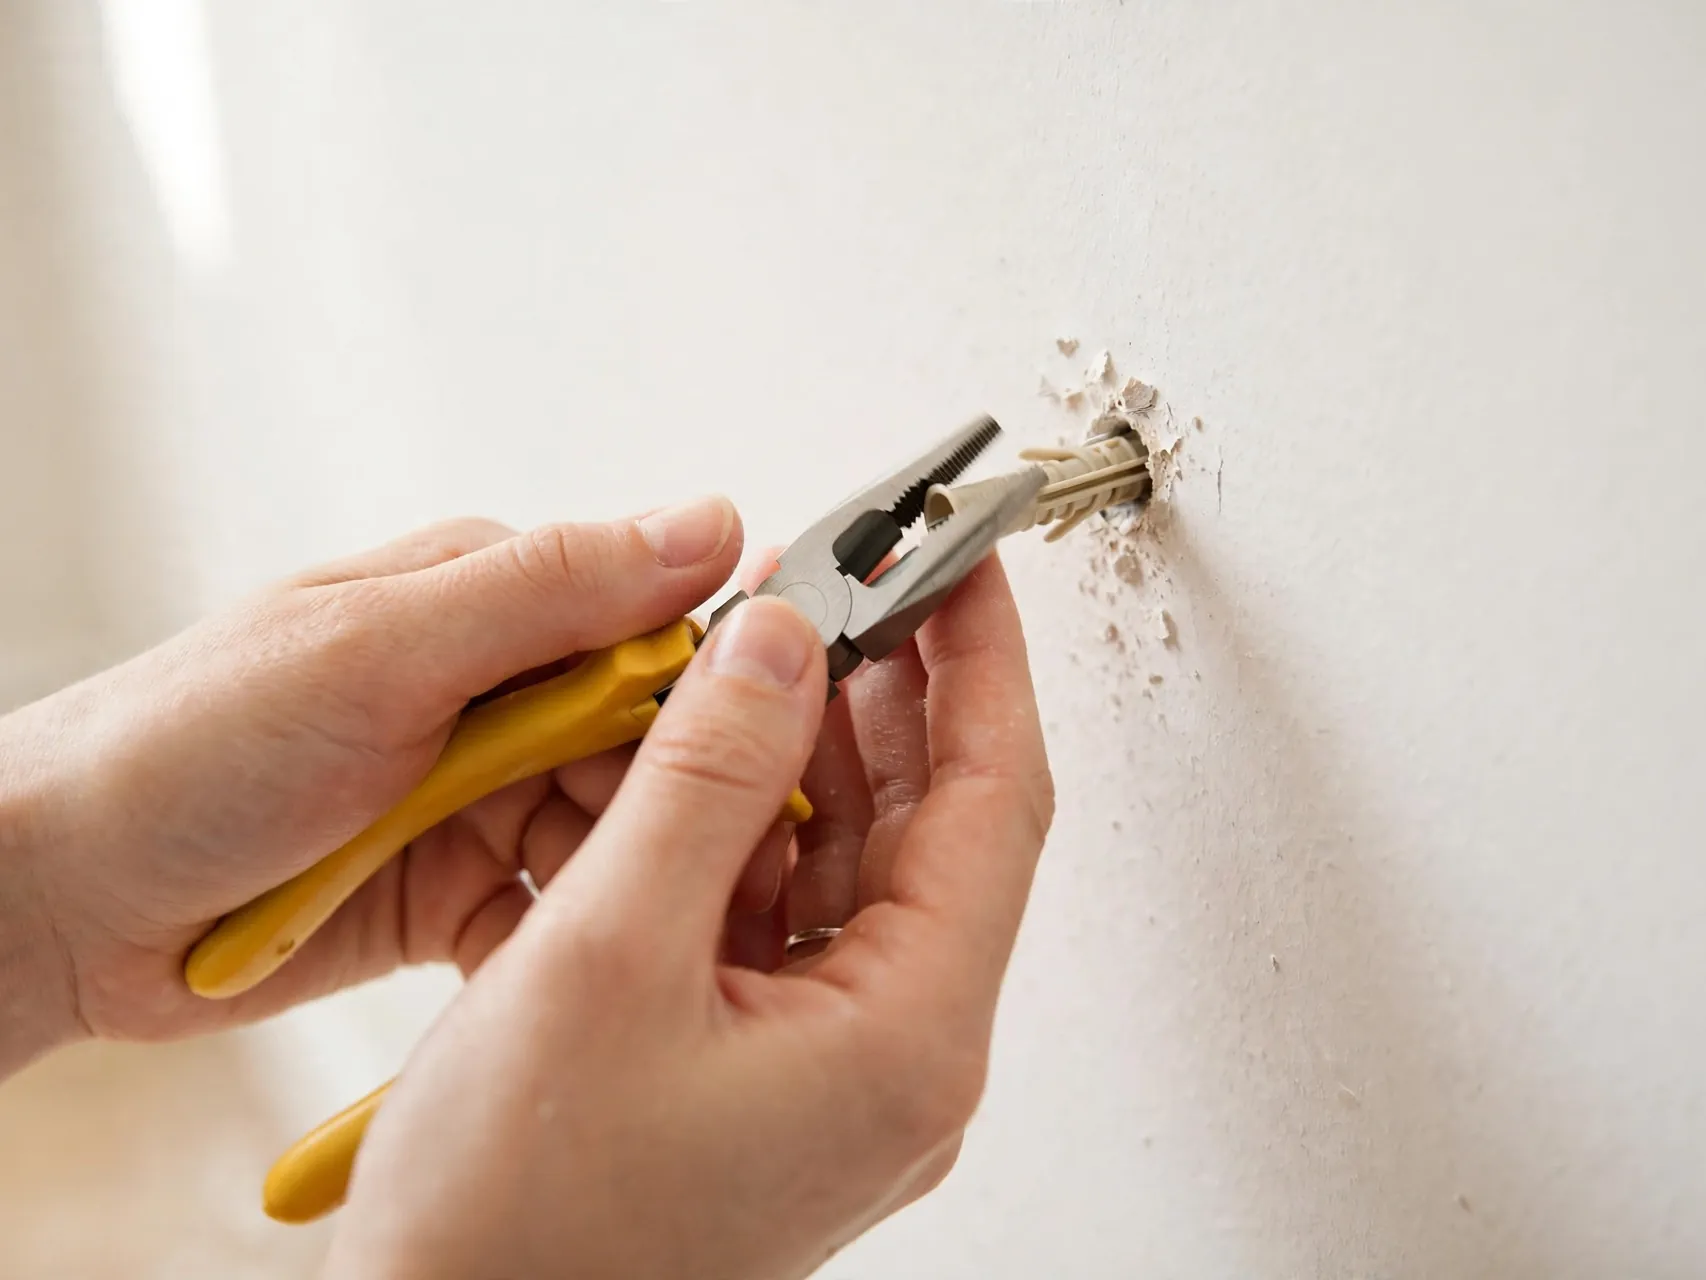
A small side to side wiggle, paired with steady outward pressure, loosens the bond between a plug and the gypsum without tearing the paper facing. Think of easing a tooth loose, not ripping a bandage off. Small movements, patient pressure.
Yanking concentrates force at one edge and is the most common way a neat round hole becomes a ragged crater. If several minutes of gentle work changes nothing, that anchor is telling you to switch methods, usually to the cut and push approach below.
8. Twist While You Pull for Ribbed Plugs

For ribbed expansion plugs, a slow counterclockwise twist combined with your pull often helps the ribs spiral out of the hole they compressed into. Keep the twist gentle and keep the pliers aligned so the plug does not tilt and bite one side.
This twist and pull works especially well when the plug is slightly loose already. Stop twisting if you feel the plug grinding or see white dust pouring out, since that means gypsum is breaking down and the hole is growing instead of releasing.
9. Stop if the Paper Facing Starts to Tear

Drywall strength lives in its paper facing. Once that paper tears around a hole, the soft gypsum crumbles easily and patches sit poorly. Watch the paper edge as you pull, and stop the instant you see it lift, wrinkle or rip.
A stopped job is a saved wall. Set the pliers down, reassess the anchor type and choose a lower damage path. Cutting the collar and pushing the body inward, covered next, exists precisely for anchors that threaten the paper when pulled.
10. Cut the Flange Flush if an Anchor Will Not Budge
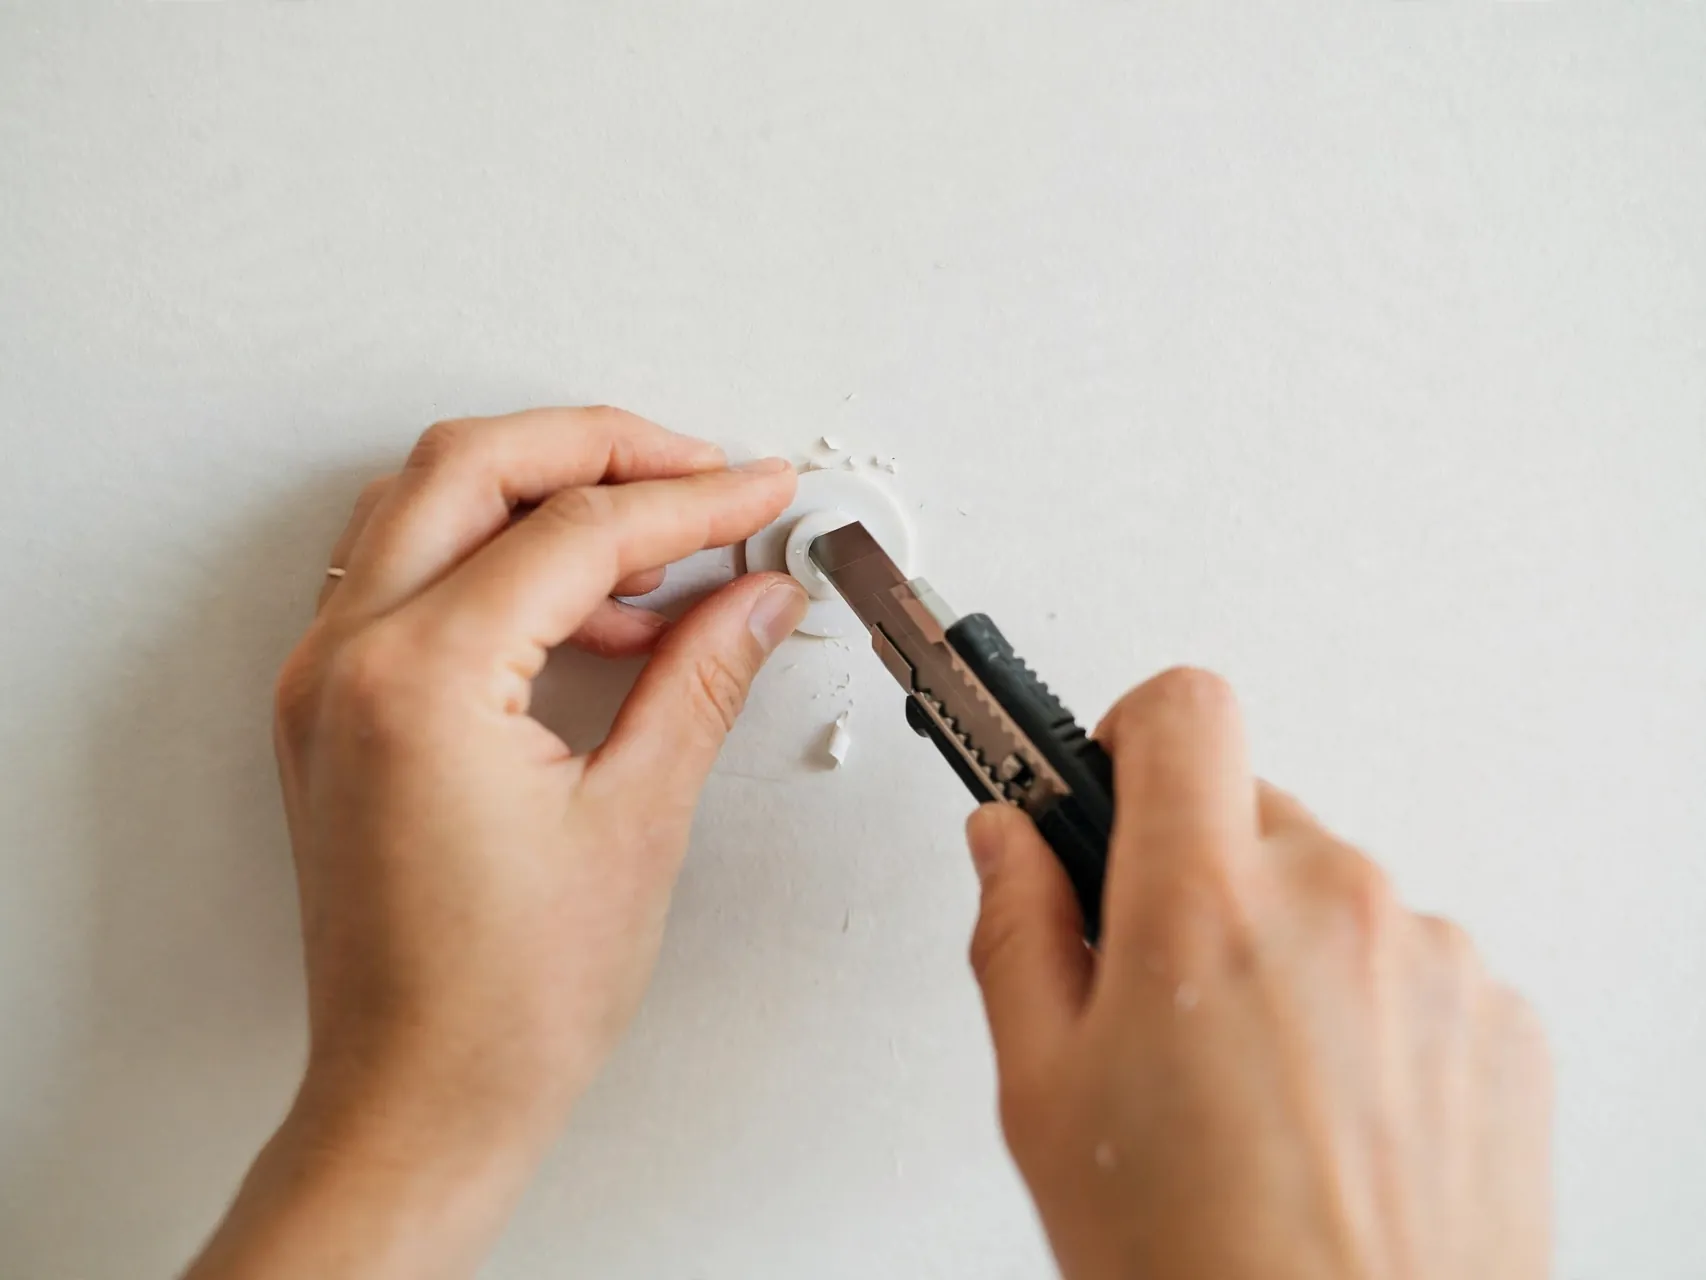
When a plastic anchor refuses to move, score its visible flange carefully with a utility knife where it meets the wall, cutting the head off flush with the surface. Use light, controlled cuts away from your supporting hand and never dig the blade into the wall.
With the collar gone, the remaining sleeve has nothing holding it at the surface. This remove plastic wall plugs fallback keeps the final hole at its original small size, which is the whole point of choosing it over a forceful pull.
11. Push Small Plastic Anchors Into the Cavity
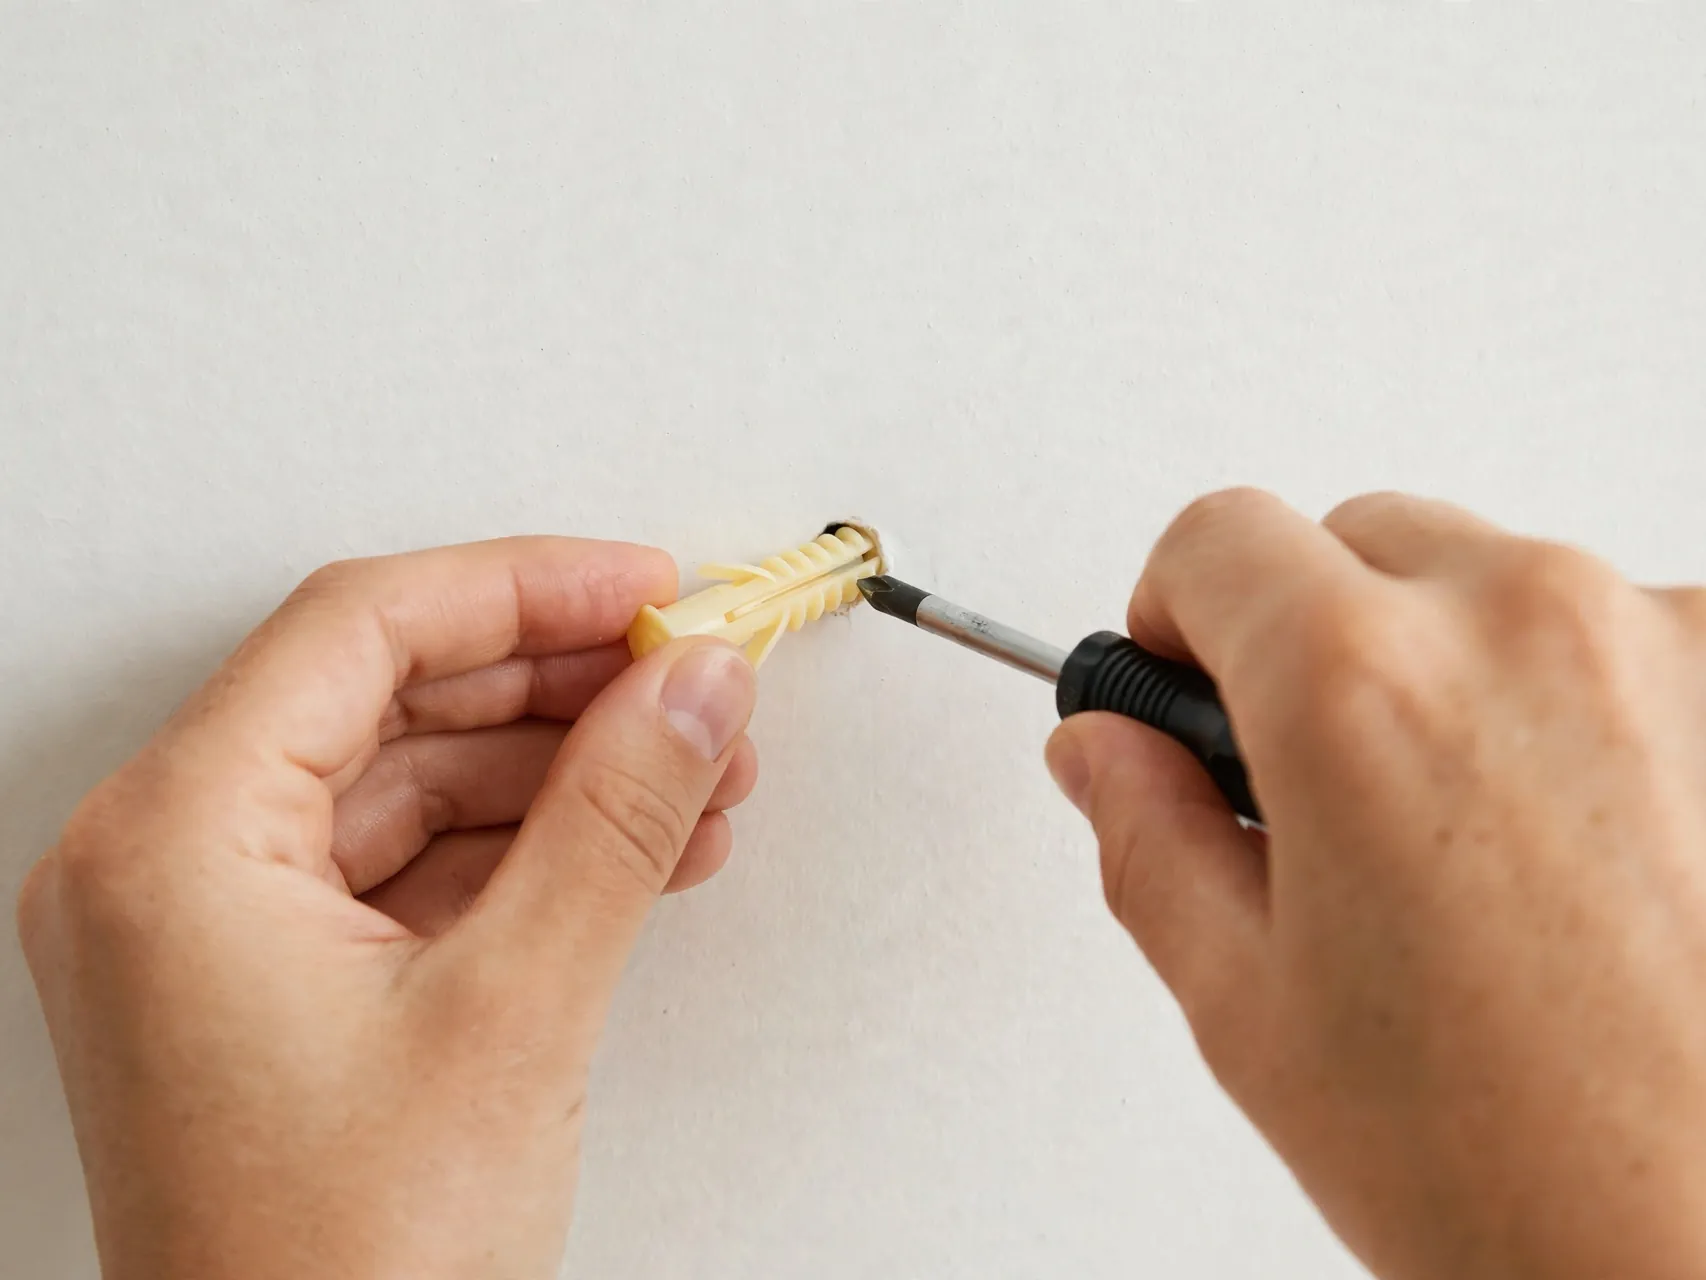
After the flange is cut, or when a plug is loose but will not pull clear, push the remaining body gently into the wall cavity with a screwdriver or the end of a putty knife. It will drop harmlessly inside the hollow wall.
Pushing in feels wrong the first time, but for small lightweight plugs it is often the cleanest option. The alternative, prying harder, tears a much larger hole. What remains on your side is one small, round, easy opening ready for filler.
12. Tap a Stuck Anchor Just Below the Surface
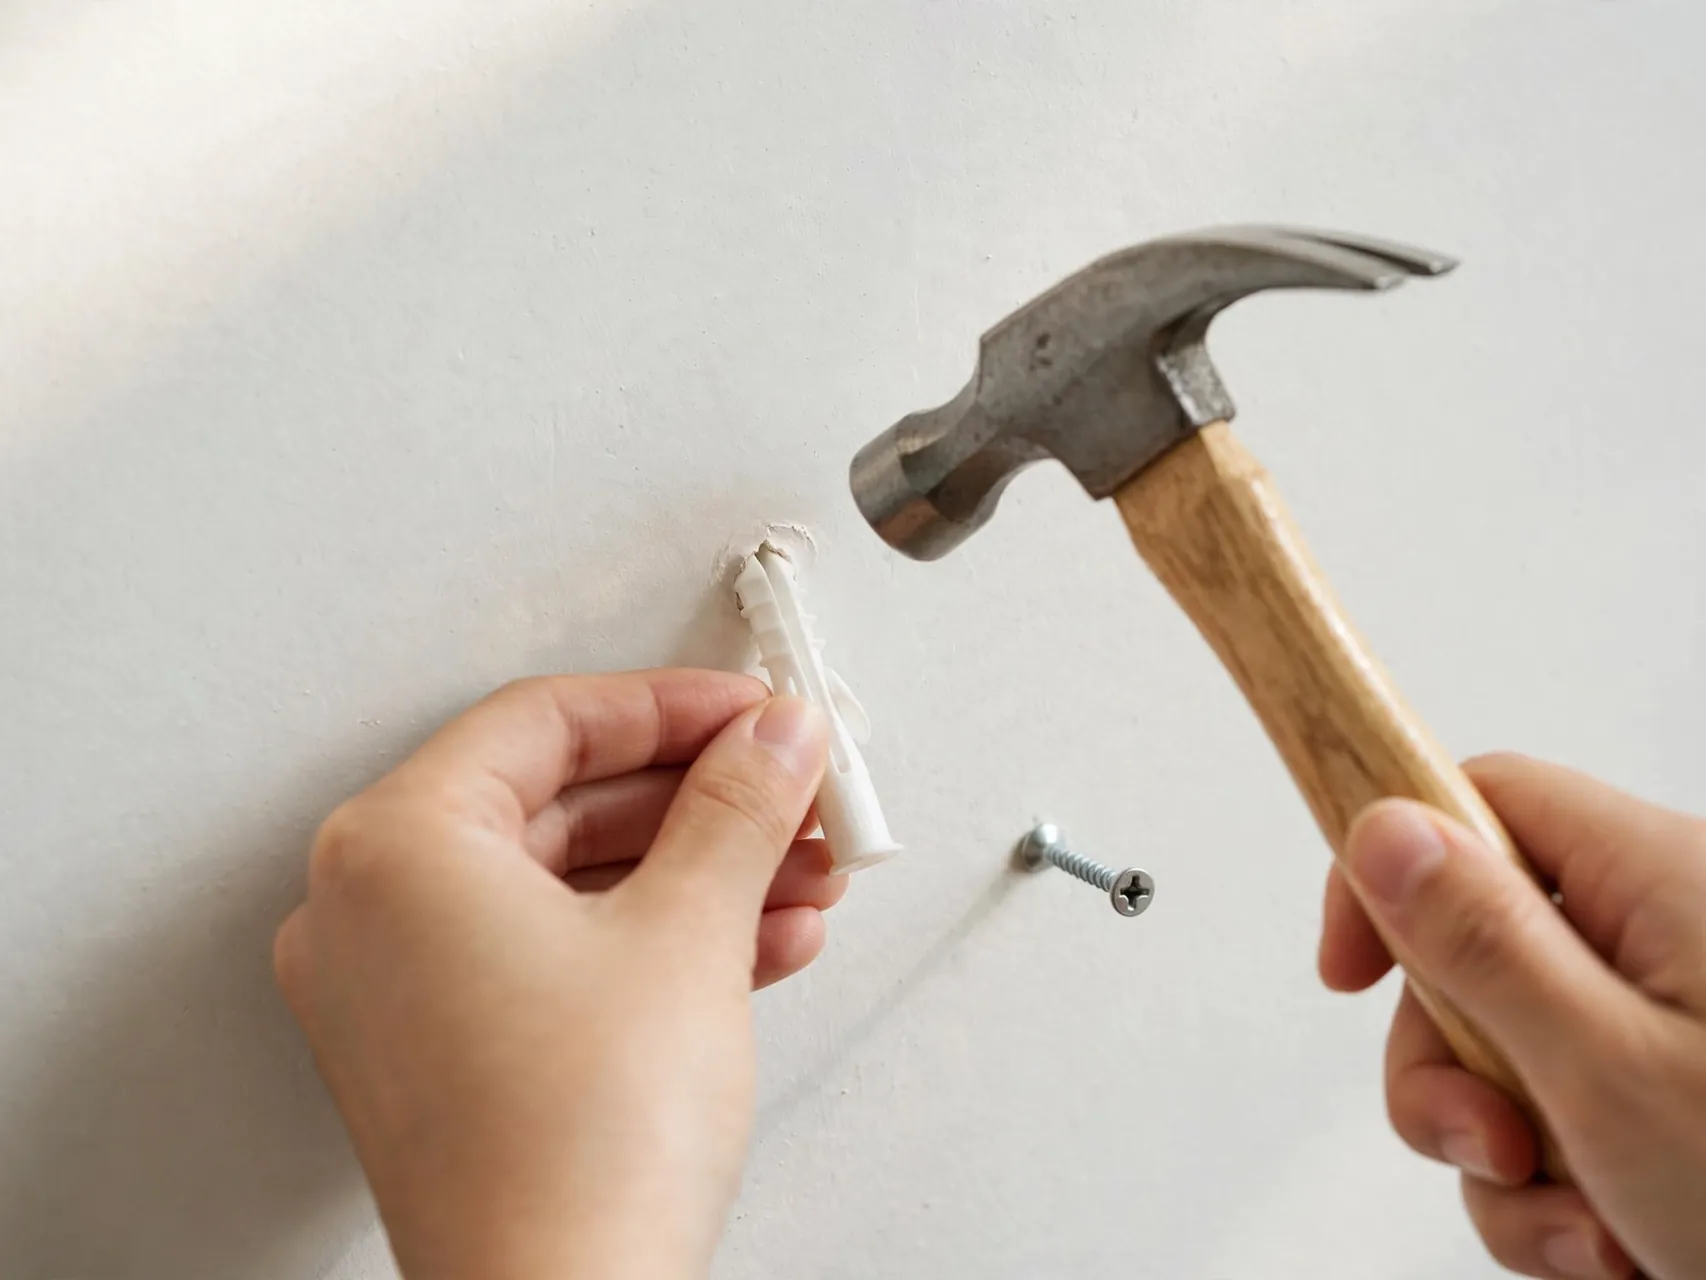
If an anchor will neither pull out nor push through, recess it. Place a flat screwdriver or punch that spans the anchor head and tap gently with a hammer until the top sits just below the wall surface, roughly a sixteenth of an inch deep.
That shallow recess gives spackle something to grip over the anchor without a bump showing through paint. Tap in small steps and check often. Heavy blows crack surrounding gypsum and turn a one minute patch into a wide repair you did not need.
13. Remove the Screw From Molly Bolts First
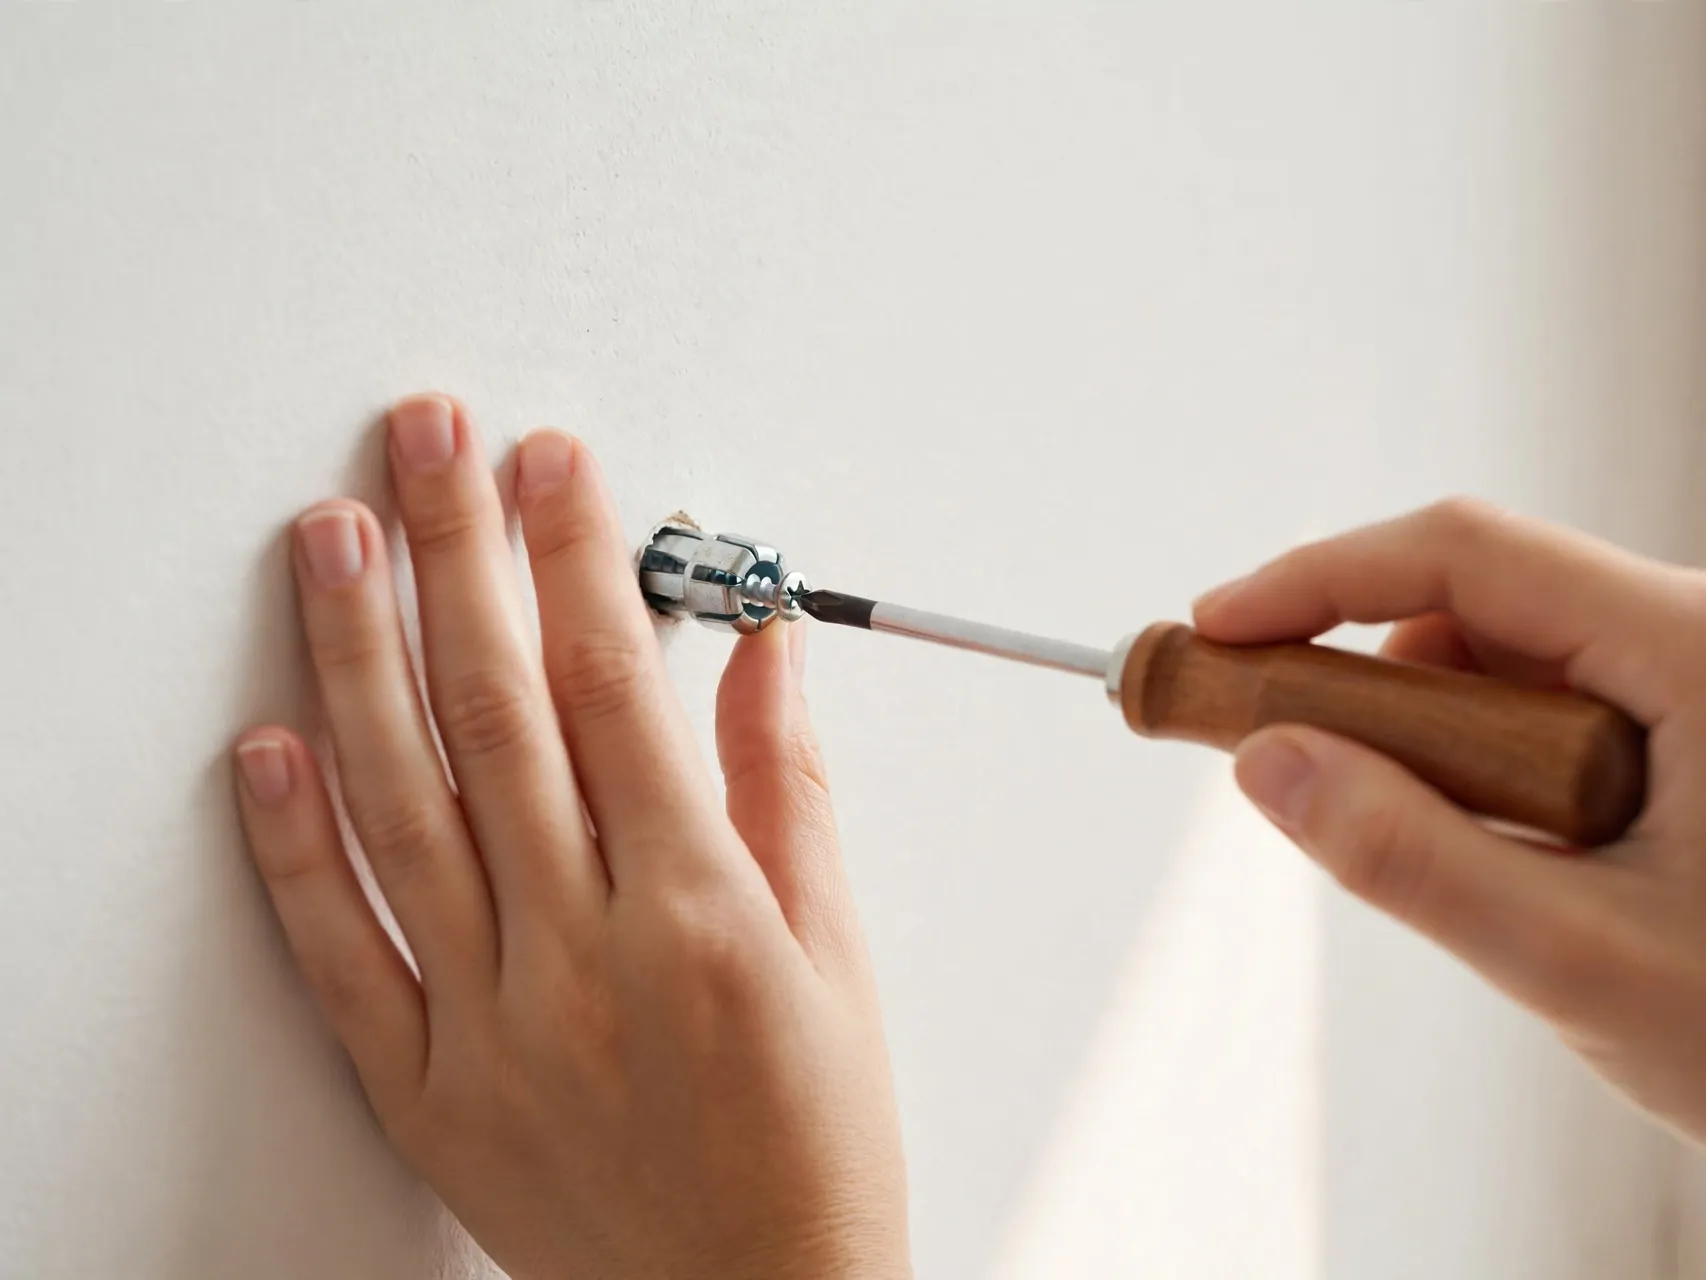
Molly bolts, also called hollow wall anchors, hold with a metal sleeve that flared wide behind the drywall when first tightened. That flare is wider than the hole, so a molly can never be pulled straight out. Start by removing its machine screw completely.
Removing the screw relaxes the sleeve slightly and frees the fixture. Do not try to unscrew the whole molly body or pry at its flange with force. The flange and sleeve are handled from the front in the next step, with the wall surface protected throughout.
14. Push Molly Bolt Sleeves Into the Wall

With the screw out, cut or fold the small front flange if needed, then tap the sleeve gently inward with a hammer and a blunt tool until it releases and drops into the cavity. Support the wall around the hole with your free hand as you tap.
Work in light taps and listen for the sleeve to let go. The hole left behind is only the original drilled size, even though the anchor inside was much wider. That is the quiet advantage of pushing molly parts in instead of tearing them out.
15. Let Toggle Bolt Wings Drop Into the Cavity

Toggle bolts use spring loaded wings that open flat behind the wall and cannot fold back through the hole. Unscrew the bolt while holding the fixture, and be ready: once the bolt is free, the wing assembly will drop inside the wall on its own.
That drop is the correct removal. Nothing needs to come back out through the hole. If a wing stays attached to a loose bolt, push the bolt gently inward until the wings clear and fall. The remaining hole patches like any other small round opening.
16. Drill Out a Metal Head Only as a Last Resort

Occasionally a metal anchor head is so damaged that no screwdriver or pliers can grip it. As a last resort, a drill bit sized to the head can remove the head alone, letting the body drop into the cavity. Use slow speed and stop the moment the head separates.
Protect the area, wear eye protection, and keep the drill straight so the bit does not wander across the paint. If you are renting, ask your landlord before drilling into an anchor at all.
17. Support the Wall Around the Hole While You Work
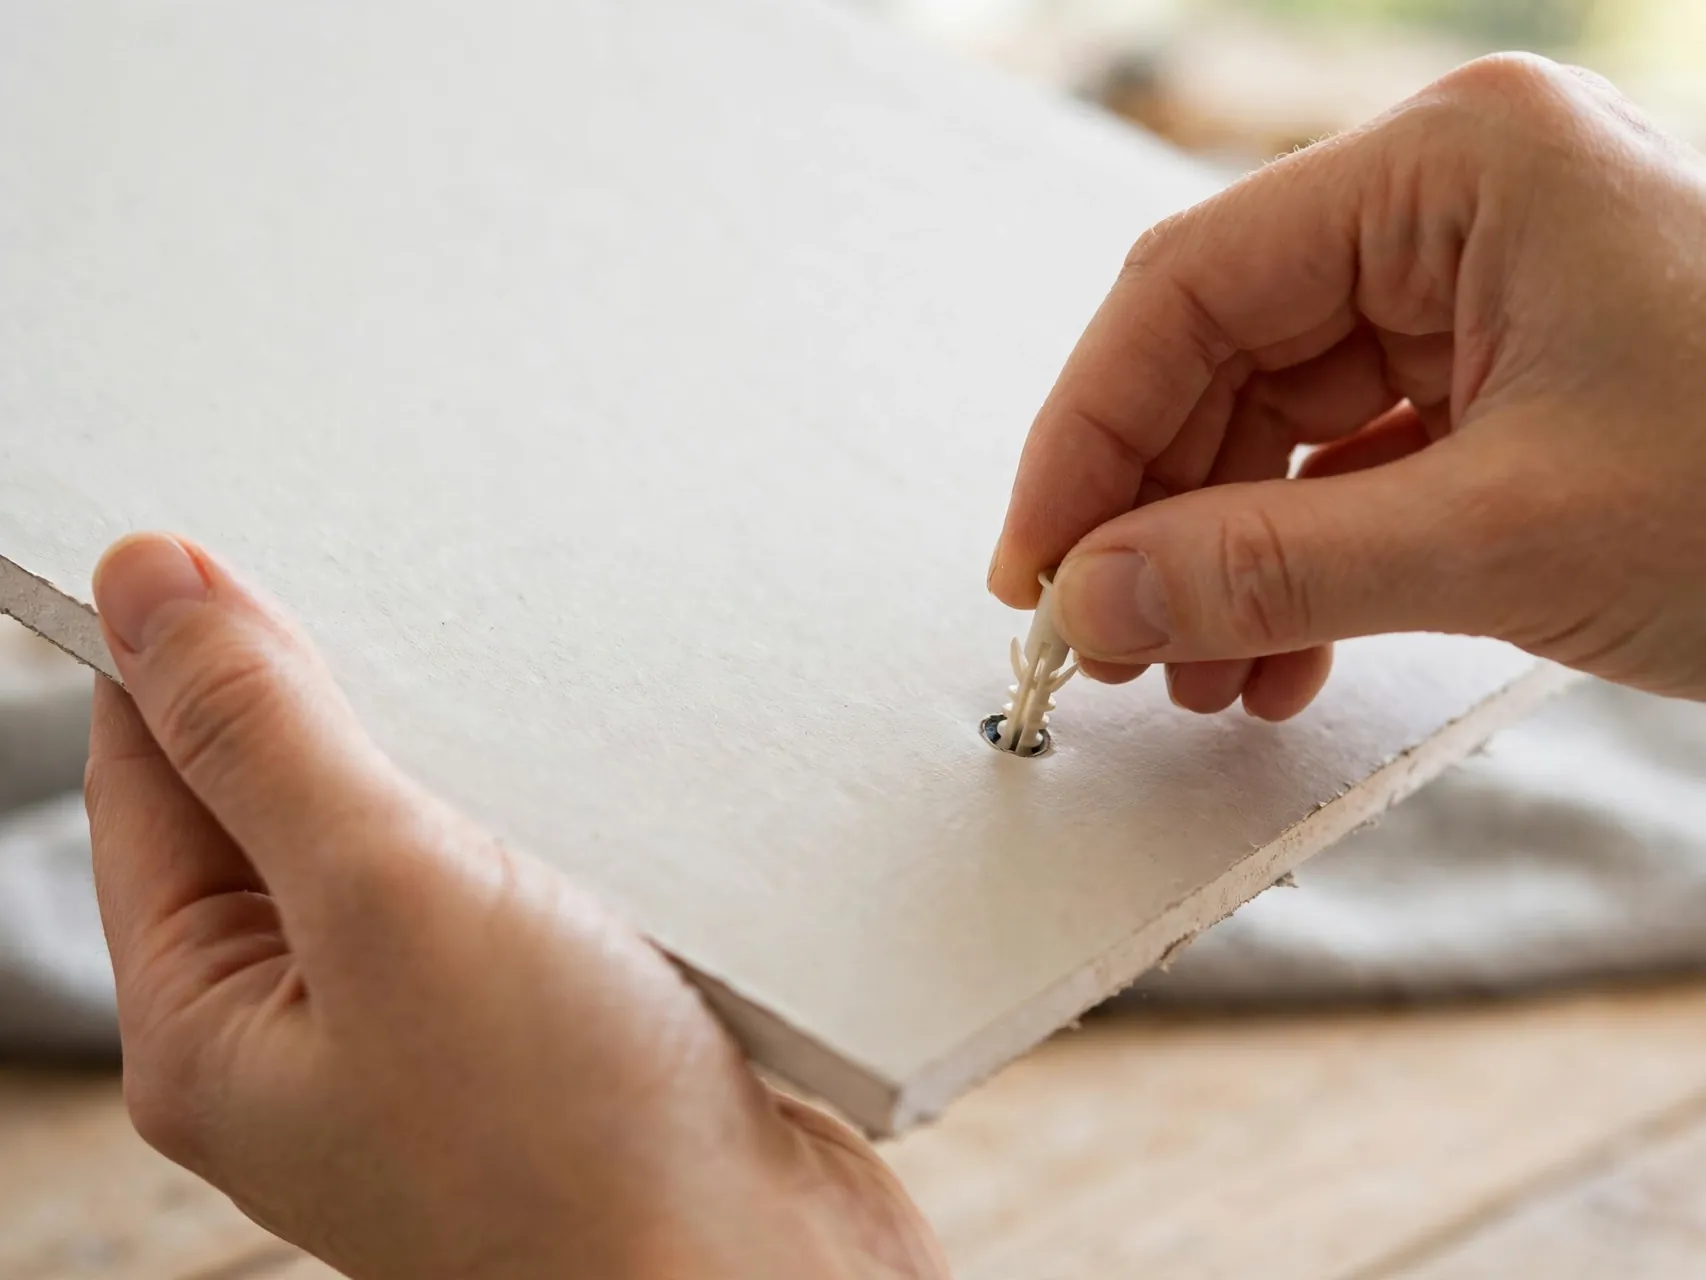
Place your free hand flat on the wall around the anchor whenever you pull, tap or push. Your palm spreads pressure, steadies the panel and gives you instant feedback if the surface starts to flex, crack or bulge while you work.
Thin drywall flexes more than you expect, especially between studs. If the wall feels soft or damp around a hole, stop and note it, because soft wallboard needs a different repair.
18. Keep the Hole as Small and Clean as Possible
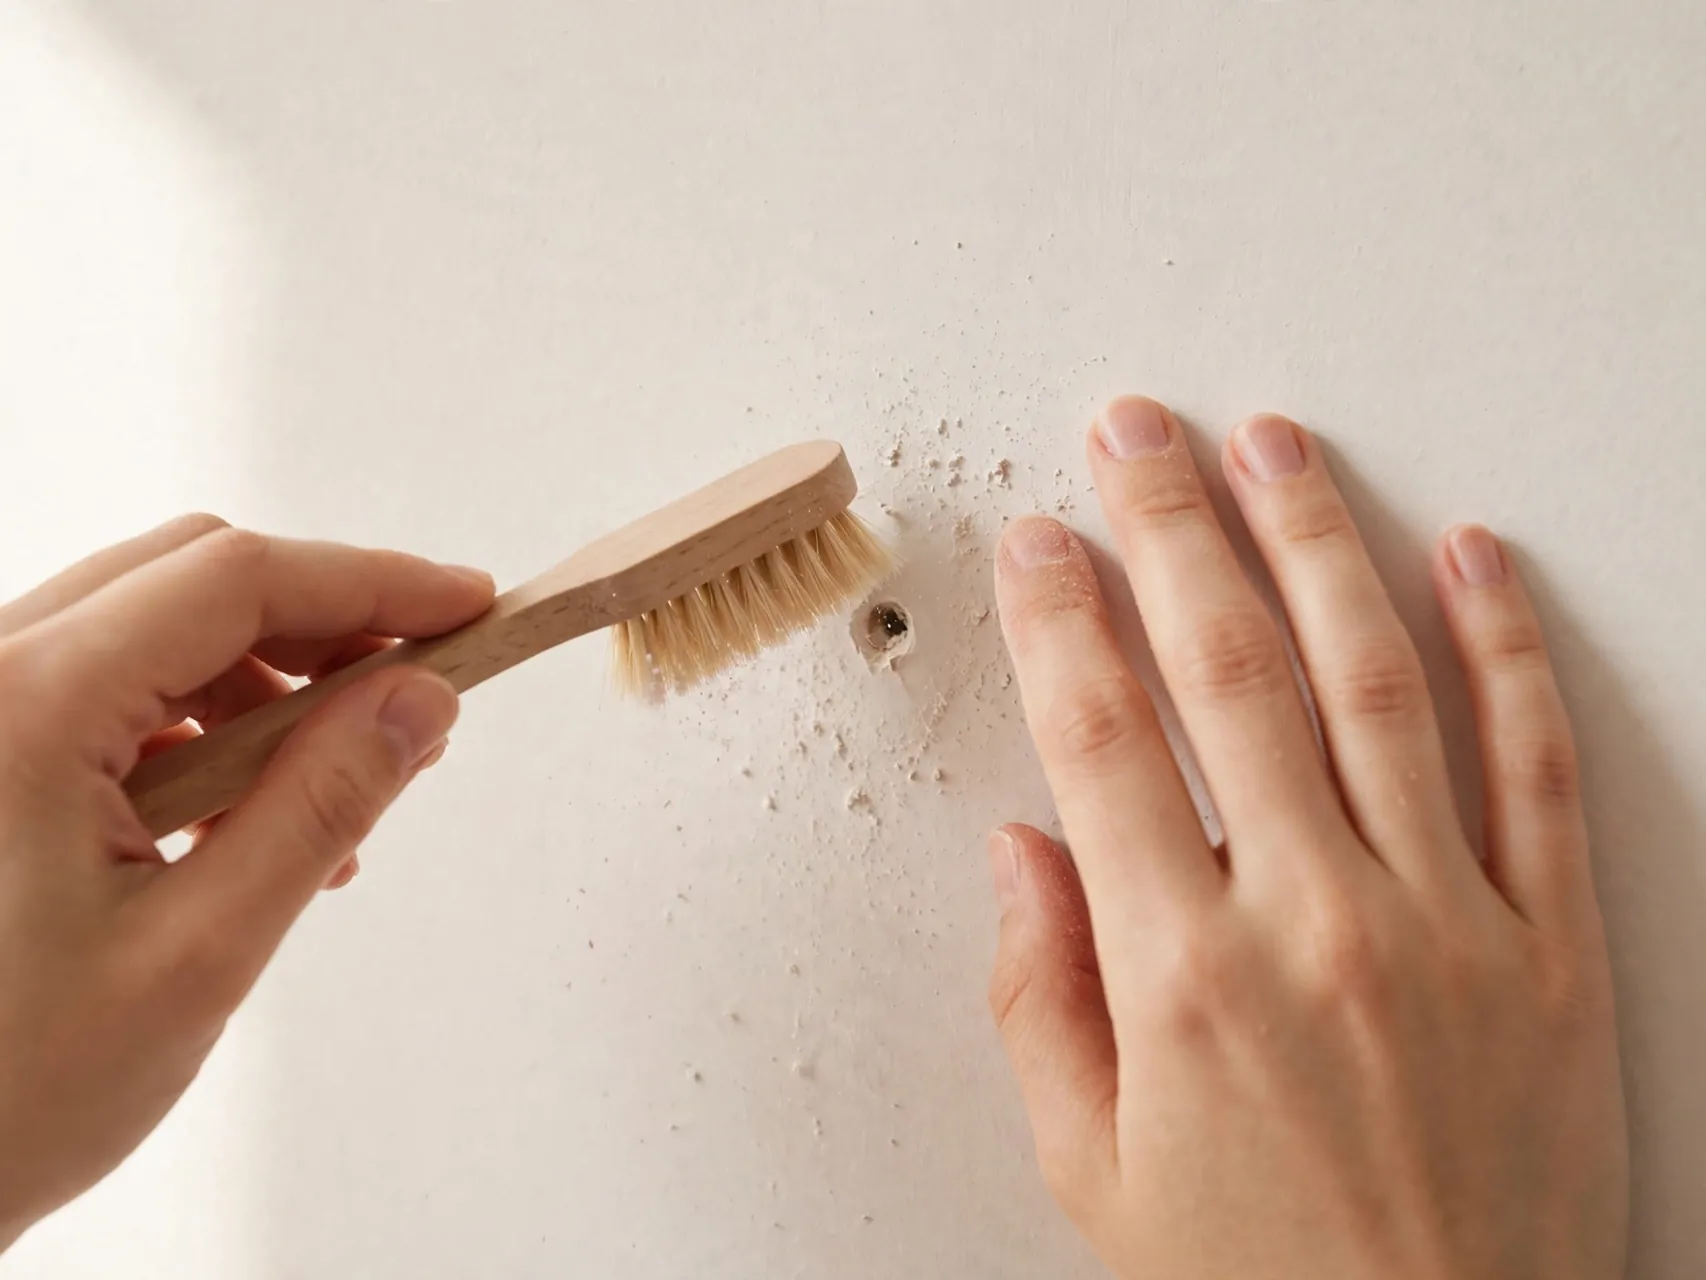
Every good method in this guide shares one result: the smallest, cleanest hole the anchor allows. Before patching, brush loose dust away and trim any raised paper edge flat with a utility knife so no lip sticks up through your filler later.
Do not widen a hole to make it look neater. Extra width is extra patching, sanding and painting. A small round hole with flat edges nearly disappears under one or two thin coats of filler, while a wide ragged hole needs far more work to hide.
19. Check for Bulges and Press Them Flat Gently

Anchor removal can leave a slight outward bulge around a hole, especially after tapping or a hard pull. Run your hand over the area and look at it in side light. A bulge left alone will show through paint as a raised ring forever.
Press a broad putty knife flat over the bulge and push gently to level it, or sand it lightly later once you reach the patching stage. Work gradually. Forcing a bulge flat in one push can crack the facing and create the very damage you avoided during removal.
20. Fill Small Holes With Lightweight Spackle if Allowed
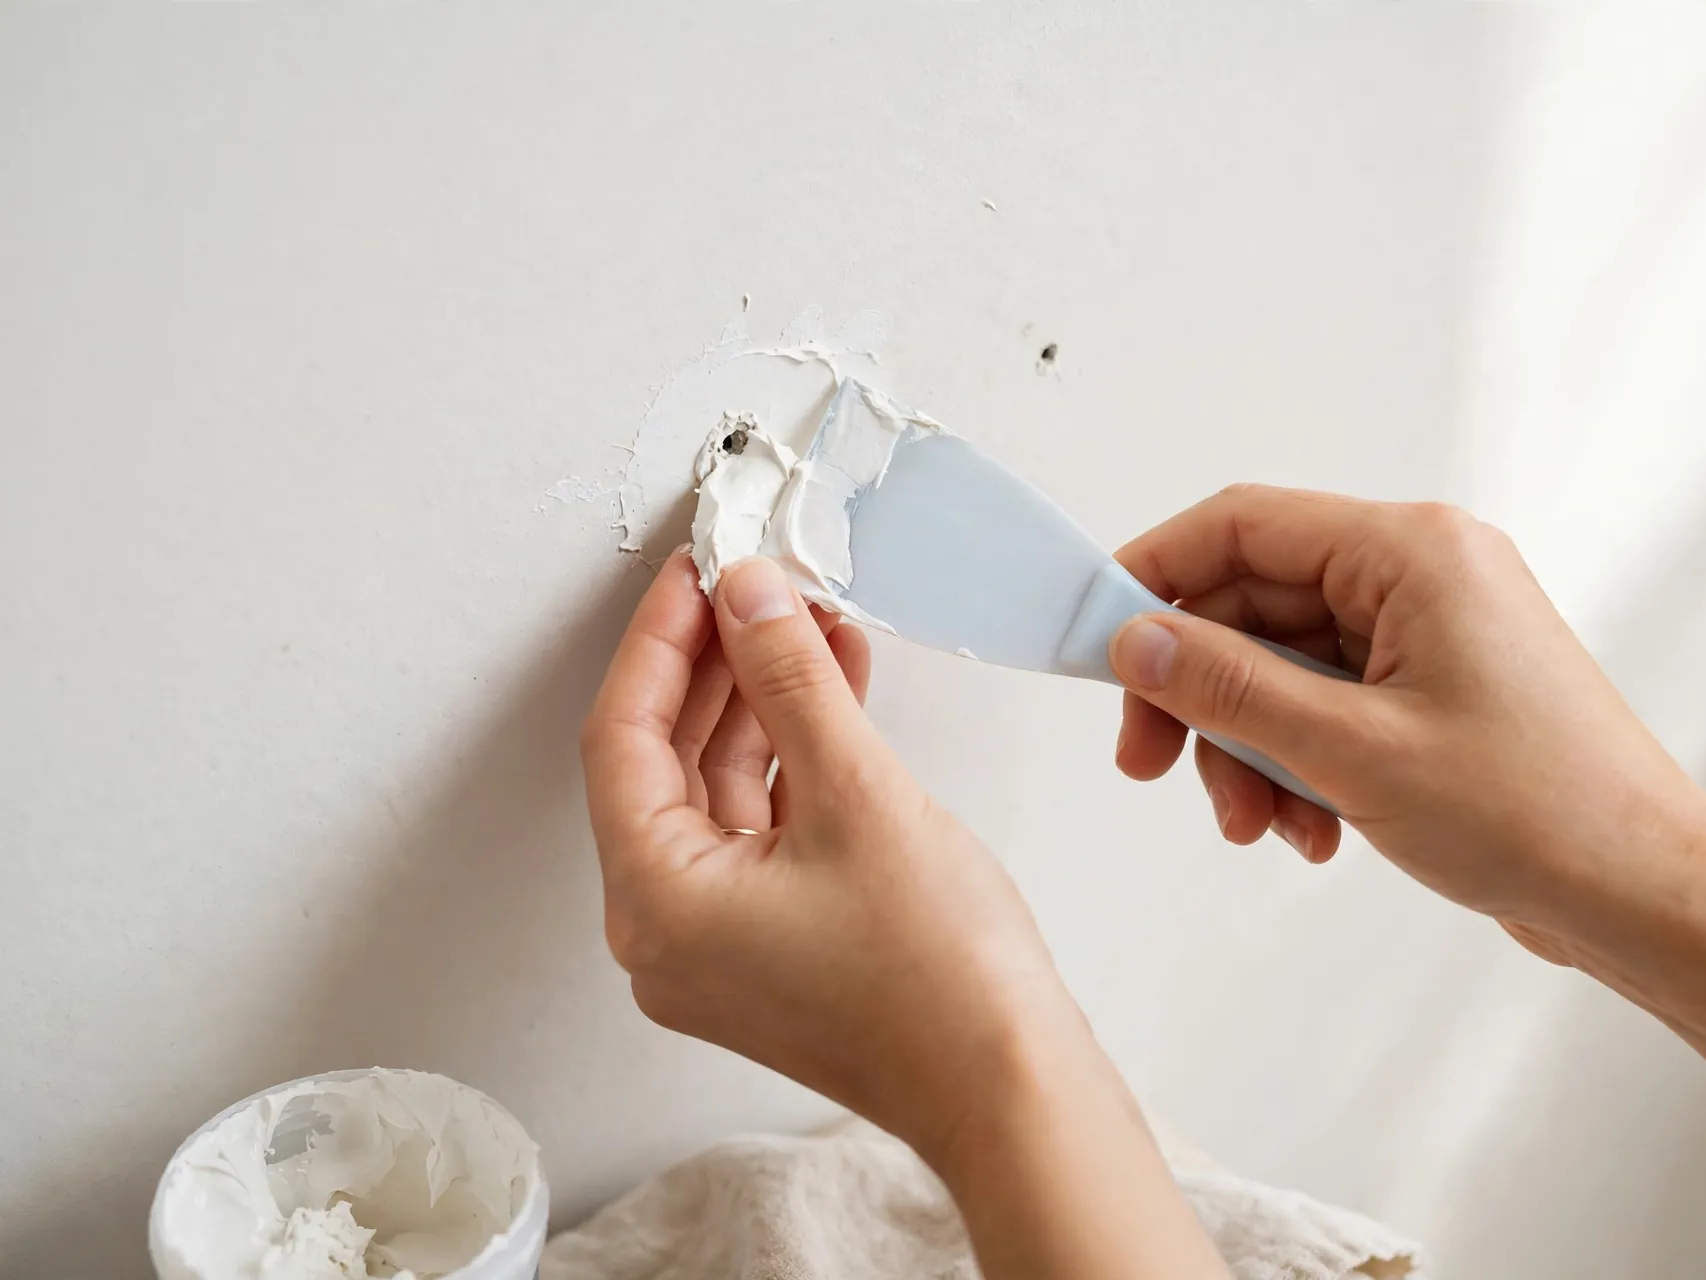
If your lease allows small repairs, lightweight spackle or filler is the right material for anchor holes. Load a small amount on a putty knife, press it into the hole to fill the depth, then scrape the knife flat across the surface to remove the excess.
The goal is filler in the hole, not a mound on the wall. A level fill shrinks slightly as it dries on deeper holes, which is normal and is handled by the thin second coat in the next tip. Clean the knife between holes for a tidy finish.
21. Apply Filler in Thin Layers and Let It Dry
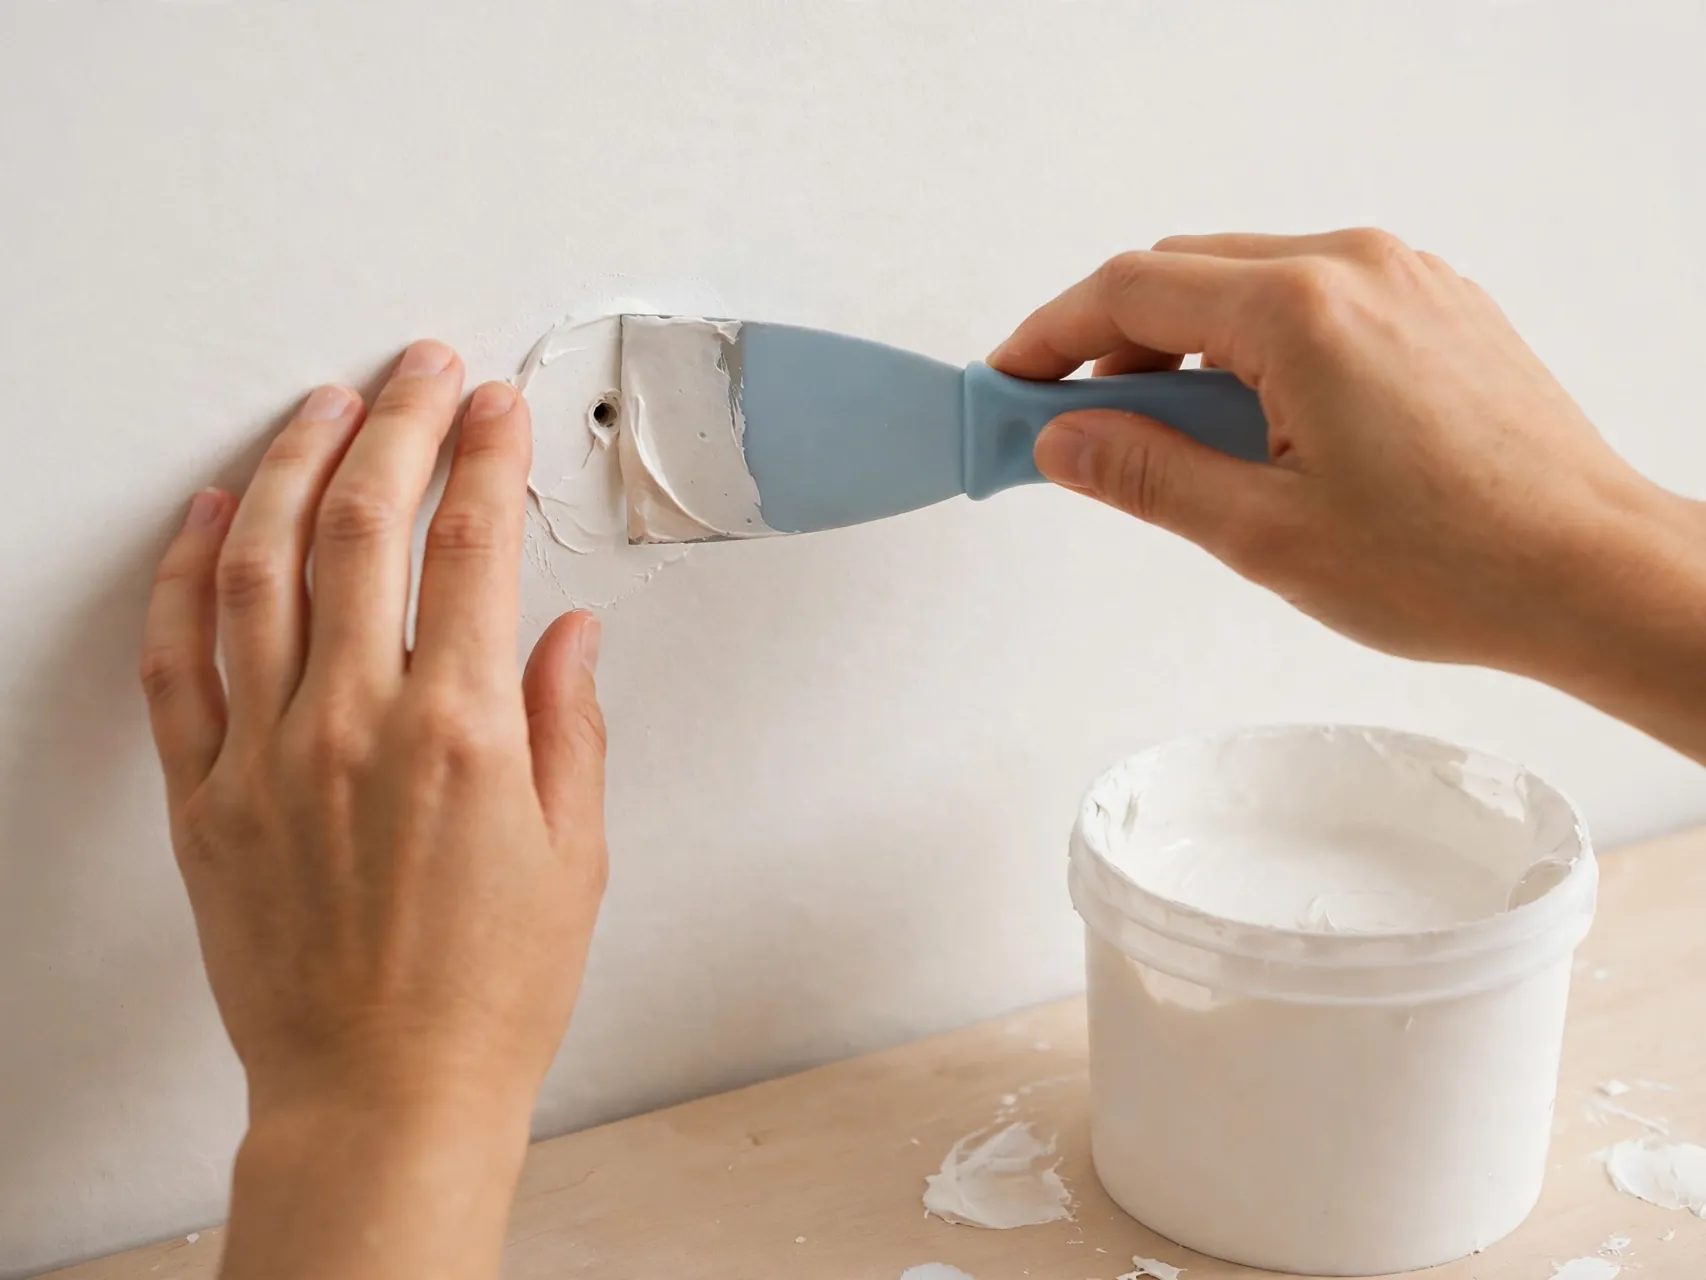
Two thin layers always beat one thick blob. Thick filler dries slowly, shrinks unevenly and sands into a dip. Apply the first thin coat, let it dry fully for the time on the tub, then add a second thin coat only if the hole still shows a hollow.
Keep each coat as flat as you can with the knife so sanding stays minimal. This is the core skill of learning to patch drywall anchor holes well: patience between coats. Rushing a wet coat with paint is what makes repairs flash through the finish later.
22. Sand Lightly Only After Filler Is Fully Dry
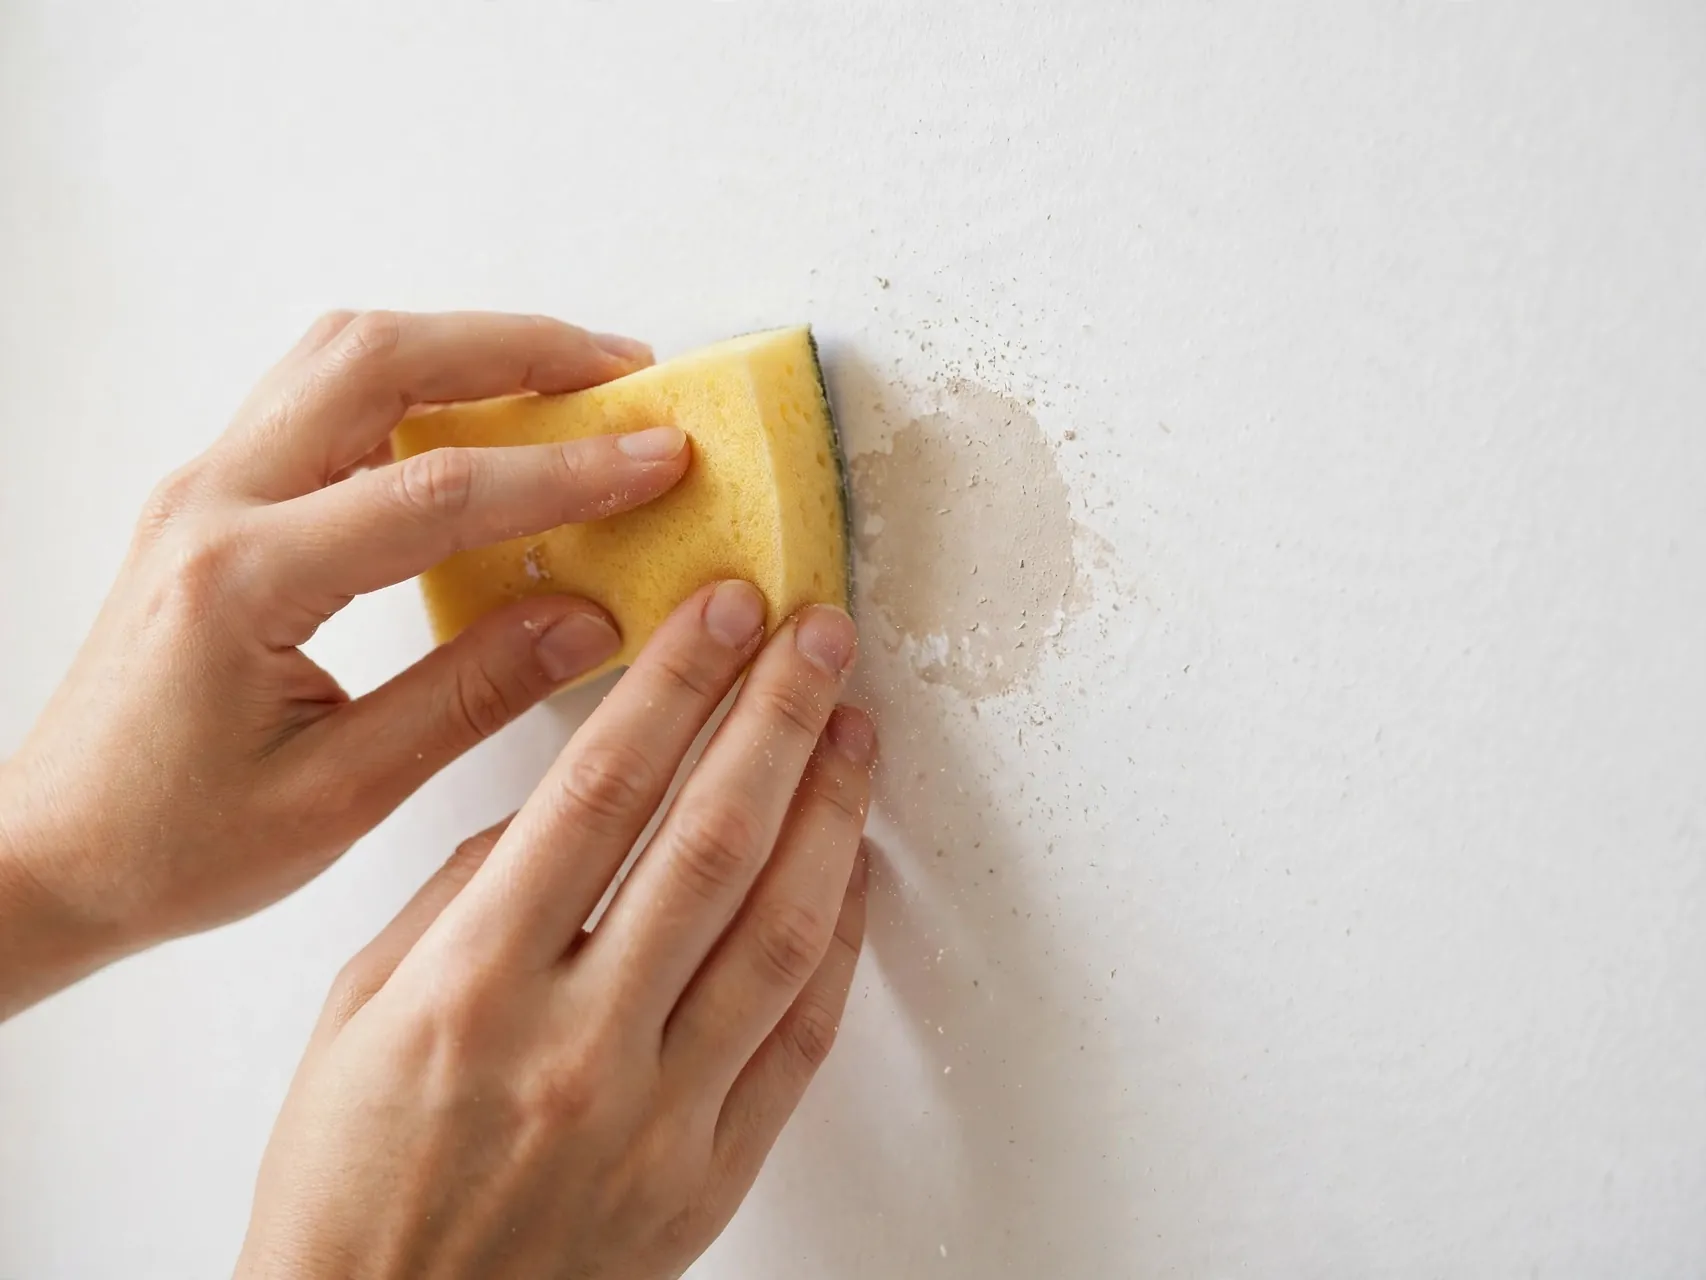
Wait until the filler is completely dry and has turned its full dry color before you sand. Use fine sandpaper on a flat block or a sanding sponge and sand with light, wide strokes that blend the patch into the surrounding wall, not just the hole itself.
Wipe dust off with a dry cloth afterward. Sanding a half dry patch tears it and forces a third coat. Keep pressure gentle, because aggressive sanding can scuff a dull halo into good paint.
23. Prime the Patch Before Touch Up Paint

Bare filler absorbs paint differently from the wall around it, so an unprimed patch often shows as a dull flat spot called flashing. A small coat of primer, or the wall paint used as a first sealing coat where appropriate, levels that absorption before your finish coat.
Feather the primer slightly beyond the patch edges. This tiny extra step is the difference between a repair you can find in side light and one that truly disappears. Let primer dry fully before judging color, since wet coatings always look darker and glossier than dry ones.
24. Match Paint Sheen, Not Just Color

A perfect color in the wrong sheen still shows. Rental walls are often flat or eggshell, trim is often satin or semi gloss, and a shiny patch on a flat wall stands out from across the room even when the color code is identical.
If you know the original paint, use it. If not, test a small dab in a low spot and view it dry, in daylight and room light. Dab paint on with a small brush or cotton swab for tiny holes rather than rolling a large square that creates its own visible edge.
25. Know When to Ask Your Landlord or a Pro

Stop and ask when holes are large, the wall is soft or water stained, anchors sit in tile or plaster you do not recognize, or your lease says the landlord handles repairs. A quick written question with a photo gets you a clear answer and a clean record.
Pros are also worth it for walls full of TV mount anchors or damage that needs a proper patch rather than filler. One good repair is cheaper than losing deposit money over rough patches.
FAQ
Can I reuse a drywall anchor hole after removing the old anchor?
Usually not in the same hole. Removal loosens the gypsum and the hole is normally patched. If you need to hang there again, let the patch cure fully and use a new anchor in sound material nearby.
Is it better to pull an anchor out or push it into the wall?
It depends on the type. Simple ribbed plastic plugs often pull out cleanly with the screw trick. Molly bolts, toggle bolts and stuck plastic anchors are usually pushed or dropped into the cavity instead, because pulling them would tear a hole far larger than the original.
What filler should I use for anchor holes?
Lightweight spackle made for small nail and screw holes suits most anchor holes well. Apply it in thin layers, let each layer dry fully, sand lightly and prime before paint. Deep or wide holes may need a setting type compound or a real patch, which is a job to confirm with your landlord first.
Will my landlord charge me for anchor holes?
Rules vary by lease, state and the size and number of holes. A few tiny holes are viewed differently from large anchor damage in general guidance, but only your lease and local law decide your case. Photograph walls at move in and move out and ask in writing if you are unsure.
How do I remove an anchor that just spins in the hole?
Spinning means the grip is stripped. Try gripping the collar or a partly inserted screw with needle nose pliers and pulling with a gentle wiggle. If it still will not come, cut the flange flush with a utility knife and push the body into the cavity, then patch the small clean hole.
Key Takeaways
- Name the anchor first: Plastic plugs pull, self drilling anchors unscrew, and molly and toggle parts drop inside.
- Use the screw as a handle: A few turns of the screw gives pliers a clean grip on plastic plugs.
- Gentle beats forceful: Wiggle, twist and steady pressure protect the paper facing that keeps drywall strong.
- Push in when pulling harms: Cutting the flange and pushing the body into the cavity keeps holes small.
- Patch in thin layers: Fill, dry, sand lightly, prime and match sheen for a repair that disappears.
- Check your lease first: Renters should confirm who handles wall repairs before filling or drilling anything.
Save this guide to Pinterest before your next repaint so each anchor comes out the calm way.